
JALL V1021

JALL Digital Alarm Clock User Manual
Model: V1021 | Brand: JALL
Introduction
Thank you for choosing the JALL Digital Alarm Clock. This manual provides detailed instructions on how to set up, operate, and maintain your new alarm clock. Designed for simplicity and functionality, it features a large LED display, adjustable brightness and volume, multiple alarm settings, a convenient USB charging port, and temperature detection.
Key features include:
- 5.5" High Resolution LED Display for time, date, and temperature.
- 6 Adjustable Brightness Levels (5% to 100%).
- 8 Adjustable Alarm Sounds (30-85 dB) with easy snooze function.
- Dual USB Charging Ports for external devices.
- 12-hour / 24-hour format and indoor temperature display.
- Backup button battery to retain time during power outages.
Product Overview
Familiarize yourself with the components of your JALL Digital Alarm Clock.

Figure 1: Front view of the JALL Digital Alarm Clock, displaying time, month, date, day, and temperature.

Figure 2: Rear view of the alarm clock, highlighting the control buttons for settings and the USB charging ports.

Figure 3: Detailed view of the 5.5-inch large LED screen, designed for clear visibility.
Setup
Power Connection:
Connect the provided power cable to the DC 5V input port on the back of the alarm clock. Plug the other end into a standard wall outlet. The display will light up, and the clock will be ready for initial setup.
Battery Backup (Optional):
For time retention during power outages, insert a CR2032 button battery (not included) into the battery compartment on the back. This battery only maintains time settings and does not power the display.
Initial Time Setting:
Upon first power-up, the clock may display a default time. Refer to the "Operating Instructions" section to set the correct time, date, and day.
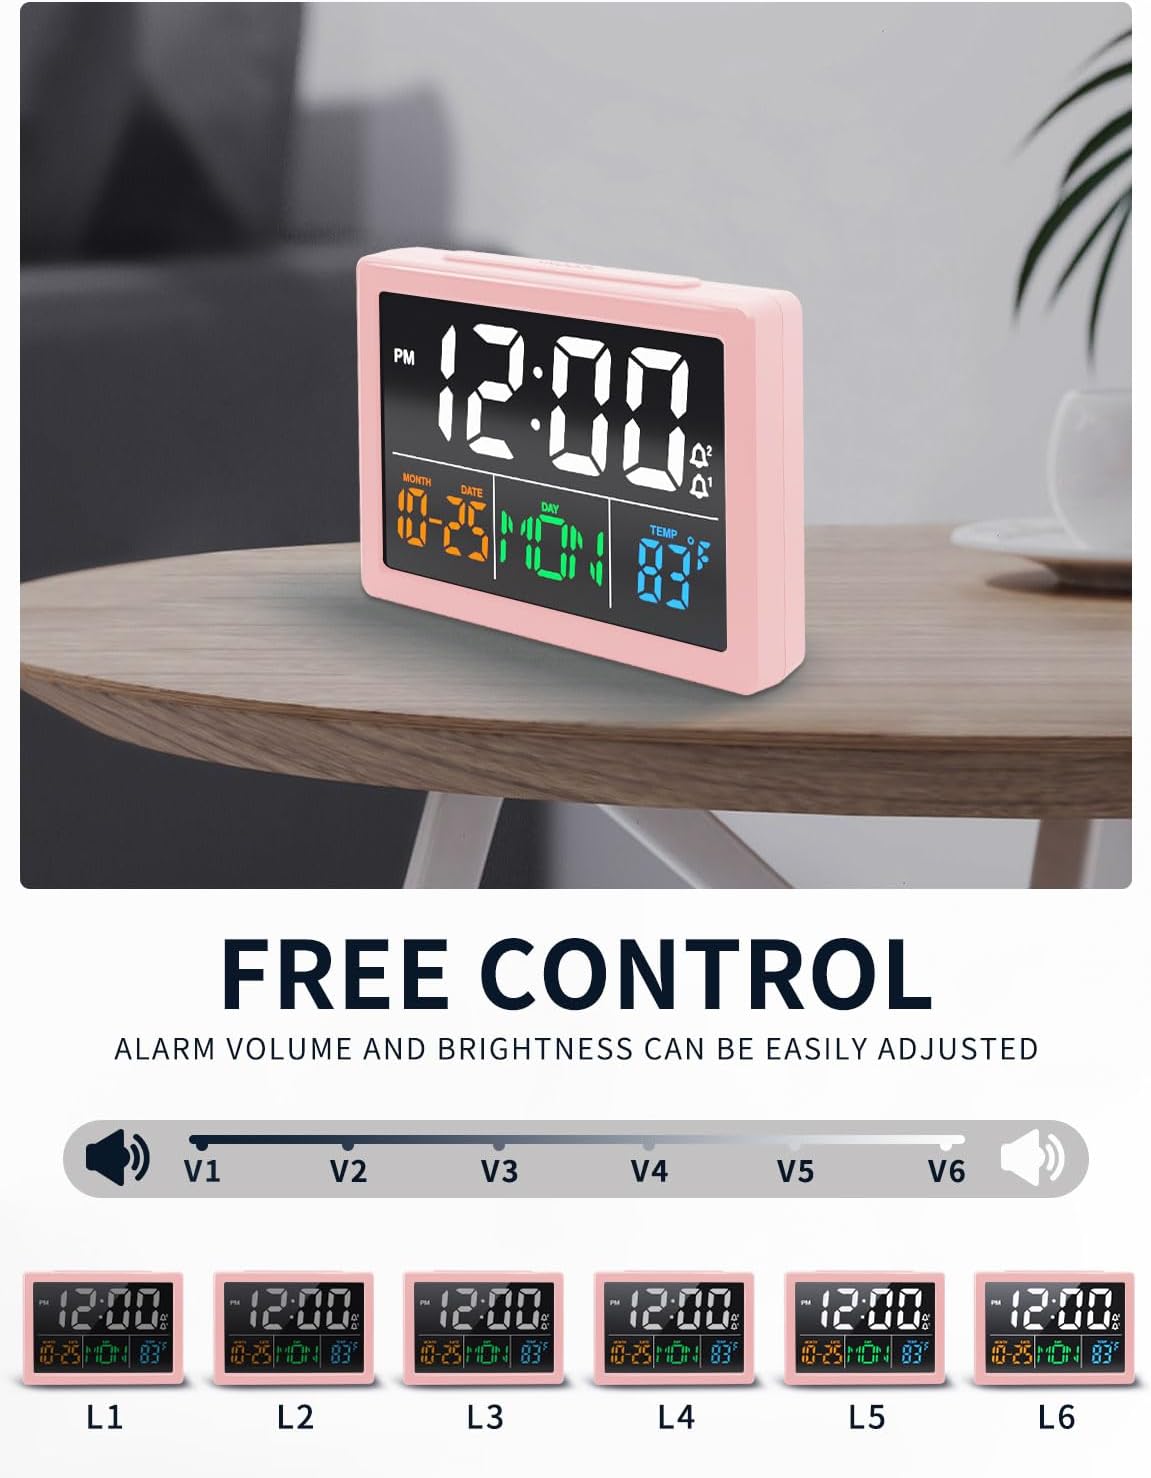
Figure 4: The alarm clock positioned on a nightstand, ready for use.
Operating Instructions
Setting Time and Date
- Press and hold the TIME button on the back of the clock until the hour digits begin to flash.
- Use the UP or DOWN buttons to adjust the hour.
- Press the TIME button again to move to minutes, then use UP or DOWN to adjust.
- Continue pressing TIME to cycle through setting the year, month, date, and day of the week, adjusting each with the UP or DOWN buttons.
- Press TIME one last time to save settings and exit.
- To switch between 12-hour and 24-hour format, press the 12/24H button.
Alarm Settings
The clock supports up to two independent alarms (AL1 and AL2).
- Press the AL1 or AL2 button to select the alarm you wish to set. The alarm time will flash.
- Use the UP or DOWN buttons to set the desired alarm hour and minutes.
- Press the AL1 or AL2 button again to confirm.
- To activate or deactivate an alarm, press the corresponding AL1 or AL2 button briefly. An alarm icon will appear/disappear on the display.
Snooze Function:
When the alarm sounds, press the large SNOOZE button on top of the clock for an additional 9 minutes of sleep. The alarm will sound again after 9 minutes.
Adjusting Alarm Volume:
The alarm offers 8 adjustable sound levels (30-85 dB). Use the VOLUME button on the back to cycle through the volume levels.
Selecting Ring Tones:
Choose from 8 different ring tones. Press the MUSIC NOTE button to preview and select your preferred alarm sound.

Figure 5: Alarm setting options, including daily, weekday, and weekend modes.

Figure 6: A selection of 8 unique ring tones available for your alarm.
Brightness Control
The display brightness can be adjusted to 6 levels (L1 to L6, from 5% to 100%).
- Press the BRIGHTNESS button (sun icon) on the back of the clock to cycle through the brightness levels.
- Select the level that best suits your environment and preference.
Temperature Display
The clock displays the indoor temperature. You can switch between Celsius and Fahrenheit.
- Press the °C/°F button on the back to toggle between Celsius and Fahrenheit.
USB Charging Ports
The clock features two USB output ports (5V) on the back for convenient charging of your mobile devices.
- Simply connect your smartphone, tablet, or other compatible electronic device to one of the USB output ports using its charging cable.
- Ensure the alarm clock is powered via its main power cable for the USB charging function to work.
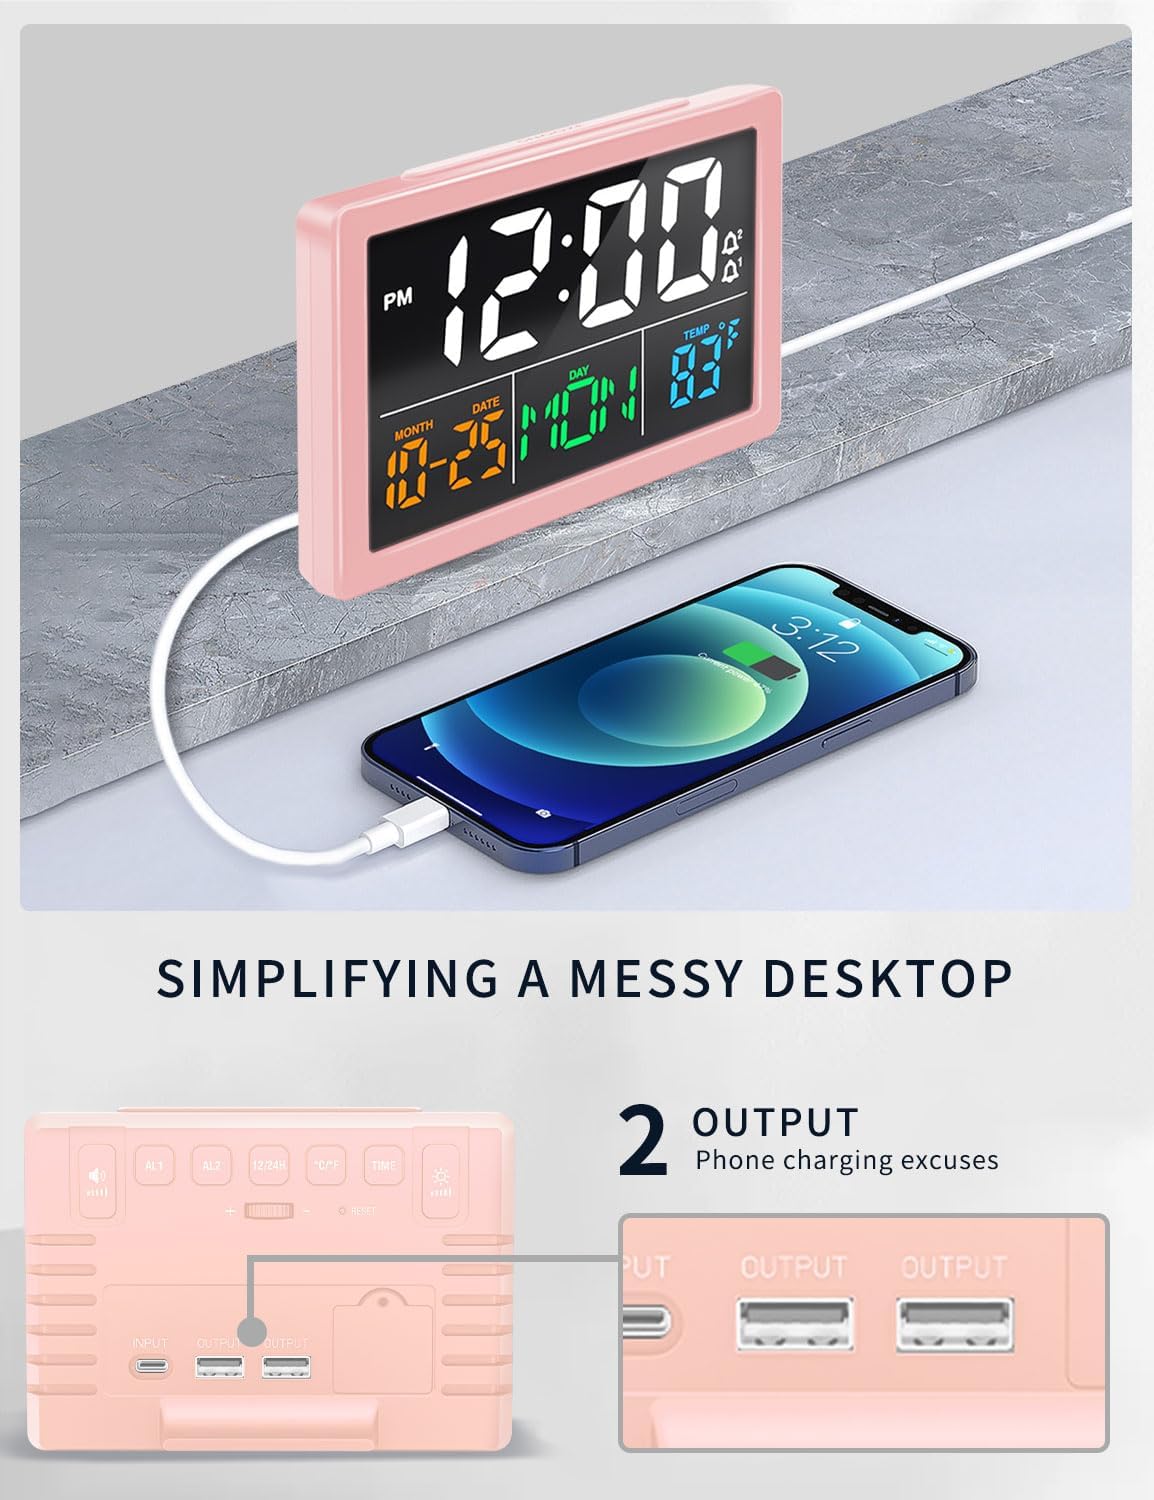
Figure 7: The alarm clock's USB charging port in use, simplifying your desktop by charging devices directly.
Product Demonstration Video
Video 1: A brief demonstration of the JALL Digital Alarm Clock's features and functions, including display, controls, and USB ports.
Maintenance
Cleaning:
Wipe the clock surface with a soft, dry cloth. Do not use abrasive cleaners or solvents, as they may damage the finish or display.
Battery Replacement (Backup):
If the clock loses time during a power outage, the CR2032 backup battery may need replacement. Open the battery compartment on the back, replace the old battery with a new one, and close the compartment securely.
Troubleshooting
| Problem | Possible Cause | Solution |
|---|---|---|
| Display is blank or not lighting up. | Power cable not connected or faulty. | Ensure the power cable is securely plugged into the clock and a working power outlet. |
| Alarm does not sound. | Alarm not activated, volume too low, or incorrect alarm time set. | Verify alarm is activated (icon visible), increase volume, and check alarm time settings. |
| Time is inaccurate (running fast/slow). | Internal clock deviation. | Reset the time manually. If the issue persists frequently, contact customer support. |
| USB charging not working. | Clock not powered by main cable, or device incompatibility. | Ensure the clock is plugged into the wall. Try a different USB cable or device. |
Specifications
| Feature | Detail |
|---|---|
| Brand | JALL |
| Model Number | V1021 |
| Display Type | Digital LED |
| Screen Size | 5.5 inches |
| Brightness Levels | 6 (5% to 100%) |
| Alarm Volume | 8 levels (30-85 dB) |
| Ring Tones | 8 options |
| USB Output Ports | 2 (5V) |
| Time Format | 12-hour / 24-hour |
| Temperature Display | °C / °F |
| Power Source | Electrical (USB cable) |
| Backup Battery | CR2032 (for time memory only, not included) |
| Product Dimensions | 5.5"W x 5.5"H |
| Material | Acrylonitrile Butadiene Styrene |
Warranty and Support
JALL offers a 365-Day Warranty on products sold on Amazon. For any questions, troubleshooting assistance, or warranty claims, please contact our customer support team.
You can reach us via email at: ThreeDucksDirect@outlook.com
Please provide your product model number (V1021) and a detailed description of your issue when contacting support for faster service.
Related documentsV1021


Ask a question about this manual
Ask about setup, troubleshooting, compatibility, parts, safety, or missing instructions. Manuals+ will review the question and use this page’s manual context to help answer it.