
1. Product Overview
The RadioMaster TX12 MKII is a compact yet powerful multi-protocol radio controller designed for various remote-controlled applications, including drones and RC aircraft. It features an internal ExpressLRS module and comes pre-installed with the EdgeTX operating system, offering extensive customization and control capabilities. The controller is equipped with precision Hall effect gimbals for smooth and accurate input, an upgraded main processor (STM32F407), and improved USB-C charging with QC3.0 support.

Figure 1: Front view of the RadioMaster TX12 MKII radio controller.

Figure 2: Key features of the RadioMaster TX12 MKII, including EdgeTX/OpenTX support, ExpressLRS, and Hall Gimbals.
Key Features:
- Internal ExpressLRS module for reliable long-range communication.
- Standard precision Hall effect gimbals for enhanced control.
- Upgraded STM32F407 main processor for improved performance.
- Improved USB-C charging IC with QC3.0 support for faster charging.
- Factory installed EdgeTX operating system, with OpenTX support.
- Ergonomic design with improved rear case grips and S1/S2 slider grips.
- Supports 16 channels.
- Functionality to play simulators and games via USB.
2. Setup Guide
2.1. Unboxing and Initial Inspection
Upon receiving your RadioMaster TX12 MKII, carefully unbox all components. Verify that the package includes the TX12 MKII Radio and a USB cable. Inspect the controller for any visible damage.

Figure 3: Contents of the RadioMaster TX12 MKII package.
2.2. Battery Installation
The TX12 MKII requires two 18650 Li-ion batteries (not included) or a 2S 7.4V LiPo battery. Ensure batteries are correctly oriented according to the polarity indicators inside the battery compartment.
- Open the battery compartment cover on the back of the controller.
- Insert the two 18650 Li-ion cells into the battery holder, observing correct polarity.
- Close the battery compartment cover securely.
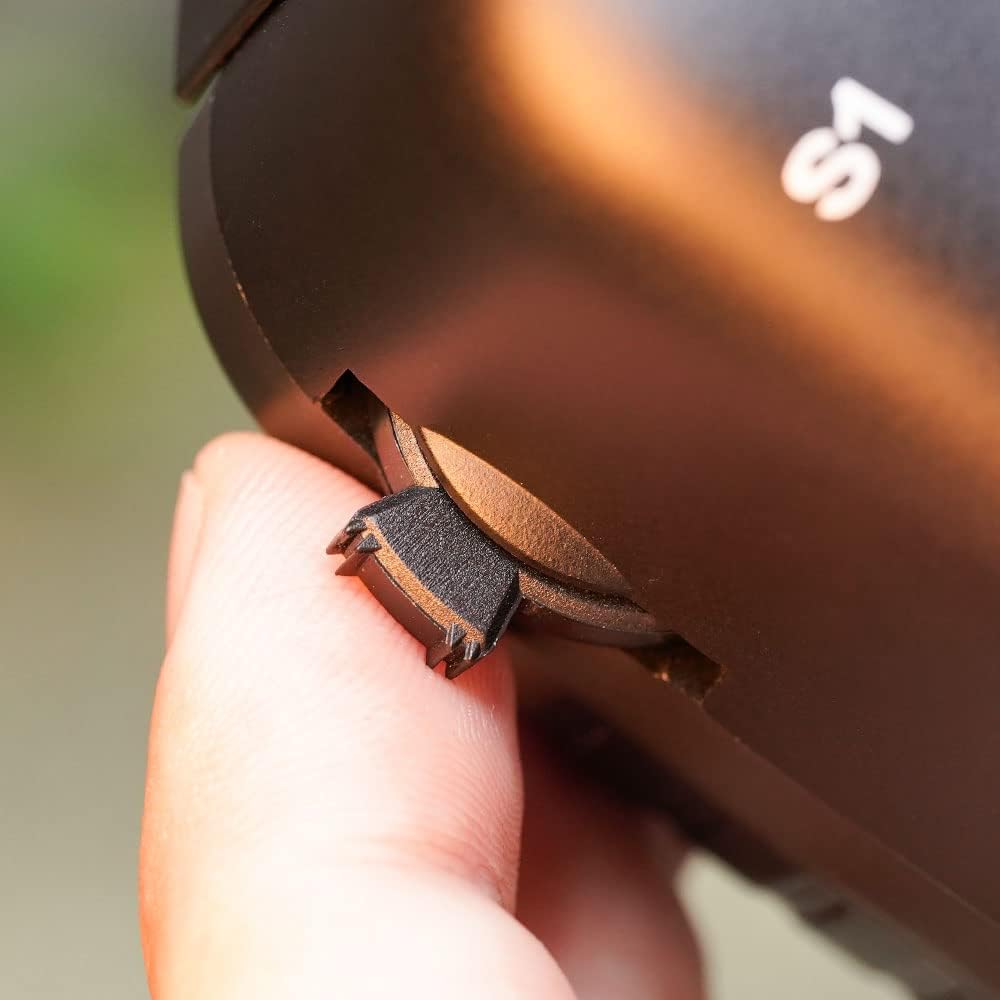
Figure 4: Battery compartment and MicroSD card slot location.
2.3. Antenna Installation
Before powering on the radio, ensure the external antenna is securely attached to the antenna port at the top of the controller. Operating the radio without an antenna can damage the internal module.
2.4. MicroSD Card
The TX12 MKII comes with a MicroSD card pre-installed, which is essential for the EdgeTX operating system. Do not remove the MicroSD card during operation or while the radio is powered on, as this may cause data corruption.
3. Operating Instructions
3.1. Powering On/Off
To power on the TX12 MKII, press and hold the power button located in the center of the controller until the screen illuminates. To power off, press and hold the power button again until the shutdown sequence completes.
3.2. Controls and Navigation
The TX12 MKII features two precision Hall effect gimbals for primary control inputs (throttle, rudder, elevator, aileron). Various switches (A, B, C, D, S1, S2, SE3, SF3, SA, SB, SC, SD) and buttons (SYS, RTN, PAGE>, PAGE<, TELE, MDL, Trim) provide additional control and menu navigation.

Figure 5: Labeled components and dimensions of the TX12 MKII radio controller.

Figure 6: Precision Hall effect gimbals for accurate control.

Figure 7: Navigation and control buttons (SYS, RTN, PAGE, TELE).

Figure 8: Improved S1/S2 slider grip for comfortable operation.
3.3. EdgeTX Operating System
The TX12 MKII comes with EdgeTX pre-installed, providing a highly customizable and feature-rich experience. Refer to the official EdgeTX documentation for detailed instructions on model setup, mixing, and advanced configurations. The radio also supports OpenTX.
3.4. Simulator Use
The TX12 MKII can be connected to a computer for use with flight simulators. This is an excellent way to practice and improve your flying skills without risking damage to your physical models.
- Connect the radio to your computer using the top USB-C data port.
- The radio will typically be recognized as a joystick or game controller.
- Configure the controls within your chosen simulator software.

Figure 9: USB-C data port and DSC trainer socket for simulator connection.
4. Maintenance
4.1. Charging the Battery
The TX12 MKII features an improved USB-C charging IC with QC3.0 support. Connect a USB-C cable to the charging port (located at the bottom of the controller) and to a compatible USB power adapter. The charging indicator on the radio will show the charging status.
4.2. Cleaning
To clean the radio controller, use a soft, dry cloth. For stubborn dirt, a slightly damp cloth can be used, but ensure no moisture enters the internal components. Avoid using harsh chemicals or abrasive materials.
4.3. Storage
When not in use for extended periods, store the TX12 MKII in a cool, dry place away from direct sunlight and extreme temperatures. It is recommended to remove the batteries if storing for several months to prevent potential damage from battery discharge or leakage.
5. Troubleshooting
5.1. "No SD Card" Warning
If you encounter a "No SD Card" warning upon powering on, ensure the MicroSD card is properly inserted into its slot. Power off the radio, re-insert the card firmly, and power on again. If the issue persists, the SD card may be corrupted or faulty and might need to be reformatted or replaced with a new one containing the correct EdgeTX firmware files.
5.2. Radio Not Powering On
Check that the batteries are fully charged and correctly installed with the correct polarity. If using 18650 cells, ensure they are suitable for the radio's power requirements. Try charging the radio for a period to see if it responds.
5.3. Connection Issues
If experiencing issues with model connection, ensure the radio and receiver are properly bound. Verify that the correct protocol is selected in the radio's settings. Check for any physical obstructions or excessive distance between the radio and the model.
6. Specifications
| Feature | Detail |
|---|---|
| Product Dimensions | 6.26 x 4.25 x 6.69 inches |
| Item Weight | 1.43 pounds |
| Item Model Number | TX12 MKII |
| Brand | RADIOMASTER |
| Special Feature | Ergonomic |
| Color | Black |
| Max Number of Supported Devices | 16 |
| Compatible Devices | Multiple |
| Manufacturer | RadioMaster |
| Country of Origin | China |
7. Warranty and Support
For warranty information and technical support, please refer to the official RadioMaster website or contact their customer service directly. Keep your proof of purchase for any warranty claims.
You can find more information and contact details on the RADIOMASTER Store on Amazon.