
Continental Edison CEMF35W
CONTINENTAL EDISON CEMF35W Electric Mini-Oven User Manual
Model: CEMF35W
1. Introduction
Thank you for choosing the CONTINENTAL EDISON CEMF35W Electric Mini-Oven. This compact and versatile 35-liter oven is designed for various cooking needs, featuring 1500W power, rotisserie, and natural convection functions. Please read this manual carefully before operating the appliance to ensure safe and efficient use. Keep this manual for future reference.
2. Important Safety Instructions
When using electrical appliances, basic safety precautions should always be followed to reduce the risk of fire, electric shock, and injury to persons, including the following:
- Read all instructions before using the oven.
- Do not touch hot surfaces. Use handles or knobs.
- To protect against electrical shock, do not immerse cord, plugs, or appliance in water or other liquid.
- Close supervision is necessary when any appliance is used by or near children.
- Unplug from outlet when not in use and before cleaning. Allow to cool before putting on or taking off parts.
- Do not operate any appliance with a damaged cord or plug, or after the appliance malfunctions or has been damaged in any manner.
- The use of accessory attachments not recommended by the appliance manufacturer may cause hazards.
- Do not use outdoors.
- Do not let cord hang over edge of table or counter, or touch hot surfaces.
- Do not place on or near a hot gas or electric burner, or in a heated oven.
- Extreme caution must be used when moving an appliance containing hot oil or other hot liquids.
- Always attach plug to appliance first, then plug cord into the wall outlet. To disconnect, turn any control to "off", then remove plug from wall outlet.
- Do not use appliance for other than intended use.
- Oversized foods or metal utensils must not be inserted in a toaster oven as they may create a fire or risk of electric shock.
- A fire may occur if the oven is covered or touching flammable material, including curtains, draperies, walls, and the like, when in operation.
- Do not place any materials other than manufacturer's recommended accessories in the oven.
- Do not place any of the following materials in the oven: paper, cardboard, plastic, and similar products.
- Do not store any materials, other than manufacturer's recommended accessories, in this oven when not in use.
- Do not clean with metal scouring pads. Pieces can break off the pad and touch electrical parts, creating a risk of electric shock.
- Do not attempt to dislodge food when the oven is plugged into an electrical outlet.
- Do not operate the appliance by means of an external timer or separate remote-control system.
3. Product Overview
The CONTINENTAL EDISON CEMF35W mini-oven features a compact design with intuitive controls for temperature, function, and timer settings. It includes various accessories to enhance your cooking experience.
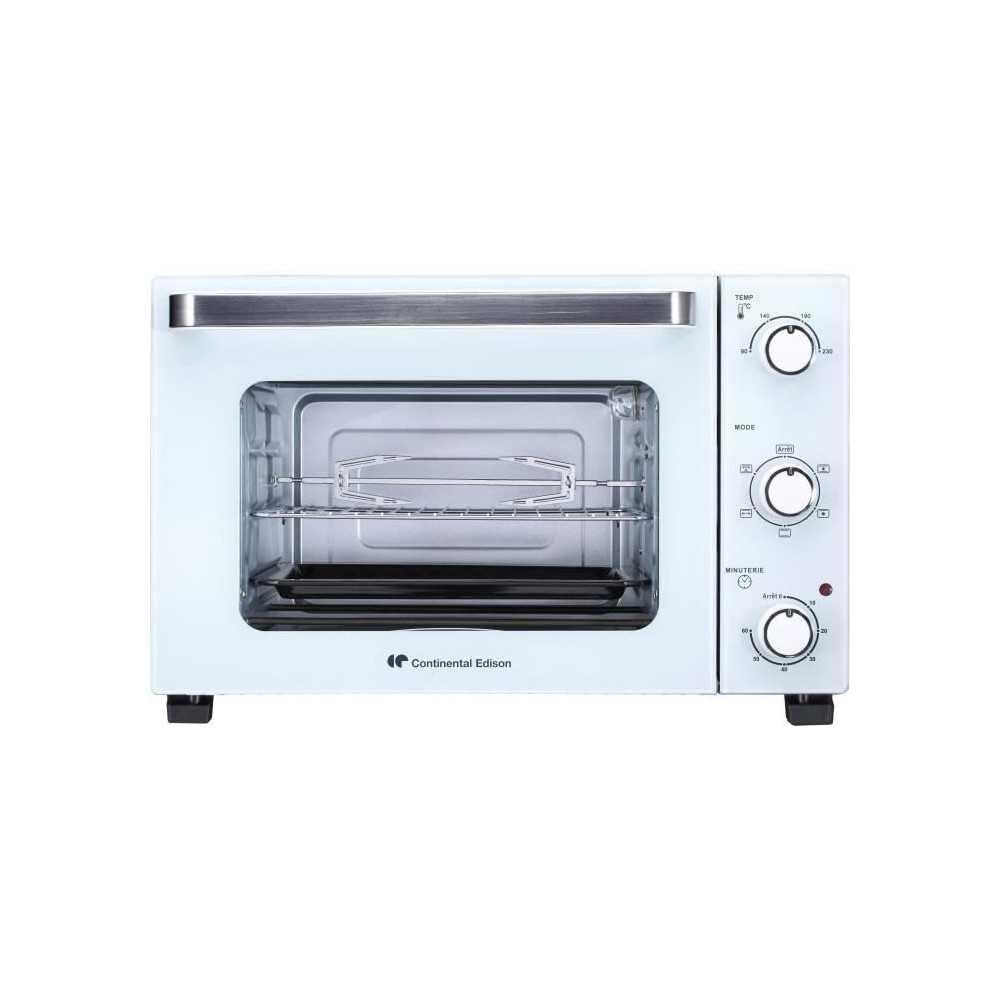
Figure 3.1: Front view of the Continental Edison CEMF35W Electric Mini-Oven, showing the control panel with three knobs and the glass door.
Components:
- Temperature Control Knob: Adjusts cooking temperature (e.g., 80°C to 230°C).
- Function Selector Knob: Selects cooking mode (e.g., top heat, bottom heat, top & bottom heat, convection, rotisserie).
- Timer Knob: Sets cooking duration (e.g., up to 60 minutes) with an auto-off feature.
- Power Indicator Light: Illuminates when the oven is operating.
- Glass Door: Allows visibility of food during cooking.
- Baking Rack: For placing baking trays or dishes.
- Baking Tray: For baking or collecting drips.
- Rotisserie Spit and Forks: For roasting poultry or large cuts of meat.
- Rotisserie Handle: For safely removing the hot rotisserie spit.
- Crumb Tray: Collects crumbs and food debris for easy cleaning.

Figure 3.2: Interior view of the mini-oven with the door open, showing the baking rack, baking tray, and heating elements.
4. Setup and First Use
- Unpacking: Carefully remove the oven and all accessories from the packaging. Retain packaging for future transport or storage.
- Placement: Place the oven on a stable, heat-resistant, and level surface. Ensure there is adequate ventilation around the oven (at least 10-15 cm clearance on all sides). Do not place it near flammable materials.
- Cleaning: Before first use, wipe the interior and accessories (baking rack, tray, rotisserie parts) with a damp cloth and mild detergent. Dry thoroughly. Do not immerse the main unit in water.
- Initial Burn-in:
- Plug the oven into a grounded electrical outlet.
- Set the temperature knob to maximum (230°C).
- Set the function knob to "Top and Bottom Heat" (or convection if available).
- Set the timer knob to 15 minutes.
- Allow the oven to operate for 15 minutes to burn off any manufacturing residues. A slight odor or smoke is normal during this process. Ensure the area is well-ventilated.
- After 15 minutes, turn the timer knob to "OFF" and unplug the oven. Let it cool completely.
- The oven is now ready for use.
5. Operating Instructions
This section details how to use the various functions of your mini-oven.
5.1 General Baking/Roasting
- Place the baking rack or tray with food into the desired position inside the oven.
- Close the oven door.
- Turn the Temperature Control Knob to the desired temperature (e.g., 180°C).
- Turn the Function Selector Knob to the desired cooking mode:
- Top Heat: For browning or grilling.
- Bottom Heat: For gentle cooking or crisping bases.
- Top & Bottom Heat: Standard baking and roasting.
- Convection (Fan Assisted): For even cooking and faster results.
- Turn the Timer Knob to the desired cooking time. The power indicator light will illuminate.
- When the set time elapses, the oven will automatically turn off, and a bell will sound.
- Carefully remove the cooked food using oven mitts.
5.2 Rotisserie Function
The rotisserie function is ideal for roasting whole chickens or larger cuts of meat, ensuring even cooking and browning.

Figure 5.1: Interior view of the mini-oven showing the rotisserie spit installed, ready for use.
- Prepare the food (e.g., chicken) by trussing it securely to ensure it fits and rotates freely.
- Slide one rotisserie fork onto the spit, pointed ends facing the center. Secure it with the thumbscrew.
- Insert the spit through the center of the food.
- Slide the second rotisserie fork onto the spit, securing the food, and tighten the thumbscrew.
- Insert the pointed end of the spit into the rotisserie drive socket on the right side of the oven interior.
- Rest the square end of the spit onto the rotisserie support on the left side.
- Place the baking tray at the bottom to catch drips.
- Close the oven door.
- Set the Temperature Control Knob to the desired temperature (e.g., 200°C).
- Turn the Function Selector Knob to the "Rotisserie" setting (often combined with top and bottom heat or convection).
- Set the Timer Knob to the required cooking time.
- When cooking is complete, turn the timer to "OFF".
- Using the rotisserie handle, carefully remove the hot spit and food from the oven.
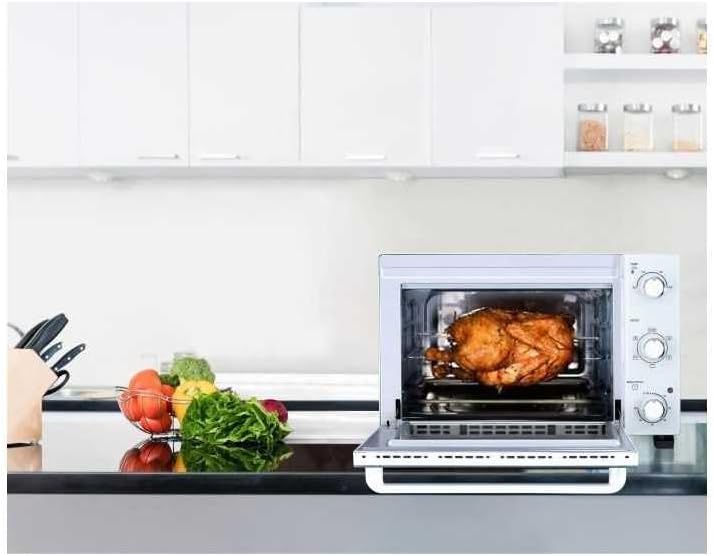
Figure 5.2: The mini-oven in a kitchen, demonstrating the rotisserie function with a chicken roasting inside.
6. Maintenance and Cleaning
Regular cleaning and maintenance will prolong the life of your oven and ensure optimal performance.
- Always unplug the oven from the power outlet and allow it to cool completely before cleaning.
- Exterior: Wipe the exterior surfaces with a soft, damp cloth. Do not use abrasive cleaners or scouring pads, as they may damage the finish.
- Interior: Wipe the interior walls with a damp cloth and mild detergent. For stubborn stains, a non-abrasive liquid cleaner can be used. Avoid spraying cleaners directly onto the heating elements.
- Glass Door: Clean the glass door with a soft cloth and glass cleaner or mild soapy water.
- Accessories: The baking rack, baking tray, rotisserie spit, and crumb tray can be washed in warm soapy water. Rinse thoroughly and dry completely before storing or reusing. The crumb tray should be emptied and cleaned regularly.
- Do not immerse the oven body in water or any other liquid.
- Ensure all parts are dry before plugging the oven back in and using it.
7. Troubleshooting
If you encounter any issues with your mini-oven, refer to the following table for common problems and solutions.
| Problem | Possible Cause | Solution |
|---|---|---|
| Oven does not turn on. | Not plugged in; power outlet issue; timer not set. | Ensure the oven is securely plugged into a working outlet. Check the circuit breaker. Set the timer knob to a desired cooking time. |
| Food is not cooking evenly. | Incorrect temperature/function setting; overcrowding; food placed too close to heating elements. | Adjust temperature and function settings. Avoid overcrowding the oven. Ensure proper clearance around food. Consider using the convection function for more even heat distribution. |
| Excessive smoke during operation. | Food residue or grease buildup; initial burn-in odor. | Ensure the oven and accessories are clean. If it's the first use, some smoke is normal (refer to "Initial Burn-in"). If smoke persists, unplug and contact support. |
| Rotisserie spit does not rotate. | Food is too heavy or improperly balanced; spit not correctly seated. | Ensure food is securely trussed and balanced on the spit. Verify the spit is correctly inserted into the drive socket and resting on the support. Do not exceed the maximum weight capacity for the rotisserie. |
If the problem persists after attempting these solutions, please contact customer support.
8. Specifications
Technical details for the CONTINENTAL EDISON CEMF35W Electric Mini-Oven.
| Model Number | CEMF35W |
| Brand | Continental Edison |
| Capacity | 35 Litres |
| Power | 1500 Watts |
| Material | Stainless Steel (interior/accessories), White exterior |
| Control Type | Knob Control |
| Special Features | Timer, Rotisserie, Natural Convection |
| Dimensions (L x W x H) | 55.4 x 37.6 x 43.4 cm |
| Item Weight | 11.66 Kilograms |
| Power Source | Electric |

Figure 8.1: Technical drawing illustrating the dimensions of the Continental Edison CEMF35W mini-oven.
9. Warranty and Support
For warranty information or technical support, please refer to the warranty card included with your product or contact Continental Edison customer service. Keep your proof of purchase for any warranty claims.
For further assistance, please visit the official Continental Edison website or contact their customer support line.
Ask a question about this manual
Ask about setup, troubleshooting, compatibility, parts, safety, or missing instructions. Manuals+ will review the question and use this page’s manual context to help answer it.