
De'Longhi EC885BG
Contents
De'Longhi Dedica Arte EC885.BG Espresso and Cappuccino Machine User Manual
Model: EC885BG
1. Introduction
This manual provides essential information for the safe and efficient operation, maintenance, and troubleshooting of your De'Longhi Dedica Arte EC885.BG Espresso and Cappuccino Machine. Please read this manual thoroughly before first use and keep it for future reference.
Important Safety Instructions
- Always ensure the machine is unplugged before cleaning or maintenance.
- Do not immerse the machine, power cord, or plug in water or other liquids.
- Keep hands and face away from hot steam and hot water outlets during operation.
- Use only cold, fresh water in the water tank.
- Do not operate the machine if the power cord or plug is damaged.
- This appliance is intended for household use only.
2. Product Overview
Familiarize yourself with the main components of your De'Longhi Dedica Arte EC885.BG machine.

Figure 2.1: Front view of the De'Longhi Dedica Arte EC885.BG Espresso Machine, showcasing its compact design and ability to prepare two espresso shots simultaneously, alongside a glass of frothed milk.

Figure 2.2: Key features of the De'Longhi Dedica Arte EC885.BG, highlighting its capability for single or double espresso with a single button press, the My LatteArt steam wand, and 15 bar pump pressure for optimal extraction.
Main Components:
- Water Tank: Removable tank for filling with fresh water.
- Control Panel: Buttons for power, single espresso, double espresso, and steam.
- Portafilter: Holds ground coffee or E.S.E. pods.
- Steam Wand (My Latte Art): For frothing milk and dispensing hot water.
- Drip Tray: Collects excess liquid, adjustable for different cup sizes.
- Cup Warmer: Passive surface on top to warm cups.
3. Setup and First Use
3.1 Unpacking
- Remove all packaging materials from the machine.
- Place the machine on a stable, flat surface away from heat sources.
- Remove the water tank, drip tray, and portafilter for initial cleaning.
3.2 Initial Setup (Priming)
- Wash the water tank, portafilter, and drip tray with warm water and mild detergent. Rinse thoroughly.
- Fill the water tank with fresh, cold water up to the MAX level.
- Insert the water tank back into the machine.
- Place a container under the coffee spouts and the steam wand.
- Plug the machine into a suitable power outlet. The power indicator light will flash.
- Press the power button to turn on the machine. Wait for the indicator lights to become steady, indicating the machine is ready.
- Open the steam knob to dispense hot water through the steam wand until water flows continuously. Close the steam knob.
- Press the single espresso button to dispense water through the coffee spouts until water flows continuously.
- The machine is now primed and ready for use.
4. Operating Instructions
4.1 Preparing Espresso
Your machine can use either ground coffee or E.S.E. (Easy Serving Espresso) pods.

Figure 4.1: The portafilter with options for using either ground coffee or E.S.E. pods, allowing for versatile coffee preparation.
Using Ground Coffee:
- Insert the appropriate filter (single or double shot) into the portafilter.
- Add finely ground espresso coffee to the filter. For a single shot, use one level scoop (approx. 7g); for a double shot, use two level scoops (approx. 14g).
- Tamp the coffee firmly and evenly using the tamper provided.
- Wipe any excess coffee from the rim of the portafilter.
- Attach the portafilter to the group head by aligning it and rotating it to the right until it is firmly locked.
- Place one or two cups under the portafilter spouts.
- Press the single or double espresso button. The machine will automatically stop when the pre-set volume is reached.
Using E.S.E. Pods:
- Insert the E.S.E. pod filter into the portafilter.
- Place one E.S.E. pod into the filter, ensuring it is centered.
- Attach the portafilter to the group head and lock it firmly.
- Place a cup under the portafilter spout.
- Press the single espresso button.
Customizing Coffee Length (Flow Stop Function):
You can program the desired amount of coffee for both single and double shots.
- Prepare the portafilter with ground coffee or an E.S.E. pod.
- Press and hold the desired coffee button (single or double).
- Release the button when the desired amount of coffee has been dispensed into the cup. The machine will remember this setting for future use.
4.2 Frothing Milk (My Latte Art Steam Wand)
The professional steam wand allows you to create rich, creamy milk foam for cappuccinos and lattes.
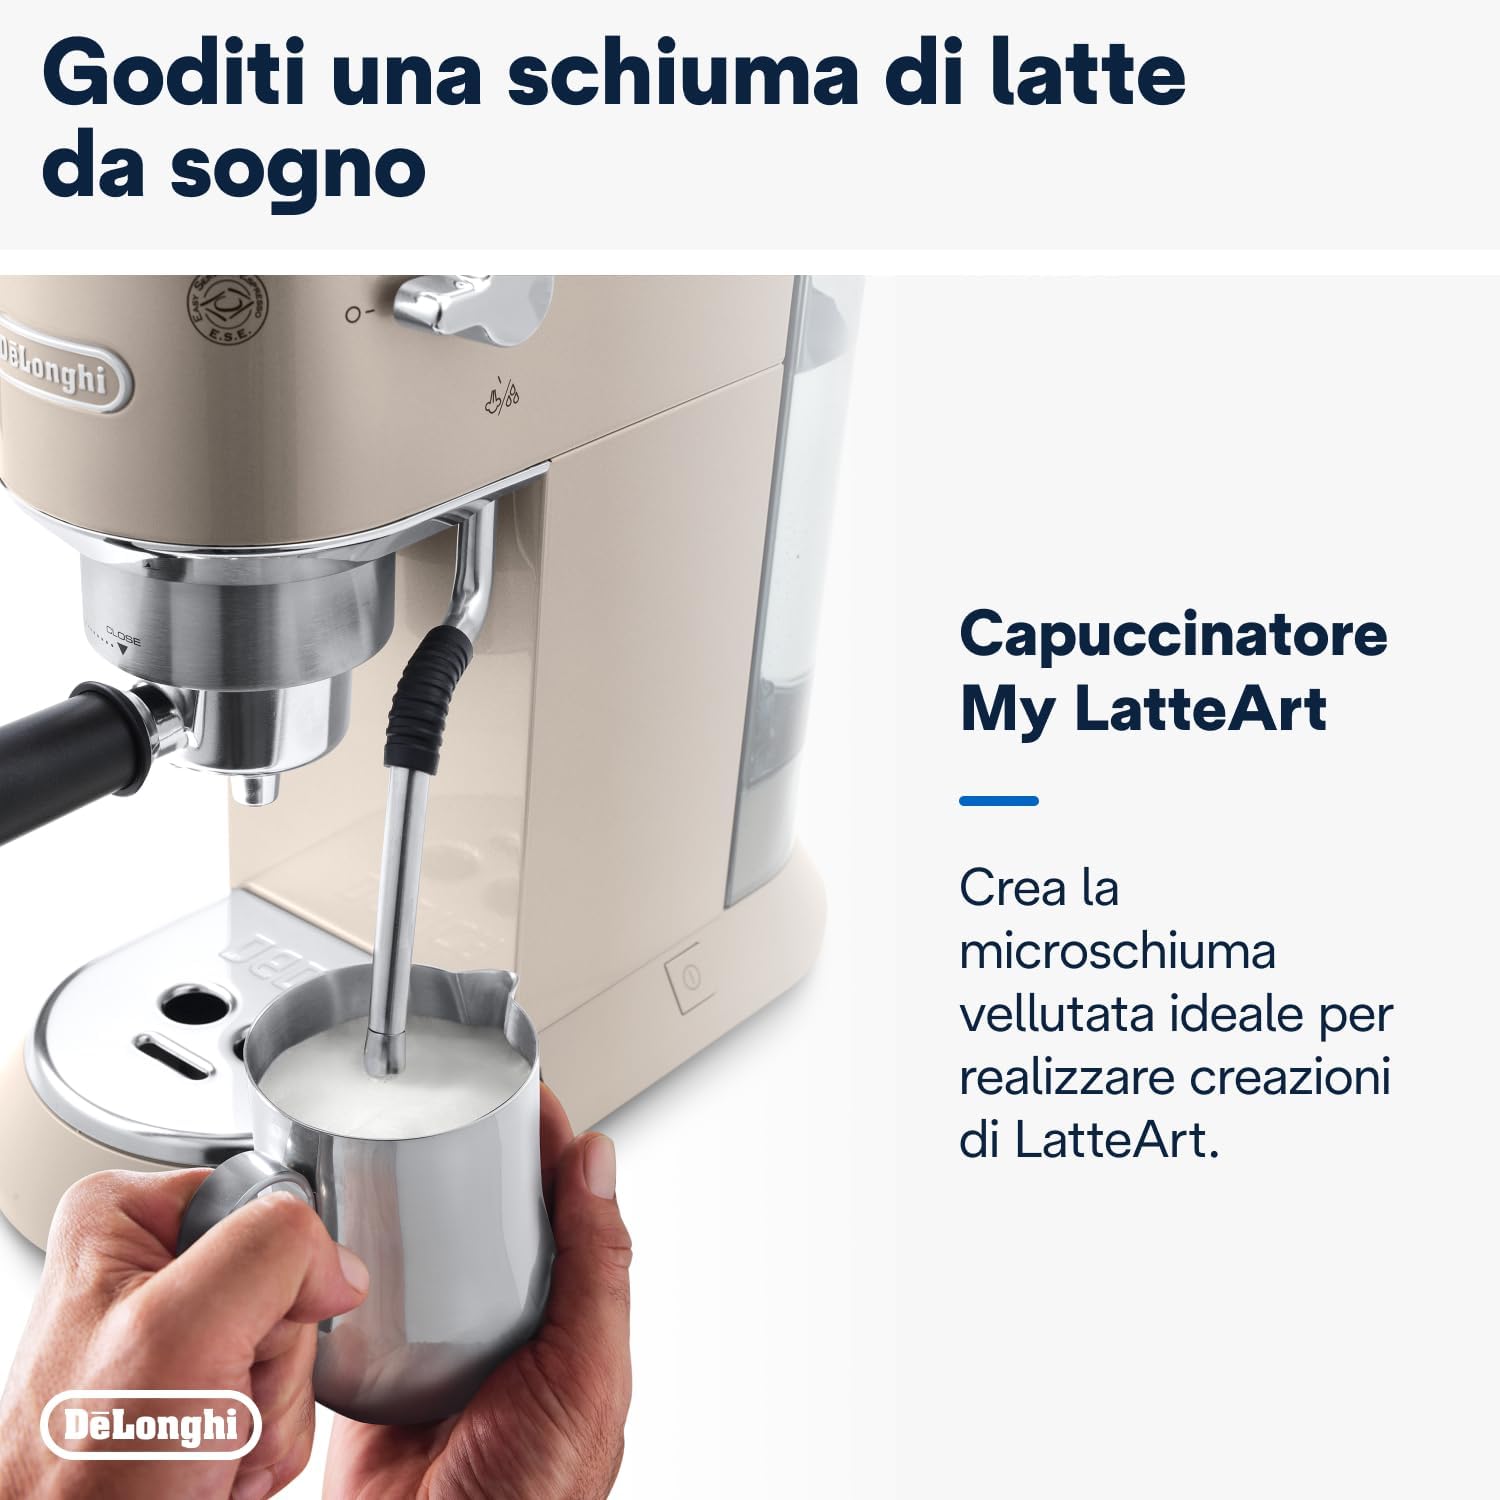
Figure 4.2: The My Latte Art steam wand in action, demonstrating its ability to create velvety microfoam for various milk-based coffee beverages.
- Fill a stainless steel milk pitcher (included in the barista kit) with cold milk, up to one-third full.
- Press the steam button. The light will flash until the optimal steam temperature is reached, then it will become steady.
- Position the steam wand just below the surface of the milk.
- Open the steam knob slowly to release steam. Move the pitcher up and down gently to incorporate air and create foam.
- Once the desired foam consistency and temperature are achieved, close the steam knob.
- Wipe the steam wand immediately with a damp cloth to prevent milk residue from drying.
4.3 Hot Water Dispensing
To dispense hot water for tea or other beverages:
- Ensure the machine is on and ready.
- Place a cup under the steam wand.
- Open the steam knob. Hot water will be dispensed.
- Close the steam knob when done.
4.4 Automatic Shut-off
The machine features an automatic shut-off function to save energy. It will turn off after 9 minutes of inactivity. This setting can be adjusted (2 minutes, 30 minutes, or 3 hours) by following instructions in the full user manual (refer to online resources if needed, as per user reviews).

Figure 4.3: The adjustable drip tray allows for various cup heights, accommodating cups up to 12 cm for both espresso and taller beverages.
5. Maintenance and Cleaning
Regular cleaning ensures optimal performance and extends the lifespan of your machine.
5.1 Daily Cleaning
- Portafilter: After each use, remove the portafilter and discard the coffee grounds. Rinse the filter and portafilter under running water.
- Drip Tray: Empty and rinse the drip tray daily or when the red indicator floats up.
- Steam Wand: Immediately after frothing milk, wipe the steam wand with a damp cloth to remove any milk residue. Purge a small amount of steam to clear the nozzle.
5.2 Water Tank Cleaning
Clean the water tank periodically with warm water and a soft brush. Do not use abrasive cleaners.
5.3 Descaling
Limescale buildup can affect machine performance and coffee quality. The machine will indicate when descaling is required (refer to the full manual for specific indicator lights). Use a De'Longhi descaler solution and follow the instructions provided with the descaler. Descaling frequency depends on water hardness and usage.
6. Troubleshooting
Refer to this section for common issues and their solutions.
| Problem | Possible Cause | Solution |
|---|---|---|
| No coffee dispensed or very slow flow. |
|
|
| Coffee is watery or lacks crema. |
|
|
| No steam from the wand. |
|
|
| Water leaking from machine. |
|
|
7. Specifications
- Brand: De'Longhi
- Model: EC885BG
- Color: Beige
- Dimensions (L x W x H): 330 x 149 x 305 mm (approx. 33P x 15l x 31H cm)
- Weight: 4.2 kg
- Voltage: 240 Volt
- Pump Pressure: 15 Bar
- Water Tank Capacity: 1 Liter (approx.)
- Heating System: Thermoblock (40-second heat-up)
- Coffee Type: Ground Coffee, E.S.E. Pods
- Special Features: My Latte Art Steam Wand, Flow Stop Function, Adjustable Drip Tray, Automatic Shut-off

Figure 7.1: Dimensional overview of the De'Longhi Dedica Arte EC885.BG, showing its compact footprint with a width of 149mm, depth of 330mm, and height of 305mm.

Figure 7.2: Illustration of the Thermoblock heating system, which ensures water is maintained at the precise temperature required for optimal espresso extraction.
8. Warranty and Support
Your De'Longhi Dedica Arte EC885.BG machine comes with a standard manufacturer's warranty. Please refer to the warranty card included in your product packaging for specific terms and conditions.
For technical assistance, spare parts, or service, please contact De'Longhi customer support. Contact details can typically be found on the official De'Longhi website or in your product documentation.
Online Resources: For additional tips, video tutorials, and frequently asked questions, visit the official De'Longhi website.
Ask a question about this manual
Ask about setup, troubleshooting, compatibility, parts, safety, or missing instructions. Manuals+ will review the question and use this page’s manual context to help answer it.