
1. Introduction
Thank you for choosing the Aramox Car Door Side View Blind Spot Camera. This device is designed to enhance driving safety by providing clear side views, assisting with blind spot monitoring, reversing, and parking. It features HD night vision, IP68 waterproofing, and a wide viewing angle, making it suitable for a variety of vehicles. Please read this manual thoroughly before installation and operation to ensure correct usage and optimal performance.
2. Safety Information
- Ensure all power to the vehicle's electrical system is disconnected before beginning installation to prevent electrical shock or damage.
- Improper installation can lead to vehicle damage or malfunction. If you are unsure about any step, consult a qualified professional.
- Do not obstruct the camera's view with stickers, dirt, or other materials. Regularly clean the camera lens for clear images.
- This camera is an aid for safe driving and should not replace careful observation and judgment by the driver.
- Keep wiring away from hot engine parts, sharp edges, and moving components. Secure all cables to prevent interference or damage.
3. Package Contents
Verify that all items listed below are present in your package:
- 1 x Dual Core Camera
- 1 x Extension Cord (approximately 2 meters / 6.56 feet)
- 5 x Wire Clips

Figure 3.1: Package contents including the camera, main cable, and extension cord with RCA connectors.
4. Product Features
- Universal Compatibility: Suitable for a wide range of vehicles including cars, trucks, RVs, vans, trailers, emergency vehicles, commercial vehicles, school buses, boats, and forklifts.
- High-Definition Night Vision: Equipped with 2 LED fill lights and a CMOS image sensor for clear color images even in low-light conditions.
- IP68 Waterproof Rating: Designed with a durable rubber housing that is resistant to water and mud, ensuring reliable performance in various weather conditions.
- Wide Viewing Angle: Features a 90-degree real angle of view per camera, providing comprehensive coverage.
- Flexible Perspective: Supports conversion functions for front, rear, left, and right perspectives, allowing clear visibility of vehicle and road conditions.
- Easy Installation: Designed for non-destructive installation with direct adhesive mounting.
5. Specifications
| Parameter | Value |
|---|---|
| Image Type | 1/4 inch High Performance Color Display |
| TV System | NTSC |
| Horizontal Resolution | 520 TV Lines |
| Night Vision Effect | HD Night Vision |
| IP Rating | IP68 |
| Working Temperature | -20°C to 70°C (-4°F to 158°F) |
| Camera Working Voltage | DC 12V |
| Camera Working Current | 30mA |
| Display Connector | RCA Interface (5PIN camera output) |
| Effective Distance of White Light | 3 meters (for illumination) |
| Shockproof Grade | 7G |
| Signal to Noise Ratio | >52 dB |
| Camera Angle | 2 x 90° (Real Angle of View) |
| Dimensions (approx.) | 49mm (length) x 28mm (width) x 20mm (height) |
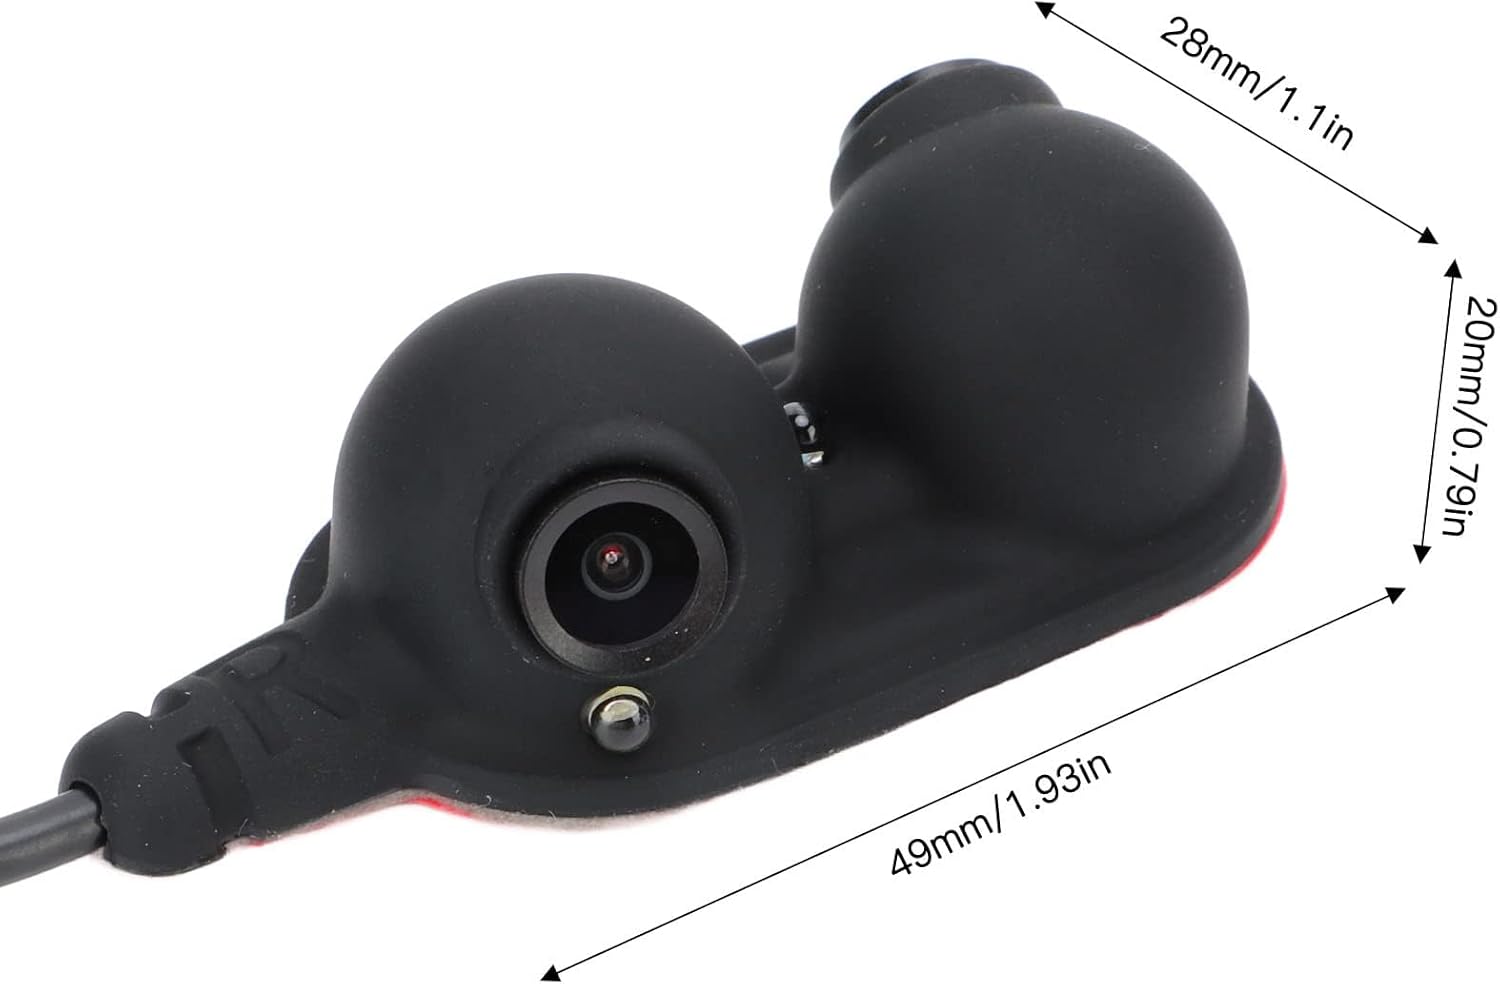
Figure 5.1: Detailed view of the camera unit.

Figure 5.2: Camera highlighting universal type and CMOS image sensor.
6. Setup and Installation
The Aramox side view camera is designed for non-destructive installation, typically using direct adhesive mounting. Follow these steps for proper setup:
- Choose Mounting Location: Select a suitable flat surface on your vehicle's side mirror housing or door panel that provides an unobstructed view of the blind spot area. Ensure the camera is positioned to capture the desired perspective (right side for this model).
- Clean Surface: Thoroughly clean the chosen mounting surface with rubbing alcohol and allow it to dry completely. This ensures optimal adhesion.
- Attach Camera: Remove the protective backing from the adhesive on the camera base. Carefully align the camera and firmly press it onto the cleaned surface for at least 30 seconds.
- Route Wiring: Carefully route the camera's cable from the mounting location into the vehicle's interior. Use the provided wire clips to secure the cable along its path, preventing it from dangling or interfering with moving parts. Avoid routing cables near heat sources or sharp edges.
- Connect to Display: Connect the camera's 5PIN output interface to the provided extension cord, and then connect the RCA end of the extension cord to your aftermarket radio or compatible display unit. Ensure the display unit has an RCA input for video.
- Power Connection: Connect the camera's power wire (typically red) to a 12V DC power source that is activated when the vehicle is on or when the camera is intended to be used (e.g., reverse light circuit for a backup camera function, or an accessory power source for continuous side view). Connect the ground wire (typically black) to a suitable vehicle ground point.
- Test Functionality: Once all connections are made, turn on your vehicle and display unit to test the camera's functionality. Adjust the camera's angle slightly if needed to optimize the view.

Figure 6.1: Example of non-destructive installation on a vehicle's side mirror.
7. Operation
Once installed and powered, the Aramox side view camera will transmit video to your connected display unit.
- Viewing Modes: The camera supports conversion between front, rear, left, and right perspectives. The specific method for switching views depends on your connected display unit or aftermarket radio. Refer to your display unit's manual for instructions on selecting camera inputs or changing viewing modes.
- Night Vision: The integrated LED fill lights automatically activate in low-light conditions, providing clear HD color night vision.
- Blind Spot Monitoring: Use the camera feed to check blind spots before changing lanes or merging.
- Reversing and Parking: When connected to a reverse trigger, the camera can automatically display the side view when reversing, aiding in parking maneuvers.

Figure 7.1: Illustrates potential viewing angles (front and rear) on a display unit.
8. Maintenance
- Cleaning: Regularly clean the camera lens with a soft, damp cloth to remove dirt, dust, or water spots. Avoid abrasive cleaners that could scratch the lens.
- Inspection: Periodically check the camera's mounting and wiring for any signs of damage, looseness, or corrosion. Ensure all connections remain secure.
- Weather Protection: While the camera is IP68 rated, extreme weather conditions (e.g., heavy ice buildup) can temporarily affect performance. Ensure the lens is clear of obstructions before driving.
9. Troubleshooting
| Problem | Possible Cause | Solution |
|---|---|---|
| No image on display. |
|
|
| Image is blurry or distorted. |
|
|
| Night vision is poor. |
|
|
10. Warranty and Support
Aramox products are manufactured to high-quality standards. For warranty information or technical support, please refer to the documentation provided with your purchase or contact Aramox customer service.
If you have any questions or require assistance, please feel free to get in touch with Aramox. We are committed to providing support to our customers.
Contact Information: Please visit the official Aramox website or your point of purchase for the most current support contact details.