1. Introduction
This manual provides comprehensive instructions for the installation, operation, and maintenance of your BEAMFLY H7 LED Headlight Bulbs. These bulbs are designed to offer superior illumination for automotive applications, featuring high brightness and a cool white light temperature. Please read this manual thoroughly before installation and use to ensure proper function and safety.
2. Product Specifications
| Feature | Specification |
|---|---|
| Bulb Type | H7 LED |
| Power | 100 W/kit |
| Luminous Flux | 18000 lm/pair |
| Color Temperature | 6000 K (Cool White) |
| Color Rendering Index (CRI) | 90+ |
| Waterproof Rating | IP68 |
| Operating Temperature | -40 ℃ to +120 ℃ |
| Lifespan | > 10,000 hours (up to 45 years) |
| Voltage | 12 Volts |
| Cooling System | Integrated fan (12000 RPM) and Aviation-grade aluminum body |
| Special Features | Integrated EMC, Plug-and-play installation, Not CANBUS compatible, For lenticular headlights only |
3. Package Contents
- 2 x BEAMFLY H7 LED Bulbs
- 1 x User Manual
4. Installation Guide
Before beginning installation, ensure your vehicle's engine is off and the headlights are cool. It is recommended to consult your vehicle's owner's manual for specific headlight access procedures.
4.1 Compatibility Check
These H7 LED bulbs are designed for universal fitment in vehicles that use H7 halogen bulbs, specifically for lenticular (projector) headlights. They are not CANBUS compatible. If your vehicle has a CANBUS system, additional decoders may be required to prevent error messages or flickering.
4.2 Step-by-Step Installation (Approx. 10 minutes)
- Step 1: Remove the Original Halogen Bulb.
Locate the H7 halogen bulb in your headlight assembly. Disconnect the power connector and carefully remove the bulb from its housing. Refer to your vehicle's manual for specific instructions on accessing the headlight bulb.

Image: Comparison of BEAMFLY H7 LED bulb with a standard halogen bulb, highlighting the compact design and dimensions for easy fitment.
- Step 2: Insert the BEAMFLY LED Bulb.
Insert the BEAMFLY H7 LED bulb into the headlight housing. Ensure it is seated correctly and securely. The rotational adapter allows for 360-degree adjustment to achieve the optimal beam pattern.

Image: Illustration of the 360-degree rotational adapter, demonstrating how to adjust the LED bulb for a correct beam pattern and focused lighting effects.
- Step 3: Connect the Power.
Connect the power connector of the BEAMFLY LED bulb to the vehicle's original headlight power socket. Ensure a firm connection. The installation is plug-and-play.

Image: A visual guide illustrating the three simple steps for installing the BEAMFLY H7 LED bulbs: removing the old bulb, inserting the new LED bulb, and connecting the power.
After installation, test the headlights to ensure they function correctly. Adjust the beam pattern if necessary using the rotational adapter to avoid dazzling oncoming traffic.
5. Operation
BEAMFLY H7 LED Headlight Bulbs provide a powerful and clear 6000K cool white light, significantly brighter than standard halogen bulbs. The advanced design ensures a wide angle and uniform beam pattern with a reduced glare cut-off line, enhancing visibility and driving safety.

Image: Visual comparison demonstrating the impressive lighting effects of BEAMFLY LED bulbs compared to other LED solutions, highlighting a more perfect and focused beam pattern.
The integrated cooling system, featuring a 12000 RPM turbo fan and aviation-grade aluminum body, ensures stable performance and extends the lifespan of the bulbs by efficiently dissipating heat.
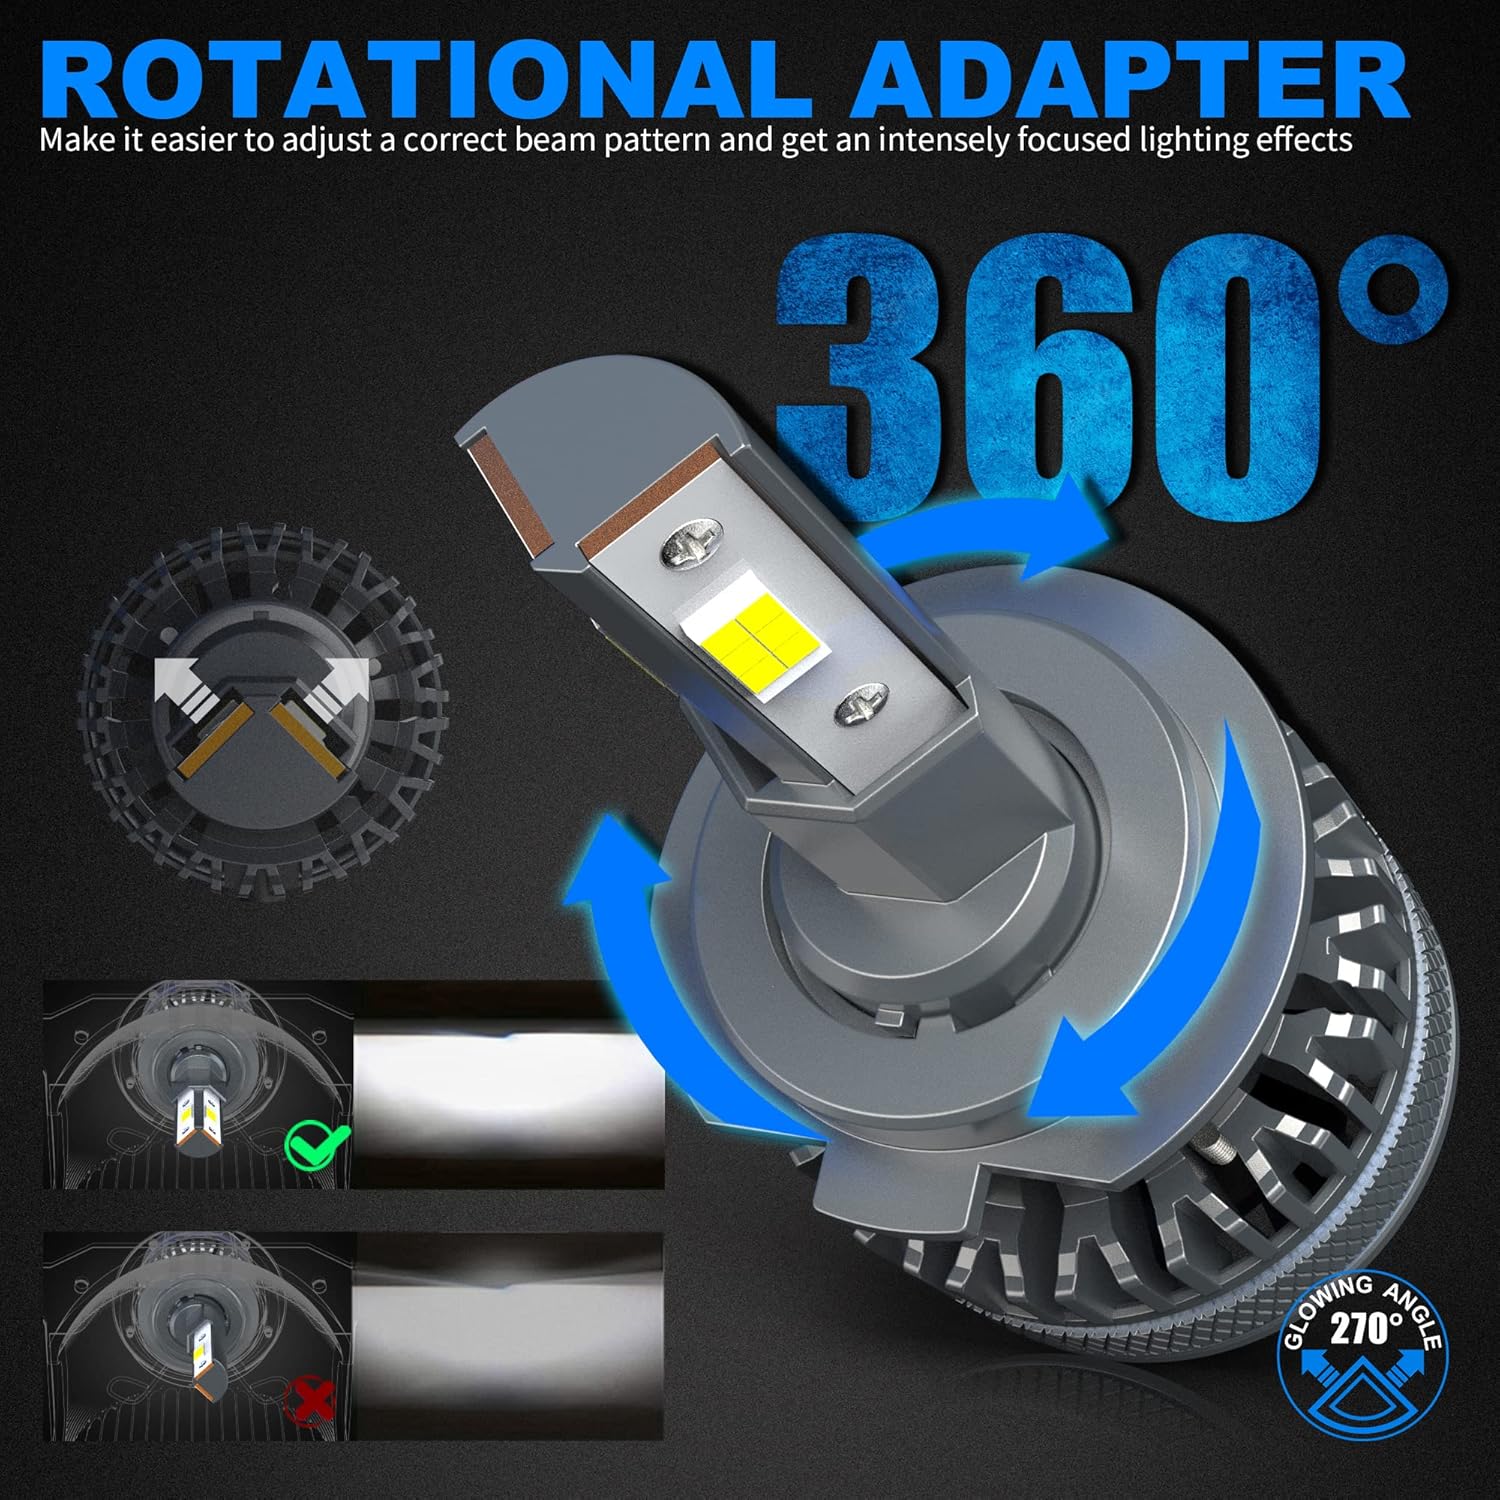
Image: Detailed illustration of the dynamic cooling system, showcasing automotive-specific LED chipsets, a 12000 RPM turbo fan, an exterior LED driver, and an aviation-grade aluminum body for optimal heat dissipation and longevity.
6. Maintenance
BEAMFLY H7 LED bulbs are designed for long-term, maintenance-free operation. However, to ensure optimal performance and longevity:
- Periodically inspect the headlight assembly for any signs of moisture or damage.
- Keep the headlight lenses clean to maximize light output. Use a soft cloth and appropriate cleaning solution.
- Avoid touching the LED chips directly during installation or inspection to prevent damage.
7. Troubleshooting
If you encounter issues with your BEAMFLY H7 LED bulbs, refer to the following common troubleshooting steps:
- Bulbs not turning on:
- Check all connections to ensure they are secure.
- Verify that the vehicle's headlight fuse is intact.
- Ensure the polarity is correct (some vehicles may require flipping the connector).
- Flickering or error messages on dashboard:
- These bulbs are not CANBUS compatible. If your vehicle has a CANBUS system, you may need to install additional CANBUS decoders (resistors) to resolve flickering or error warnings.
- Poor beam pattern or glare:
- Adjust the rotational adapter on the LED bulb to optimize the beam pattern. Ensure the light output is focused and does not cause excessive glare to oncoming drivers.
- Confirm the bulbs are correctly seated in the headlight housing.
- One bulb not working:
- Swap the non-working bulb with the working one to determine if the issue is with the bulb or the vehicle's wiring.
- Check the specific wiring and connections for the affected headlight.
8. Safety Information
- Always disconnect the vehicle's battery before performing any electrical work.
- Wear appropriate safety gear, suchs as gloves and eye protection, during installation.
- Do not touch the LED chips with bare hands.
- Ensure the bulbs are securely installed to prevent them from dislodging during vehicle operation.
- Dispose of old bulbs responsibly according to local regulations.
9. Warranty and Support
BEAMFLY H7 LED Headlight Bulbs are manufactured to high-quality standards and are designed for a long operational life of over 10,000 hours. For specific warranty details or technical support, please refer to the retailer where the product was purchased or visit the official BEAMFLY website.
Manufacturer: Guangzhou Ting Lin Mao Yi You Xian Gong Si