
1. Introduction
This manual provides instructions for the proper use and maintenance of your Kadacha Mini Bike Pump. This handheld, manual air pump is designed for inflating bicycle tires and is compatible with both Presta and Schrader valves. It features a built-in pressure gauge for accurate inflation up to 120 PSI and is constructed from durable aluminum.
2. Package Contents
Verify that all components are present in the package:
- Kadacha Mini Bike Pump with integrated pressure gauge
- Frame mounting bracket
- Velcro strap
- Mounting screws
- Ball inflation needle (stored within the pump handle)

Figure 1: Kadacha Mini Bike Pump and included accessories.
3. Setup
3.1 Mounting to Bicycle Frame
- Locate the water bottle cage mounting holes on your bicycle frame.
- Align the mounting bracket with these holes.
- Secure the bracket using the provided screws. Ensure it is tightened firmly to prevent rattling.
- Place the pump into the bracket and secure it with the Velcro strap.

Figure 2: Pump mounted on a bicycle frame.
3.2 Valve Compatibility
The pump head is designed for automatic compatibility with both Presta and Schrader valves without requiring manual adjustment. The anti-leak locker ensures a tight seal.
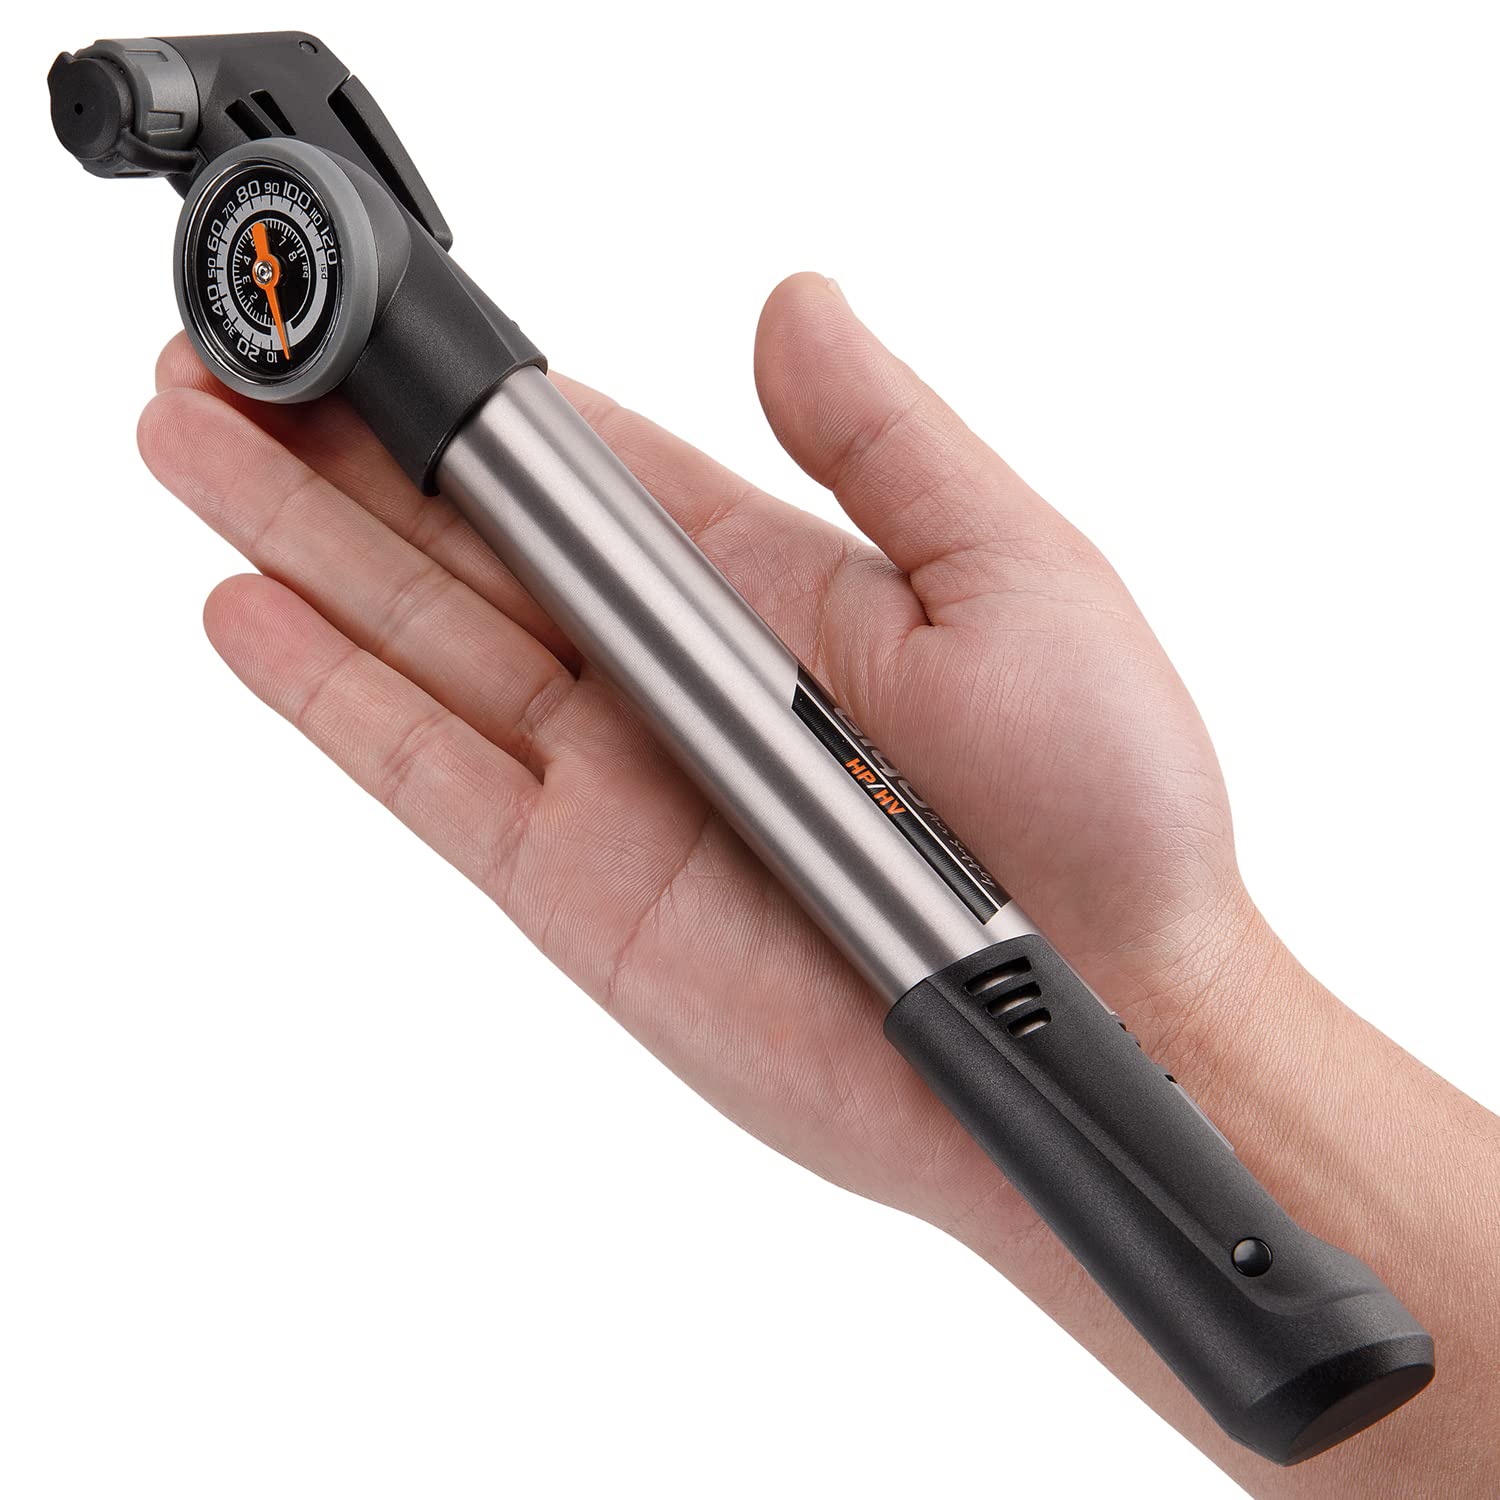
Figure 3: Smart valve head with Presta and Schrader indicators.
4. Operating Instructions
4.1 Attaching to Valve and Inflating
- Ensure the anti-leak locker lever is in the "UNLOCKED" position.
- Firmly push the pump head onto the tire valve stem.
- Push the anti-leak locker lever to the "LOCKED" position to secure the connection.
- Begin pumping by moving the handle up and down.
- Monitor the integrated pressure gauge to reach the desired PSI.
- Once inflated, return the locker lever to "UNLOCKED" and carefully remove the pump head from the valve.

Figure 4: Inflating a bicycle tire.
4.2 High Volume (HV) and High Pressure (HP) Modes
The pump features a dual-mode system for efficient inflation:
- HV (High Volume) Mode: Provides more air output per stroke, ideal for quickly inflating tires from flat.
- HP (High Pressure) Mode: Provides higher pressure with less air output per stroke, making it easier to reach higher PSI levels, especially when tires are already partially inflated.
To switch between modes, rotate the collar near the handle. The pump's design allows for an extended stroke in HP mode for easier pumping at higher pressures.

Figure 5: Switching between HV and HP modes.
4.3 Using the Pressure Gauge
The integrated 1.5-inch industrial gauge provides precise pressure readings up to 120 PSI (8 Bar). Read the large numbers on the gauge to ensure your tire is inflated to the recommended pressure, avoiding over or under-inflation.

Figure 6: Close-up of the pressure gauge.
4.4 Ball Inflation Needle
A ball inflation needle is stored within the pump's handle. To access it, unscrew the end cap of the handle. Attach the needle to the pump head for inflating sports balls.
5. Maintenance
- Cleaning: Wipe the pump exterior with a damp cloth to remove dirt and debris. Avoid using harsh chemicals.
- Storage: Store the pump in a dry place, away from extreme temperatures. Ensure the handle is fully retracted and the valve locker is disengaged when not in use.
- Inspection: Periodically check the pump head, seals, and barrel for any signs of wear or damage. Replace if necessary.
6. Troubleshooting
| Problem | Possible Cause | Solution |
|---|---|---|
| Pump head does not attach securely to valve. | Locker lever not fully engaged; valve stem not fully inserted. | Ensure valve stem is fully inserted and locker lever is pushed completely to the "LOCKED" position. |
| Air leaks during inflation. | Improper connection; worn seals in pump head. | Re-attach pump head, ensuring a tight seal. Inspect and replace pump head seals if necessary. |
| Pressure gauge not reading correctly. | Faulty gauge; improper connection. | Ensure pump head is securely attached. If issue persists, contact customer support. |
| Difficulty pumping or low air output. | Incorrect mode (HV/HP); internal pump issue. | Switch to the appropriate mode (HV for initial inflation, HP for higher pressures). If problem continues, inspect pump for blockages or damage. |
7. Specifications
- Brand: Kadacha
- Model: B09STHQVJ8
- Material: Aluminum
- Color: Black, Silver
- Item Weight: 5.3 ounces
- Product Dimensions: 3.15"L x 3.15"W x 11.02"H (compacted)
- Maximum Pressure: 120 PSI (8 Bar)
- Valve Compatibility: Presta, Schrader
- Operation Mode: Manual, Dual (High Volume & High Pressure)
8. Warranty & Support
For warranty information or technical support, please refer to the product packaging or contact Kadacha customer service directly. Contact details are typically provided with your purchase documentation.