
1. Introduction and Overview
The INKBIRDPLUS 6-in-1 CO2 Monitor is an advanced indoor air quality detection device designed to provide real-time measurements of various environmental parameters. This monitor helps you understand and maintain a healthy indoor environment by tracking Air Quality Index (AQI), Carbon Dioxide (CO2), Particulate Matter (PM2.5 and PM10), Temperature, and Humidity. Its clear display and alarm functions ensure you are always informed about your air quality.

Figure 1: INKBIRDPLUS 6-in-1 CO2 Monitor displaying various air quality metrics.
2. Product Features
- 6-in-1 Multifunction: Accurately detects AQI, CO2, PM2.5, PM10, temperature, and humidity levels.
- 3-Color Status Indicator: Visual alerts for air quality: Green (Normal: 0-50), Yellow (Warning: 51-100), Red (Danger: 101-500). An audible alarm activates when AQI exceeds 100.
- Easy to Use: USB rechargeable with automatic CO2 calibration. Temperature display can be switched between Celsius (℃) and Fahrenheit (℉).
- Real-Time Display: Backlit color display shows current values, time, date, and year.
- Versatile Placement: Features a hanging hole for wall mounting and a pull-out stand for desktop use.
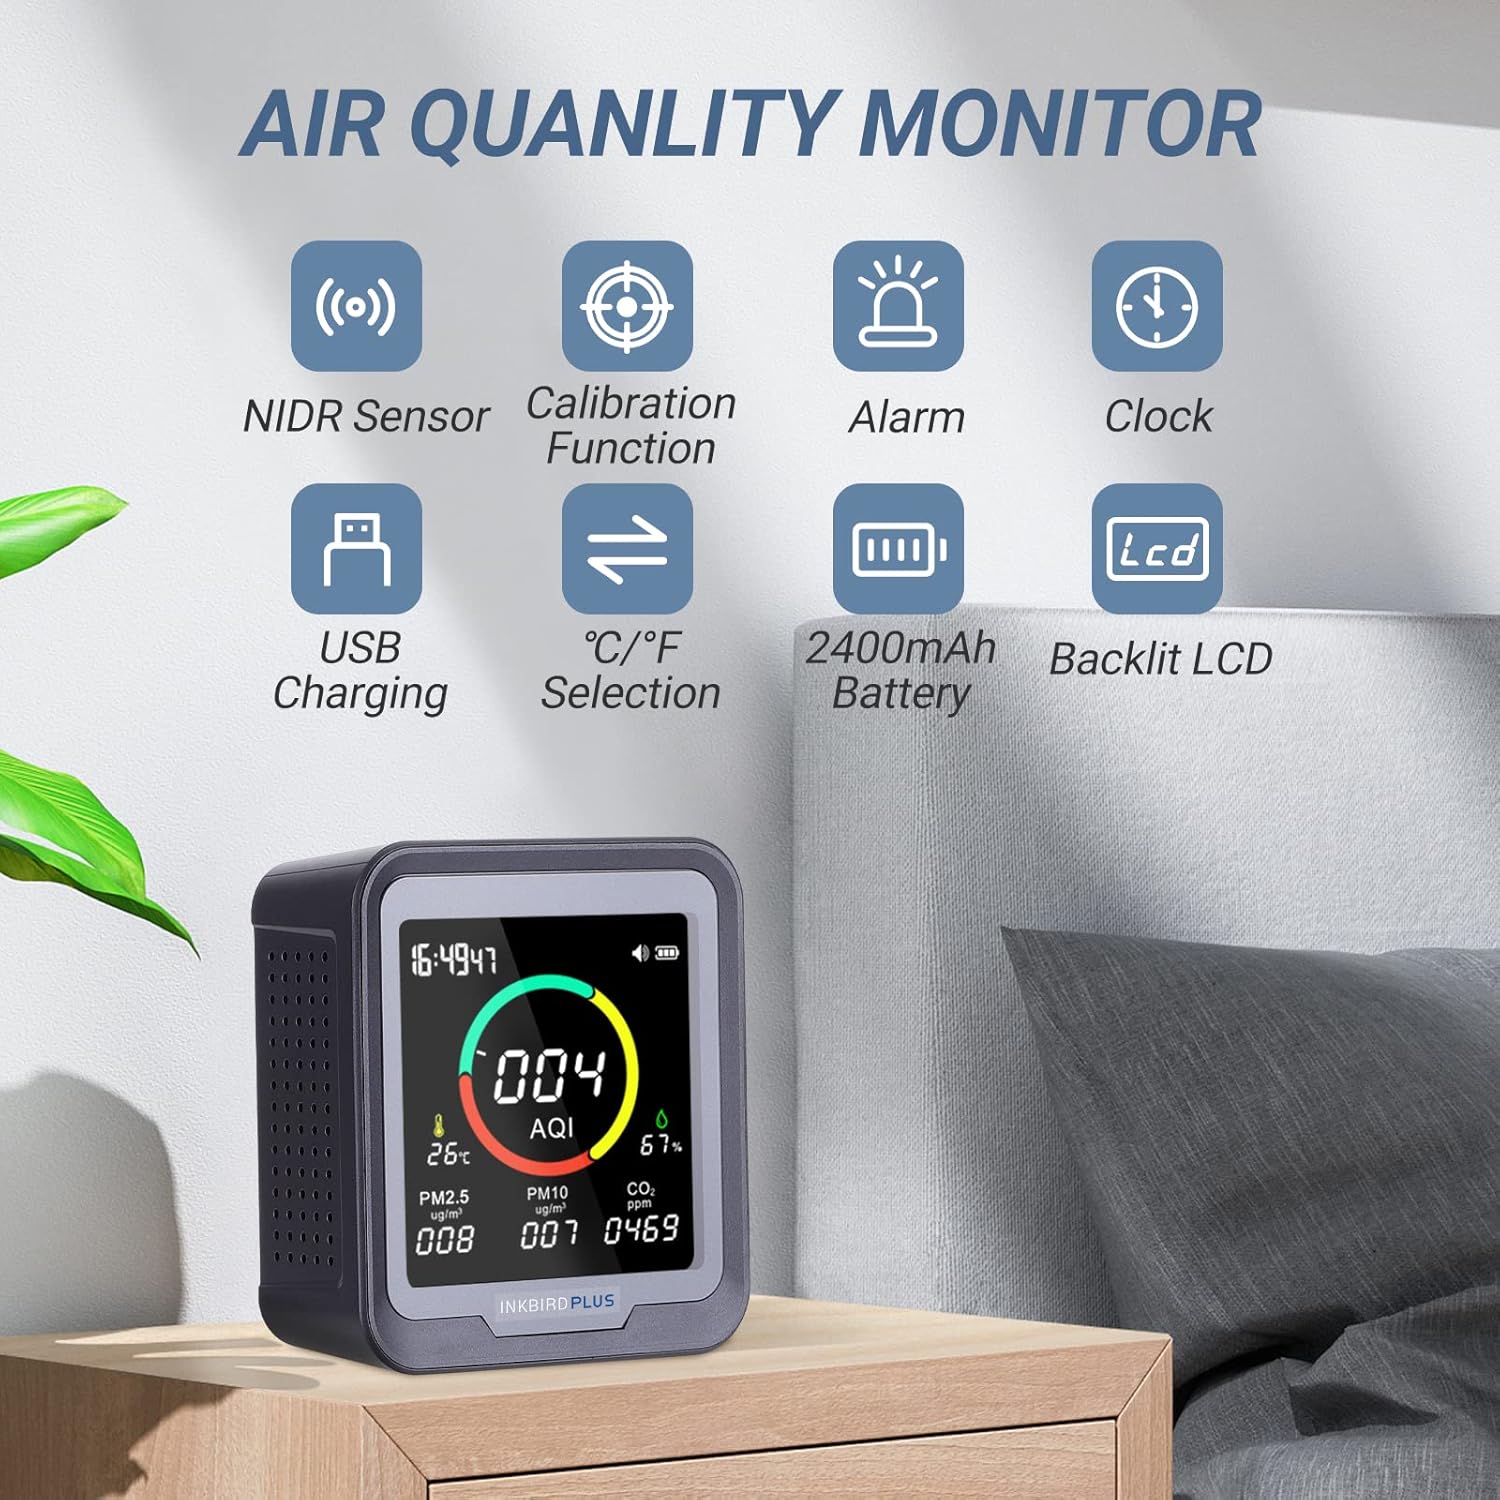
Figure 2: Key features of the INKBIRDPLUS Air Quality Monitor.
3. Package Contents
Upon unpacking, ensure all items are present:
- 1x INKBIRDPLUS 6-in-1 Air Quality Monitor
- 1x USB Type-C Charging Cable
- 1x User Manual
4. Product Diagram and Components
Familiarize yourself with the monitor's layout and controls:

Figure 3: Front and back view of the monitor with labeled components.
- Display Screen: Shows all measurement values and settings.
- Power Button: Turns the device on/off.
- 'DOWN' Button: Adjusts parameters, turns backlight on/off.
- 'UP' Button: Adjusts parameters, turns alarm on/off.
- USB-C Port: For charging the device.
- Hanging Hole: For wall mounting.
- Pull-out Stand: For desktop placement.
5. Setup
5.1 Charging the Device
The monitor is equipped with a rechargeable lithium-ion battery. For continuous operation, it is recommended to keep the device plugged in using the provided USB Type-C cable. The battery serves as a backup power source.

Figure 4: Connecting the monitor for USB charging.
5.2 Placement
The monitor can be placed on a flat surface using its integrated pull-out stand or mounted on a wall using the hanging hole on the back.

Figure 5: Wall mounting option for the monitor.
6. Operating Instructions
6.1 Power On/Off
Press and hold the Power button to turn the device on or off. The device will perform an initial measurement sequence upon startup.
6.2 Initial Measurement
After powering on, the monitor will take approximately 30 seconds to measure CO2 and air quality. It performs this measurement five times to ensure accuracy.
6.3 Setting Time, Date, and Year
- Double-click the 'Power' button to enter setting mode.
- The setting sequence is year, date, then time. After setting each item, press the 'Power' button to confirm and move to the next setting.
- Use the '-' button to decrease the parameter value and the '+' button to increase it.

Figure 6: Steps for setting the device's time and date.
7. Display Information
The monitor features a clear, backlit color display that presents all relevant data at a glance. The AQI value is prominently displayed with a color-coded indicator:
- Green: Normal air quality (AQI 0-50)
- Yellow: Warning, moderate air quality (AQI 51-100)
- Red: Dangerous, unhealthy air quality (AQI 101-500)

Figure 7: AQI concentration levels and their corresponding color indicators.
8. Calibration
The CO2 sensor supports automatic calibration. For manual calibration, power off the device and then long-press three buttons simultaneously to enter the calibration mode. Follow the on-screen prompts to complete the calibration process.

Figure 8: Initiating the calibration function.
9. Alarm Function
The monitor features an audible alarm that activates when the detected AQI value exceeds 100. To abort the alarm, long-press the '+' key.

Figure 9: Stopping the AQI alarm.
10. Temperature Unit Selection
You can select either Celsius (℃) or Fahrenheit (℉) for temperature display based on your preference. Refer to the on-screen menu or the 'DOWN' button functionality for switching units.
11. Maintenance
- Cleaning: Use a soft, dry cloth to clean the device. Do not use abrasive cleaners or solvents.
- Battery Care: For optimal battery life, avoid fully discharging the device frequently. Keep it plugged in for continuous monitoring.
- Storage: Store the device in a cool, dry place when not in use for extended periods.
12. Troubleshooting
- Short Battery Life: The internal battery is primarily for backup. For continuous operation, keep the device plugged in via the USB-C cable.
- Inaccurate Readings: Ensure the device is placed in an area with good air circulation, away from direct drafts or heat sources. Allow sufficient time for initial calibration (approx. 30 seconds). If readings seem consistently off, perform a manual calibration as described in Section 8.
- Alarm Not Sounding: Check if the alarm function is enabled (refer to 'UP' button functionality). Ensure the volume is not muted.
- Display Not Working: Ensure the device is charged or plugged in. If the screen is dark, try adjusting the backlight using the 'DOWN' button.
13. Specifications
| Specification | Value |
|---|---|
| Manufacturer | INKBIRDPLUS |
| Model Number | 6-IN-1 |
| Item Weight | 306 g |
| Product Dimensions | 14 x 10 x 5 cm |
| Batteries | 1 Lithium Ion battery required (included) |
| Power Source Type | Battery Powered |
| Measurement Accuracy | +/-5% |
| Included Components | TYPE-C charging cable |
| Alarm | Audible |
14. Official Product Videos
INKBIRDPLUS CO2 Monitor Overview
This video provides a detailed overview of the INKBIRDPLUS CO2 Monitor, demonstrating its features, display, and basic operation, including battery installation and charging.
INKBIRD Smart CO2 Detector with Bluetooth
This video showcases the INKBIRD Smart CO2 Detector, highlighting its smart features and connectivity options, which are similar to the INKBIRDPLUS 6-in-1 model.
15. Warranty and Support
For any questions, concerns, or support regarding your INKBIRDPLUS 6-in-1 CO2 Monitor, please contact customer service directly. You can reach them via email at: unni_technology@hotmail.com.


