
1. Introduction
This manual provides detailed instructions for the proper setup, operation, and maintenance of your Leipan MS1 Digital Microscope. Please read this manual thoroughly before using the device to ensure optimal performance and longevity. The Leipan MS1 is designed for detailed observation and analysis, featuring a 7-inch LCD screen, up to 1500X magnification, and versatile connectivity options.
2. Package Contents
Upon unboxing, verify that all the following items are included in your package:
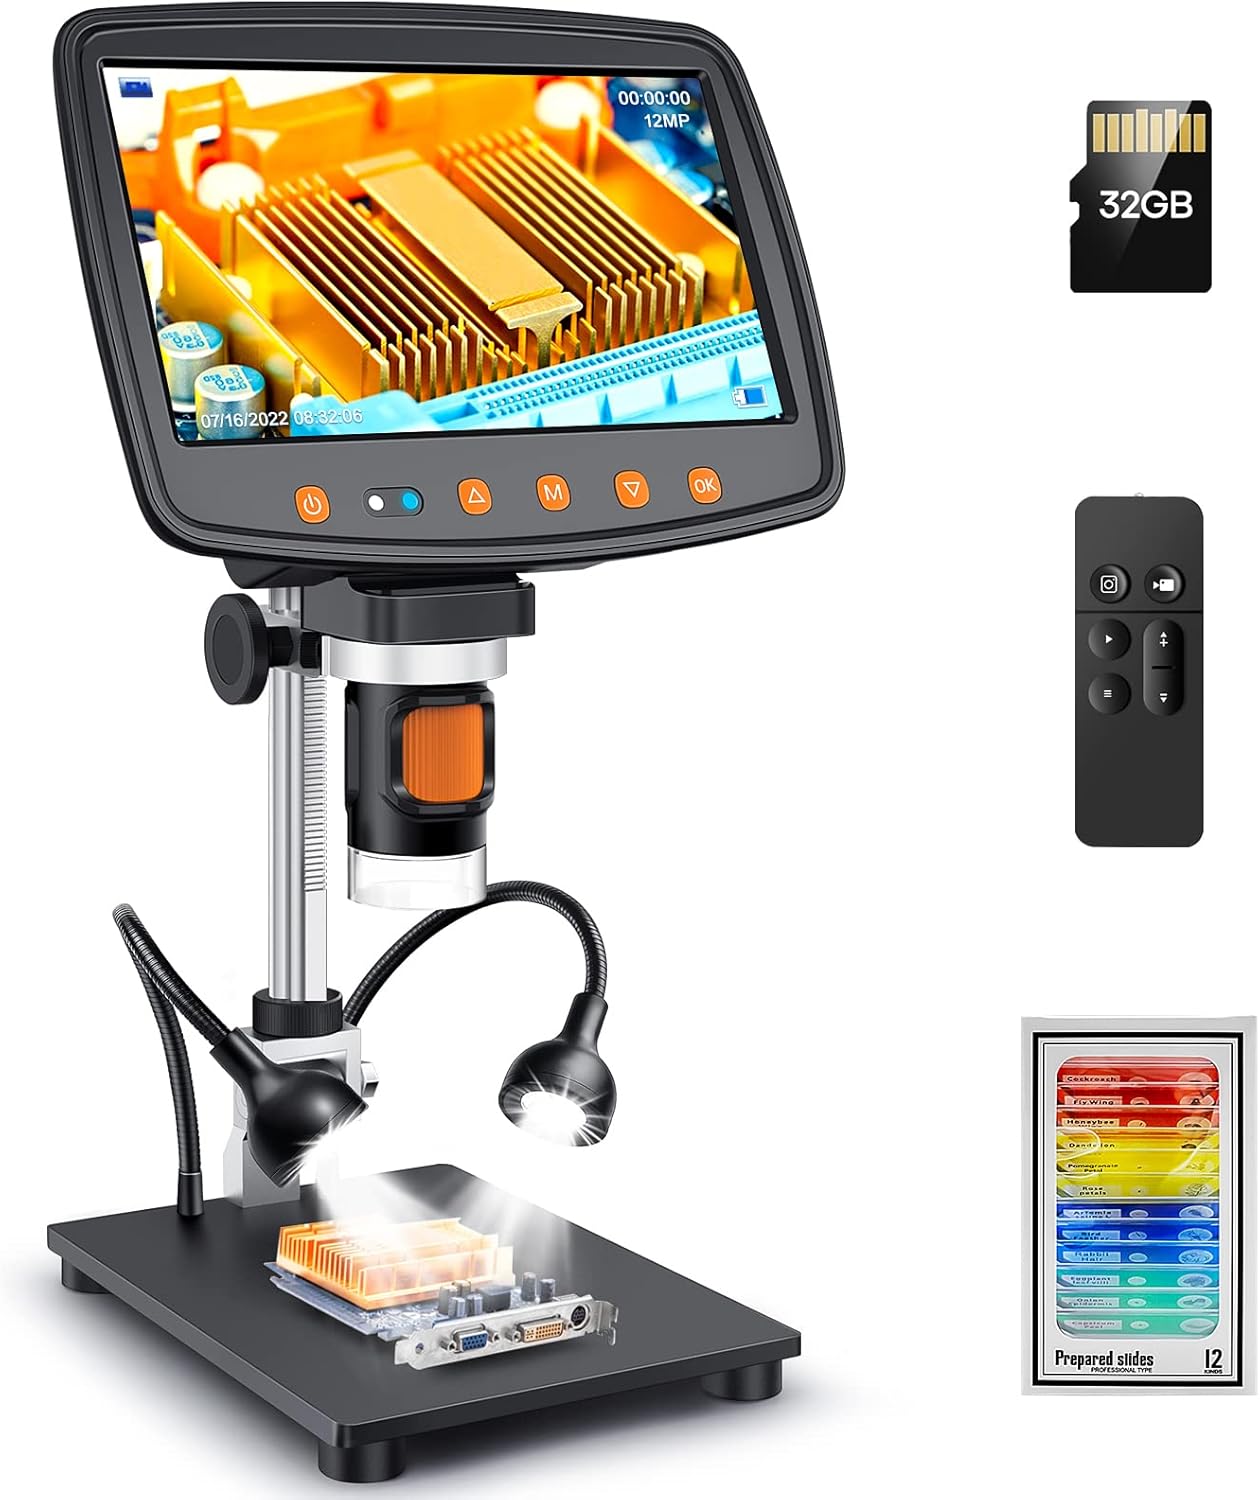
- MS1 Microscope Unit (with 7-inch LCD screen)
- Aluminum Alloy Base with two flexible LED lights
- Aluminum Alloy Stand
- HDMI Cable
- Wireless Remote Control
- Straightedge (Microscope Micrometer Calibration Ruler)
- 32GB Micro-SD Card
- USB Type-C Cable (for microscope power/data)
- USB Cable (for base lights power)
- Light Shield
- 12 Pcs Prepared Slides
- User Manual

3. Product Overview
The Leipan MS1 Digital Microscope is equipped with advanced features for detailed observation and analysis. Its ergonomic design and high-quality components ensure a superior user experience.
- 7-inch LCD Screen: The upgraded 7-inch LCD screen offers a 30% larger field of view compared to other 7-inch microscopes, allowing for more efficient observation. The screen can be rotated 90° for various viewing angles.
- High Magnification: Provides continuous zoom from 2X to 1500X, revealing intricate details of microscopic objects.
- 12MP Image Sensor: Captures high-definition images and 1080FHD videos without delay, stored on the included 32GB Micro-SD card.
- Adjustable Stand: Features an 8-inch high stand, increasing the maximum distance between the lens and the base to 6.5 inches. This wider perspective allows for capturing larger objects like entire coins on the display.
- Dual Lighting System: Equipped with 8 LEDs around the lens and 2 flexible side lights on the base for optimal illumination of specimens.
- Versatile Output: Supports HDMI output for direct connection to HD TVs or monitors, and USB output for compatibility with Windows and Mac computers (using default apps like "Windows Camera" or "Photo Booth").


4. Setup Instructions
Follow these steps to assemble your Leipan MS1 Digital Microscope:
- Attach the Stand to the Base: Rotate the bracket on the aluminum alloy stand into the corresponding hole on the aluminum alloy base. Tighten the black button on the bracket to secure it.
- Mount the Microscope Unit: Carefully place the microscope unit (with the LCD screen) onto the top of the stand's bracket. Ensure it is seated correctly and tighten the black button to secure it.
- Connect Power for Lights: Plug the USB cable into the base's USB port to power the flexible LED lights.
- Insert Micro-SD Card: Locate the Micro-SD card slot on the side of the microscope unit and insert the provided 32GB card until it clicks into place.
- Power On: Press the power button on the microscope unit to turn it on.
5. Operating Instructions
Once assembled, follow these steps to operate your microscope:
- Place Specimen: Position the object you wish to observe on the base directly under the microscope lens.
- Adjust Height: Use the adjustment knob on the stand to raise or lower the microscope unit, bringing the lens closer or further from the specimen.
- Adjust Focus: Rotate the orange focus wheel on the microscope lens until the image on the screen is clear.
- Adjust Lighting: Use the controls on the base or the microscope unit to adjust the brightness of the LED lights for optimal viewing.
- Screen Adjustment: The 7-inch LCD screen can be tilted up to 90 degrees to find a comfortable viewing angle.
6. Remote Control Operation
The included wireless remote control allows for convenient operation of the microscope's functions, such as taking photos, recording videos, and navigating menus, without touching the unit.
- Photo Mode: Press the 'OK' key on the remote to capture a photo.
- Video Mode: Press the 'OK' key on the remote to start/stop video recording.
- File Mode: Long press the menu key to switch to file mode to view captured photos and videos.
7. Connecting to External Devices
The Leipan MS1 offers flexible connectivity options for larger displays:
- HDMI Output: Connect an HDMI cable from the microscope to an HD TV or monitor to view specimens in real-time and high resolution.
- USB Output: Connect the USB Type-C cable from the microscope to a Windows or Mac computer. Use default applications like "Windows Camera" (Windows 10) or "Photo Booth" (MacBook) to view and capture images/videos.
8. Image and Video Capture
The Leipan MS1 is equipped with a 12MP UHD image sensor for high-quality captures. All images and 1080FHD videos are stored directly onto the included 32GB Micro-SD card. Use the remote control or the buttons on the microscope unit to switch between photo and video modes and initiate captures.
9. Maintenance
To ensure the longevity and optimal performance of your Leipan MS1 Digital Microscope, follow these maintenance guidelines:
- Cleaning: Use a soft, dry cloth to clean the exterior of the microscope and screen. For the lens, use a specialized lens cleaning cloth and solution. Avoid abrasive materials or harsh chemicals.
- Storage: Store the microscope in a cool, dry place away from direct sunlight and extreme temperatures. When not in use, cover the lens with the light shield to protect it from dust.
- Battery Care: If the microscope has a rechargeable battery, ensure it is charged regularly, even during periods of non-use, to maintain battery health.
10. Troubleshooting
If you encounter any issues with your Leipan MS1 Digital Microscope, refer to the following common troubleshooting tips:
- No Power: Ensure the microscope is fully charged or connected to a power source. Check all cable connections.
- Blurry Image: Adjust the height of the microscope unit using the stand's knob, then fine-tune the focus using the orange focus wheel on the lens. Ensure the specimen is well-lit.
- No Image on External Display: Verify that the HDMI or USB cable is securely connected to both the microscope and the external device. For USB, ensure the correct software/app is running on your computer.
- Lights Not Working: Ensure the base's USB power cable is connected and the light controls are adjusted correctly.
- Remote Control Not Responding: Check the remote control's battery. Ensure there are no obstructions between the remote and the microscope's sensor.
If the problem persists after attempting these solutions, please contact Leipan customer support for further assistance.
11. Specifications
| Feature | Specification |
|---|---|
| Product Dimensions | 7.3 x 5.29 x 8.7 inches |
| Item Weight | 2.86 pounds (1.3 Kilograms) |
| Item Model Number | MS1C-A |
| Batteries | 1 Lithium Ion battery required (included) |
| Light Source Type | LED |
| Material | Metal |
| Real Angle of View | 90 Degrees |
| Magnification Maximum | 1500 x |
| Voltage | 3.7 Volts |
| Compatible Devices | Laptop, Personal Computer, Television |
12. Warranty and Support
For warranty information or technical support regarding your Leipan MS1 Digital Microscope, please refer to the contact details provided with your purchase documentation or visit the official Leipan website. Ensure you have your model number (MS1C-A) and purchase date available when contacting support.
