1. Introduction
This manual provides essential information for the safe and effective operation of your GROVIEW RD881 Mini Projector. Please read it thoroughly before using the device and retain it for future reference.
The GROVIEW RD881 is a versatile mini projector featuring Android TV 9.0, Wi-Fi, and Bluetooth connectivity. It supports 1080P Full HD resolution and 4K video input, offering a bright display suitable for various entertainment and presentation needs.
2. Package Contents
Verify that all items listed below are included in your package. If any items are missing or damaged, please contact customer support.
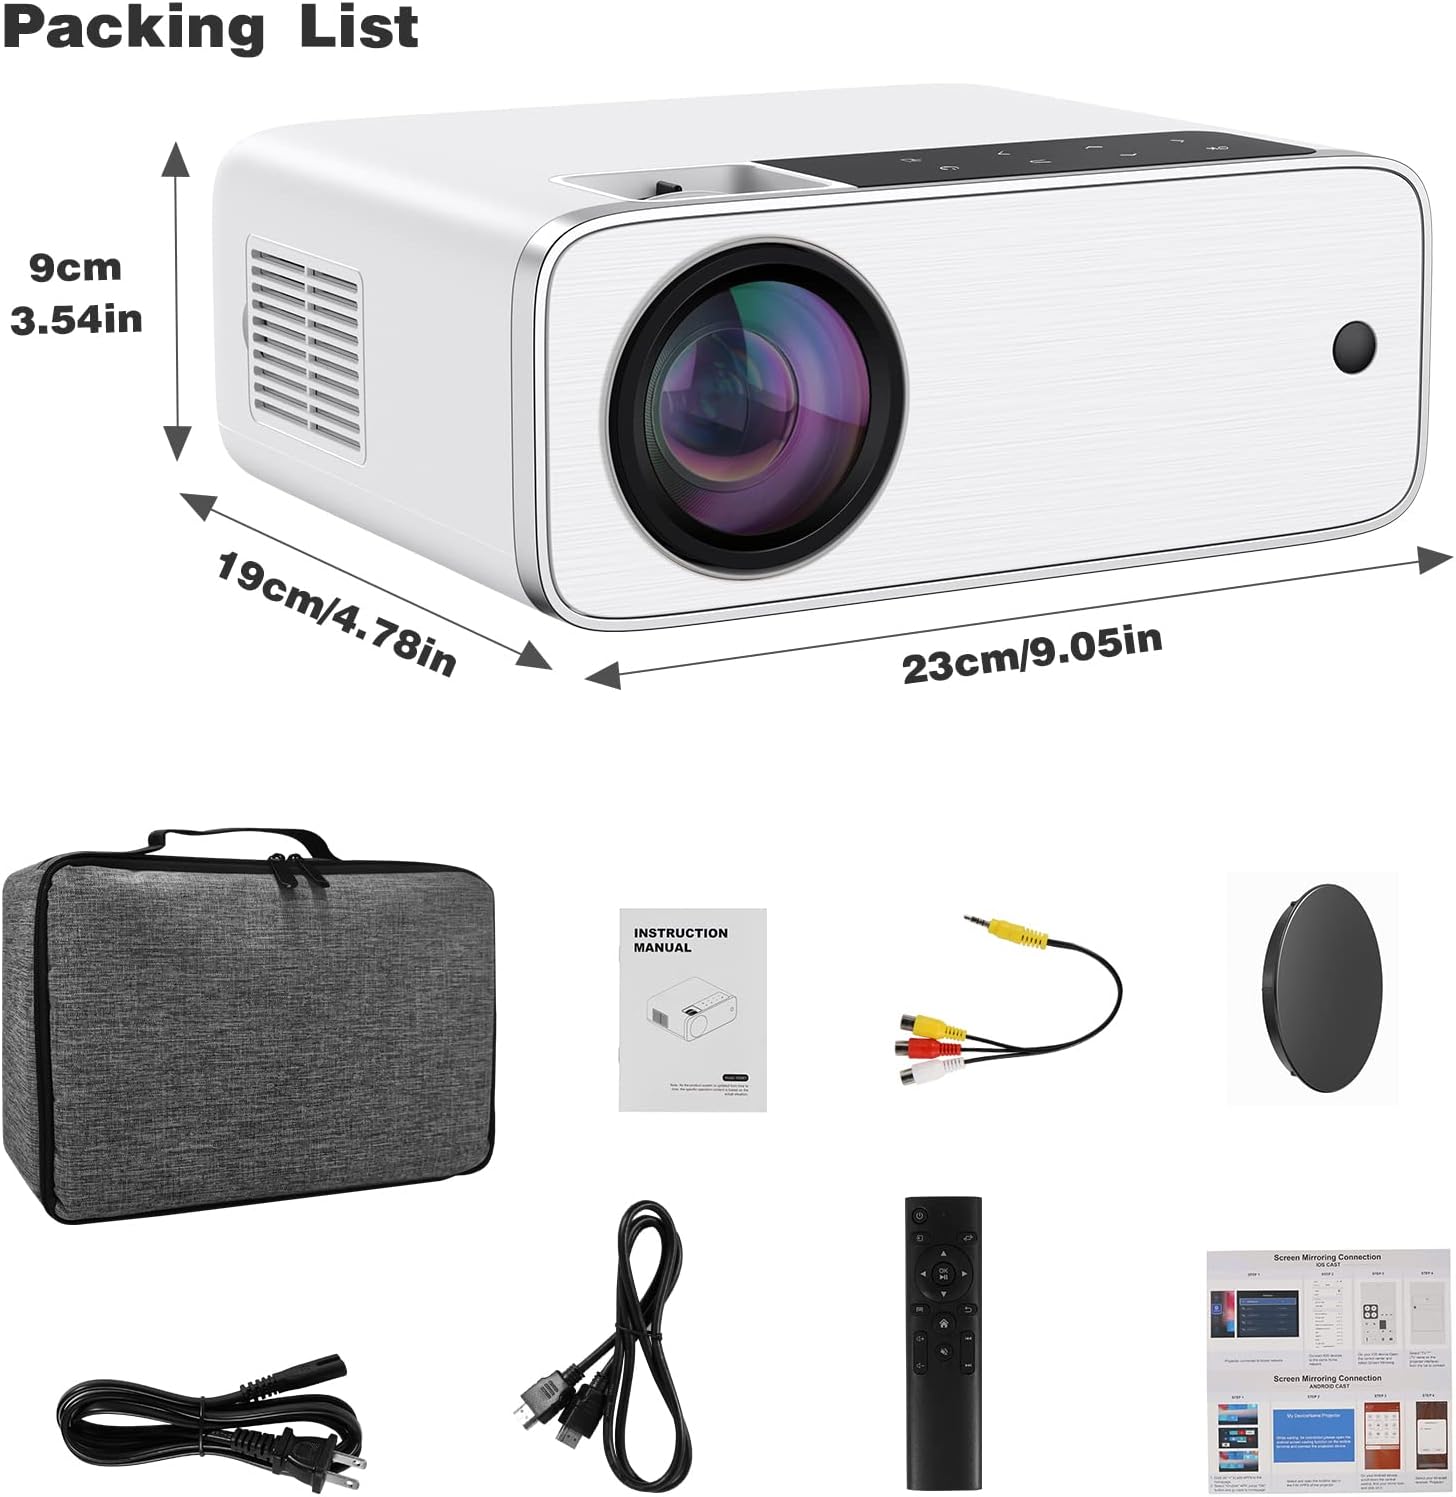
Image: The GROVIEW RD881 projector and its included accessories, such as power cables, remote control, AV cable, and instruction manual, neatly arranged.
- GROVIEW RD881 Mini Projector
- Remote Control
- Power Cable
- AV Cable
- Instruction Manual
- Carrying Case (optional, depending on package)
3. Product Features
- Native 1080P Full HD Resolution: Delivers clear and detailed images.
- 4K Video Support: Compatible with 4K video sources for enhanced viewing.
- Android TV 9.0 Operating System: Access streaming apps directly from the projector.
- Wi-Fi Connectivity: Supports 2.4G/5G Wi-Fi for seamless streaming and online access.
- Bluetooth Functionality: Connect external audio devices wirelessly.
- Digital Keystone Correction: Adjust image shape for optimal viewing from various angles.
- Multiple Input Ports: HDMI, USB, AV for connecting various devices.
- Built-in Speaker: Integrated audio for convenience.
4. Setup
4.1 Placement
Position the projector on a stable, flat surface or mount it securely. Ensure there is adequate ventilation around the projector to prevent overheating. The optimal projection distance varies, but generally, a larger screen requires a greater distance.

Image: A collage showing the projector used in different environments: a home theater, a business meeting, watching sports, and an outdoor camping setup.
4.2 Power Connection
- Connect the power cable to the projector's power input port.
- Plug the other end of the power cable into a power outlet.
- Press the power button on the projector or remote control to turn it on.
4.3 Initial Focus Adjustment
Once powered on, adjust the focus ring on the projector lens until the projected image is clear and sharp.
5. Operating Instructions
5.1 Navigating the Android TV Interface
The GROVIEW RD881 runs on Android TV 9.0, providing access to a variety of applications. Use the remote control to navigate the interface.

Image: The projector displaying the Android TV 9.0 home screen with various streaming applications like HBO Now, Netflix, YouTube, and Amazon Prime Video.
- Home Screen: Displays installed apps, recommended content, and settings.
- App Store: Download and install additional applications.
- Settings: Configure network, display, sound, and system preferences.
5.2 Input Source Selection
To switch between different input sources (HDMI, USB, AV, or internal Android TV), press the 'Source' button on the remote control and select the desired input.
5.3 Connecting External Devices
- HDMI: Connect Blu-ray players, game consoles, laptops, or TV sticks.
- USB: Play media files directly from a USB drive or connect a USB keyboard/mouse.
- AV: Connect older devices using the provided AV cable.
6. Connectivity
6.1 Wi-Fi Connection
- Go to Settings > Network & Internet.
- Select your Wi-Fi network from the list.
- Enter the password and connect.
6.2 Bluetooth Connection
- Go to Settings > Connected Devices > Pair new device.
- Ensure your Bluetooth audio device (e.g., speaker, headphones) is in pairing mode.
- Select your device from the list to pair.
6.3 Wireless Mirroring (AirPlay/Chromecast)
The projector supports wireless screen mirroring from compatible Android, iOS, Mac, and Windows devices.

Image: The projector displaying a mirrored screen from a laptop, tablet, and smartphone, illustrating AirPlay and Chromecast compatibility.
- Ensure both the projector and your device are connected to the same Wi-Fi network.
- Select the mirroring function on the projector's interface (e.g., 'Screen Mirroring', 'AirPlay', or 'Chromecast').
- On your mobile device or computer, initiate screen mirroring and select the projector from the available devices.
7. Keystone Correction
Keystone correction adjusts the image shape to be rectangular when the projector is not perfectly perpendicular to the screen.

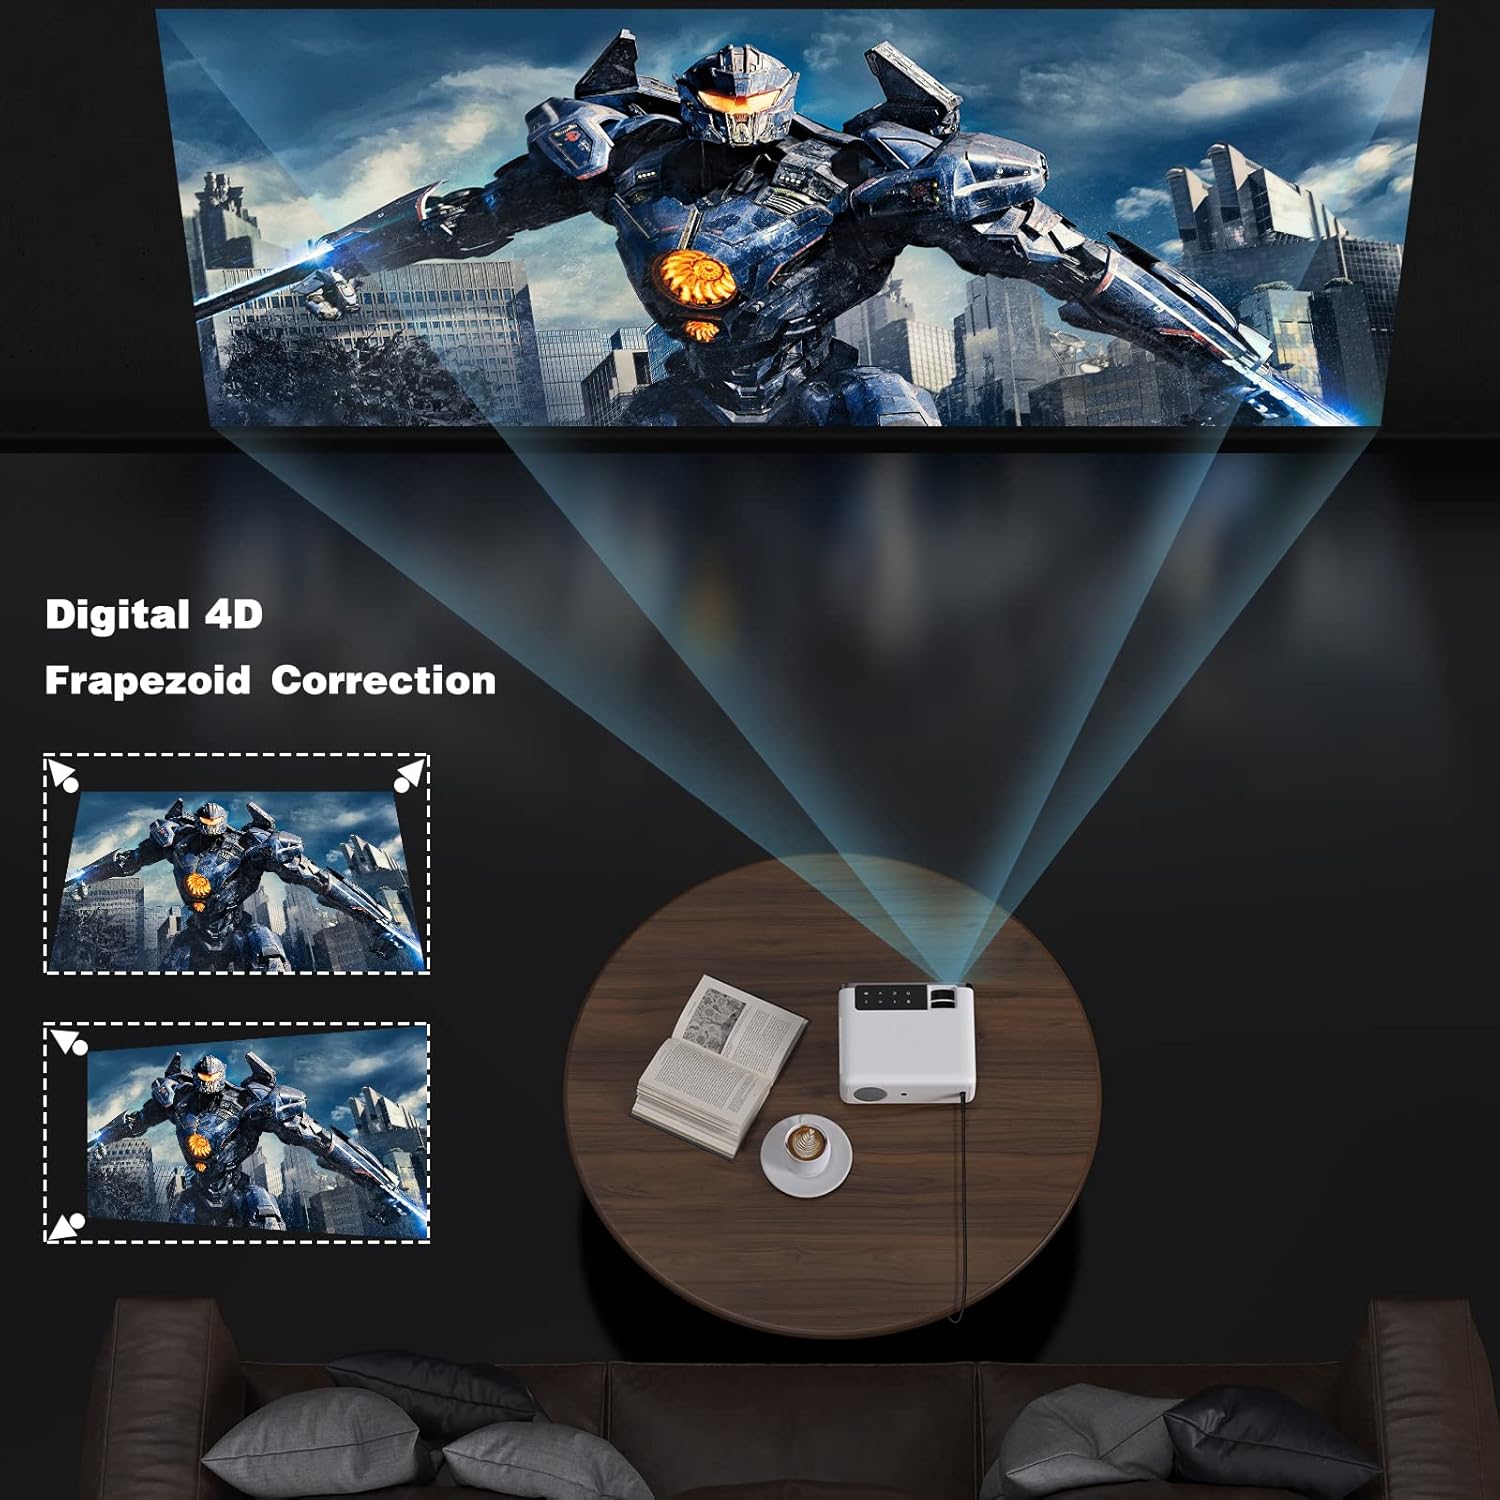
Image: A diagram showing how 4D keystone correction adjusts the corners of a projected image to achieve a perfect rectangle, alongside an image of the projector demonstrating this feature.
- Access the keystone correction settings via the projector menu or remote control.
- Adjust the horizontal and vertical parameters until the image appears rectangular.
8. Maintenance
8.1 Cleaning the Lens
Use a soft, lint-free cloth specifically designed for optical lenses to gently wipe the projector lens. Avoid using abrasive cleaners or excessive force.
8.2 Cleaning the Projector Body
Wipe the exterior of the projector with a soft, dry cloth. Do not use liquid cleaners directly on the device.
8.3 Ventilation
Ensure the ventilation vents are clear of dust and obstructions to maintain proper airflow and prevent overheating. Do not block the vents during operation.
9. Troubleshooting
| Problem | Possible Cause | Solution |
|---|---|---|
| No image projected | Power not connected; Incorrect input source; Lens cap on | Check power connection; Select correct input source; Remove lens cap |
| Blurry image | Focus not adjusted; Keystone not corrected | Adjust focus ring; Perform keystone correction |
| No sound | Volume too low; Muted; External audio device not connected/paired | Increase volume; Unmute; Check Bluetooth connection or external audio cable |
| Remote control not working | Batteries low/dead; Obstruction between remote and projector | Replace batteries; Remove obstructions; Point remote directly at projector sensor |
| Wi-Fi connection issues | Incorrect password; Router too far; Network interference | Verify password; Move projector closer to router; Restart router and projector |
10. Specifications
| Feature | Specification |
|---|---|
| Model | RD881 |
| Brand | Groview |
| Display Technology | LCD |
| Native Resolution | 1920 x 1080 (1080P Full HD) |
| Supported Resolution | Up to 4K |
| Operating System | Android TV 9.0 |
| Brightness | 12000 Lux (Manufacturer's rating) |
| Connectivity | Wi-Fi (2.4G/5G), Bluetooth, HDMI, USB, AV |
| Speaker | Built-in |
| Dimensions | 13.35 x 6.5 x 9.69 inches (approx.) |
| Weight | 5.57 pounds (approx.) |
11. Safety Information
- Do not look directly into the projector lens when the lamp is on.
- Ensure proper ventilation to prevent overheating.
- Keep the projector away from water or other liquids.
- Do not attempt to disassemble or repair the projector yourself. Contact qualified service personnel.
- Use only the power adapter supplied with the projector.
12. Warranty and Support
Your GROVIEW RD881 Mini Projector comes with a standard manufacturer's warranty. Please refer to the warranty card included in your package for specific terms and conditions.
For technical support, troubleshooting assistance, or warranty claims, please contact GROVIEW customer service through the retailer where you purchased the product or visit the official GROVIEW support website.
13. Product Videos
13.1 Product Overview
Video: A general overview of the GROVIEW RD881 Mini Projector, showcasing its design and key features. (Duration: 3:40)
13.2 Setup and Connectivity Guide
Video: A guide demonstrating how to set up the GROVIEW RD881 projector and connect it to various devices, including Wi-Fi and Bluetooth. (Duration: 1:33)


