1. Introduction
Thank you for choosing Linkind Solar Fence Lights. This manual provides essential information for the proper installation, operation, and maintenance of your solar lights. Please read these instructions carefully before use and retain them for future reference.
2. Product Overview
The Linkind Solar Fence Lights are designed for outdoor use, providing illumination for fences, patios, stairs, and other areas. Each light features 27 LEDs, a motion sensor for enhanced security, and is powered by solar energy, offering an eco-friendly lighting solution. The lights are IP65 rated for weather resistance and emit a 3000K warm white light.

Image 2.1: Overview of the Linkind Solar Fence Lights, illustrating the design and components.
3. Specifications
| Feature | Specification |
|---|---|
| Brand | Linkind |
| Model Number | LL4000236 |
| Dimensions (L x W x H) | 10 x 5.3 x 5.8 cm |
| Weight | 530 g (per unit, approximate) |
| Battery | 1 Lithium-ion (included) |
| IP Rating | IP65 (Waterproof) |
| Number of LEDs | 27 |
| Light Color Temperature | 3000K Warm White |
| Material | Acrylonitrile Butadiene Styrene (ABS) |
| Special Features | Motion Detector |
| Power Source | Solar Powered |
| Luminous Flux | 200 lm |
4. Package Contents
Ensure all items are present and in good condition upon unpacking:
- 4 x Linkind Solar Fence Lights
- Mounting Screws and Wall Plugs (quantity sufficient for 4 lights)
- Instruction Manual (this document)
5. Installation
For optimal performance, choose an installation location that receives direct sunlight for at least 6-8 hours daily. Avoid areas under eaves, trees, or other obstructions that may block sunlight.
Mounting Steps:
- Prepare the Surface: Identify the desired mounting location on a fence, wall, or stair riser. Ensure the surface is clean and stable.
- Mark Drill Points: Hold the light in position and mark the two screw holes.
- Drill Holes: Use a drill to create holes at the marked points. Insert the provided wall plugs into the drilled holes.
- Secure the Light: Align the light with the wall plugs and insert the screws, leaving a small gap (approximately 5mm) between the screw head and the wall.
- Hang the Light: Hang the light onto the screws. Ensure it is securely fastened.
- Alternative Installation: For surfaces where drilling is not preferred, the lights can also be fixed using strong double-sided adhesive tape (not included).

Image 5.1: Step-by-step visual guide for mounting the solar fence lights.

Image 5.2: Examples of suitable installation locations for the solar lights, including fences, stairs, and walls.
6. Operation
Initial Activation and Charging:
Before first use, ensure the lights are placed in direct sunlight for at least 8-10 hours to allow the internal battery to fully charge. The lights will automatically charge during the day and turn on at night.

Image 6.1: Illustration of the automatic charging during the day and illumination at night.
Working Modes:
The lights feature multiple working modes, selectable via a button on the unit. Press the button to cycle through the modes:
- Mode 1 (Dim Light Mode): The light stays on at a dim level. When motion is detected, it brightens to 100% for 25 seconds, then returns to dim.
- Mode 2 (Energy Saving Mode): The light remains off. When motion is detected, it brightens to 100% for 25 seconds, then turns off.
- Mode 3 (Lights Off): The lights remain off at all times, regardless of motion.
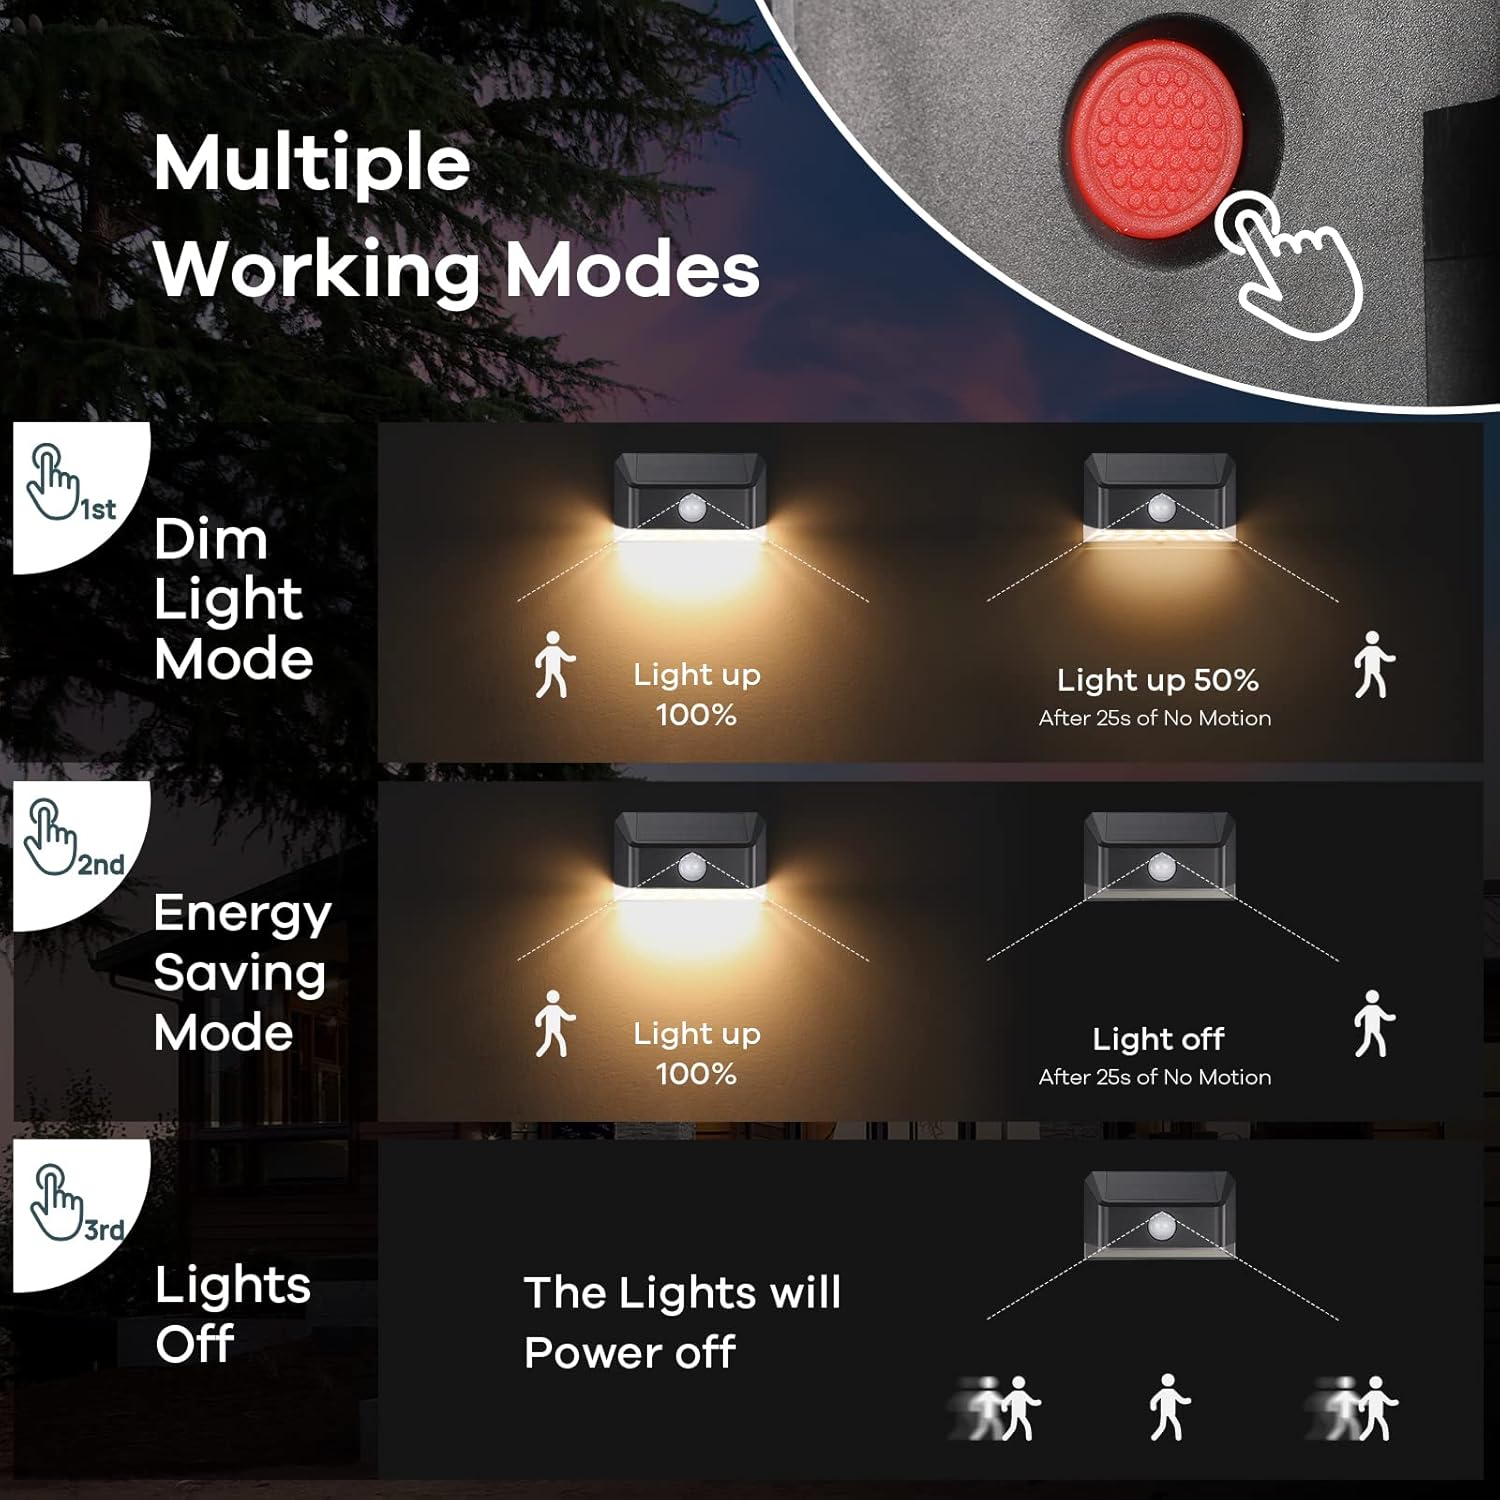
Image 6.2: Explanation of the three selectable lighting modes.
Motion Sensor Functionality:
The integrated motion sensor detects movement within a specific range and angle, activating the brighter light modes as configured.
- Detection Distance: Up to 6 meters (20 feet)
- Detection Angle: 120 degrees

Image 6.3: Details of the motion sensor's detection capabilities.
7. Maintenance
Regular maintenance ensures optimal performance and longevity of your solar lights.
- Cleaning the Solar Panel: Periodically wipe the solar panel with a soft, damp cloth to remove dust, dirt, or debris. A clean panel ensures efficient charging.
- Battery Care: The integrated Lithium-ion battery is designed for long-term use. Avoid prolonged storage in a completely discharged state. If storing the lights, ensure they are fully charged first.
- Environmental Protection: The lights are IP65 rated, making them waterproof, frost-resistant, heat-resistant, and windproof. However, extreme weather conditions may temporarily affect performance.
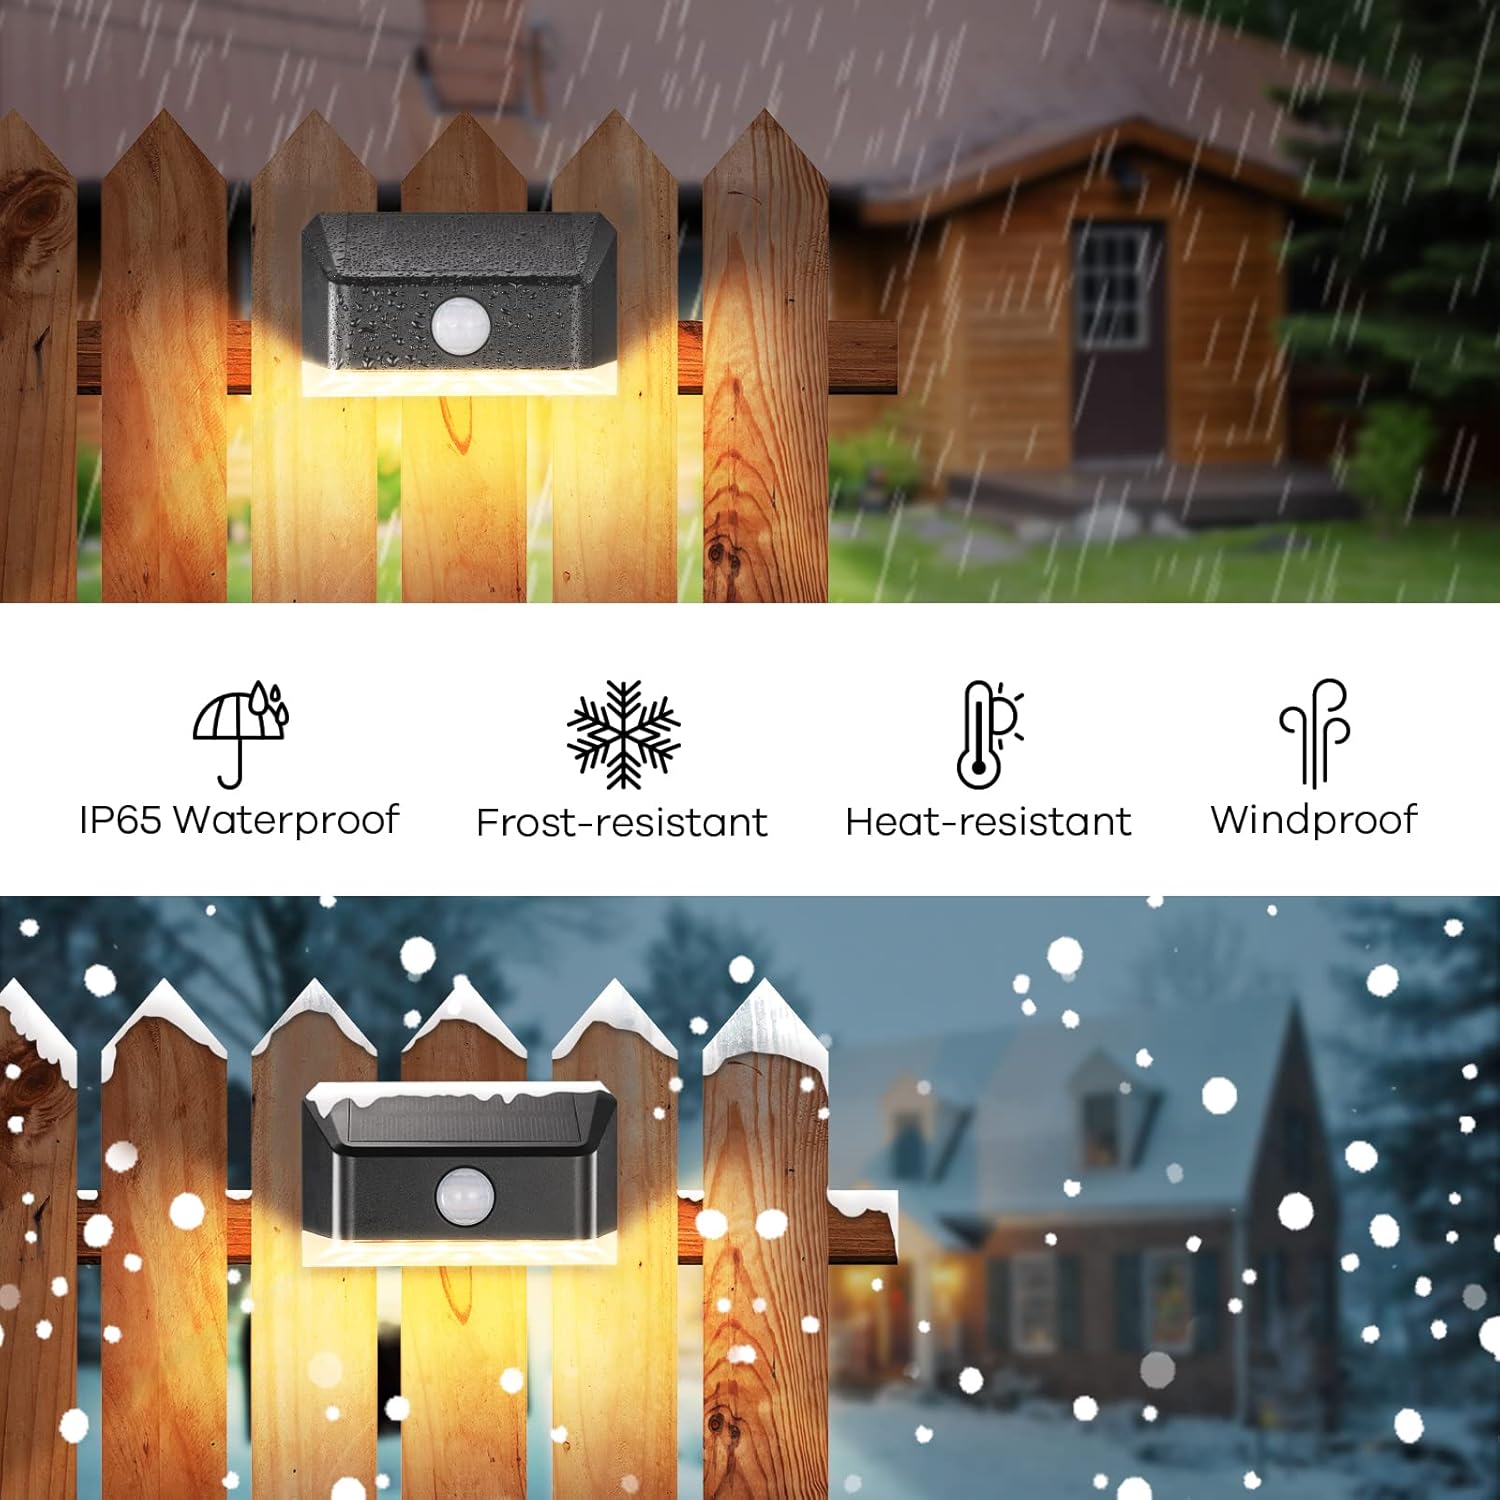
Image 7.1: Visual representation of the light's weather resistance features.
8. Troubleshooting
If you encounter issues with your Linkind Solar Fence Lights, refer to the following common problems and solutions:
| Problem | Possible Cause | Solution |
|---|---|---|
| Light does not turn on at night. | Insufficient sunlight exposure; switch is off; battery is depleted. | Ensure the light is placed in direct sunlight for 8-10 hours. Check if the operating mode is set to 'Lights Off' (Mode 3) and change it if necessary. Allow the battery to charge fully. |
| Light is dim or only stays on for a short period. | Insufficient charging; dirty solar panel; aging battery. | Relocate the light to an area with more direct sunlight. Clean the solar panel regularly. If the issue persists after prolonged use, the battery may need replacement (contact support). |
| Motion sensor is not working or is too sensitive. | Sensor obstructed; incorrect mode selected; environmental interference. | Ensure the sensor lens is clean and unobstructed. Verify the light is in Mode 1 or Mode 2. Avoid installing near heat sources or reflective surfaces that might trigger the sensor. |
9. Safety Information
- Do not disassemble or modify the product. This may cause damage and void the warranty.
- Keep the product away from fire or high temperatures.
- Do not immerse the product in water, despite its waterproof rating, to prevent potential damage to internal components.
- Dispose of batteries according to local regulations. Do not dispose of batteries in household waste.
- Ensure proper installation to prevent the light from falling and causing injury or damage.
10. Warranty and Support
Linkind products are designed for reliability and performance. For warranty information, technical support, or any questions regarding your product, please refer to the contact information provided with your purchase or visit the official Linkind website.


