1. Product Overview
The PENO XK-W2001 is an electronic socket thermostat designed for automatic temperature control. It features a digital display for clear temperature readings and easy setting adjustments. This device is suitable for various applications requiring precise temperature regulation, such as aquaculture, greenhouse environments, or home brewing.
Package Contents:
- 1 x PENO XK-W2001 Temperature Controller
Key Components:
Familiarize yourself with the main parts of your temperature controller:
- Digital Display: Shows current and set temperatures.
- SET Button: Used to enter temperature setting mode.
- Up/Down Buttons: Adjust temperature values.
- Output Indicator (OUT): Illuminates when the controlled device is active.
- Temperature Probe: Measures ambient temperature.
- Power Plug: Connects the controller to a power outlet.
- Controlled Device Socket: Where the heating or cooling device is plugged in.

Figure 1: Front view of the PENO XK-W2001 Electronic Socket Thermostat, showing the digital display, control buttons, and output socket.

Figure 2: Close-up of the digital display and control buttons (SET, Up, Down) on the PENO XK-W2001, indicating temperature measurement accuracy.
2. Safety Information
Please read and understand all safety instructions before using this product. Failure to follow these instructions may result in electric shock, fire, or serious injury.
- Do not immerse the controller unit in water or expose it to excessive moisture. The temperature probe is waterproof, but the main unit is not.
- Ensure the power supply voltage matches the device's requirements (110-220V).
- Do not exceed the maximum output power of 1500W (10A).
- Keep the device out of reach of children.
- Do not disassemble or modify the device. Refer all servicing to qualified personnel.
- Ensure proper ventilation around the device.
- Unplug the device from the power outlet before cleaning or performing any maintenance.
3. Product Specifications
| Feature | Specification |
|---|---|
| Model | XK-W2001 |
| Control Type | Intelligent Temperature Control Regulator |
| Temperature Range | -50°C to 110°C |
| Temperature Measurement Error | 0.1°C |
| Output Power | 1500W (Max) |
| Current Capacity | Maximum 10A |
| Input Voltage | 110-220V (US Plug) |
| Material | ABS and PCB |
| Item Weight | 4.2 ounces |
| Package Dimensions | 6.3 x 3.15 x 1.18 inches |
4. Setup Instructions
Follow these steps to set up your PENO XK-W2001 temperature controller:
- Connect the Temperature Probe: Insert the metal tip of the temperature probe into the environment where you wish to measure and control the temperature. Ensure the probe cable is securely connected to the controller.
- Plug in the Controlled Device: Connect your heating or cooling device (e.g., heater, fan) into the output socket of the temperature controller. Ensure the device's power consumption does not exceed 1500W (10A).
- Connect to Power: Plug the temperature controller's power plug into a standard 110-220V US wall outlet. The digital display will illuminate, showing the current measured temperature.

Figure 3: The PENO XK-W2001 controller showing its integrated temperature probe and power cord, ready for connection.
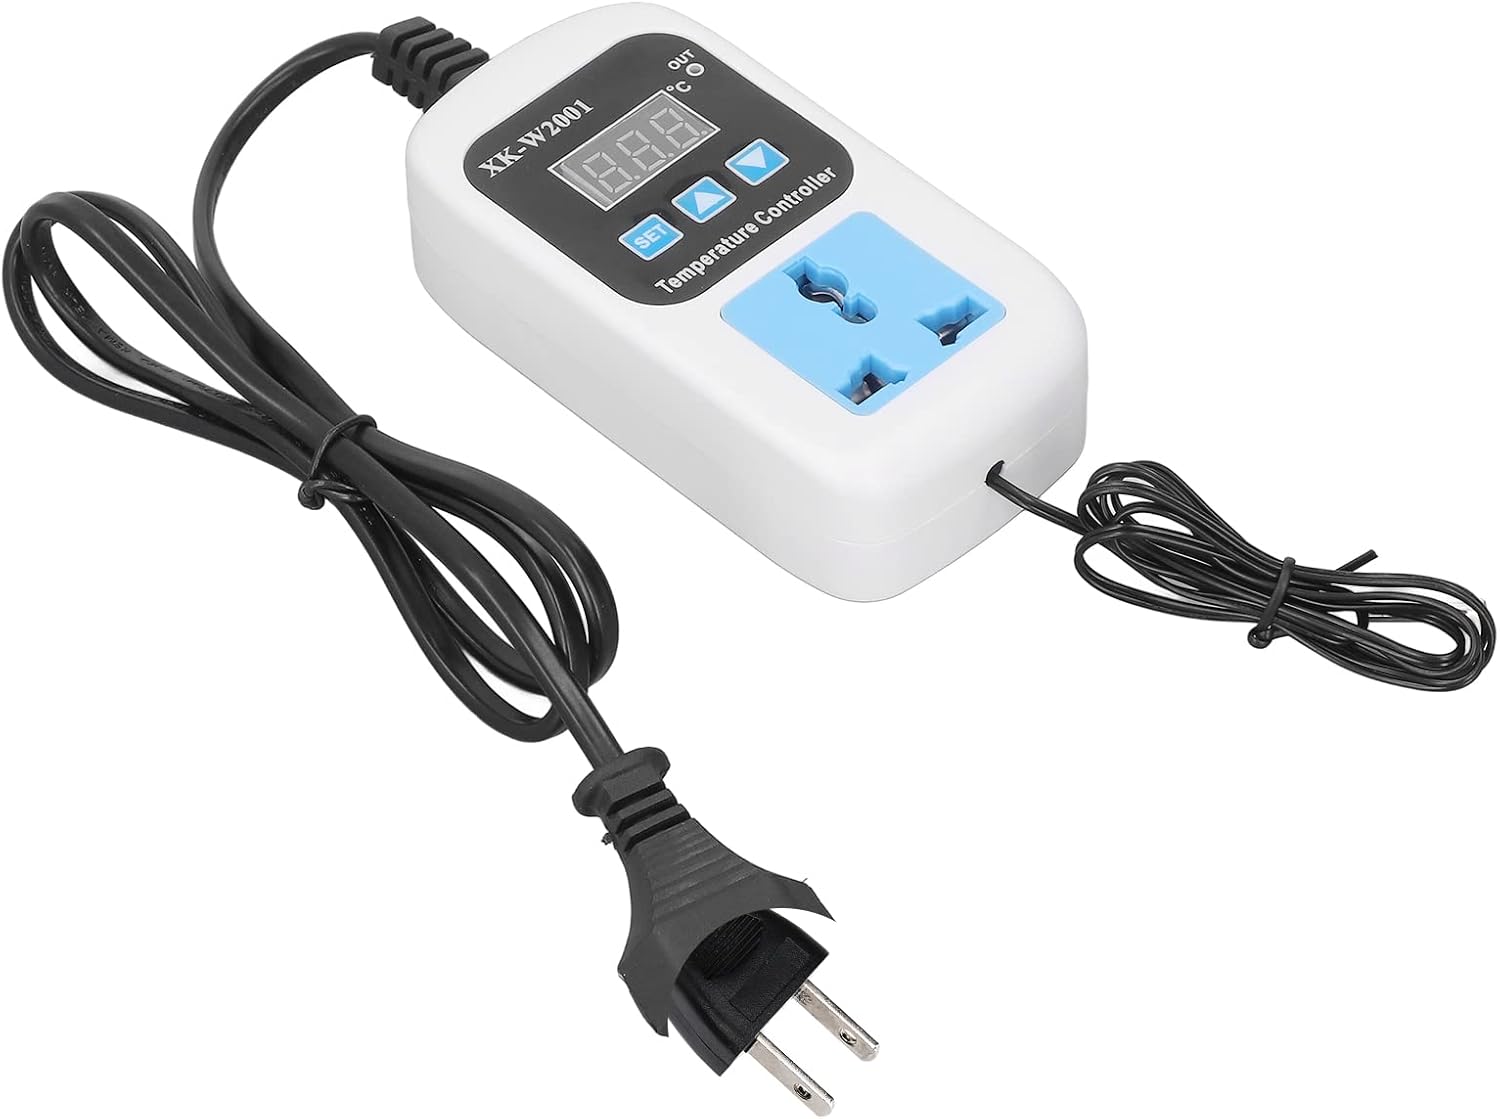
Figure 4: The PENO XK-W2001 temperature controller plugged into a wall outlet, indicating it is powered on.
5. Operating Instructions
The PENO XK-W2001 allows for precise temperature control. The display shows the current temperature measured by the probe. The 'OUT' indicator light will illuminate when the connected device is actively heating or cooling to reach the set temperature.
Setting the Desired Temperature:
- Press the SET button once. The digital display will start flashing, indicating it is in setting mode.
- Use the Up (▲) and Down (▼) buttons to adjust the desired temperature value.
- Once the desired temperature is set, press the SET button again to confirm and exit the setting mode. The display will return to showing the current measured temperature.
The controller will now automatically activate or deactivate the connected device to maintain the temperature around your set point. The device supports both Celsius and Fahrenheit readings, which can typically be toggled through a long press of the SET button or a combination of buttons (refer to on-device markings if available for specific instructions).

Figure 5: The PENO XK-W2001 operating in a greenhouse, demonstrating its intelligent temperature control capabilities and digital display.
6. Maintenance
Proper maintenance ensures the longevity and accurate operation of your temperature controller.
- Cleaning: Disconnect the device from power before cleaning. Use a soft, dry cloth to wipe the exterior of the controller. Do not use abrasive cleaners or solvents.
- Probe Care: Periodically inspect the temperature probe for any damage or buildup. Clean the probe gently if necessary, ensuring it remains free of debris that could affect readings.
- Storage: When not in use for extended periods, store the controller in a cool, dry place, away from direct sunlight and extreme temperatures.
7. Troubleshooting
If you encounter issues with your PENO XK-W2001, refer to the following common problems and solutions:
| Problem | Possible Cause | Solution |
|---|---|---|
| Display is off | No power supply | Check if the controller is properly plugged into a live power outlet. Verify the outlet is functional. |
| Temperature reading is inaccurate | Probe is damaged or improperly placed | Ensure the probe is fully inserted and positioned correctly in the measurement area. Inspect the probe for visible damage. |
| Connected device not turning on/off | Set temperature not reached; device malfunction; controller malfunction | Verify the set temperature is appropriate. Check if the connected device is working independently. Ensure the controller's output indicator (OUT) illuminates when it should be active. |
| Display shows 'HHH' or 'LLL' | Temperature probe error (out of range or disconnected) | Check the temperature probe connection. Ensure the measured temperature is within the -50°C to 110°C range. |
8. Warranty and Support
PENO products are manufactured to high-quality standards. For information regarding warranty coverage, technical support, or service, please refer to the documentation provided at the time of purchase or contact your retailer. Keep your purchase receipt as proof of purchase.


