1. Introduction
This manual provides essential information for the safe and effective operation, maintenance, and troubleshooting of your Eastvolt 8-inch Variable Speed Bench Grinder. Please read this manual thoroughly before operating the machine to ensure proper use and to prevent injury or damage.

Figure 1: Eastvolt 8-inch Variable Speed Bench Grinder. This image shows the overall view of the bench grinder with its two wheels, the main body, and the support bar.
2. Important Safety Instructions
Always follow basic safety precautions to reduce the risk of fire, electric shock, and personal injury when using this product.
- Read all instructions before operating the grinder.
- Wear appropriate personal protective equipment, including safety glasses, gloves, and hearing protection.
- Ensure the machine is placed on a stable, level surface.
- Do not operate the grinder without water in the tank for wet grinding.
- Never sharpen against the direction of the leather stropping wheel, as this may damage the leather.
- Keep hands and loose clothing away from moving parts.
- Disconnect power before performing any maintenance or adjustments.
- Do not modify the machine or use it for purposes other than its intended use.
3. Package Contents
Verify that all items are present and undamaged upon unpacking:
- 1 x Eastvolt 8-inch Wet Sharpener
- 1 x Angle Gauge
- 1 x Sharpening Compound
- 1 x Chisel Attachment
- 1 x Instruction Manual
4. Product Components
Familiarize yourself with the main parts of your bench grinder:

Figure 2: Labeled components of the Eastvolt Bench Grinder. This diagram highlights the Straight Edge Sharpening Jig, Leather Stropping Wheel, Grinding Wheel, Water Tank, Rubber Feet, and ON/OFF Switch.
- Grinding Wheel: 8-inch aluminum oxide wheel for wet sharpening.
- Leather Stropping Wheel: Used for deburring and achieving a razor-sharp edge.
- Water Tank: Holds water for wet grinding, preventing heat buildup and residue.
- Straight Edge Sharpening Jig: Adjustable jig for precise angle sharpening.
- ON/OFF Switch: Controls power to the unit.
- Rubber Feet: Provides stability and reduces vibration.
5. Setup
- Placement: Place the bench grinder on a sturdy, level workbench. Ensure adequate space around the machine for safe operation.
- Fill Water Tank: Fill the water tank with clean water up to the marking. The grinding stone will absorb water and become saturated, which is essential for wet grinding.

Figure 3: Filling the water tank. Ensure the water level reaches the indicated mark to properly saturate the grinding stone.
- Power Connection: Connect the power cord to a suitable electrical outlet.
6. Operating Instructions
6.1. General Grinding and Sharpening
- Turn on the grinder using the ON/OFF switch. The grinding wheel will rotate at 120 RPM.
- Use the grinding wheel for initial sharpening and shaping of tools. The wet operation keeps tools cool and prevents overheating.
- For precision sharpening, utilize the included Straight Edge Sharpening Jig. Adjust the jig to achieve the desired cutting angle.
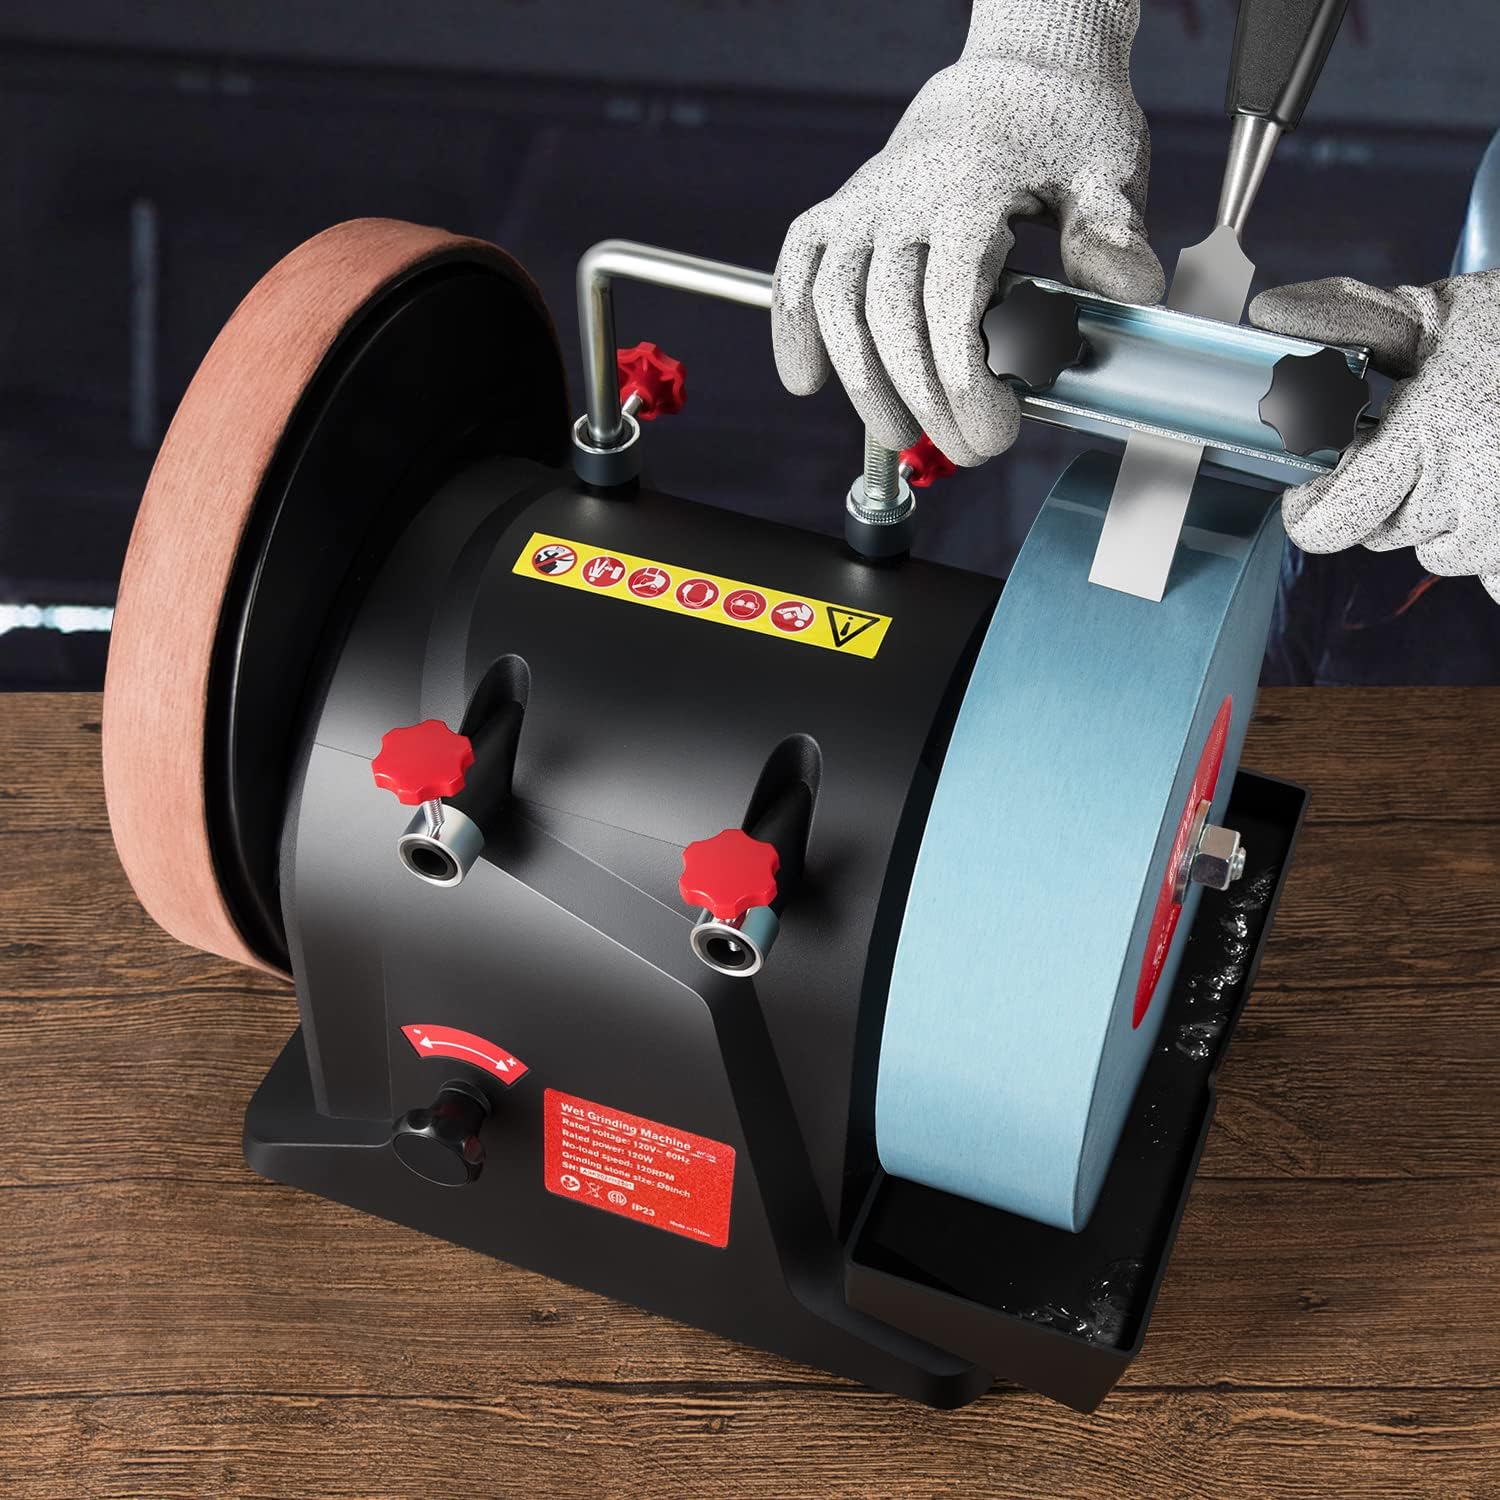
Figure 4: Grinding on top of the knife holder. This image demonstrates how to position a tool on the sharpening jig for grinding.

Figure 5: Comparison of grinding and post-grinding. The left image shows grinding on the top of the knife holder, while the right image shows the tool after initial grinding, ready for stropping.
6.2. Using the Angle Gauge
- The included angle gauge helps you consistently set the correct cutting angle for your tools.
- Refer to the markings on the angle gauge for common sharpening angles (e.g., 20°, 30°, 40°).
- Adjust the sharpening jig until the tool's edge aligns with the desired angle on the gauge.

Figure 6: Using the angle ruler. This image shows a hand holding the angle ruler against a tool on the grinding wheel to ensure precise angle setting.
6.3. Leather Stropping Wheel
- After grinding, apply the provided sharpening compound to the leather stropping wheel.

Figure 7: Applying abrasive paste. This image illustrates the process of applying the abrasive paste to the leather stropping wheel for final honing.
- Use the leather wheel to remove any burrs and achieve a final, razor-sharp edge on your tools.
- Important: Never sharpen against the direction of the leather stropping wheel, as this can cut and damage the leather.
7. Maintenance
- Water Tank Cleaning: Steel chips and grinding residue will accumulate in the water tank. Regularly empty and clean the water reservoir to maintain optimal performance and prevent contamination.

Figure 8: Steel chips in the water tank. This image shows accumulated steel chips at the bottom of the water tank, emphasizing the need for regular cleaning.
- General Cleaning: Wipe down the exterior of the machine with a damp cloth. Do not use harsh chemicals or abrasive cleaners.
- Wheel Inspection: Periodically inspect both the grinding wheel and leather stropping wheel for wear or damage. Replace if necessary.
8. Troubleshooting
| Problem | Possible Cause | Solution |
|---|---|---|
| Grinding or honing wheel stops during operation. | Excessive pressure applied to the wheel. | Reduce the pressure applied to the wheel. The motor is designed to rotate at 120 RPM; applying too much force can stall it. Figure 9: Troubleshooting wheel stoppage. This image shows a hand applying pressure to the wheel, indicating a common cause for stalling, and also points to the tension knob for adjustment. |
| Inconsistent sharpening angle. | Improper use of the angle gauge or sharpening jig. | Ensure the angle gauge is used correctly to set the jig. Practice maintaining a consistent angle during sharpening. |
| Poor sharpening results. | Insufficient water in the tank; worn-out wheel; incorrect technique. | Ensure water tank is filled. Inspect wheels for wear. Review operating instructions for proper technique. |
9. Specifications
| Feature | Detail |
|---|---|
| Model Number | EVEBG001D |
| Manufacturer | Eastvolt |
| Style | Angled |
| Material | Metal |
| Power Source | Corded Electric |
| Included Components | Bench Grinder |
| Weight | 9.71 Kilograms (21.4 lbs) |
| Product Dimensions (L x W x H) | 38.1 x 30.48 x 30.48 cm (15 x 12 x 12 inches) |
| Grinding Wheel Diameter | 8 inches |
| Rotation Speed | 120 RPM |
10. Warranty and Support
For warranty information or technical support, please refer to the documentation included with your purchase or contact Eastvolt customer service. Specific warranty terms may vary by region and retailer.
Eastvolt is committed to improving product quality and providing innovative solutions. For more information about Eastvolt products, please visit the official Eastvolt brand store.

Figure 10: About Eastvolt. This image highlights the company's commitment to quality and innovation in tools.