1. Introduction
This user manual provides comprehensive instructions for the ALVAR Mini Projector (Model D503). Please read this manual carefully before using the projector to ensure proper operation and to maximize its performance and lifespan. Keep this manual for future reference.
The ALVAR Mini Projector is designed for versatile home entertainment and professional presentations, offering a clear and detailed viewing experience. Key features include 5G WiFi and Bluetooth connectivity, a built-in stereo speaker, and broad compatibility with various devices.

Image: The ALVAR Mini Projector, shown with its included tripod and carrying bag, highlighting its compact design and portability.
2. What's in the Box
Verify that all items listed below are included in your package:
- 1* ALVAR Mini Projector
- 1* Projector Tripod & Bag
- 1* Remote Control
- 1* Power Cable
- 1* HDMI Cable
- 1* Cleaning Kit
- 1* Projector Lens Cover
- 1* User Manual
- 1* Quick Start Guide
- 1* Warranty Information Card

Image: The ALVAR Mini Projector displayed alongside its essential accessories, including the tripod, remote control, and various cables, demonstrating the complete package contents.
3. Setup
3.1 Placement
Place the projector on a stable, flat surface. For optimal viewing, position the projector directly in front of your projection screen or wall. The included tripod can be used for easy adjustment and stability. The projector also features screw holes for ceiling mounting if desired.

Image: The ALVAR Mini Projector positioned on its mini tripod on a side table in a living room, illustrating its ease of placement and compact size.
3.2 Power Connection
Connect the power cable to the projector's power input port and then plug the other end into a standard electrical outlet.
3.3 Focus and Keystone Adjustment
Turn on the projector. Adjust the focus ring on the lens until the projected image is clear and sharp. If the image appears trapezoidal, use the keystone correction feature (usually a dial or digital setting) to square the image. The projector supports vertical keystone correction up to ±15 degrees.

Image: The ALVAR Mini Projector projecting a large, clear image onto a wall, demonstrating its capability to produce displays up to 240 inches from a distance of approximately 7.5 feet.
4. Operating Instructions
4.1 Power On/Off
Press the power button on the projector or the remote control to turn the unit on or off.
4.2 Menu Navigation
Use the navigation buttons on the projector or remote control to access and navigate through the on-screen menu. Select options using the OK/Enter button.
4.3 Audio Settings
The projector features a built-in Hi-Fi stereo speaker for immersive audio. You can also connect external audio devices via Bluetooth 5.1 or the 3.5mm audio-out port.
Note on Dolby Sound: Dolby sound is not supported. If you experience no sound when playing videos from platforms like Netflix, please disable Dolby Digital Output on your connected device or application (e.g., Setting > Display & Sounds > Audio > Dolby Digital Output > Turn off Dolby Digital Plus).

Image: The ALVAR Mini Projector shown with Bluetooth headphones and a Bluetooth speaker, illustrating its versatile audio connectivity options via Bluetooth 5.1.
5. Connectivity
5.1 WiFi Screen Mirroring (5G & 2.4G)
The projector supports both 2.4G and 5G WiFi for screen mirroring from iOS and Android devices. 5G WiFi offers faster transmission speeds (up to 1Gbps) for smoother mirroring of movies, photos, and games without the need for additional adapters.
Important Note: Due to copyright restrictions, direct mirroring of content from Netflix, Disney+, and Amazon Prime Video is prohibited. To watch content from these platforms, connect a TV Stick (such as Amazon Fire TV Stick) to the projector's HDMI port.

Image: The ALVAR Mini Projector displaying a football match via 5G WiFi screen mirroring from a smartphone, with a smaller inset showing 2.4G mirroring, highlighting the speed advantage of 5G.

Image: A visual representation of iOS Miracast functionality, showing a smartphone screen mirrored onto a large projection, indicating seamless wireless connectivity for Apple devices.

Image: A visual representation of Android Miracast functionality, showing a smartphone screen mirrored onto a large projection, indicating seamless wireless connectivity for Android devices.
5.2 Multi-media Ports
The projector is equipped with a variety of ports for connecting external devices:
- HDMI: For connecting TV Sticks, game consoles (X-Box ONE), PCs, laptops, and other HDMI-enabled devices.
- VGA: For connecting older PCs or laptops.
- AV: For connecting DVD players or other devices with AV output.
- USB: For connecting USB drives to play media files directly.
- TF (Micro SD) Card Slot: For playing media files from TF cards.
- 3.5mm Audio-out: For connecting external speakers or headphones.

Image: A detailed view of the ALVAR Mini Projector's rear panel, highlighting its multiple input ports including HDMI, USB, Audio Out, VGA, and TF card slot, demonstrating its extensive connectivity options.
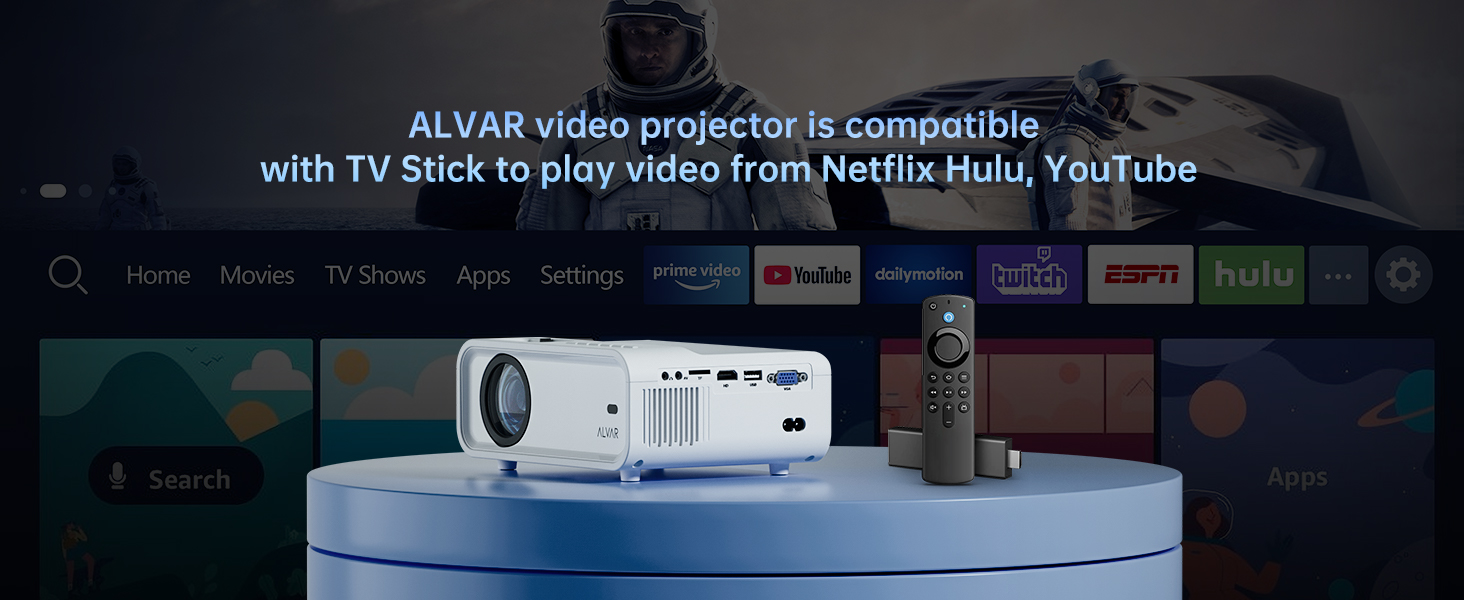
Image: The ALVAR Mini Projector positioned in front of a screen displaying various streaming service logos (Netflix, Hulu, YouTube), with a TV Stick nearby, illustrating its compatibility for accessing online content.
6. Maintenance
6.1 Cleaning the Lens
Use the provided cleaning cloth or a soft, lint-free cloth to gently wipe the projector lens. Do not use abrasive cleaners or solvents.
6.2 Cleaning the Vents
Regularly check and clean the projector's ventilation openings to prevent dust buildup, which can affect performance and lead to overheating. Use a soft brush or compressed air to remove dust.
6.3 Storage
When not in use, store the projector in its carrying bag in a cool, dry place away from direct sunlight and extreme temperatures.

Image: The ALVAR WiFi projector bag, designed for convenient transport and protection of the projector during outings or storage, shown in an outdoor setting.
7. Troubleshooting
| Problem | Possible Cause | Solution |
|---|---|---|
| No image projected | Power cable disconnected; Input source not selected; Lens cap on. | Ensure power is connected. Select correct input source (HDMI, USB, etc.). Remove lens cap. |
| Image is blurry | Focus not adjusted; Projector too far/close to screen. | Adjust the focus ring. Adjust projection distance. |
| Image is trapezoidal | Projector not perpendicular to screen. | Adjust keystone correction. Reposition the projector. |
| No sound from Netflix/Disney+/Amazon Prime Video | Dolby sound enabled on connected device. | Disable Dolby Digital Output on your connected device or app (e.g., Setting > Display & Sounds > Audio > Dolby Digital Output > Turn off Dolby Digital Plus). Use a TV Stick for these services. |
| Screen mirroring issues | Weak WiFi signal; Device compatibility. | Ensure strong 5G or 2.4G WiFi signal. Check device compatibility and mirroring steps. |
8. Specifications
| Feature | Detail |
|---|---|
| Brand | Alvar |
| Model Number | D503 |
| Product Dimensions | 7 x 4 x 2.5 inches |
| Item Weight | 3.56 pounds |
| Display Resolution | 1280 x 720 (1080P Supported) |
| Connectivity Technology | Wireless (5G & 2.4G WiFi, Bluetooth 5.1), HDMI, VGA, AV, USB, TF Card, 3.5mm Audio-out |
| Special Features | Built-In Speaker, Portable, Screen Mirroring, Built-In Wi-Fi, Tripod & Bag Included |
| Recommended Uses | Home Cinema, Gaming, Outdoor Movie |
| Lumens | 9000L |
| Aspect Ratio | 4:3 |
| Contrast Ratio | 10000:1 |
9. Warranty and Support
ALVAR provides professional lifetime technical support for this projector. If you have any questions or concerns regarding your ALVAR Mini Projector, please do not hesitate to contact our support team.
Refer to the Warranty Information Card included in your package for specific warranty terms and contact details.


