1. Introduction
This manual provides detailed instructions for the installation, operation, and maintenance of the UCTRONICS Pi Rack Pro (Model RM0004). This 1U rack mount solution is designed to house up to four Raspberry Pi 4B units, offering integrated support for 2.5-inch SSDs, individual secure shutdown buttons, and a 0.96-inch color LCD for system monitoring. Please read this manual thoroughly before proceeding with installation and operation.
2. Product Overview
The UCTRONICS Pi Rack Pro is a specialized enclosure for creating Raspberry Pi clusters. It integrates multiple functionalities into a compact 1U form factor, suitable for standard 19-inch server racks or desktop use.

Figure 2.1: Front view of the UCTRONICS Pi Rack Pro, showcasing the four individual Raspberry Pi bays with front-facing ports and displays.
Key Features:
- Raspberry Pi 4B Compatibility: Designed to accommodate up to four Raspberry Pi 4B boards.
- Integrated 2.5" SSD Support: Each Pi bay includes a SATA shield for direct connection of a 2.5" SSD (up to 7mm thickness) without external SATA-to-USB cables.
- Secure Shutdown Buttons: Individual power buttons for each Raspberry Pi enable a soft shutdown and power-on sequence, preventing data corruption from hard shutdowns.
- 0.96" Color LCD Display: Each bay features a display showing real-time information such as RAM usage, disk usage, CPU temperature, and IP address. Custom display content is also supported.
- 19" 1U Rack Mount Design: Standard dimensions (482.6 x 145.4 x 44.5mm) for seamless integration into server racks or for stable desktop placement.
- Front Removable Modules: Each Raspberry Pi module can be easily removed from the front for maintenance or upgrades.
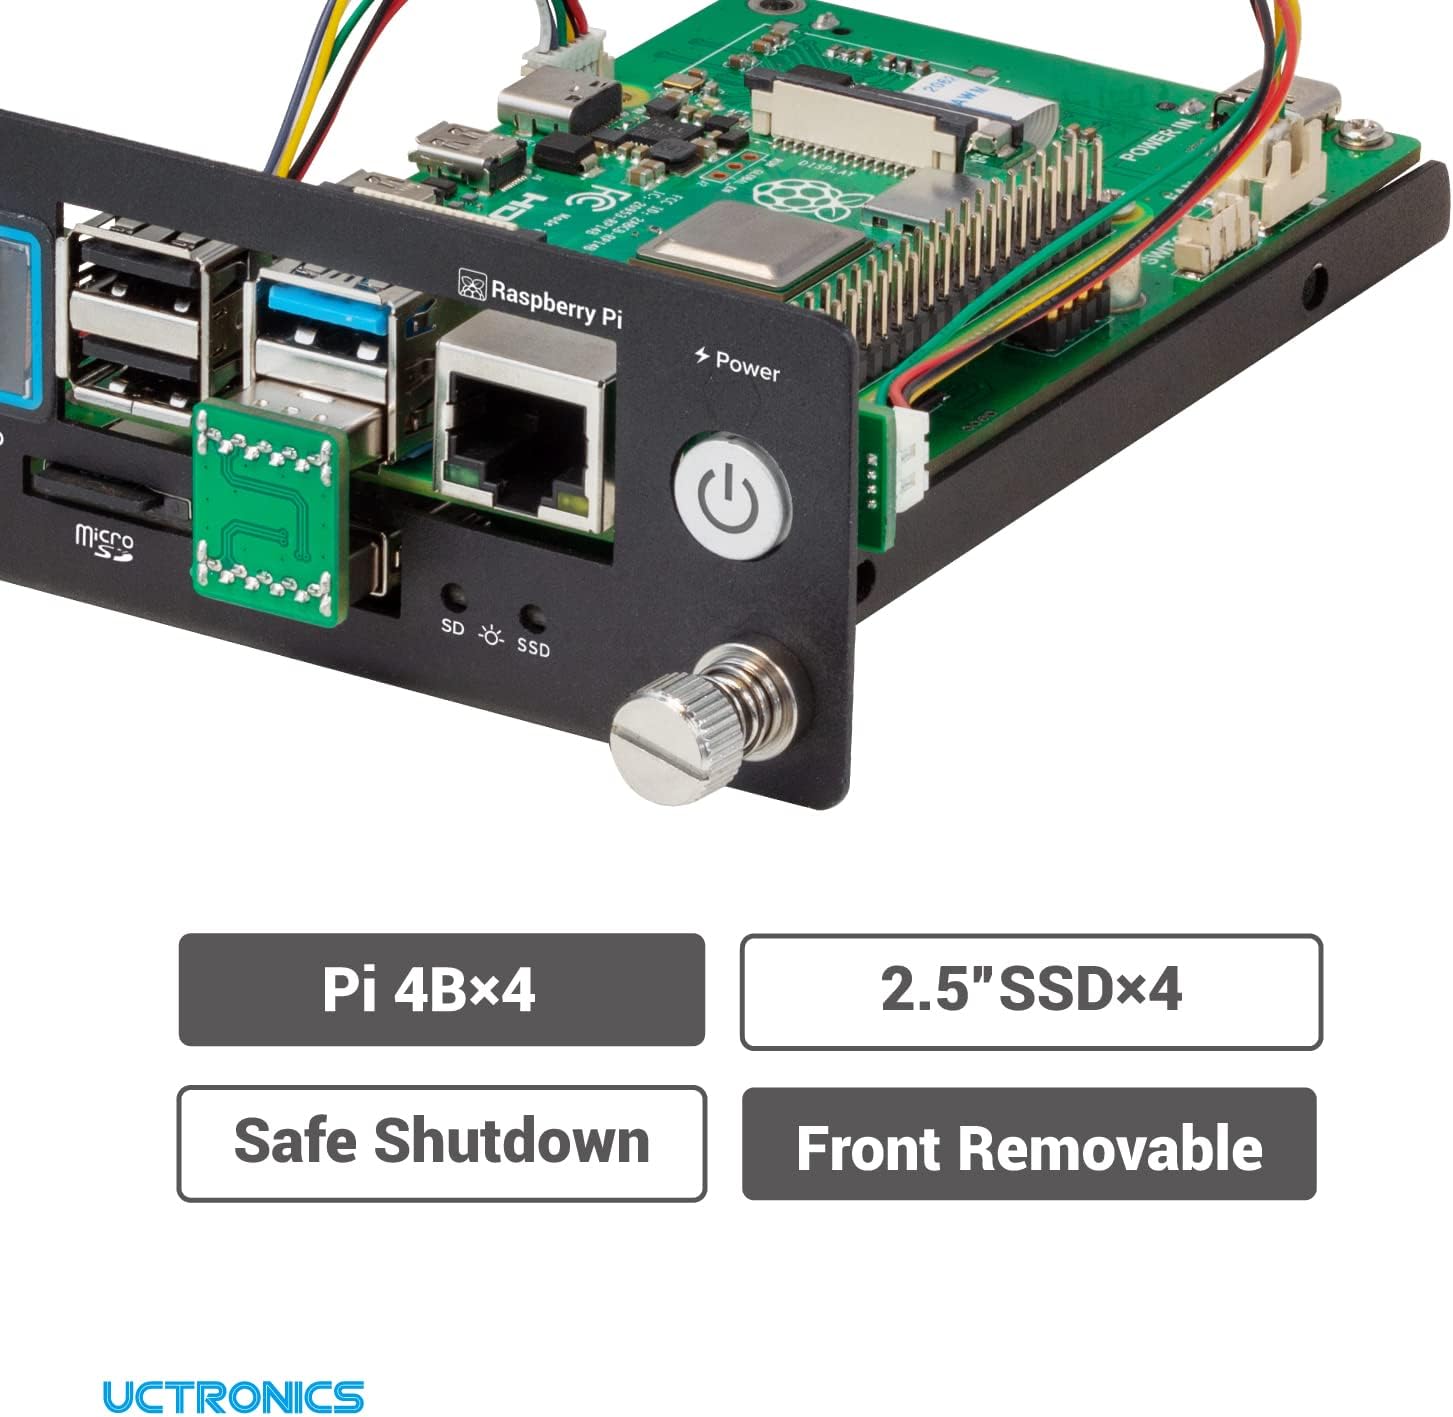
Figure 2.2: Key features of the Pi Rack Pro include support for four Raspberry Pi 4B units, four 2.5" SSDs, safe shutdown functionality, and front-removable modules.

Figure 2.3: Detailed view of a single module, highlighting key components: (1) USB Adapter, (2) SATA Shield for 2.5" SSD, (3) 0.96" LCD, (4) Safety Shutdown Button, (5) SD Card slot, (6) Status Indicator.

Figure 2.4: The 0.96" LCD display provides real-time monitoring of RAM, temperature, disk usage, and CPU load for each Raspberry Pi.
3. Setup and Installation
Follow these steps to install your Raspberry Pi 4B units and 2.5" SSDs into the Pi Rack Pro.
3.1. Raspberry Pi and SSD Installation
- Prepare Raspberry Pi 4B: Ensure your Raspberry Pi 4B is ready for installation. It is recommended to configure your operating system and any necessary software before physical installation.
- Install 2.5" SSD: Attach your 2.5" SSD to the designated SATA shield within each module. Ensure the SSD thickness does not exceed 7mm. Secure the SSD with appropriate screws.
- Connect Raspberry Pi to Module: Carefully connect the Raspberry Pi 4B to the module's internal connectors. This typically involves connecting the USB adapter and any necessary GPIO pins for the LCD and shutdown functionality.
- Insert Module into Rack: Slide the assembled Raspberry Pi module into an available bay in the Pi Rack Pro chassis. Secure it using the front-facing thumbscrews.
- Repeat for Additional Units: Repeat steps 1-4 for each Raspberry Pi 4B and SSD you intend to install.
Note: For detailed visual guidance, please refer to the official Installation Manual (PDF).
3.2. Software Configuration
To enable the full functionality of the 0.96" LCD display and the secure shutdown buttons, specific software configurations are required on each Raspberry Pi. This typically involves installing drivers and scripts.
- LCD Display: Install the necessary drivers and software to activate the 0.96" LCD. This will allow it to display system metrics like RAM, disk, temperature, and IP address.
- Secure Shutdown: Implement the provided scripts or software to enable the soft shutdown functionality via the front panel buttons. This ensures the Raspberry Pi shuts down gracefully, preventing data loss.
- Raspberry Pi OS (Debian 12 Bookworm) Note: If you are using Raspberry Pi OS (Debian version: 12 Bookworm), you may need to press the power button twice to initiate a shutdown.
Refer to the UCTRONICS official documentation or support resources for the most up-to-date software installation guides and scripts.
4. Operating Instructions
Once installed and configured, operating the Pi Rack Pro is straightforward.
4.1. Power On/Off
- Power On: Press the individual power button on the front panel of each module to power on the corresponding Raspberry Pi.
- Soft Shutdown: To perform a graceful shutdown, press the individual power button. Ensure the necessary software is configured for this functionality. For Raspberry Pi OS (Debian 12 Bookworm), a double press may be required.
4.2. Monitoring with LCD
The 0.96" LCD on each module provides real-time system status. The display cycles through various metrics or can be configured to show specific information.
- Displayed Information: Typically includes RAM usage, CPU temperature, disk usage, and the IP address of the Raspberry Pi.
- Customization: The display content can be customized through software scripts. Consult UCTRONICS documentation for details on customization options.
5. Maintenance
Proper maintenance ensures the longevity and optimal performance of your UCTRONICS Pi Rack Pro.
- Cleaning: Regularly clean the exterior of the rack and the front panels with a soft, dry cloth. Avoid using liquid cleaners directly on the device.
- Dust Management: Periodically inspect the rack for dust accumulation, especially around ventilation points. Dust can impede airflow and lead to overheating.
- Ventilation: Ensure adequate airflow around the rack. While the design helps keep dust out, proper room ventilation is crucial. Consider external fan solutions if high temperatures are observed, especially in densely packed environments or with high-load applications. The SATA boards have fan interfaces for 2.54 2-pin fans.
- Firmware/Software Updates: Keep your Raspberry Pi operating system and any UCTRONICS-specific drivers/scripts updated to benefit from performance improvements and bug fixes.
6. Troubleshooting
This section addresses common issues you might encounter.
6.1. Common Issues and Solutions
- Raspberry Pi Not Powering On:
- Verify all power connections to the Raspberry Pi and the rack.
- Ensure the power supply is adequate for all connected Raspberry Pis and SSDs.
- Check the integrity of the power button connection to the Raspberry Pi's GPIO pins.
- SSD Not Detected:
- Confirm the 2.5" SSD is properly seated in the SATA shield.
- Check the USB connection between the SATA shield and the Raspberry Pi. Inspect for any bent pins or damage to the USB ports.
- Ensure the SSD is formatted and partitioned correctly for your operating system.
- LCD Display Not Working or Showing Incorrect Information:
- Verify the physical connection of the LCD to the Raspberry Pi's GPIO pins.
- Ensure the necessary LCD drivers and monitoring scripts are correctly installed and running on the Raspberry Pi.
- Restart the Raspberry Pi to reinitialize the display software.
- Secure Shutdown Button Not Functioning:
- Confirm that the shutdown script is installed and configured correctly on the Raspberry Pi.
- Check the physical connection of the button to the Raspberry Pi's GPIO pins.
- If using Raspberry Pi OS (Debian 12 Bookworm), try pressing the button twice.
- Overheating:
- Ensure the rack is placed in a well-ventilated area.
- Consider adding external fans to the rack or individual Raspberry Pis, especially if using PoE+ hats or running high-load applications. The SATA boards have fan interfaces for 2.54 2-pin fans.
If issues persist, consult the official UCTRONICS support resources or the detailed PDF manual.
7. Specifications
Detailed technical specifications for the UCTRONICS Pi Rack Pro (RM0004).
| Feature | Specification |
|---|---|
| Model Number | RM0004 |
| Compatibility | Raspberry Pi 4B (up to 4 units) |
| SSD Support | 4x 2.5" SSDs (max 7mm thickness) |
| Display | 0.96" Color LCD |
| Rack Unit Size | 1U |
| Dimensions (L x W x H) | 19 x 5.72 x 1.75 inches (482.6 x 145.4 x 44.5 mm) |
| Material | Metal |
| Item Weight | 3.29 pounds |

Figure 7.1: Dimensional drawing of the UCTRONICS Pi Rack Pro, illustrating its 1U 19-inch form factor and specific measurements.

Figure 7.2: The Pi Rack Pro can be installed in a standard server cabinet or used as a standalone unit on a desktop.
8. Warranty and Support
UCTRONICS is committed to providing high-quality products and customer satisfaction.
- Warranty Information: For details regarding product warranty, please refer to the terms and conditions provided at the time of purchase or contact UCTRONICS customer service.
- Technical Support: If you encounter any issues not covered in this manual or require further assistance, please contact UCTRONICS support.
- Official Documentation: An official Installation Manual (PDF) is available for download.


