
Luqeeg Luqeeghgib6foyrn8427-11
Luqeeg Automatic Tape Dispenser User Manual
Model: Luqeeghgib6foyrn8427-11
1. Introduction
This manual provides detailed instructions for the safe and efficient operation, setup, and maintenance of your Luqeeg Automatic Tape Dispenser. This electric tape cutting machine is designed for precision and efficiency, capable of handling various tape types and widths for industrial, commercial, and office applications.

Figure 1: Luqeeg Automatic Tape Dispenser
2. Safety Information
Please read all safety warnings and instructions carefully before operating the device to prevent injury or damage.
- Power Source: Ensure the device is connected to a 110V power source as specified.
- Blade Safety: The cutting blade is sharp. ALWAYS USE TWEEZERS TO REMOVE THE TAPE. DO NOT INSERT YOUR FINGER INTO THE OUTLET.
- Obstruction: If tape becomes blocked, the machine will automatically stop. Do not force tape or attempt to clear obstructions with bare hands. Disconnect power before clearing.
- Children and Pets: Keep the device out of reach of children and pets.
- Environment: Operate the dispenser in a dry, stable environment. Avoid exposure to water or excessive humidity.

Figure 2: Front panel with safety caution regarding tape removal.
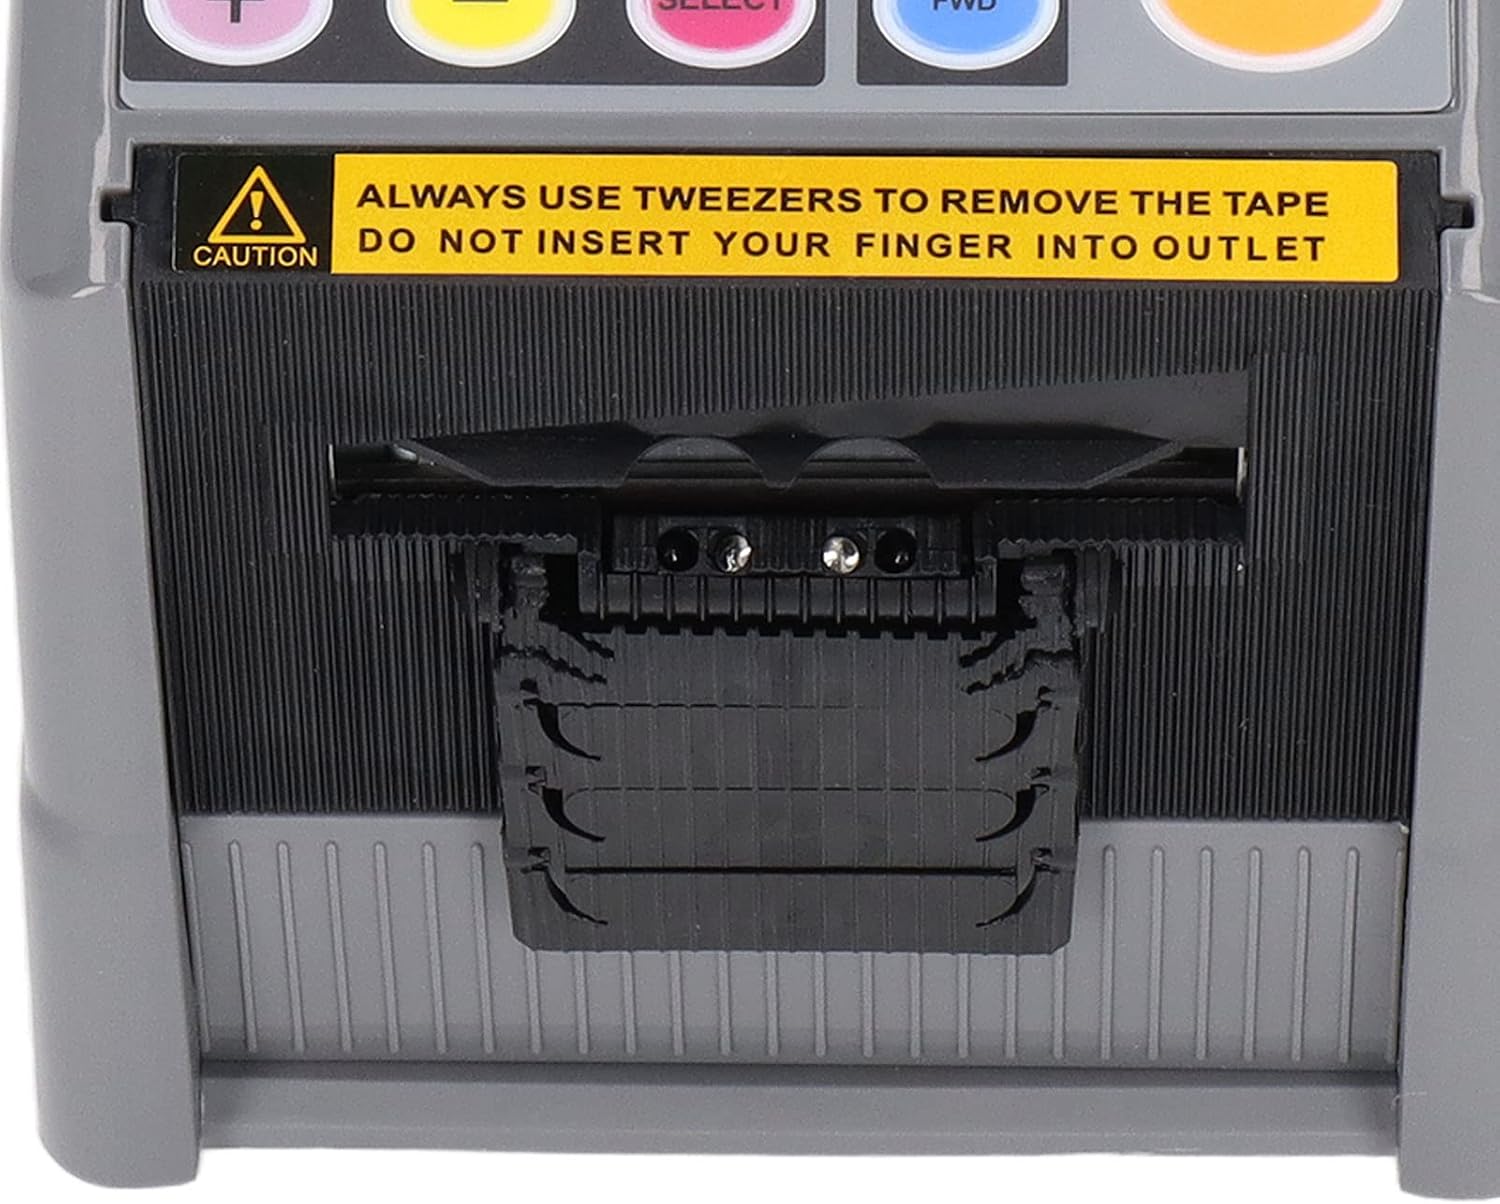
Figure 3: Detailed view of the tape outlet and caution label.
3. Product Overview
3.1 Components
The Luqeeg Automatic Tape Dispenser consists of the following main components:
- Control Panel: Features a digital display, length adjustment buttons (+/-), mode selection (AUTO/MANU), reverse (REV), forward (FWD), and start (START) buttons.
- Tape Compartment: Area for loading one or two rolls of tape. Includes adjustable partition and bracket.
- Tape Outlet: Where cut tape is dispensed. Equipped with a safety warning.
- Cutting Mechanism: Internal blade for precise tape cutting.
- Power Switch & Input: Located at the rear for power connection and control.

Figure 4: Main view of the automatic tape dispenser.
3.2 Key Features
- Intelligent Desktop Design: Allows setting up to 6 groups of different cutting lengths (5-999mm) and pre-setting cutting quantities. Settings are retained after restart.
- Automatic/Manual Mode: Easily switch between automatic and manual operation to suit various working conditions.
- High Precision Cutting: Ensures flat and clean incisions with an error margin of approximately 1mm.
- Time and Labor Saving: Memory function for repeated cuts and ability to cut two rolls of tape simultaneously, enhancing work efficiency.
- Wide Tape Compatibility: Suitable for tapes with widths from 6mm to 60mm, including electrical tape, scotch tape, filament tape, double-sided tape, sealing tape, and more.
- Smart Sensor: Automatically stops operation if tape becomes blocked, preventing damage.

Figure 5: Side view illustrating key operational features.

Figure 6: Overview of the dispenser's benefits and modes.
4. Setup
4.1 Unpacking
- Carefully remove the tape dispenser from its packaging.
- Inspect the device for any signs of damage. If damaged, do not operate and contact customer support.
- Place the dispenser on a stable, flat surface.
4.2 Power Connection
- Ensure the power switch located at the rear of the unit is in the 'OFF' position.
- Connect the power cord to the power input port on the back of the dispenser.
- Plug the other end of the power cord into a standard 110V AC electrical outlet.

Figure 7: Rear view with power connection details.
4.3 Loading Tape
- Open the top cover of the tape dispenser.
- Adjust the internal partition and bracket to accommodate the width and diameter of your tape roll(s). The dispenser supports tape widths from 6mm to 60mm and can hold one or two rolls.
- Place the tape roll(s) onto the spindle, ensuring the adhesive side faces down towards the cutting mechanism.
- Pull the leading edge of the tape through the tape path, guiding it under the rollers and towards the tape outlet. Ensure it is properly aligned.
- Close the top cover securely.

Figure 8: Internal view showing the tape loading path.

Figure 9: Bottom view illustrating the partition and bracket for tape adjustment.

Figure 10: Internal view showing the adjustable partition.
5. Operating Instructions
5.1 Control Panel Overview
The control panel features a digital display and several buttons:
- Digital Display: Shows current cutting length or quantity.
- '+' / '-': Adjusts cutting length or quantity.
- SELECT: Toggles between setting cutting length and quantity, or selects memory groups.
- AUTO / MANU: Switches between automatic and manual operating modes.
- REV (Reverse): Rewinds tape slightly.
- FWD (Forward): Advances tape slightly.
- START: Initiates the cutting process in automatic mode or dispenses one piece in manual mode.
Figure 11: Control panel layout.
5.2 Setting Cutting Length and Quantity
- Turn on the power switch. The digital display will illuminate.
- Press the SELECT button to cycle between setting the cutting length and the number of pieces.
- Use the '+' and '-' buttons to adjust the desired cutting length (5-999mm) or the number of pieces.
- The dispenser allows storing up to 6 different length/quantity settings. Consult the full product manual for detailed instructions on saving and recalling these presets.
5.3 Automatic Mode
- Press the AUTO/MANU button until 'AUTO' is indicated on the display (if applicable, or by mode indicator light).
- Set the desired cutting length and quantity as described in Section 5.2.
- Press the START button. The dispenser will automatically cut and dispense the specified number of tape pieces at the set length.
- The machine will pause after dispensing the set quantity. To continue, press START again.
5.4 Manual Mode
- Press the AUTO/MANU button until 'MANU' is indicated on the display (if applicable, or by mode indicator light).
- Set the desired cutting length using the '+' and '-' buttons.
- Each press of the START button will dispense one piece of tape at the set length.
5.5 Applicable Tape Types
The dispenser is compatible with a wide range of tapes, including but not limited to:
- Electrical Tape
- Scotch Tape
- Filament Tape
- Glass Wallpaper Tape
- Double-Sided Tape
- Sealing Tape
- Technical Tape
- Fiber Tape
- Silicone Polyester Tape
- Kraft Paper Tape
- Masking Tape
- Plastic Tape

Clear Tape

Kraft Paper Tape

Double-Sided Tape

Technical Tape

Silicone Polyester Tape

Masking Tape
Figure 12: Examples of compatible tape types.
6. Maintenance
Regular maintenance ensures optimal performance and extends the lifespan of your tape dispenser.
- Cleaning: Regularly wipe the exterior of the dispenser with a soft, dry cloth. For internal cleaning, ensure the power is off and unplugged. Use a soft brush or compressed air to remove tape residue or dust from the tape path and cutting area.
- Blade Inspection: Periodically inspect the cutting blade for dullness or damage. A dull blade can lead to uneven cuts. Replacement blades may be available from the manufacturer. Always use tweezers for blade handling.
- Roller Check: Ensure the tape rollers are clean and free of adhesive buildup to maintain smooth tape feeding.
7. Troubleshooting
Refer to the table below for common issues and their solutions.
| Problem | Possible Cause | Solution |
|---|---|---|
| Dispenser does not power on. | Power cord not connected; Power switch off; No power from outlet. | Ensure power cord is securely plugged in; Turn power switch to 'ON'; Check outlet with another device. |
| Tape is not feeding or getting stuck. | Tape improperly loaded; Tape path obstructed; Rollers dirty; Tape too wide/narrow. | Re-load tape correctly; Clear any obstructions (use tweezers); Clean rollers; Ensure tape width is 6-60mm. |
| Tape cuts are uneven or frayed. | Dull blade; Tape misalignment. | Inspect and replace blade if dull; Ensure tape is properly aligned in the path. |
| Incorrect cutting length. | Length setting is incorrect. | Adjust cutting length using the '+' and '-' buttons on the control panel. |
| Automatic mode not working. | Device is in Manual mode; Sensor obstructed. | Press AUTO/MANU button to switch to Automatic mode; Clear any debris from the sensor area. |
8. Specifications
| Feature | Detail |
|---|---|
| Brand | Luqeeg |
| Model Number | Luqeeghgib6foyrn8427-11 |
| Material | Acrylonitrile Butadiene Styrene (ABS) |
| Operation Mode | Automatic / Manual |
| Power Source | 110V |
| Tape Width Compatibility | Approx. 6 - 60mm (0.24 - 2.36 inches) |
| Max Cutting Length | Approx. 999mm (39.33 inches) |
| Min Cutting Length | Approx. 5mm (0.2 inches) |
| Max Tape Outer Diameter | Approx. 300mm (11.81 inches) |
| Cutting Accuracy | Approx. ±1mm |
| Memory Storage | 6 groups of settings |
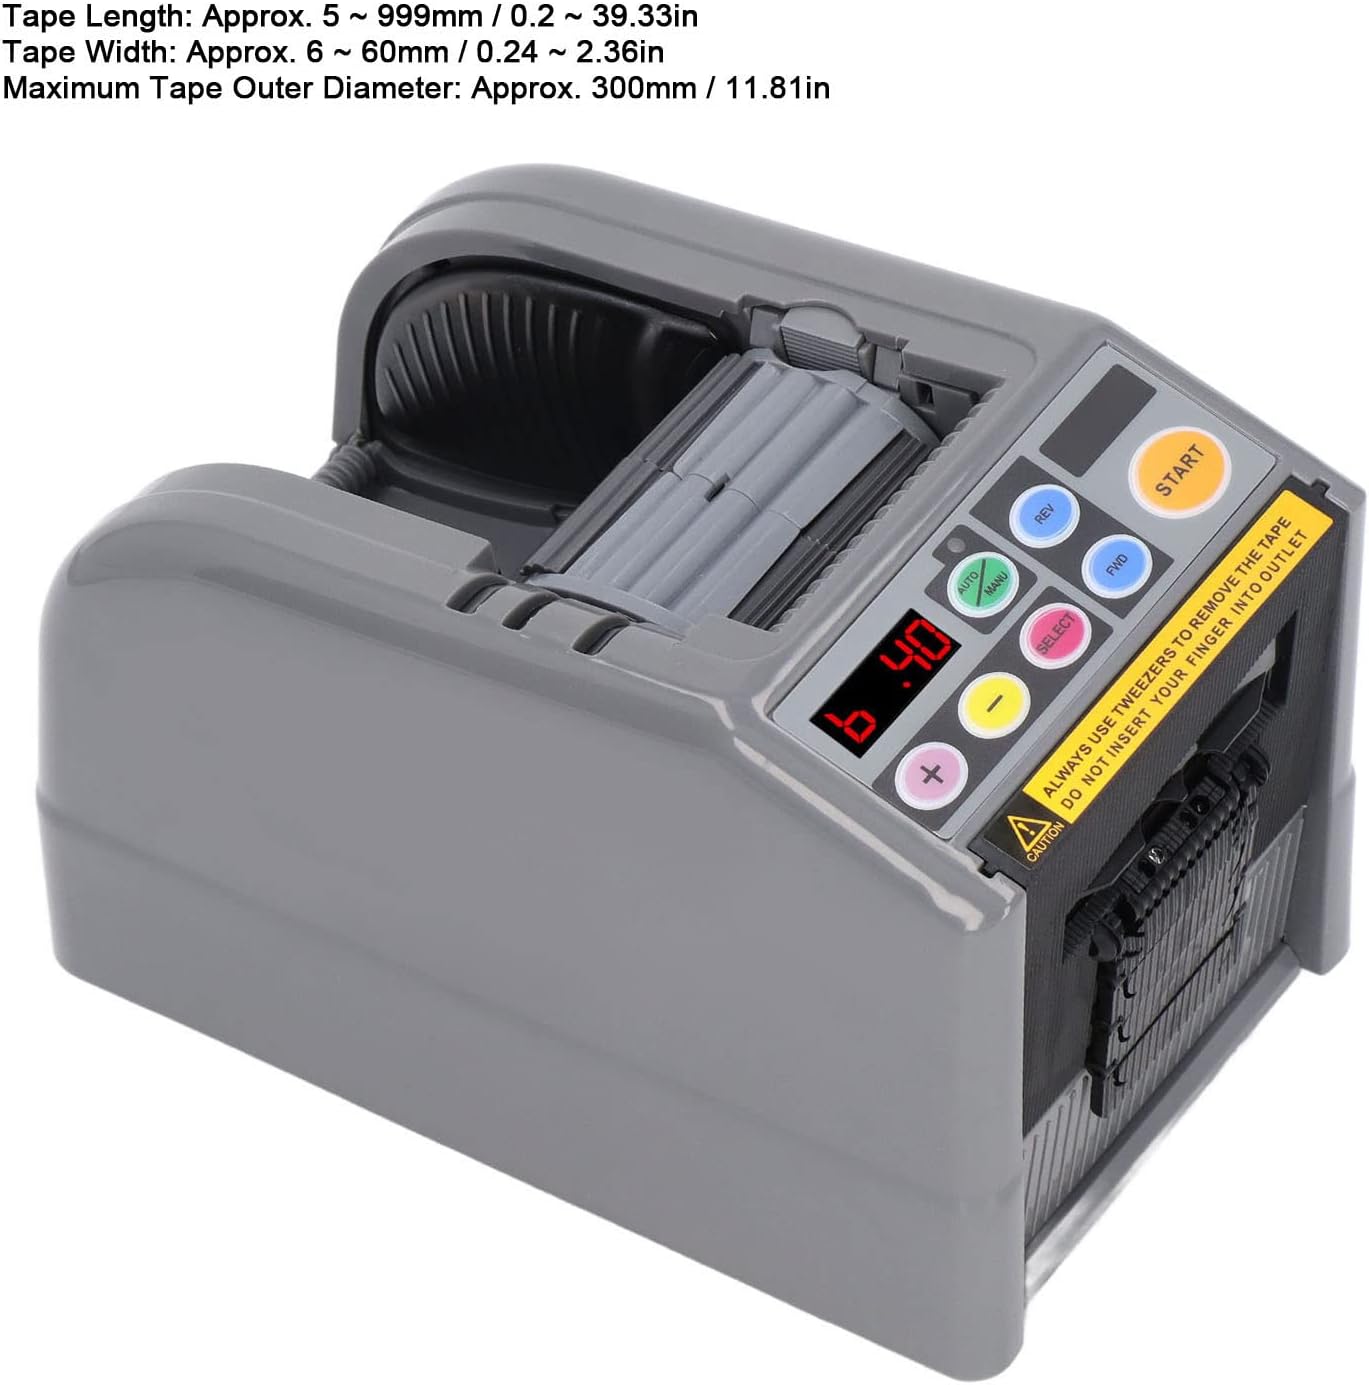
Figure 13: Key dimensions and specifications.
9. Warranty and Support
Luqeeg is committed to providing high-quality products. This electronic tape dispenser comes with a quality assurance guarantee. If you encounter any issues or have questions regarding your purchase, please do not hesitate to contact our customer support team. We aim to resolve your concerns within 24 hours.
For support, please refer to the contact information provided with your purchase or visit the official Luqeeg store page on Amazon: Luqeeg Store.
Ask a question about this manual
Ask about setup, troubleshooting, compatibility, parts, safety, or missing instructions. Manuals+ will review the question and use this page’s manual context to help answer it.