1. Introduction
The GOWENIC Shortkiller is a specialized tool designed for the precise detection and repair of short circuits on mobile phone and computer motherboards. It assists technicians in quickly identifying fault points by evaluating current flow, enabling efficient and accurate repairs. This device features real-time current and voltage display, along with multiple protection functions.
2. Safety Information
Please read all safety instructions carefully before using the GOWENIC Shortkiller. Failure to follow these instructions may result in electric shock, fire, or damage to the device or components.
- Personal Protective Equipment: Always wear appropriate personal protective equipment (PPE), such as safety glasses, to protect against potential hazards.
- Power Disconnection: Ensure the device is disconnected from the power source before performing any maintenance or adjustments.
- Environmental Conditions: Do not operate the device in wet or damp conditions. Avoid exposure to liquids.
- Children and Unauthorized Users: Keep the device out of reach of children and individuals not trained in its use.
- High Current Output: This device can output current up to 30A. Exercise extreme caution to avoid electric shock or damage to sensitive electronic components.
- Ventilation: Ensure adequate ventilation when operating the device, as short circuits can generate heat.
- Proper Use: Use the device only for its intended purpose of short circuit detection and repair on electronic motherboards.
3. Package Contents
Verify that all items are present in the package:
- GOWENIC Shortkiller Main Unit
- Power Cord (US Plug)
- Test Leads (Red Probe, Black Alligator Clip)

Image: Contents of the GOWENIC Shortkiller package, including the main unit, power cord, and test leads.
4. Product Overview
The GOWENIC Shortkiller consists of a main unit and detachable test leads. Familiarize yourself with its components:
- Main Unit: A compact black rectangular box housing the control circuitry and display.
- Digital Displays: Two LED displays show real-time current (A) and voltage (V) readings.
- Test Lead Port: A circular connector on the front panel for attaching the test leads.
- Voltage Adjustment Buttons: 'V+' and 'V-' buttons allow for precise voltage control.
- Power Switch: Located on the side or rear of the unit to power the device on/off.
- Test Leads: Comprise a red probe with a sharp needle tip for precise contact and a black lead with an alligator clip for grounding.

Image: Close-up view of the Shortkiller's front panel, showing the digital current (A) and voltage (V) displays, the test lead connection port, and voltage adjustment buttons.

Image: The Shortkiller unit showing its digital displays for current and voltage in operation.
5. Setup
Follow these steps to set up your GOWENIC Shortkiller:
- Connect Power: Plug the provided power cord into the power input port on the Shortkiller main unit, then connect the other end to a standard AC 100-240V power outlet.
- Attach Test Leads: Connect the test leads to the circular port on the front panel of the Shortkiller. Ensure a secure connection.
- Power On: Flip the power switch (usually located on the side or rear) to the 'ON' position. The digital displays should illuminate.
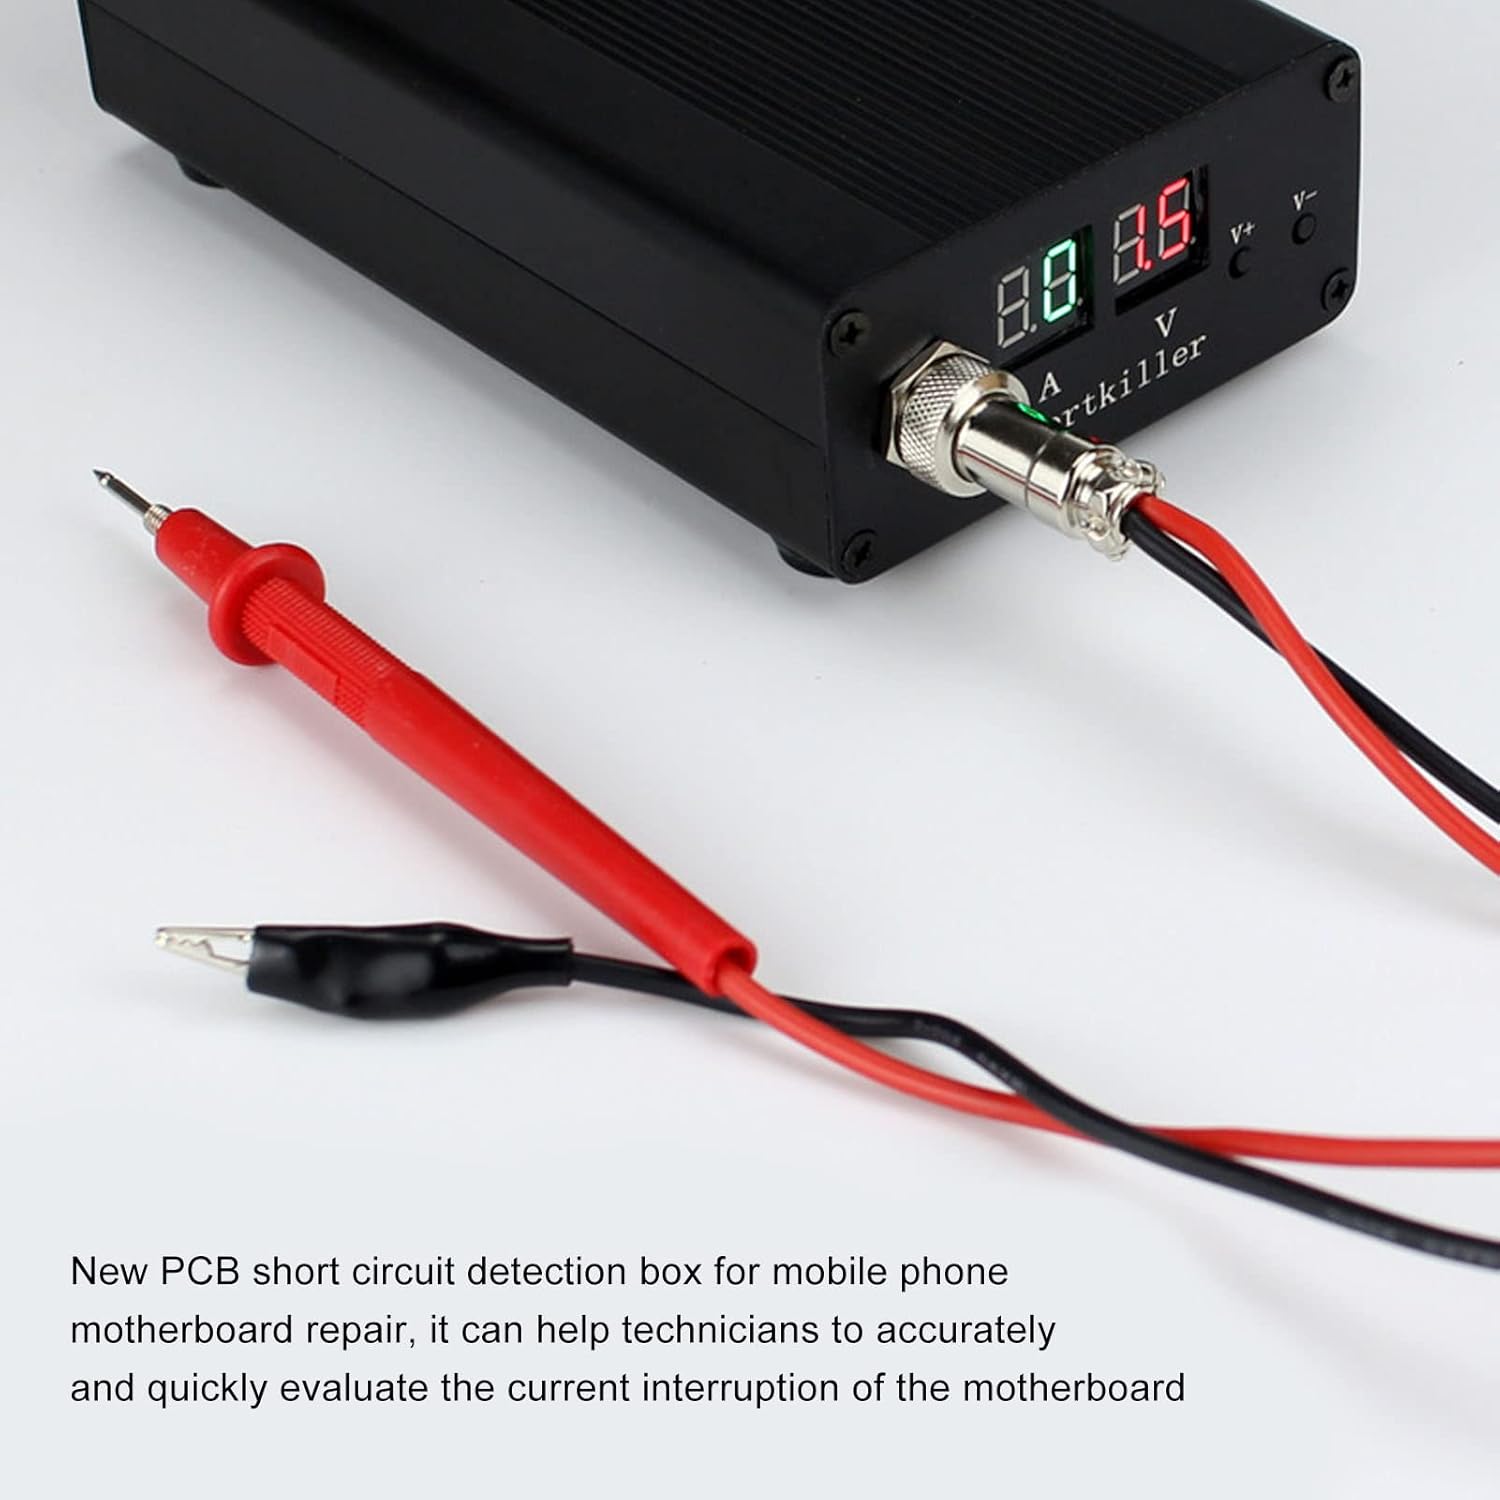
Image: The GOWENIC Shortkiller unit with the test leads properly connected to the front panel.
6. Operating Instructions
The GOWENIC Shortkiller is designed for efficient short circuit detection on electronic motherboards. Always proceed with caution.
- Prepare Motherboard: Ensure the motherboard to be tested is clean, dry, and disconnected from any power source or battery.
- Connect Ground: Attach the black alligator clip of the test lead to a known ground point on the motherboard.
- Adjust Voltage: Use the 'V+' and 'V-' buttons on the Shortkiller to set the desired output voltage. Start with a low voltage and gradually increase if necessary.
- Probe Suspected Area: Carefully touch the red needle probe to the suspected shorted areas on the motherboard.
- Observe Readings: Monitor the current (A) and voltage (V) displays. A sudden increase in current indicates a short circuit.
- Locate Fault: The device will help locate the short circuit by causing the fault point to heat up or, in some cases, burn out the faulty component. Use thermal imaging or careful touch (with insulated tools) to pinpoint the exact location.
- Disconnect: Once the short is identified or repaired, power off the Shortkiller and disconnect the test leads from the motherboard.

Image: The GOWENIC Shortkiller actively being used to probe a mobile phone motherboard, with the digital display showing readings.

Image: A close-up of the red probe making contact with a component on a motherboard during short circuit detection.
Video: A demonstration of the GOWENIC Shortkiller in action, showing how it detects short circuits on a motherboard. The video highlights the quick detection capability.
7. Specifications
| Feature | Specification |
|---|---|
| Item Type | Mobile Phone Short Circuit Detector |
| Material | Aluminum Alloy, Plastic |
| Product Size (L x W x H) | Approx. 15 x 8.5 x 4 cm (5.9 x 3.3 x 1.6 inches) |
| Power Cord Length | Approx. 150 cm (59.1 inches) |
| Pen Line Length | Approx. 50 cm (19.7 inches) |
| Input Voltage | AC 100-240V |
| Current Range | 0-30A |
| Item Weight | 1.37 pounds |

Image: Diagram illustrating the dimensions of the GOWENIC Shortkiller unit and the lengths of its power cord and test leads.
8. Troubleshooting
If you encounter issues with your GOWENIC Shortkiller, refer to the following common problems and solutions:
- Device Not Powering On:
- Check that the power cord is securely connected to both the Shortkiller and the power outlet.
- Ensure the power switch is in the 'ON' position.
- Verify that the power outlet is functional.
- No Current Reading / Inaccurate Readings:
- Ensure the test leads are securely connected to the Shortkiller unit.
- Confirm that the black alligator clip has good contact with the motherboard's ground.
- Check that the red probe is making firm contact with the circuit point being tested.
- Inspect test leads for any visible damage or breaks.
- Overheating / Overcurrent Protection Triggered:
- The device has built-in protection mechanisms. If triggered, disconnect the test leads immediately.
- Allow the device to cool down.
- Re-evaluate the circuit for severe short circuits or incorrect voltage settings before resuming operation.
9. Maintenance
Proper maintenance ensures the longevity and reliable operation of your GOWENIC Shortkiller:
- Cleaning: Keep the device clean and dry. Use a soft, dry cloth to wipe the exterior. Avoid using abrasive cleaners or solvents.
- Storage: Store the Shortkiller in a cool, dry place away from direct sunlight and extreme temperatures.
- Test Lead Inspection: Regularly inspect the test leads for any signs of wear, cuts, or damage to the insulation. Replace damaged leads immediately to prevent electrical hazards.
- Probe Tip: Ensure the red probe tip remains sharp and clean for effective contact.
10. Warranty and Support
For specific warranty information, technical assistance, or customer support regarding your GOWENIC Shortkiller, please refer to the documentation provided with your purchase or contact GOWENIC customer service directly through their official channels. Keep your purchase receipt as proof of purchase for warranty claims.