
ORICO Dual M.2 NVMe+NVMe
ORICO Dual M.2 NVMe SSD Enclosure User Manual
Model: Dual M.2 NVMe+NVMe
Product Overview
The ORICO Dual M.2 NVMe SSD Enclosure is designed for high-speed data transfer and convenient storage expansion. It features two independent M.2 NVMe SSD slots, allowing for simultaneous operation of two SSDs. The enclosure supports M-Key PCIe NVMe SSDs of various sizes (2230, 2242, 2260, 2280) and offers tool-free installation for ease of use.
Key features include:
- Dual-slot NVMe Enclosure: Supports two independent M.2 NVMe SSDs, up to 4TB per slot (total 8TB).
- All-aluminum Heat Dissipation: Features an aluminum alloy ribbed design, along with included heat dissipation vests and silicone thermal pads, to manage heat during high-speed operation.
- Tool-Free Installation: Simplifies SSD installation with a secure rubber plug mechanism, eliminating the need for screws.
- 10Gbps Transfer Speed: Utilizes USB 3.2 Gen2 Type-C interface with UASP acceleration and Trim support for fast and stable data transfer.
- Wide Compatibility: Compatible with Windows, Mac, and Linux systems, and can be used with PCs, laptops, smart TVs, OTG-enabled mobile phones, smart routers, and gaming consoles (PS3/PS4/XBOX).

Figure 1: The ORICO Dual M.2 NVMe SSD Enclosure, showcasing its sleek design and included USB-C to USB-C/A cable.
Package Contents
Verify that all items are present in the package:
- 1 x ORICO Dual M.2 NVMe SSD Enclosure (BM2-2N)
- 1 x USB-C to USB-C/A 2-in-1 Data Cable
- 2 x Aluminum Cooling Vests (Heatsinks)
- 2 x Silicone Thermal Pads
- 4 x Rubber Plugs for SSD securing
- 1 x User Manual
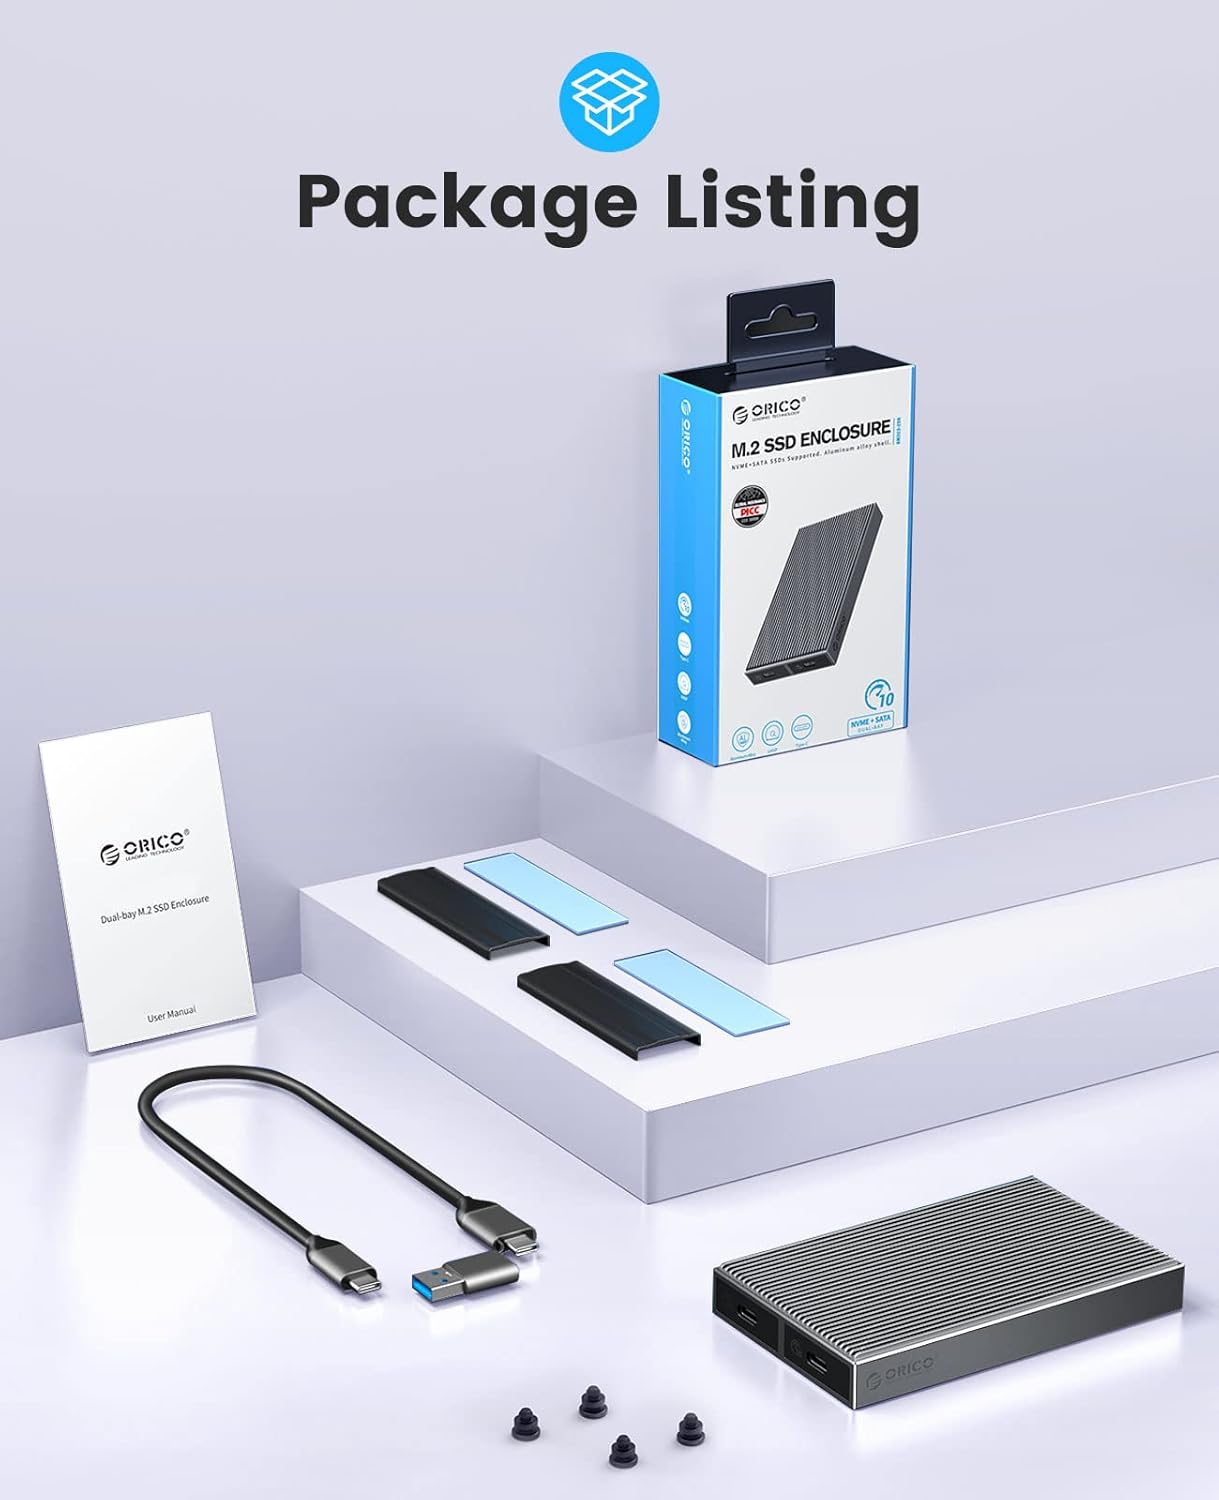
Figure 2: All components included in the ORICO Dual M.2 NVMe SSD Enclosure package, including the enclosure, cable, heatsinks, thermal pads, rubber plugs, and user manual.
Setup and Installation
Follow these steps to install your M.2 NVMe SSD into the enclosure:
- Prepare the SSD: If desired, apply the provided silicone thermal pad and aluminum cooling vest (heatsink) to your M.2 NVMe SSD. Ensure proper contact for optimal heat dissipation.

Figure 3: Illustration of applying the thermal pad and heatsink to the M.2 SSD.
- Open the Enclosure: Slide the button on the side of the enclosure to the left and gently push the SSD tray out. The enclosure is designed for tool-free access.

Figure 4: Opening the enclosure by sliding the release button and extracting the internal tray.
- Insert the SSD: Carefully insert your M.2 NVMe SSD into the appropriate slot on the tray. Ensure the SSD's notch aligns with the slot's key. Secure the SSD in place using the provided rubber plug at the end of the SSD.
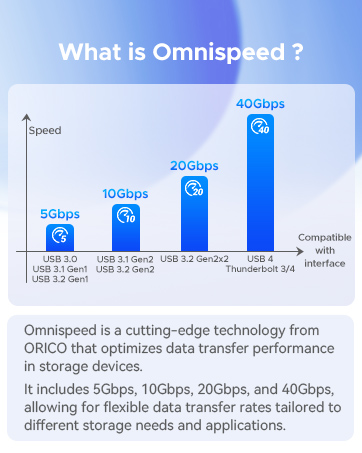
Figure 5: Inserting the M.2 SSD into the tray and securing it with a rubber plug.
- Close the Enclosure: Gently push the SSD tray back into the aluminum enclosure until it clicks securely into place.
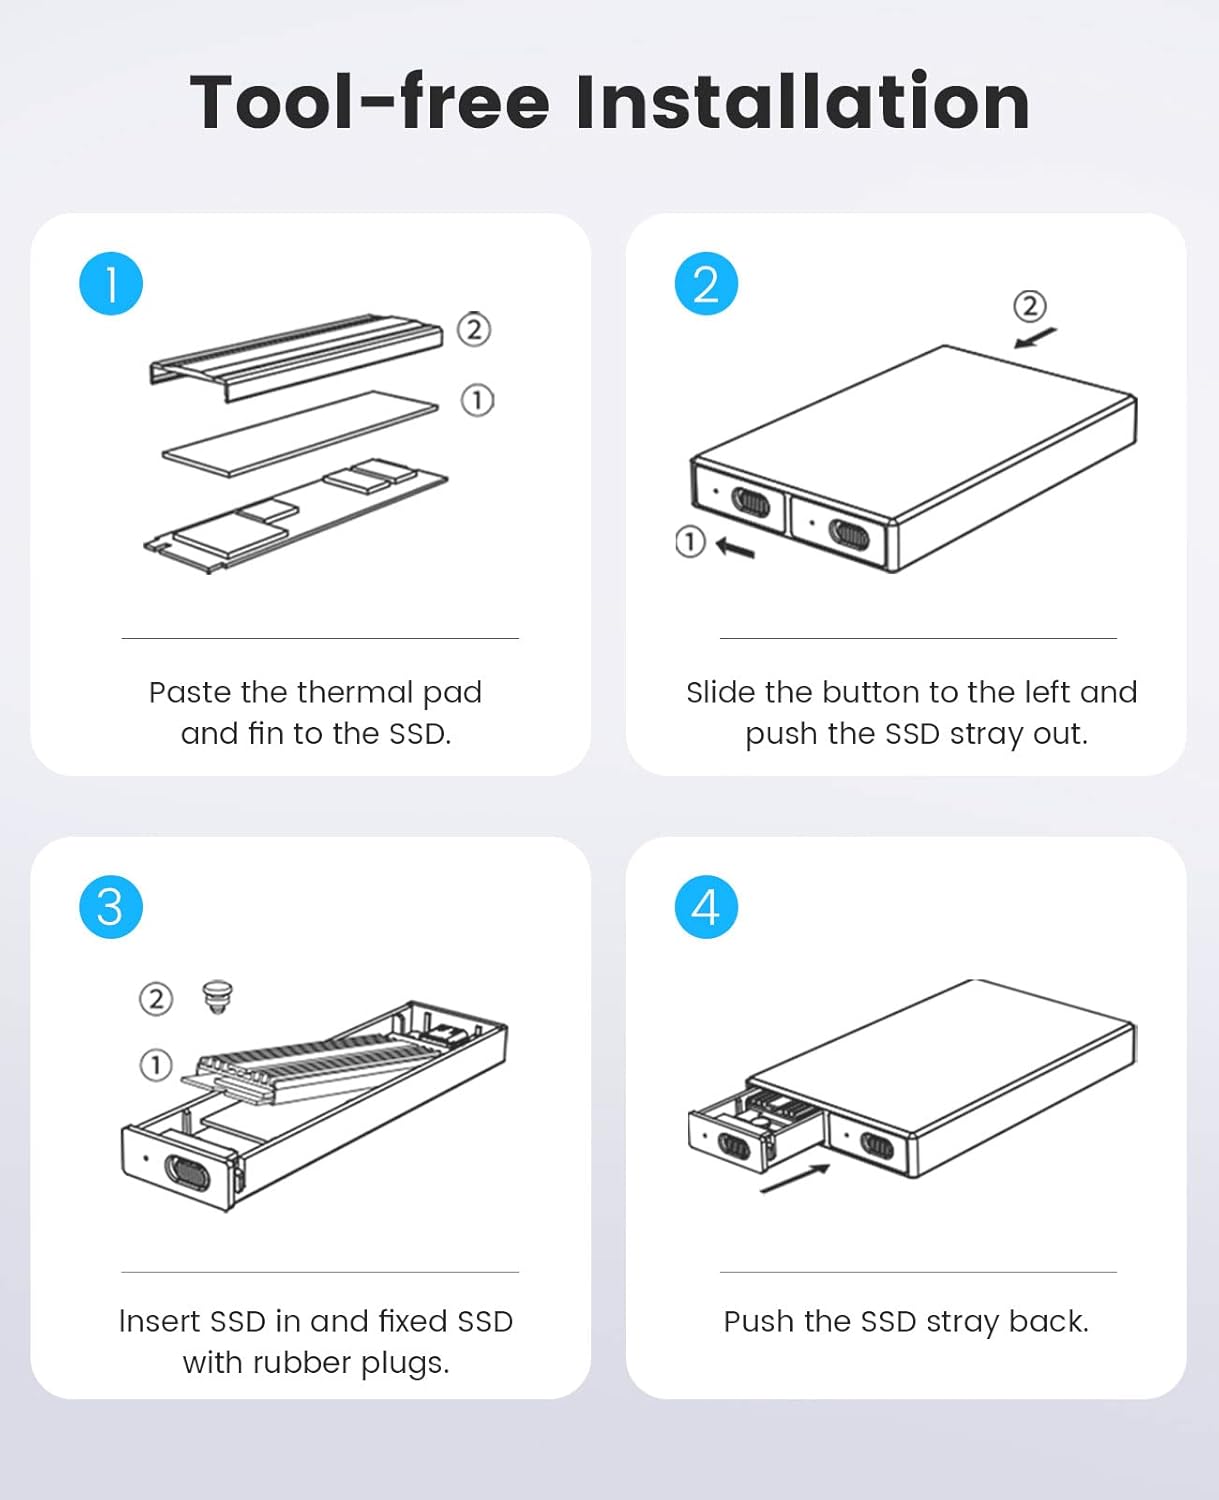
Figure 6: The final step of installation, pushing the loaded SSD tray back into the enclosure.
Important Note: Please properly back up all data on your SSD before installation to prevent data loss. Be careful to check compatibility (M-Key NVMe only) and handle the SSD gently to avoid damage.
Operating Instructions
Connecting to a Device
Use the provided USB-C to USB-C/A 2-in-1 cable to connect the enclosure to your computer or compatible device. The enclosure supports plug-and-play functionality, requiring no additional drivers.

Figure 7: The ORICO enclosure connected to a laptop, demonstrating its plug-and-play ease of use.
If connecting two SSDs simultaneously, ensure your host device has two available USB-C ports, as each SSD slot operates independently and requires its own connection.
Initializing and Formatting SSDs
Upon first connection, your operating system (Windows, macOS, Linux) may prompt you to initialize and format the new SSD. Follow the on-screen instructions. If no prompt appears, you can manually access Disk Management (Windows) or Disk Utility (macOS) to prepare the drive for use.
- Windows: Right-click "This PC" > "Manage" > "Disk Management". Locate the unallocated disk, right-click, and select "New Simple Volume" to format.
- macOS: Open "Disk Utility" (Applications > Utilities). Select the new drive from the sidebar, click "Erase", choose a format (e.g., APFS or ExFAT), and confirm.
- Linux: Use disk management tools like GParted or fdisk/mkfs commands in the terminal.
Caution: Formatting an SSD will erase all data on it. Ensure you have backed up any important files before proceeding.
Data Transfer
Once initialized and formatted, your SSD will appear as a removable drive. You can drag and drop files, or use copy/paste functions to transfer data. The enclosure supports USB 3.2 Gen2 speeds up to 10Gbps, enabling rapid data transfer.
Warning: Do not unplug the M.2 SSD enclosure from your PC during data transfer, as this may lead to data corruption or loss. Always safely eject the drive before disconnecting.
Maintenance
To ensure the longevity and optimal performance of your ORICO Dual M.2 NVMe SSD Enclosure, consider the following maintenance tips:
- Heat Management: The aluminum alloy design and included heatsinks are crucial for heat dissipation. Ensure the enclosure is placed in a well-ventilated area, especially during prolonged high-speed operations. Avoid covering the enclosure.
- Cleaning: Use a soft, dry cloth to clean the exterior of the enclosure. Do not use liquid cleaners or abrasive materials.
- Safe Ejection: Always safely eject the SSD from your operating system before disconnecting the enclosure to prevent data corruption and ensure proper shutdown of the SSD.
- Storage: When not in use, store the enclosure in a cool, dry place away from direct sunlight and extreme temperatures.

Figure 8: The enclosure's design emphasizes heat dissipation, crucial for maintaining SSD performance and lifespan.
Troubleshooting
| Problem | Possible Cause | Solution |
|---|---|---|
| Enclosure not detected by computer. |
|
|
| Slow data transfer speeds. |
|
|
| Enclosure gets hot during use. |
|
|
| Only one SSD slot works. |
|
|
Specifications
| Feature | Detail |
|---|---|
| Model | BM2-2N (Dual M.2 NVMe+NVMe) |
| Supported SSD Type | M-Key NVMe (PCIe-based) SSDs only |
| Supported SSD Sizes | 2230, 2242, 2260, 2280 |
| Max Storage Capacity | Up to 2x4TB (8TB total) |
| Interface | USB 3.2 Gen2 Type-C (10Gbps) |
| Data Transfer Rate | Up to 10 Gigabits Per Second |
| Compatible Devices | Laptops, PCs, Smart TVs, OTG-enabled Mobile Phones, Smart Routers, PS3/PS4/XBOX |
| Compatible OS | Windows, macOS, Linux |
| Material | Aluminum Alloy |
| Color | Silver or Gray |
| Product Dimensions | 4.43 x 2.68 x 0.61 inches (11.25 x 6.81 x 1.55 cm) |
| Item Weight | 8.1 ounces (230 grams) |
| Manufacturer | SHENZHEN ORICO TECHNOLOGIES CO.,LTD |
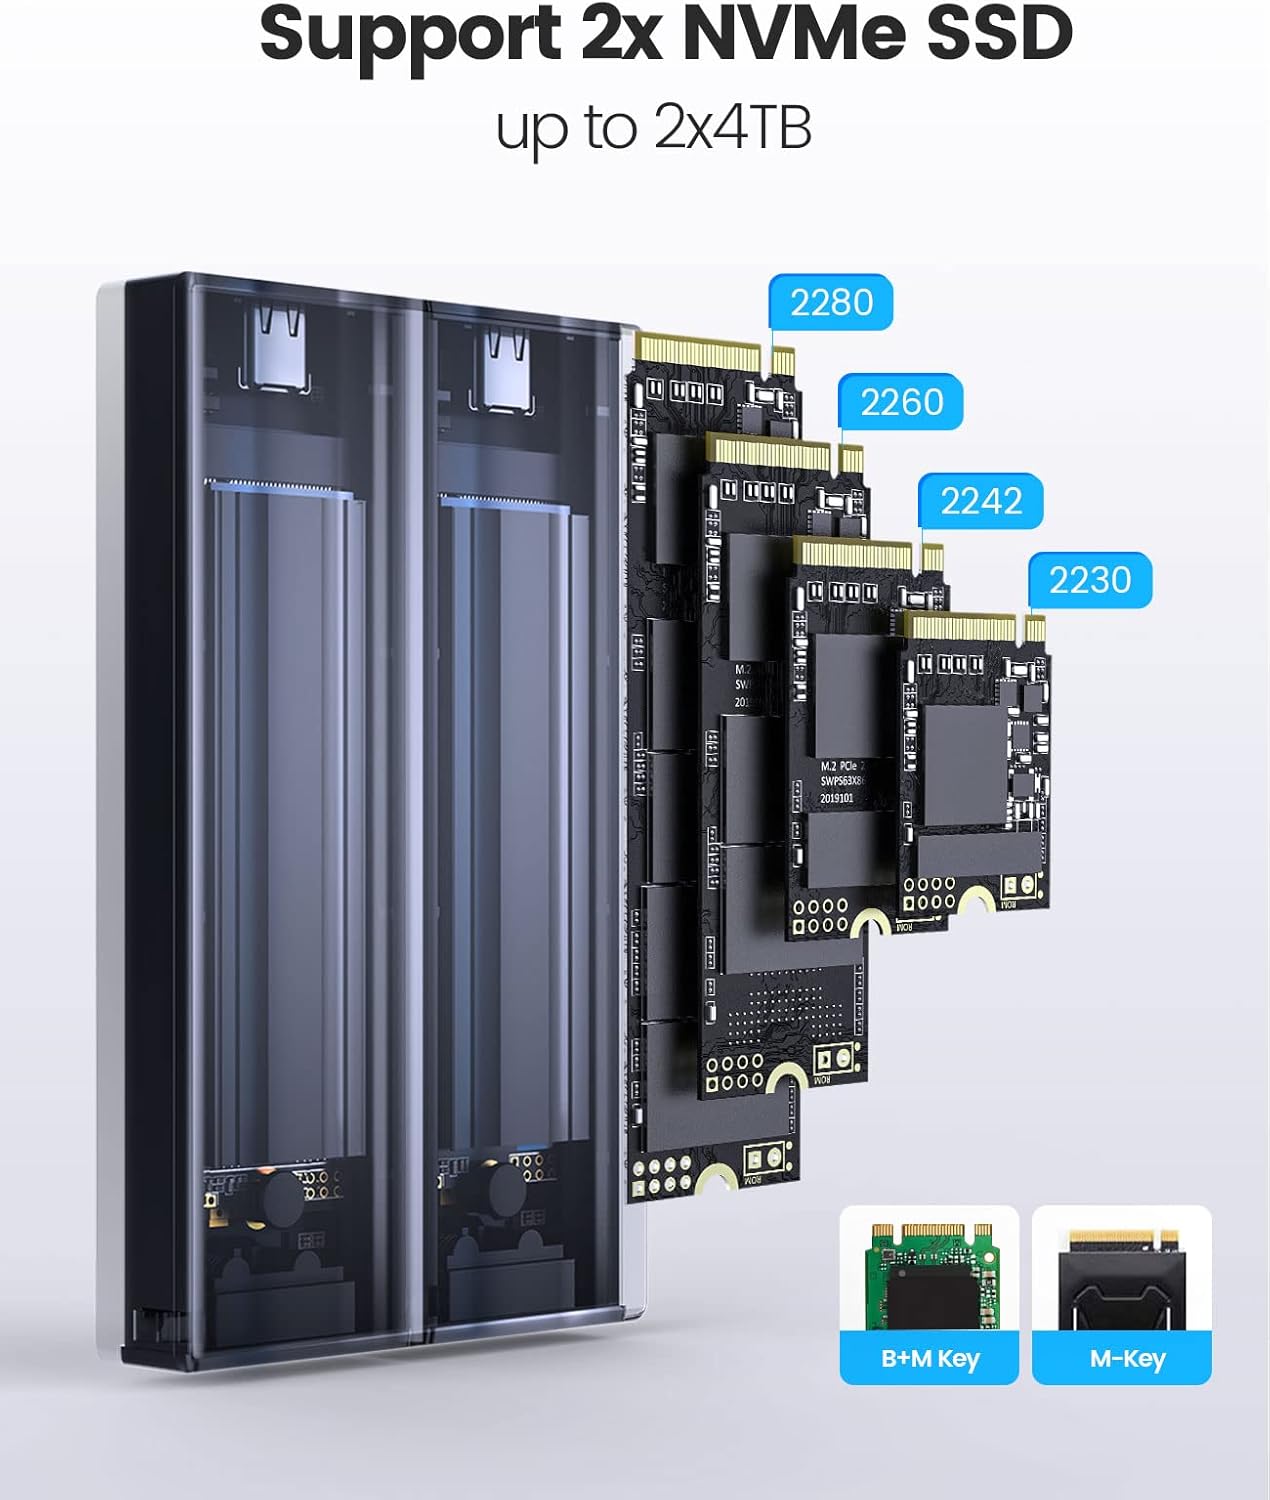
Figure 9: Visual representation of supported M.2 NVMe SSD form factors (2230, 2242, 2260, 2280) and compatible M-Key interface.
Warranty and Support
For warranty information and technical support, please refer to the official ORICO website or contact ORICO customer service directly. Details are typically provided with your product packaging or on the manufacturer's official support pages.
Note: Specific warranty terms may vary by region and retailer. Please retain your proof of purchase for warranty claims.
Related documentsDual M.2 NVMe+NVMe


Ask a question about this manual
Ask about setup, troubleshooting, compatibility, parts, safety, or missing instructions. Manuals+ will review the question and use this page’s manual context to help answer it.