
Product Overview
The Aramox RV Roof Vent Fan is designed to provide efficient ventilation for various large vehicles, including RVs, campers, vans, buses, and yachts. This 12V fan features a dual-mode operation, allowing for both air intake and air outlet with a simple one-key switch. It is equipped with 10 blades for stable and quiet operation, a stainless steel protective net, and integrated LED lighting for added utility.

Figure 1: This collage illustrates the diverse applications of the Aramox RV Roof Vent Fan, showcasing its suitability for installation in various large vehicles such as recreational vehicles (RVs), buses, and yachts, highlighting its versatility for mobile living spaces.
Key Features:
- Dual Mode Operation: Easily switch between air intake and air outlet with a single button.
- Efficient Ventilation: Quickly exchanges air, removing cooking fumes and unpleasant odors.
- Integrated LED Lighting: Features 4 LED light bars for illumination within the vehicle.
- Durable Construction: Equipped with a stainless steel net to prevent debris entry and a pure copper core motor for reliable performance.
- Quiet Operation: Designed with 10 blades for stable and low-noise ventilation.
- Wide Application: Suitable for RVs, buses, yachts, and other large vehicles.
Safety Precautions
Important Installation Note: The opening direction of the ventilating fan must be installed opposite to the direction of the front of the vehicle. Failure to install according to this method may result in the air flow lifting the ventilating fan cover when driving at high speeds, potentially causing product damage. This type of damage is not covered by product warranty or after-sales service.
Package Contents
Please verify that all items listed below are included in your package:
- 1 x RV Roof Vent Fan
- 4 x Screw Plugs
Technical Specifications
| Item Type | RV Roof Vent Fan |
| Material | ABS Plastic, Stainless Steel |
| Working Voltage | DC12V |
| Installation Hole Size | Approx. 280x280mm / 11.02x11.02in |
| Fan Dimensions | Approx. 360x360x120mm / 14.17x14.17x4.72in |
| Suitable Installation Thickness | Approx. 25x60mm / 0.98x2.36in |
| Fan Blades | 10 Blades |
| Lighting | 4 LED Light Bars |
| Cooling Method | Air |
| Item Weight | 7.06 pounds |
| Package Dimensions | 14.96 x 14.57 x 5.91 inches |

Figure 2: Diagram showing the dimensions of the RV Roof Vent Fan, measuring approximately 14.17 inches by 14.17 inches with a height of 4.72 inches.
Installation Guide
This section provides general guidance for installing your RV Roof Vent Fan. Professional installation is recommended for optimal safety and performance. Ensure the vehicle's power is disconnected before beginning installation.
- Prepare the Opening: Ensure your roof opening is approximately 280x280mm (11.02x11.02in). The fan is suitable for roof thicknesses between 25mm and 60mm (0.98in and 2.36in).
- Orient the Fan: As per safety precautions, the opening direction of the fan must be opposite to the forward direction of the vehicle. This prevents the fan cover from being lifted by airflow during high-speed driving.
- Position the Fan: Carefully place the fan unit into the prepared roof opening.
- Secure the Fan: Use appropriate fasteners (not included, typically screws and sealant) to secure the fan to the roof. Apply a suitable RV roof sealant around the perimeter of the fan to ensure a watertight seal.
- Connect Wiring: Connect the fan's 12V DC wiring to your vehicle's electrical system. Ensure correct polarity (positive to positive, negative to negative).
- Install Screw Plugs: Once the fan is securely mounted, insert the provided screw plugs into the designated holes to cover the mounting screws for a clean finish.
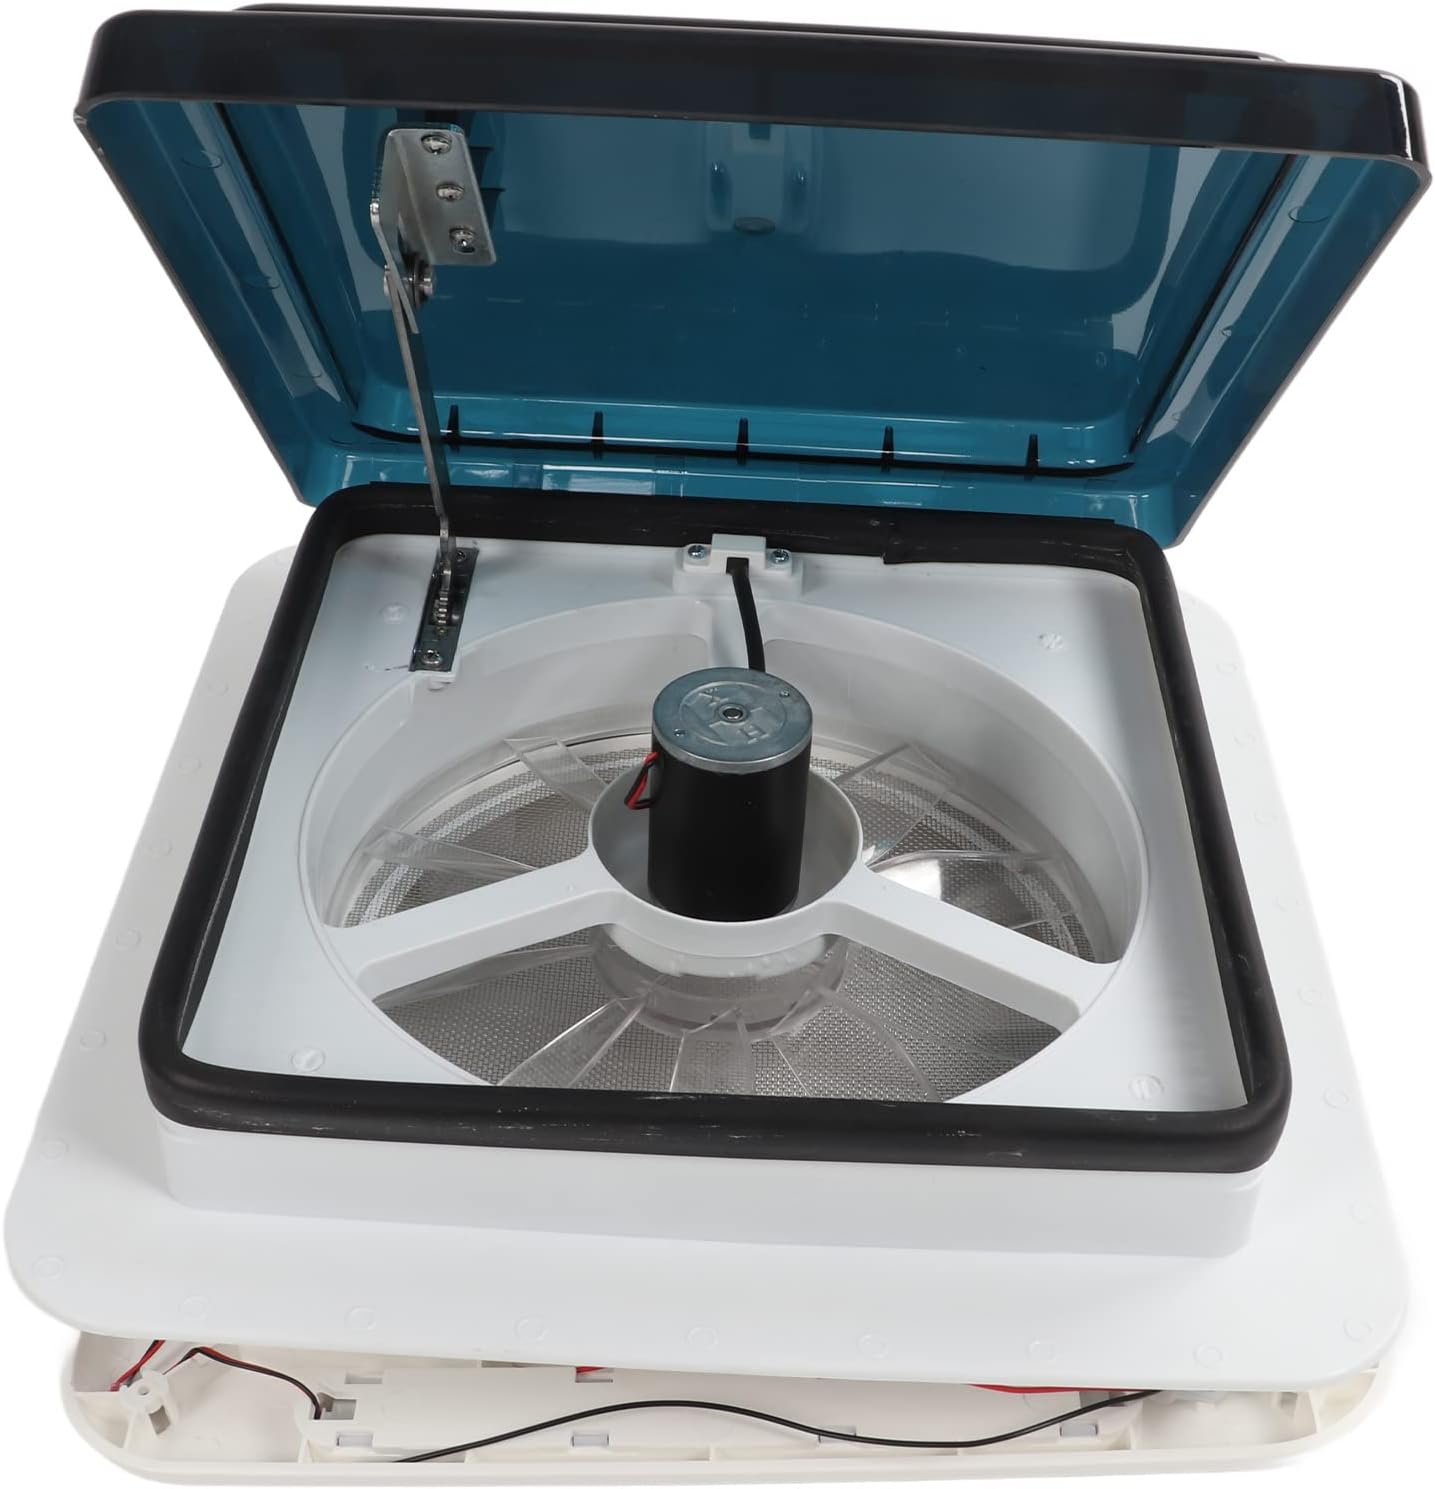
Figure 3: View of the RV Roof Vent Fan with its lid open, revealing the central motor and transparent fan blades, along with the protective mesh screen. This view is helpful for understanding internal components during installation or maintenance.

Figure 4: An image showing the RV Roof Vent Fan installed flush with the interior ceiling of a recreational vehicle, demonstrating its integrated appearance. A separate inset shows a side profile of the fan unit, highlighting its compact design.

Figure 5: An exploded or disassembled view of the RV Roof Vent Fan, illustrating its main components including the top cover, fan assembly with motor, and the base unit. This image provides insight into the fan's construction and assembly.
Operation
The Aramox RV Roof Vent Fan is designed for straightforward operation.
- Power On/Off: Locate the power switch on the fan unit. Press to turn the fan on or off.
- Dual Mode Switching: The fan features a "one-key switch" to toggle between air intake (blowing air into the vehicle) and air outlet (exhausting air from the vehicle). Press the designated button or switch to select the desired mode.
- LED Lighting: The fan is equipped with 4 LED light bars. There is a separate switch to control the LED lights, allowing them to be used independently of the fan function for interior illumination.

Figure 6: The RV Roof Vent Fan with its four integrated LED light bars fully illuminated, demonstrating its capability to provide interior lighting in addition to ventilation.

Figure 7: A top-down view of the RV Roof Vent Fan, clearly showing the control panel with switches for power and air direction (intake/outlet), along with the protective mesh over the fan blades and the four corner LED light strips.
Maintenance
Regular maintenance ensures the longevity and optimal performance of your RV Roof Vent Fan.
- Cleaning: Periodically clean the fan blades and the protective stainless steel net to remove dust, dirt, and debris. Use a soft cloth and mild detergent if necessary. Ensure the fan is turned off and disconnected from power before cleaning.
- Inspect for Obstructions: Regularly check the fan and vent opening for any obstructions (e.g., leaves, insects, bird nests) that could impede airflow or damage the fan.
- Check Wiring: Occasionally inspect the wiring connections for any signs of wear, corrosion, or looseness.
- Lubrication: The motor is designed for long-term operation and typically does not require lubrication. Refer to manufacturer guidelines if unusual noises occur.

Figure 8: A detailed close-up of the fan's pure copper core motor and the transparent fan blades, visible through the protective mesh. This view is useful for inspecting the fan's operational components during maintenance.
Troubleshooting
If you encounter issues with your RV Roof Vent Fan, refer to the following common problems and solutions:
| Problem | Possible Cause | Solution |
|---|---|---|
| Fan does not turn on. | No power supply; loose wiring connection; blown fuse. | Check vehicle's 12V power supply. Inspect wiring for secure connections. Check and replace any blown fuses in the circuit. |
| Fan operates but airflow is weak. | Obstructed fan blades or vent opening; incorrect mode selected. | Turn off and disconnect power. Clear any debris from fan blades or protective net. Ensure the correct intake/outlet mode is selected. |
| Fan makes unusual noise. | Debris caught in fan blades; loose mounting. | Turn off and disconnect power. Inspect and remove any debris from the fan blades. Check if the fan unit is securely mounted to the roof. |
| LED lights do not work. | LED switch off; wiring issue to lights. | Ensure the LED light switch is in the 'on' position. Check wiring connections specifically for the LED lights. |
Warranty and Support
For warranty information, technical support, or any inquiries regarding your Aramox RV Roof Vent Fan, please contact Aramox customer service through the retailer where the product was purchased or visit the official Aramox website. Please have your purchase details and product model information ready when contacting support.
Note: Damage resulting from improper installation, particularly regarding the fan's opening direction relative to vehicle movement, is not covered under warranty.