
Introduction
This manual provides detailed instructions for the safe installation, operation, and maintenance of your Maxxima 4-inch 5 CCT Ultra Thin Recessed LED Downlight. Please read all instructions carefully before installation and retain this manual for future reference.
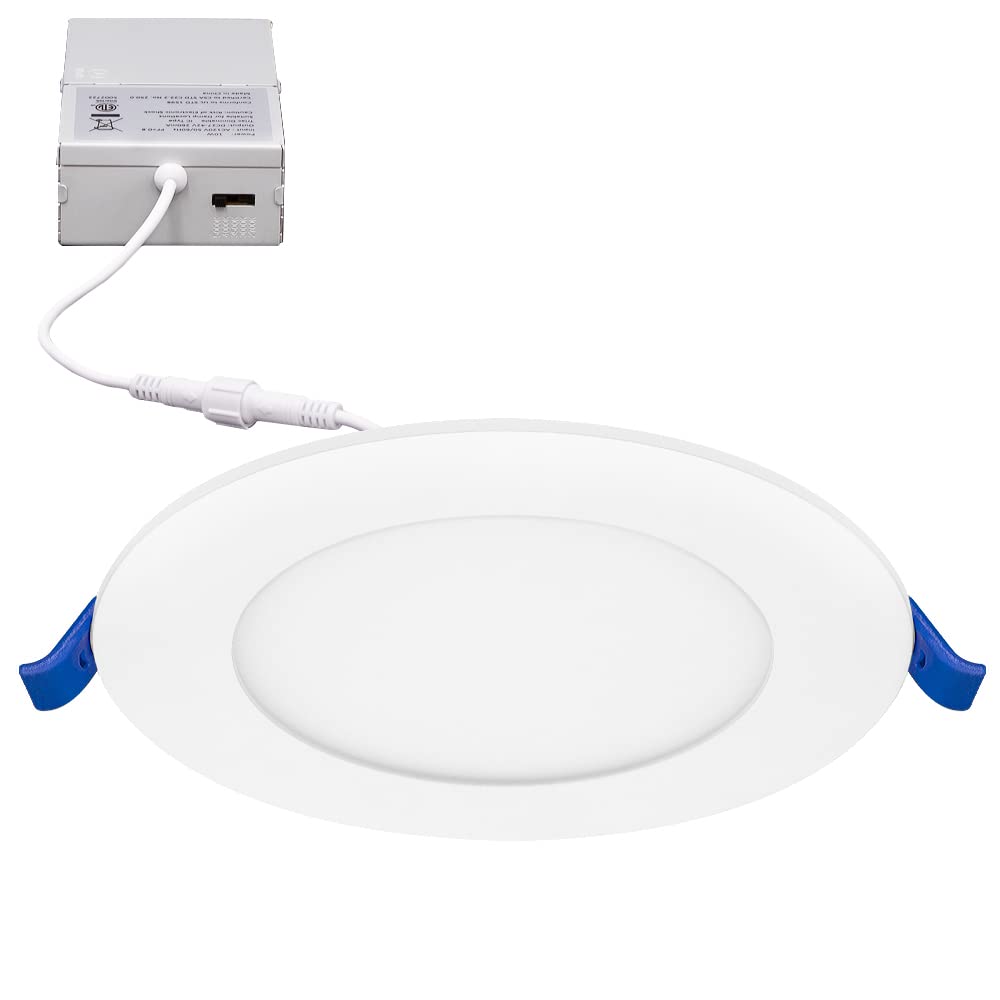
Image: Front view of the Maxxima 4-inch 5 CCT Ultra Thin Recessed LED Downlight.
Safety Information
To reduce the risk of fire, electric shock, or injury to persons, please observe the following safety precautions:
- Always turn off power at the circuit breaker before beginning installation or performing any maintenance.
- Ensure all electrical connections comply with local codes and ordinances, as well as the National Electric Code (NEC).
- If you are unsure about wiring, consult a qualified electrician.
- Do not install in locations where the operating temperature exceeds the fixture's rated temperature.
- This fixture is suitable for damp locations and is IC Rated, meaning it is safe for direct contact with insulation.
- Do not modify the fixture or use it for purposes other than its intended use.
Package Contents
Verify that all components are present before beginning installation:
- 1 x Maxxima 4 in. 5 CCT Ultra Thin Recessed LED Downlight
- 1 x Junction Box (J-Box) with integrated power supply
- Mounting Hardware
Specifications
| Feature | Specification |
|---|---|
| Model Number | MRL-S40905 |
| Size | 4 inch |
| Wattage | 10W (equivalent to 60W incandescent) |
| Lumen Output | 750 Lumens |
| Color Temperature (CCT) | Selectable: 2700K, 3000K, 3500K, 4000K, 5000K |
| Voltage | 120VAC |
| Dimmable | Yes (20% - 100% with compatible LED dimmer) |
| CRI | 82 |
| Material | Aluminum |
| Installation Type | Flush Mount, Canless |
| Certifications | IC Rated, ETL Listed |
| Junction Box Dimensions | 1.4” H x 2.7” W x 4.11” D |
| Fixture Dimensions | 4.8” Diameter x 0.87” Thickness |
Setup and Installation
Follow these steps for proper installation:
- Turn Off Power: Before starting any electrical work, ensure the power supply to the installation area is turned off at the circuit breaker.
- Prepare Ceiling Opening: Cut a 4-inch diameter hole in the ceiling at the desired location. Ensure there are no obstructions such as joists or pipes.
- Connect Wiring: Open the junction box cover. Connect the supply wires to the wires inside the junction box using the provided wire nuts:
- Connect the black wire from the supply to the black wire of the J-Box.
- Connect the white wire from the supply to the white wire of the J-Box.
- Connect the ground wire from the supply to the green wire of the J-Box.
- Select Color Temperature (CCT): Before inserting the light into the ceiling, locate the CCT selection switch on the side of the junction box. Choose your desired color temperature (2700K, 3000K, 3500K, 4000K, or 5000K) by sliding the switch.
- Insert Junction Box: Place the wired junction box into the ceiling opening.
- Install Downlight: Connect the downlight to the junction box via the male/female connector. Push the spring clips on the sides of the downlight upwards and insert the fixture into the ceiling hole. The clips will automatically secure the light in place.
- Restore Power: Turn the power back on at the circuit breaker.

Image: The LED downlight connected to its junction box.

Image: Close-up view of the CCT selection switch located on the side of the junction box.

Image: Side view of the downlight showing the tension spring clips used for installation.
Operating Instructions
Color Temperature Selection
The Maxxima 4-inch LED Downlight features 5 CCT (Correlated Color Temperature) options, allowing you to customize the light output to your preference. The selection switch is located on the side of the junction box.
- 2700K: Soft White (Warm, inviting light)
- 3000K: Warm White (Slightly brighter, still warm)
- 3500K: Bright White (Neutral, balanced light)
- 4000K: Neutral White (Cooler, more energetic light)
- 5000K: Daylight (Brightest, closest to natural daylight)
To change the CCT, you must access the junction box. It is recommended to select your preferred CCT before final installation into the ceiling. If changing after installation, ensure power is off before accessing the J-Box.

Image: Visual representation of the five selectable color temperatures.
Dimming Functionality
This LED downlight is dimmable from 20% to 100% when used with a compatible LED dimmer switch. Ensure your dimmer switch is rated for LED lighting to prevent flickering or damage to the fixture.
Maintenance
The Maxxima LED Downlight requires minimal maintenance.
- Cleaning: Ensure power is off before cleaning. Wipe the fixture with a soft, dry, or slightly damp cloth. Do not use abrasive cleaners or solvents, as they may damage the finish or electrical components.
- No User-Serviceable Parts: The LED light source is integrated and not replaceable. Do not attempt to open or repair the fixture.
Troubleshooting
If you encounter issues with your downlight, refer to the following table:
| Problem | Possible Cause | Solution |
|---|---|---|
| Light does not turn on | No power supply Loose wiring connection Faulty switch or circuit breaker | Check circuit breaker and wall switch. Ensure all wiring connections are secure. Test with a known working fixture or consult an electrician. |
| Light flickers or dims improperly | Incompatible dimmer switch Loose wiring | Ensure an LED-compatible dimmer is used. Check wiring connections. |
| Incorrect color temperature | CCT switch set incorrectly | Turn off power, access the junction box, and adjust the CCT selection switch to the desired setting. |
Warranty
This Maxxima LED Downlight is covered by a 3-year warranty from the date of purchase. This warranty covers defects in materials and workmanship under normal use. For warranty claims or further details, please contact Maxxima customer support.
Customer Support
For technical assistance, troubleshooting, or warranty inquiries, please contact Maxxima customer support. Refer to the product packaging or the official Maxxima website for current contact information.
Please have your model number (MRL-S40905) and date of purchase available when contacting support.


