
1. Introduction
Thank you for choosing the ZOOI 9-in-1 Multitool Pen Set. This versatile tool combines nine essential functions into a compact and durable design, ideal for various tasks. This manual provides detailed instructions for the proper setup, operation, and maintenance of your multitool pen to ensure optimal performance and longevity.

Image 1.1: ZOOI 9-in-1 Multitool Pen Set, showing the black and yellow pens alongside their packaging.
2. Product Overview
The ZOOI 9-in-1 Multitool Pen is crafted from durable aluminum and brass, offering a robust solution for everyday needs. Each pen integrates the following nine functions:
- Retractable Ballpoint Pen
- LED Light (Flashlight)
- Flat Head Screwdriver
- Phillips Screwdriver
- Stylus Pen
- Ruler (Centimeter and Inch)
- Bottle Opener
- Bubble Level
Package Contents:
- 2 x ZOOI Multitool Pens (one black, one yellow)
- 6 x Ink Refills (black ink)
- 6 x LR41 Batteries (pre-installed or extra for LED light)
- 1 x Gift Box
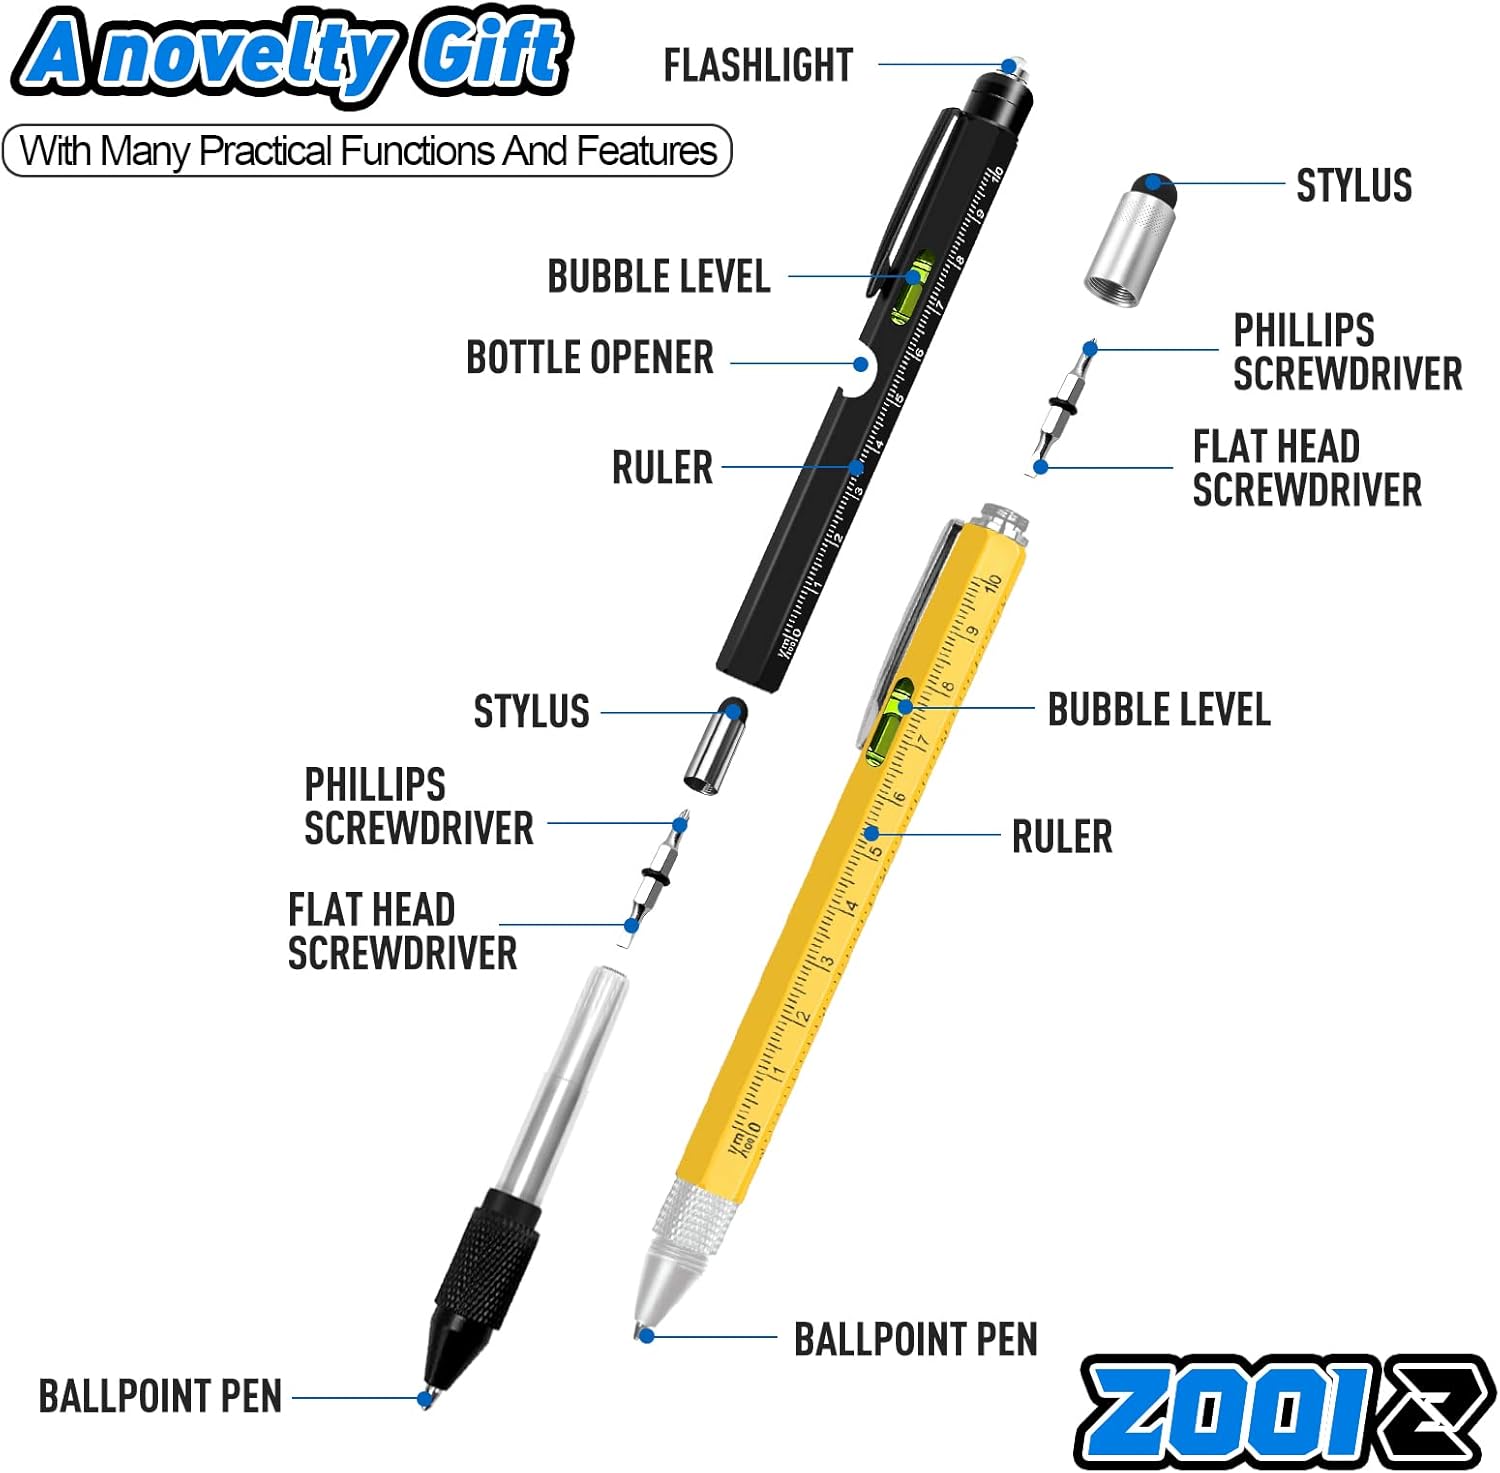
Image 2.1: Exploded view illustrating the various components and functions of the multitool pen, including the stylus, screwdrivers, bubble level, ruler, bottle opener, LED light, and ballpoint pen.
3. Setup
Your ZOOI Multitool Pen is designed for immediate use. Follow these steps for initial preparation:
- Unpacking: Carefully remove the pens and accessories from the gift box.
- Ink Cartridge: The ballpoint pen ink cartridge is typically ready for use. Remove any protective wax or plastic tip if present.
- LED Light Activation: The LED light is powered by LR41 batteries. These batteries are usually pre-installed. To activate the light, twist the top section of the pen (where the LED is located) clockwise until the light illuminates. Twist counter-clockwise to turn it off.
4. Operating Instructions
Each function of the ZOOI Multitool Pen is designed for ease of use:
4.1. Ballpoint Pen
To use the ballpoint pen, twist the lower knurled section of the pen clockwise to extend the pen tip. Twist counter-clockwise to retract it when not in use.

Image 4.1: A person using the ballpoint pen function to take notes while working on an engine.
4.2. Stylus Pen
The soft rubber tip on the opposite end of the ballpoint pen functions as a stylus. It is compatible with all capacitive touch screen devices, allowing for precise navigation and preventing smudges.
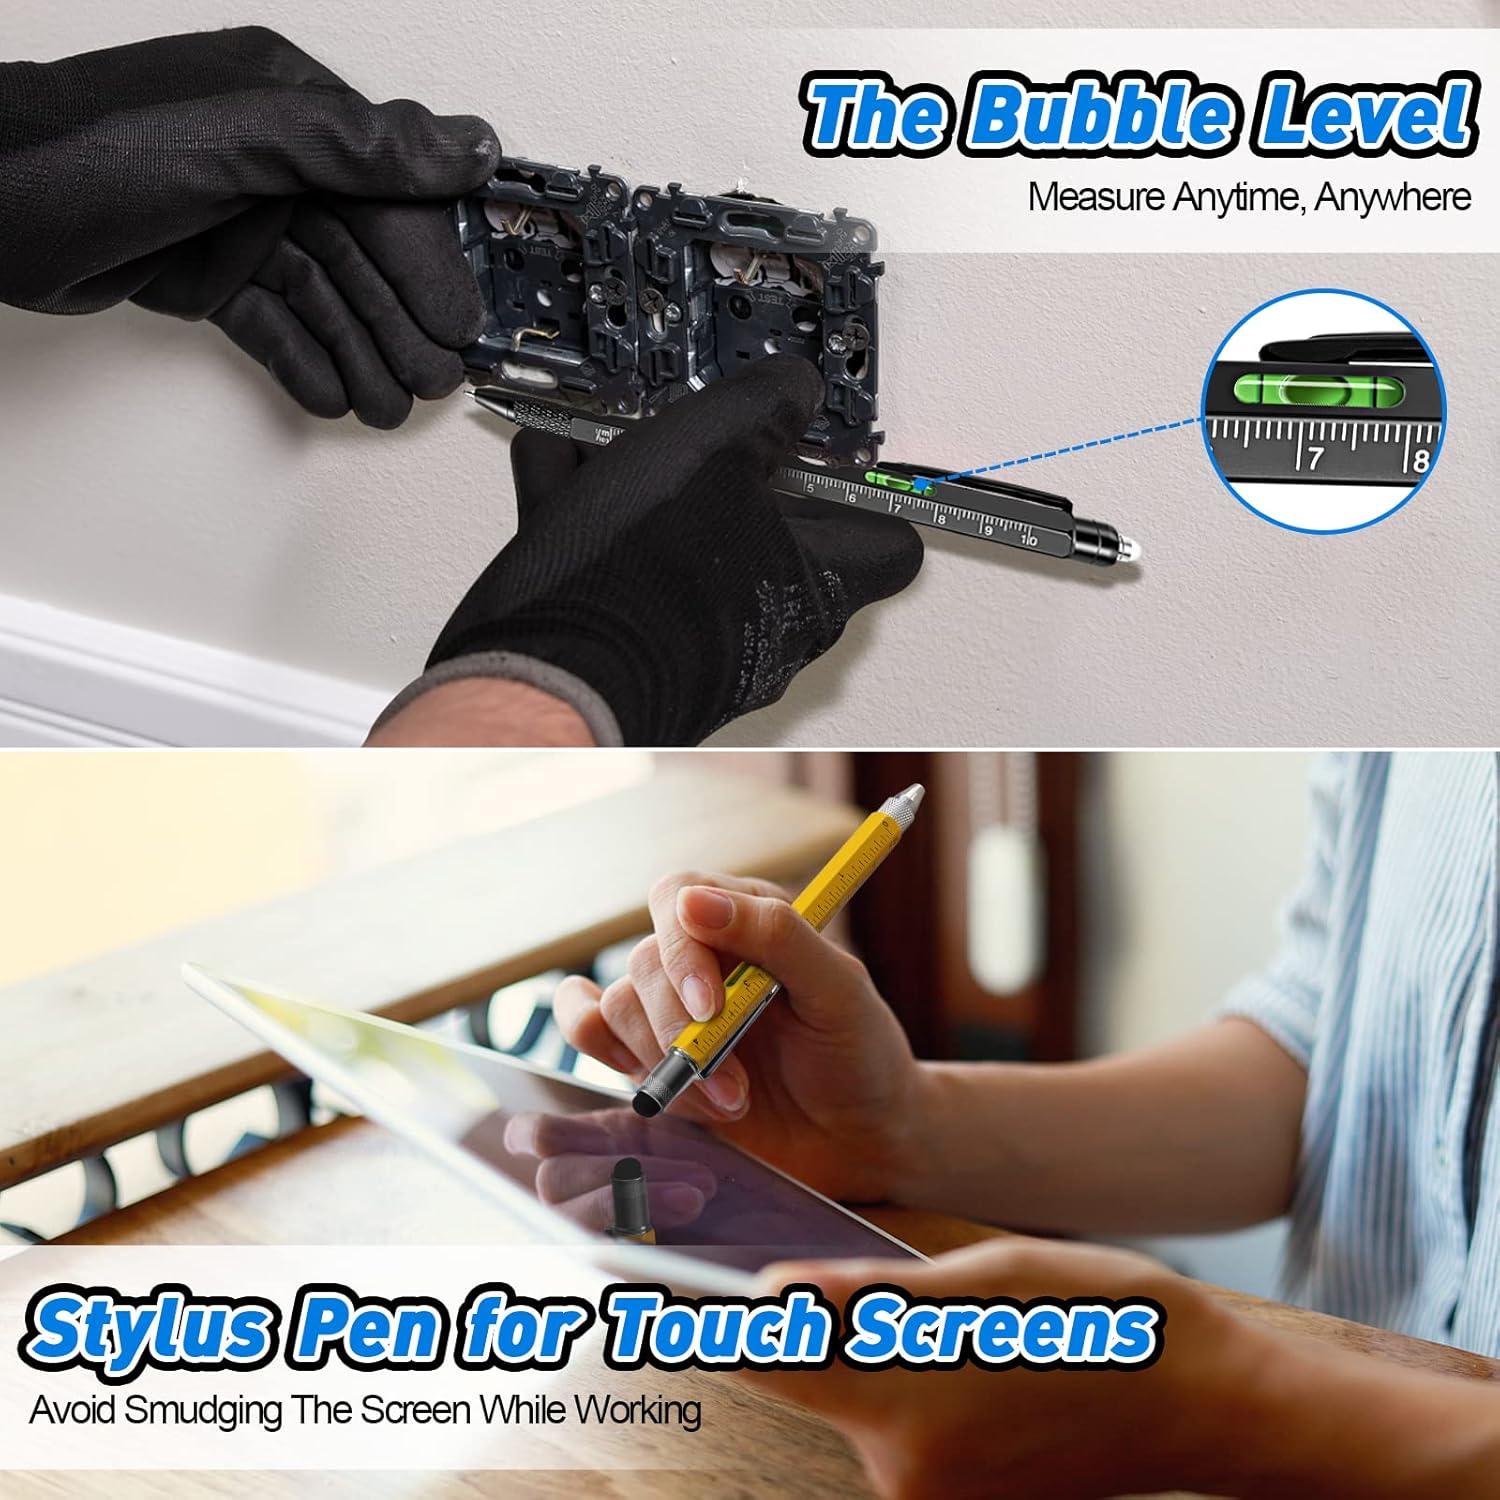
Image 4.2: A hand using the stylus tip of the multitool pen on a tablet screen.
4.3. LED Light (Flashlight)
The LED light is located at the top end of the pen. To turn it on, twist the top section clockwise. Twist counter-clockwise to turn it off. This feature is useful for illuminating dark or confined spaces.

Image 4.3: A person utilizing the integrated LED light to inspect a dimly lit area under a vehicle.
4.4. Flat Head & Phillips Screwdrivers
The screwdriver bits are located under the stylus cap. Gently pull off the stylus cap to reveal the dual-ended screwdriver bit. One end is a flat head, and the other is a Phillips head. Pull out the bit, flip it to the desired head, and reinsert it firmly into the pen body for use.
4.5. Bubble Level
The bubble level is integrated into the side of the pen body. Place the pen on the surface you wish to check for levelness. The bubble in the vial will indicate if the surface is horizontal or vertical.

Image 4.4: The multitool pen being used to check the level of an electrical outlet on a wall.
4.6. Ruler
The pen body features both centimeter and inch markings, allowing for quick measurements. Simply place the pen alongside the object you need to measure.

Image 4.5: A hand using the integrated ruler on the pen to measure the length of a bolt.
4.7. Bottle Opener
The bottle opener is integrated into the pen's clip. Position the opener under the bottle cap and apply upward pressure to remove the cap.
5. Maintenance
Proper maintenance ensures the longevity and functionality of your multitool pen.
5.1. Replacing Ink Refills
When the ink runs out, replace the cartridge with one of the provided refills:
- Unscrew the lower knurled section of the pen to separate the pen tip from the body.
- Carefully remove the empty ink cartridge.
- Insert a new ink refill into the pen body.
- Screw the lower section back onto the pen body until secure.

Image 5.1: Two multitool pens in use, with a circular inset showing six extra ink refills.
5.2. Replacing LED Batteries
If the LED light dims or stops working, the LR41 batteries may need replacement:
- Unscrew the top section of the pen where the LED light is located.
- Carefully remove the old LR41 batteries. Note their orientation.
- Insert new LR41 batteries with the correct polarity.
- Screw the top section back onto the pen body until secure.
Note: Dispose of used batteries responsibly according to local regulations.
6. Troubleshooting
- Pen not writing: Check if the ink cartridge is properly inserted. Ensure any protective tip has been removed. If the ink is dry, replace the ink refill.
- LED light not working: Ensure the top section is twisted fully clockwise. Check if the LR41 batteries are correctly installed and not depleted. Replace batteries if necessary.
- Screwdriver bit loose: Ensure the screwdriver bit is fully inserted into the pen body.
7. Specifications

Image 7.1: Visual representation of the multitool pen dimensions and included accessories.
| Feature | Detail |
|---|---|
| Model Number | JP-2P |
| Material | Aluminum, Brass |
| Functions | 9-in-1 (Ballpoint Pen, LED Light, Flat Head Screwdriver, Phillips Screwdriver, Stylus Pen, Ruler, Bottle Opener, Bubble Level) |
| Pen Length (Black) | 7.28 inches |
| Pen Length (Yellow) | 6.5 inches |
| Pen Diameter | 0.39 inches |
| Item Weight (per pen) | Approximately 1.6 ounces (0.045 kg) |
| Battery Type | LR41 (Lithium) |
| Batteries Included | Yes (6 LR41 batteries) |
| Ink Color | Black |
8. Warranty and Support
ZOOI products are manufactured with quality and customer satisfaction in mind. For any questions, concerns, or support needs regarding your 9-in-1 Multitool Pen Set, please contact ZOOI customer service through the retailer's platform or the official ZOOI website. Please retain your proof of purchase for warranty claims.


