1. Product Overview
The Monport 50W Fiber Laser Engraver is a precision marking and etching machine designed for various metal materials. It features a 50W Raycus fiber laser source, a 7.9" x 7.9" workbed, and compatibility with Lightburn software. This manual provides essential information for setup, operation, maintenance, and troubleshooting to ensure safe and efficient use of your laser engraver.

Figure 1: Monport 50W Fiber Laser Engraver with its control unit.
Key Features:
- 50W Raycus Fiber Laser Source: Estimated lifetime of up to 100,000 hours, capable of marking most metals including stainless steel, gold, silver, and brass. Laser class: Class 4, Power output: 50000mW.
- Configuration Upgrade: Includes two cooling fans for improved heat dissipation and an integrated power supply for enhanced stability. Features a simplified single power button and an added panic button for safety.
- Advanced Workspace: Built-in workspace grid with removable positioning bars for precise material placement. Supports optional rotary axis (not included) for marking curved surfaces.
- Easy Operation: Designed for direct use upon receipt, with a manual handle for convenience and improved overall shell material quality.
- Additional Laser Guidance: External red dot locator for quick and accurate laser focus setup.
- Manual Focus: Focus-height wheel and vertical supporting tower with ruler for convenient focus height measurements on various materials.
2. Setup Instructions
2.1 Unpacking and Inspection
Carefully unpack all components from the shipping box. Verify that all items listed in the packing list are present and undamaged. Report any discrepancies or damage to Monport customer support immediately.
2.2 Component Identification
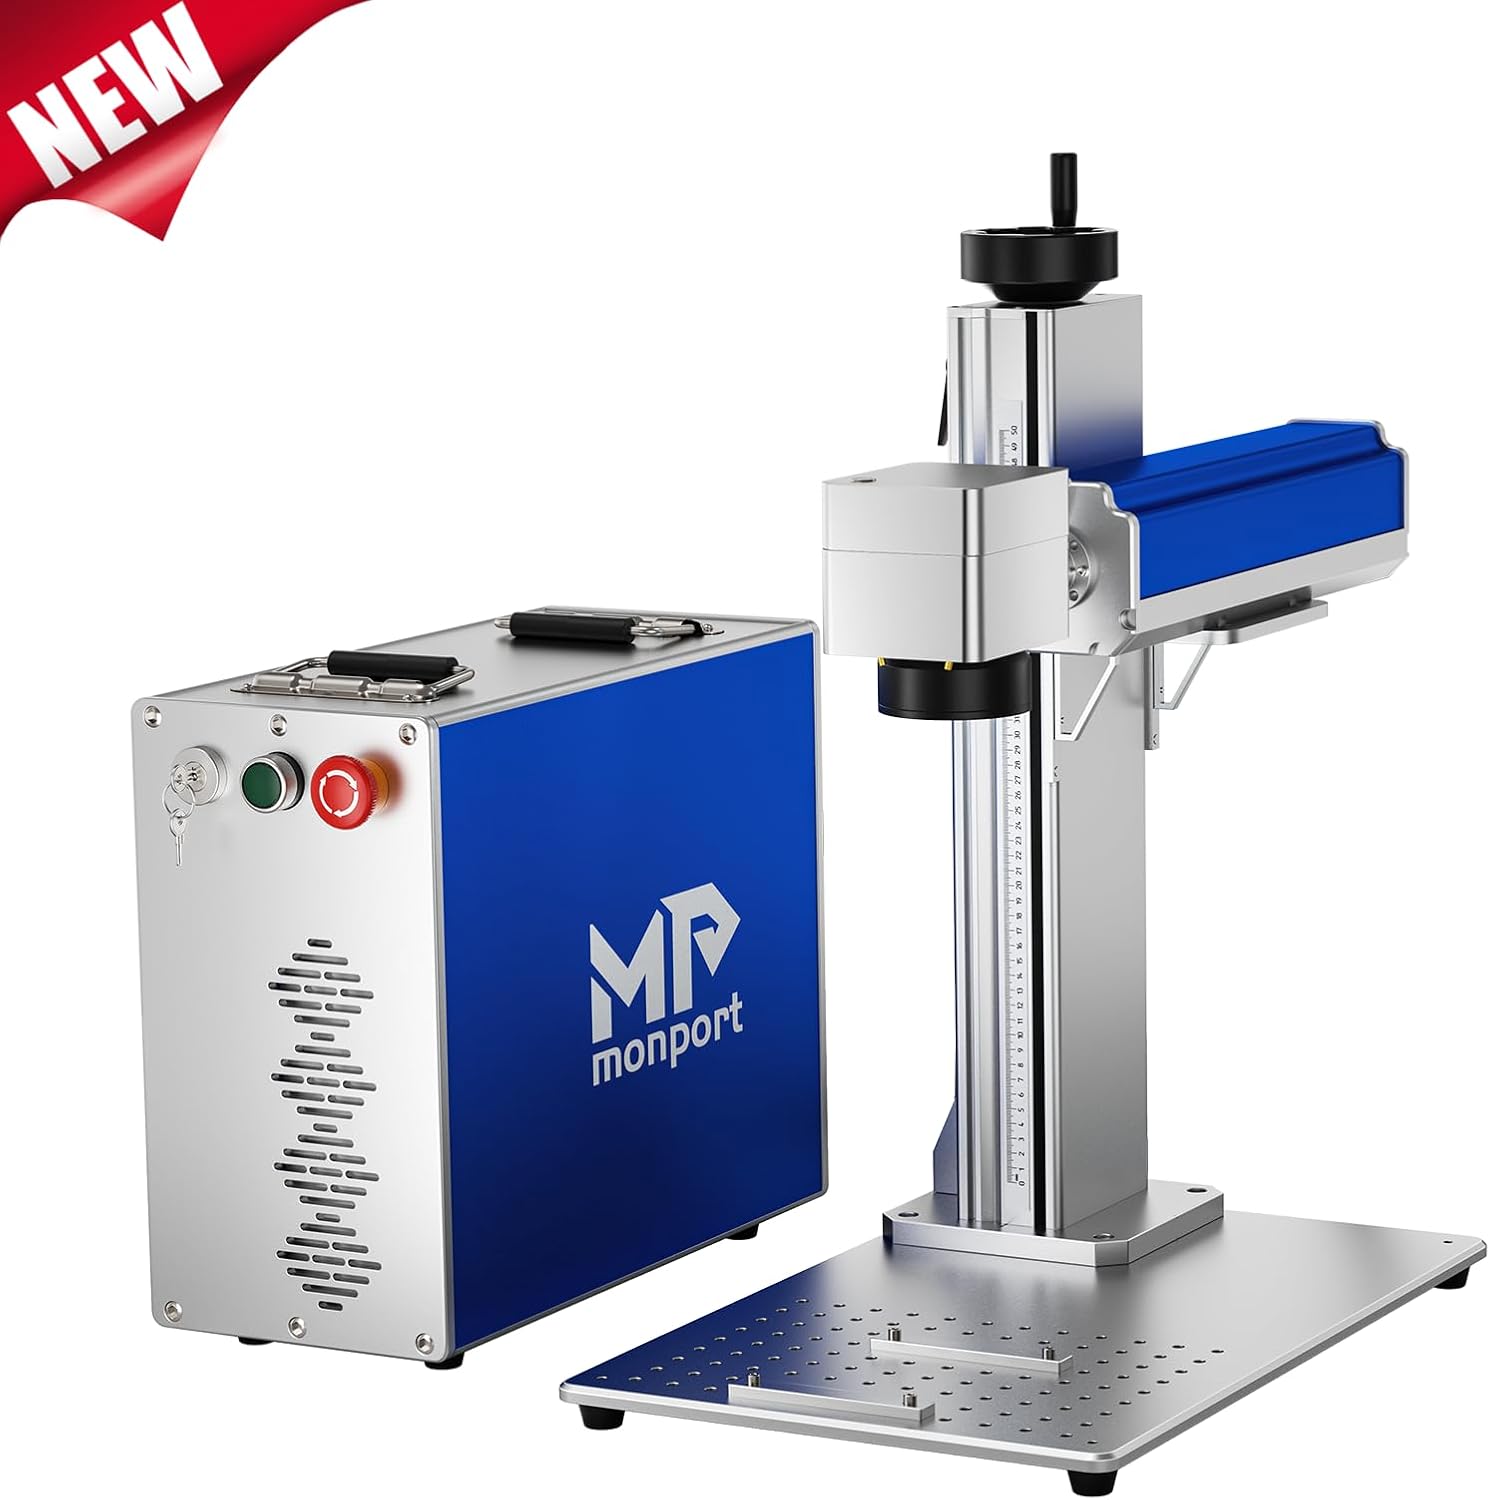
Figure 2: Key components of the fiber laser marking machine, including the GALVO-TECH System, Height Adjustment Knob, Field Lens, Fiber Optic Transmission Line, Scalepate, Worktable, Handle, and Power Button.
- Laser Head (Galvo Scanner): Contains the scanning mirrors and focusing lens.
- Control Unit: Houses the laser source, power supply, and control buttons.
- Vertical Support Tower: Provides height adjustment for the laser head.
- Workbed: The platform where materials are placed for engraving.
- Fiber Optic Cable: Connects the laser source in the control unit to the laser head.
- Power Cable: For connecting the control unit to a power outlet.
2.3 Assembly
- Place the vertical support tower onto the workbed and secure it using the provided screws.
- Attach the laser head (galvo scanner) to the vertical support tower.
- Connect the fiber optic cable from the control unit to the laser head. Ensure a secure connection.
- Connect the power cable to the control unit and then to a grounded electrical outlet.
- Ensure all connections are firm and secure before proceeding.
2.4 Software Installation (Lightburn)
The Monport 50W Fiber Laser Engraver is compatible with Lightburn software. Refer to the separate Lightburn installation guide provided with your machine or available on the Monport website for detailed instructions. Ensure you have the latest version of Lightburn that supports BSL lasers.

Figure 3: The Monport fiber laser machine is compatible with various computer systems, including MacOS and Windows versions 7, 8, 10, and 11.
3. Operating Instructions
3.1 Powering On and Safety Features
Before powering on, ensure the work area is clear and appropriate safety eyewear is worn. The machine features an upgraded button design for enhanced safety.

Figure 4: The control panel with Key Switch, Power Button, and Emergency Button.
- Insert and turn the Key Switch to the ON position. This boosts security with an additional lock.
- Press the Power Button to turn on the machine.
- In case of an emergency, press the large red Emergency Button to immediately shut off the machine.
3.2 Focusing the Laser
Accurate focusing is crucial for optimal engraving results. Use the manual focus wheel and the red dot guidance system.

Figure 5: Manual focus adjustment using the focus-height wheel and the integrated ruler.
- Place your material on the workbed.
- Activate the red dot pointer in your software (if available) or manually.
- Rotate the focus-height wheel to adjust the height of the laser head.
- Observe the two red dots projected onto your material. When they converge into a single, sharp dot, the laser is in focus.
- The vertical supporting tower is equipped with a ruler for convenient height measurements, allowing you to record optimal focus settings for different materials.
3.3 Preparing Your Design and Engraving
Use Lightburn software to create or import your designs. The machine supports a wide range of applications.

Figure 6: Examples of materials and items that can be engraved, such as keyboards, various metals, electronic equipment, circuitry, and jewelry.
- Open Lightburn and load your design.
- Adjust laser parameters (power, speed, frequency) according to your material and desired effect. Refer to material testing guides for recommended settings.
- Position your material on the workbed, utilizing the built-in grid and removable positioning bars for precise alignment.
- Use the "Frame" function in Lightburn to preview the engraving area with the red dot pointer before starting the job.
- Initiate the engraving process from Lightburn.
3.4 Official Product Video
Video 1: An official Monport video demonstrating the features and operation of the fiber laser marking machine. This video highlights the machine's components, laser focusing process, and various engraving applications on different materials.
4. Maintenance
Regular maintenance ensures the longevity and optimal performance of your Monport Fiber Laser Engraver.
- Lens Cleaning: Periodically inspect and clean the focusing lens and protective window using lens cleaning solution and wipes designed for optical components. Dust and debris can degrade laser performance.
- Cooling System: Ensure the cooling fans on the control unit are free from dust and obstructions to maintain proper heat dissipation.
- Workbed Cleaning: Keep the workbed clean from debris and residue to ensure stable material placement and prevent interference with the laser path.
- Cable Inspection: Regularly check all cables, especially the fiber optic cable, for any signs of wear, damage, or loose connections.
5. Troubleshooting
This section addresses common issues you might encounter with your laser engraver.
| Problem | Possible Cause | Solution |
|---|---|---|
| Laser not firing |
|
|
| Poor engraving quality / Weak laser output |
|
|
| Machine not recognized by computer |
|
|
If the issue persists after attempting these solutions, please contact Monport customer support for further assistance.
6. Specifications
| Feature | Detail |
|---|---|
| Brand | Monport |
| Model Number | CFCG521 |
| Laser Source | 50W Raycus Fiber Laser |
| Laser Class | Class 4 |
| Workbed Area | 7.9"L x 7.9"W (200mm x 200mm) |
| Material Compatibility | Stainless Steel, Brass, Gold, Silver, and most metals |
| Operation Mode | Manual |
| Power Source | AC |
| Included Components | 50W Fiber Laser Engraver + Lightburn |
7. Warranty and Support
Monport products typically come with a manufacturer's warranty. For specific warranty details, registration, and technical support, please refer to the official Monport website or contact their customer service directly. Keep your purchase receipt as proof of purchase.
Monport Customer Service:
- Visit the Monport Store on Amazon for FAQs and contact information.
- Refer to the documentation included with your product for direct support contacts.


