prunus J-199
PRUNUS J-199 Retro Radio User Manual
Model: J-199
1. Introduction
Thank you for purchasing the PRUNUS J-199 Retro Radio. This manual provides detailed instructions for the setup, operation, and maintenance of your new radio. Please read this manual thoroughly before using the product to ensure proper function and longevity.

Figure 1.1: Front view of the PRUNUS J-199 Retro Radio, showcasing its classic wooden design and control panel.
2. Product Overview
2.1 Key Features
- Multi-band Radio: Supports AM, FM, and SW frequencies for wide station reception.
- Bluetooth Connectivity: Seamlessly connect to your smart devices for wireless audio streaming.
- Multiple Playback Options: Includes support for TF card, USB disk, and AUX input.
- Voice Recording Function: Record audio directly onto a TF card or USB disk.
- Three Power Supply Methods: Operates via AC power, rechargeable battery, or D-type batteries.
- High-Quality Audio: Built-in 10W magnetic speaker delivers clear and balanced sound.
2.2 Package Contents
Upon opening the package, please verify that all items listed below are present and in good condition:
- PRUNUS J-199 Retro Radio Unit
- AC Power Cable
- Rechargeable Batteries (pre-installed or separate, refer to packaging)
- User Manual (this document)

Figure 2.1: Contents of the PRUNUS J-199 package, showing the radio, power cable, and manual.
2.3 Product Dimensions and Weight
- Dimensions (L x W x H): 35 cm x 19 cm x 27 cm (approximately 13.8 in x 7.5 in x 10.6 in)
- Weight: 2.25 kg (approximately 4.96 lbs)
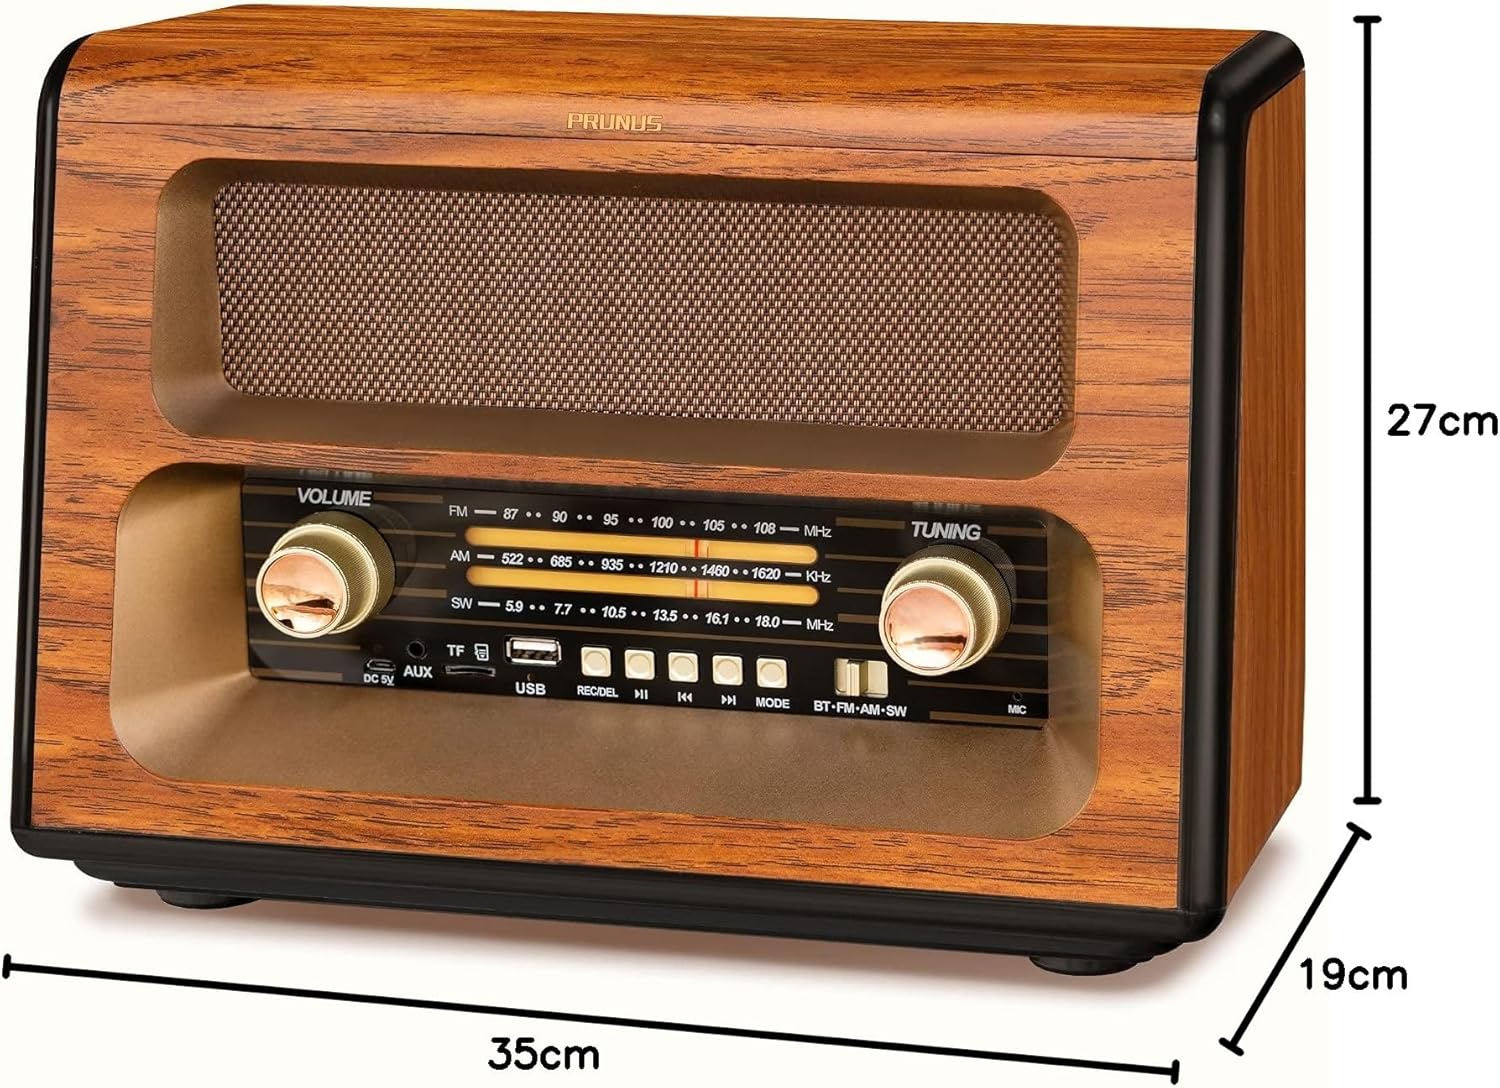
Figure 2.2: Dimensions of the PRUNUS J-199 Retro Radio.
3. Setup
3.1 Power Supply Options
The PRUNUS J-199 radio offers three convenient ways to power the device:
- AC Power: For continuous use indoors, connect the provided AC power cable to the radio's DC 5V input port and plug it into a standard wall outlet.
- Rechargeable Batteries: The radio comes with rechargeable batteries. Ensure they are properly inserted into the battery compartment. These batteries will charge automatically when the radio is connected to AC power.
- D-Type Batteries: For portable use or during power outages, the radio can be powered by two D-type batteries (not included). Open the battery compartment on the back of the unit and insert the batteries, observing the correct polarity (+/-).
Important Note: When using AC power, it is recommended to remove any D-type batteries to avoid potential interference with signal reception.

Figure 3.1: Illustration of the three power supply methods for the radio.
3.2 Antenna Adjustment
For optimal radio reception, extend the telescopic antenna fully and rotate it for the best signal clarity. The 360-degree rotary antenna allows for precise adjustment.

Figure 3.2: Extending the antenna for improved reception.
4. Operating Instructions
4.1 Basic Operation
- Power On/Off: Rotate the VOLUME knob clockwise to turn the radio on. Continue rotating to increase volume. Rotate counter-clockwise until it clicks to turn off.
- Volume Control: Adjust the VOLUME knob to your desired listening level.
- Mode Selection: Press the MODE button to cycle through available modes: Bluetooth, FM, AM, SW, TF Card, USB Disk, and AUX.

Figure 4.1: Adjusting the volume and power.

Figure 4.2: Detailed view of the control panel.
4.2 Radio Function (AM/FM/SW)
- Select the desired band (FM, AM, or SW) using the MODE button or dedicated band switch.
- Rotate the TUNING knob to scan for radio stations. The frequency display will indicate the current tuning.
- Adjust the antenna for optimal signal clarity.
4.3 Bluetooth Mode
- Switch the radio to Bluetooth mode. The radio will indicate it is ready for pairing (e.g., a voice prompt or flashing indicator).
- On your mobile device, enable Bluetooth and search for "PRUNUS J-199" or a similar device name.
- Select the radio from the list to pair. Once paired, you can stream audio wirelessly from your device.
4.4 TF Card / USB Disk Playback
- Insert a TF card into the TF slot or a USB disk into the USB port.
- Switch the radio to TF Card or USB Disk mode using the MODE button.
- The radio will automatically begin playing audio files (MP3, WAV, etc.) from the storage device.
- Use the PREV/NEXT buttons to skip tracks and PLAY/PAUSE to control playback.
4.5 Voice Recording
- Ensure a TF card or USB disk is inserted.
- Press the REC button to start recording. The radio will record ambient sound through its built-in microphone.
- Press REC again to stop and save the recording. Recordings are typically saved in a dedicated folder on the storage device.
4.6 AUX Input
- Connect an external audio device (e.g., smartphone, MP3 player) to the radio's AUX input port using a 3.5mm audio cable (not included).
- Switch the radio to AUX mode using the MODE button.
- Audio from the connected device will now play through the radio's speaker. Control playback from your external device.
5. Maintenance
5.1 Cleaning
- Always turn off and unplug the radio before cleaning.
- Wipe the exterior with a soft, dry cloth. For stubborn marks, a slightly damp cloth can be used, followed by a dry cloth.
- Do not use abrasive cleaners, waxes, or solvents as they may damage the finish.
5.2 Battery Care
- If using D-type batteries, remove them if the radio will not be used for an extended period to prevent leakage.
- For rechargeable batteries, ensure they are fully charged periodically, even if not in frequent use, to maintain battery health.
5.3 Storage
- Store the radio in a cool, dry place away from direct sunlight and extreme temperatures.
- Avoid storing in areas with high humidity or dust.
6. Troubleshooting
| Problem | Possible Cause | Solution |
|---|---|---|
| No power / Radio does not turn on. |
|
|
| Poor radio reception / Static. |
|
|
| Bluetooth not connecting. |
|
|
| TF card/USB disk not playing. |
|
|
7. Specifications
| Feature | Detail |
|---|---|
| Brand | PRUNUS |
| Model | J-199 |
| Product Dimensions | 35L x 19W x 27H centimetres |
| Weight | 2.25 kg |
| Radio Bands Supported | FM (87-108MHz), AM (522-1620KHz), SW (5.9-18.0MHz) |
| Speaker Output | 10W Magnetic Speaker |
| Connectivity Technology | Bluetooth 5.0, Auxiliary (3.5mm), USB, TF Card |
| Power Source | AC Powered, Rechargeable Battery, D-type Batteries (x2, not included) |
| Special Feature | Portable, Voice Recording |
| Colour | Gold |
| Manufacturer | prunus |
8. Warranty and Support
For information regarding warranty coverage, technical support, or service inquiries, please refer to the warranty card included with your product or contact PRUNUS customer service directly. Contact details can typically be found on the manufacturer's official website or on the product packaging.
Please retain your purchase receipt as proof of purchase for any warranty claims.
Related Documents - J-199
 |
PRUNUS J-110 Radio/Bluetooth Speaker/MP3 Player User Manual User manual for the PRUNUS J-110 portable radio, Bluetooth speaker, and MP3 player. Covers maintenance, power options (AC, battery, rechargeable), radio reception, music playback (Bluetooth, USB, TF, AUX), and remote control operation. |
 |
PRUNUS J-160BT Radio/Bluetooth Speaker/MP3 Player User Manual User manual for the PRUNUS J-160BT portable radio, Bluetooth speaker, and MP3 player. Provides instructions on maintenance, functional components, power supply, radio reception, and music playback modes. |
 |
PRUNUS J-150 BTS Portable Solar Radio and Bluetooth Speaker User Manual This user manual provides comprehensive instructions for the PRUNUS J-150 BTS portable solar radio, Bluetooth speaker, and MP3 player. It covers product features, power supply options (USB, solar, battery), radio reception tips, music playback via Bluetooth, USB, and TF card, TWS function, frequently asked questions, and after-sale service information. |
 |
PRUNUS J-180 Retro Radio User Manual - Bluetooth, FM/AM/SW Player Comprehensive user manual for the PRUNUS J-180 retro radio. Learn about its features, specifications, operation, Bluetooth connectivity, USB/TF card playback, AUX input, and troubleshooting tips. |
 |
PRUNUS J-177 Retro Clock Radio User Manual - Operation and Features Comprehensive user manual for the PRUNUS J-177 Retro Clock Radio. Learn how to set up, operate, and use all features including Bluetooth, FM radio, alarm, time setting, and media playback. Includes product specifications and troubleshooting tips. |
 |
PRUNUS J-429 Radio User Manual User manual for the PRUNUS J-429 portable radio, detailing its features, operation, maintenance, and troubleshooting for FM, MW, and SW bands, as well as MP3 playback via USB and TF card. |
Ask a question about this manual
Ask about setup, troubleshooting, compatibility, parts, safety, or missing instructions. Manuals+ will review the question and use this page’s manual context to help answer it.