1. Product Overview
The FSCEPIXI Wall Mount Tub Faucet with Extra Long Tub Spout is designed for modern bathrooms, offering both functionality and aesthetic appeal. This single-handle tub filler features a durable brass rough-in valve and a matte black finish, ensuring longevity and resistance to corrosion and leaks. Its 10-inch extra-long spout provides ample reach and can be rotated 180 degrees for convenience, allowing it to be folded up when not in use. The faucet delivers a flow rate of 2.2 GPM at 60 PSI, efficiently filling bathtubs while adhering to water conservation standards. It is suitable for various applications including lavatory basins, vanity vessel sinks, RVs, and bathtubs.

Image 1.1: The FSCEPIXI Wall Mount Tub Faucet in Matte Black, demonstrating water flow.
2. Specifications
| Feature | Detail |
|---|---|
| Brand | FSCEPIXI |
| Model Name | SHBF-B02 |
| Mounting Type | Wall Mount |
| Finish Type | Matte Black |
| Material | Solid Brass |
| Number of Handles | 1 |
| Spout Reach | 10 Inches (approx. 25.4 cm) |
| Flow Rate | 2.2 GPM at 60 PSI |
| Connection Type | 1/2 NPT (U.S. Standard) |
| Special Feature | 180° Swivel Spout |
| Product Dimensions | 10.9"D x 4.3"W x 4.3"H (approx. 27.7cm D x 10.9cm W x 10.9cm H) |
| Item Weight | 3.67 pounds (approx. 1.66 kg) |

Image 2.1: Detailed dimensions of the faucet components in millimeters and inches.
3. Package Contents
Please verify that all components are present before beginning installation. The package for your FSCEPIXI Wall Mount Tub Faucet includes:
- Wall Mount Tub Faucet Spout Assembly
- Single Handle Control Valve (Rough-in Valve)
- Decorative Wall Plate
- Installation Hardware (screws, anchors)
- Hex Wrench
- Instruction Manual

Image 3.1: All included components of the FSCEPIXI Wall Mount Tub Faucet.
4. Safety Information
Read all instructions carefully before installation and use. Failure to follow these instructions may result in property damage, personal injury, or death. Retain this manual for future reference.
- Always turn off the main water supply before beginning any plumbing work.
- Wear appropriate personal protective equipment, such as safety glasses and gloves, during installation.
- Ensure all connections are secure and watertight to prevent leaks.
- If you are unsure about any part of the installation process, consult a qualified plumber.
- Do not use harsh chemicals or abrasive cleaners on the faucet finish, as this may damage the surface.
5. Installation
5.1 Pre-Installation Steps
- Turn off the main water supply to the installation area.
- Clear the installation area of any debris or obstructions.
- Ensure you have all necessary tools, including a pipe wrench, adjustable wrench, plumber's tape, and a level.
5.2 Rough-in Valve Installation
The rough-in valve is designed for a 1/2 NPT connection. Install the valve securely within the wall, ensuring it is level and at the correct depth for the finished wall surface.

Image 5.1: Diagram showing the NPT 1/2" connections for cold water, hot water, and faucet spout on the rough-in valve.
5.3 Spout and Handle Installation
- Once the wall is finished, connect the faucet spout to the rough-in valve's spout connector. Ensure the connection is tight and sealed with plumber's tape.
- Attach the decorative wall plate over the rough-in valve opening.
- Install the single handle onto the valve stem, securing it with the provided hex wrench.

Image 5.2: Close-up of the threaded connection point for the faucet spout.
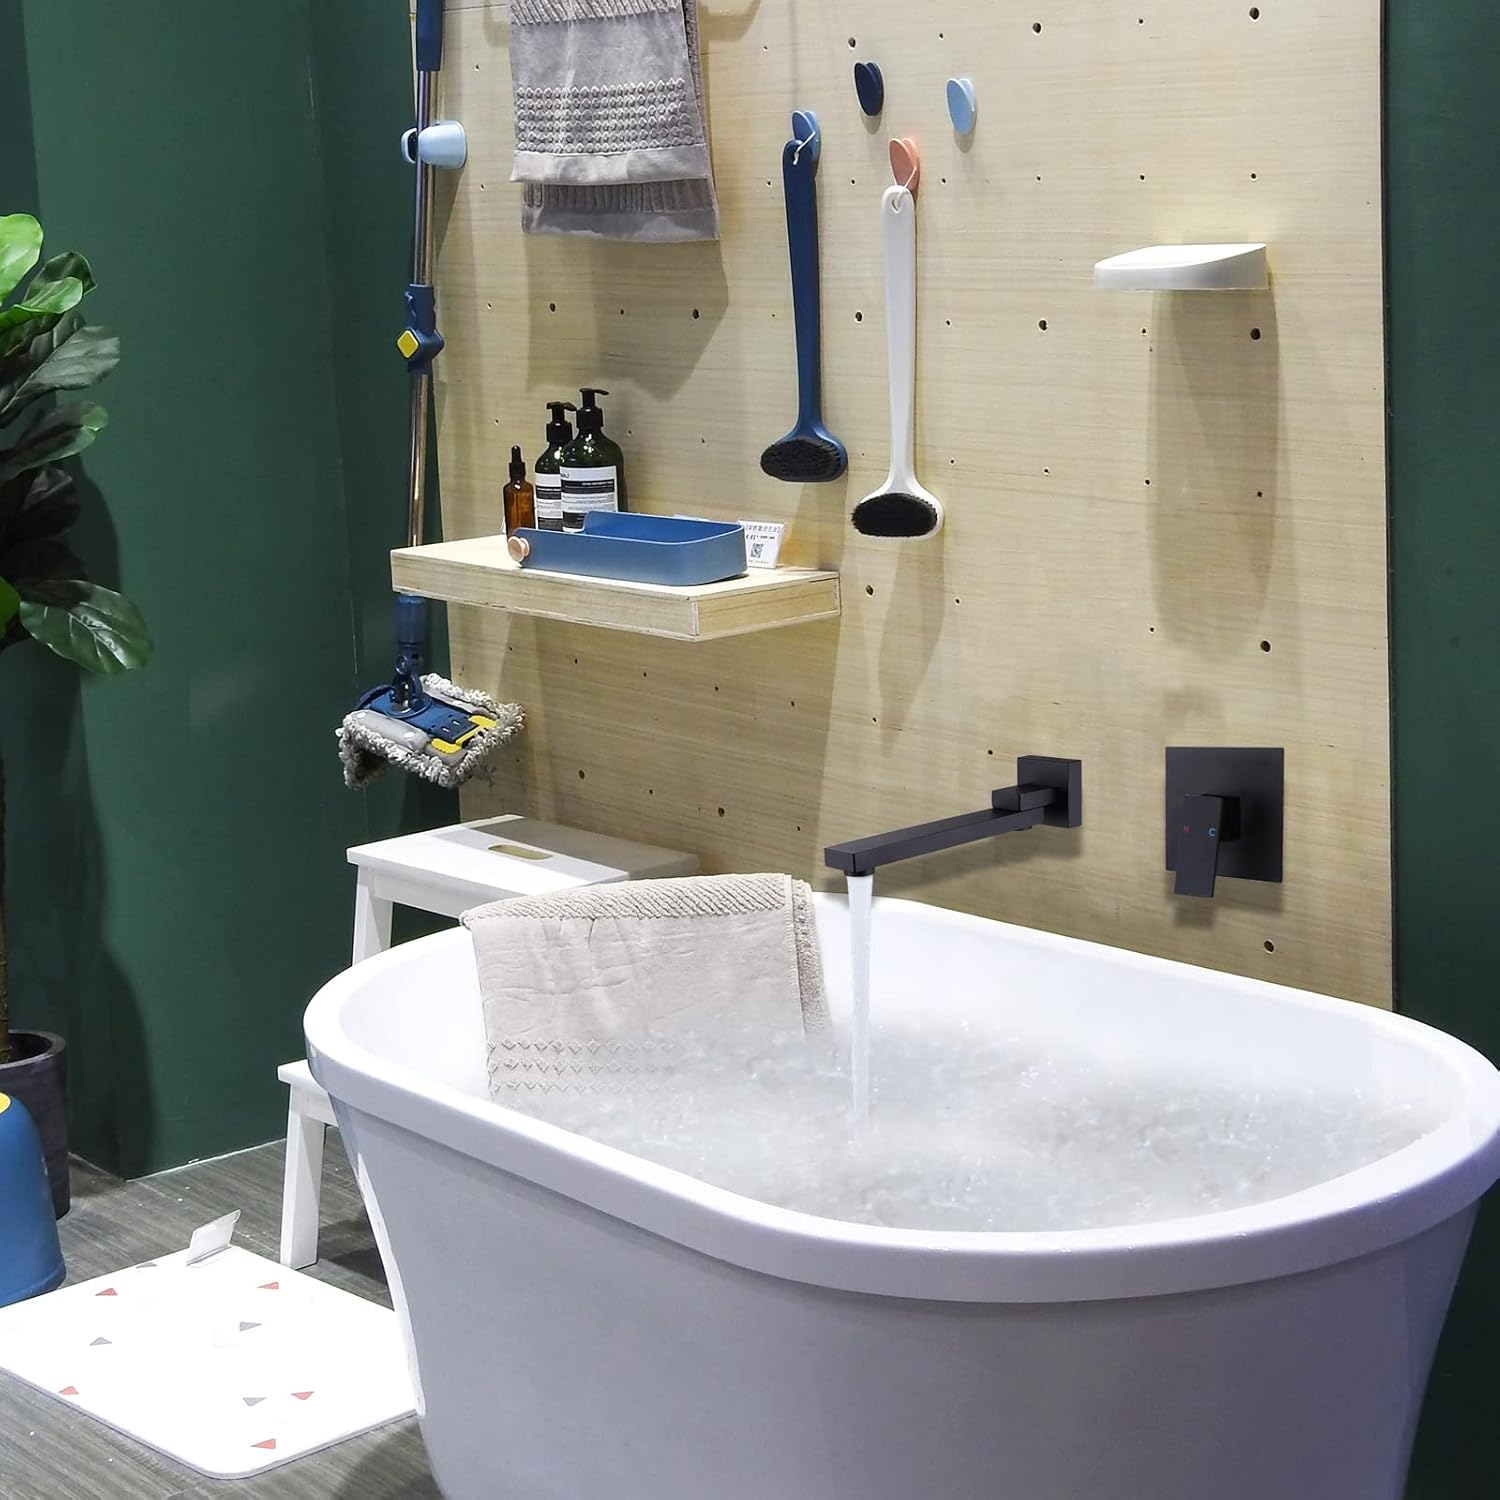
Image 5.3: Example of the faucet installed in a bathroom setting over a bathtub.

Image 5.4: Example of the faucet installed in a bathroom setting over a vessel sink.
6. Operation
To operate the faucet, simply move the single handle. Moving the handle up or down controls the water flow, while moving it left or right adjusts the water temperature. The spout can be rotated 180 degrees to direct water flow or to fold it against the wall when not in use.

Image 6.1: The faucet spout can rotate 180 degrees for convenience.
7. Maintenance
Regular cleaning and maintenance will help preserve the finish and functionality of your faucet.
7.1 Cleaning the Faucet
- Clean the faucet regularly with a soft cloth and mild soap.
- Avoid using abrasive cleaners, harsh chemicals, or scouring pads, as these can damage the matte black finish.
- Rinse thoroughly with water after cleaning and dry with a soft cloth to prevent water spots.
7.2 Aerator Maintenance
If water flow becomes restricted, the aerator may need cleaning. Unscrew the aerator from the end of the spout, rinse any debris, and reattach.
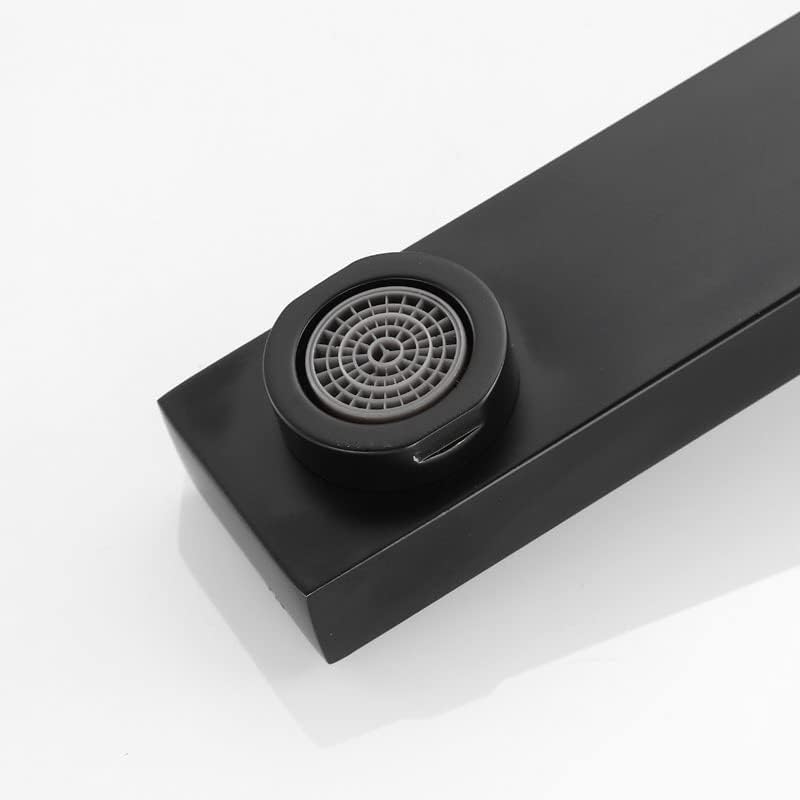
Image 7.1: Close-up of the aerator located at the end of the spout.
8. Troubleshooting
| Problem | Possible Cause | Solution |
|---|---|---|
| Low Water Flow | Clogged aerator or debris in water lines. | Clean or replace the aerator. Flush water lines before reattaching faucet. |
| Leaks from Spout Base | Loose connection or damaged O-rings. | Tighten connections. Inspect and replace O-rings if necessary. |
| Water Temperature Issues | Improper rough-in valve installation or supply line issues. | Verify hot and cold supply lines are correctly connected to the valve. Consult a plumber if issues persist. |
| Handle is Stiff or Loose | Cartridge issue or loose set screw. | Check the set screw on the handle and tighten if loose. If stiff, the cartridge may need replacement (consult professional). |
9. Warranty and Support
The FSCEPIXI Wall Mount Tub Faucet (Model SHBF-B02) comes with a Lifetime Warranty. This warranty covers defects in material and workmanship under normal use and service.
For warranty claims, technical support, or any inquiries regarding your product, please contact FSCEPIXI customer service. You can find more information and contact details by visiting the official FSCEPIXI store on Amazon: FSCEPIXI Amazon Store.


