1. Introduction
Thank you for choosing the Brio CLCTPOU520UVF2 Countertop Bottleless Water Cooler Dispenser. This manual provides essential information for the safe and efficient operation, installation, and maintenance of your new water dispenser. Please read these instructions thoroughly before use and retain them for future reference.
2. Safety Information
To reduce the risk of injury or property damage, adhere to the following safety precautions:
- Always connect the dispenser to a grounded electrical outlet.
- Do not operate the dispenser with a damaged power cord or plug.
- Keep the dispenser away from direct sunlight and heat sources.
- Ensure proper ventilation around the unit.
- Exercise caution when dispensing hot water to prevent burns.
- Do not immerse the dispenser, cord, or plug in water or other liquids.
- This appliance is intended for indoor use only.
3. Package Contents
Verify that all components are present before beginning installation:
- Brio CLCTPOU520UVF2 Water Cooler Dispenser
- Pre-assembled 1/4" tubing
- 3-way plastic 1/4" push connect adapter
- Under sink 3/8" and 1/2" adapter with shut-off valve
- Sediment Filter (Stage 1)
- Carbon Block Filter (Stage 2)
- Instruction Manual
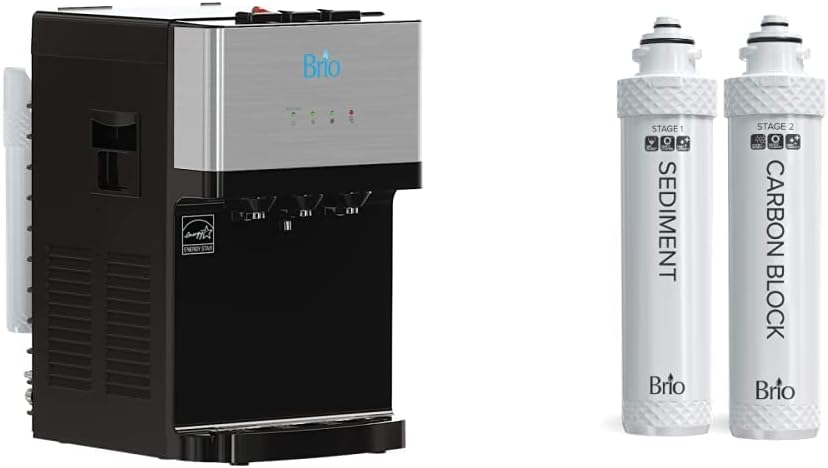
This image displays the Brio CLCTPOU520UVF2 countertop bottleless water cooler dispenser, featuring a black body with a silver-toned front panel. To the right of the dispenser are two white filter cartridges, labeled 'STAGE 1 SEDIMENT' and 'STAGE 2 CARBON BLOCK', indicating the two-stage filtration system.
4. Setup and Installation
Follow these steps for proper installation:
- Unpacking: Carefully remove all packaging materials and place the dispenser on a flat, stable surface.
- Water Line Connection: Connect the pre-assembled 1/4" tubing to your cold water supply line using the provided 3-way plastic 1/4" push connect adapter and the under-sink 3/8" or 1/2" adapter with shut-off valve. Ensure all connections are secure to prevent leaks.
- Filter Installation: Install the Sediment (Stage 1) and Carbon Block (Stage 2) filters into their designated compartments. Refer to the detailed illustrations in the included installation guide for specific filter placement.
- Flush System: Before initial use, flush the system by dispensing several cups of water from each temperature faucet until the water runs clear and free of air bubbles. This removes any carbon fines from the new filters.
- Power Connection: Plug the dispenser into a grounded electrical outlet.
- Initial Heating/Cooling: Allow approximately 15-30 minutes for the hot and cold water to reach their optimal temperatures.
5. Operating Instructions
Your Brio water cooler offers three temperature options:
- Cold Water: Press the cold water button/lever to dispense chilled water.
- Room Temperature Water: Press the room temperature water button/lever to dispense water at ambient temperature.
- Hot Water: Press the hot water safety button (if applicable) and then the hot water button/lever to dispense hot water. Always use caution with hot water.
The dispenser's filtration system transforms ordinary tap water into purified drinking water.
6. Maintenance
Regular maintenance ensures optimal performance and water quality.
6.1. Self-Cleaning Function
The dispenser features a self-cleaning function. Consult your detailed installation guide for specific instructions on how to activate and utilize this feature to maintain hygiene.
6.2. Filter Replacement
The 2-stage filtration system includes a 5-micron pre-carbon and sediment filter. These filters are designed to last approximately 6 months or filter 1500 gallons, whichever comes first. Regular replacement is crucial for maintaining water quality.
- Turn off the water supply to the dispenser and unplug the unit.
- Locate the filter compartments.
- Twist and remove the old filters.
- Insert new filters, ensuring they are securely seated.
- Turn on the water supply and check for leaks.
- Plug in the unit and flush the system as described in the Setup section.
7. Troubleshooting
If you encounter issues with your dispenser, refer to the following common solutions:
- No Water Dispensing: Check if the water supply valve is open and if the dispenser is plugged in. Ensure filters are correctly installed.
- Water Not Hot/Cold: Verify that the hot/cold switches (usually located on the back of the unit) are turned on. Allow sufficient time for heating/cooling.
- Leaks: Inspect all water line connections for tightness. Ensure filter caps are securely fastened.
- Unusual Taste/Odor: Flush the system thoroughly. If the issue persists, replace the filters.
For persistent problems, contact Brio customer support.
8. Specifications
| Feature | Specification |
|---|---|
| Model | CLCTPOU520UVF2 |
| Brand | Brio |
| Color | Black |
| Material | Plastic |
| Filter Capacity | 1500 Gallons |
| Style | Modern Black Plastic |
| Water Temperatures | Hot, Cold, Room Temperature |
| Filtration System | 2-Stage (Sediment, Carbon Block) |
9. Warranty and Support
For warranty information, technical support, or to purchase replacement parts and filters, please contact Brio customer service. Refer to the product packaging or Brio's official website for contact details.