
GMAIPOP RM
Contents
GMAIPOP 1080P Front and Rear Dash Cam Instruction Manual
Model: RM
Introduction
This manual provides detailed instructions for the installation, operation, and maintenance of your GMAIPOP 1080P Front and Rear Dash Cam. This dual dash cam system records in Full HD 1080P, features a 3-inch IPS screen, 170° wide-angle front lens, 100° wide-angle rear lens, G-sensor for accident lock, loop recording, HDR, enhanced night vision, and 24-hour parking monitoring. A 32GB SD card is included for immediate use.
Important Safety Information
- Always keep the dash cam plugged into your car's cigarette lighter. The internal small battery is designed only to maintain and save settings, not for continuous operation.
- Format the SD card upon first use and regularly thereafter to ensure optimal performance and prevent recording issues.
- Ensure the suction cup bracket is rotated to the "lock" position after mounting to prevent the dash cam from falling.
- To access menu settings or switch modes, first press the "OK" button to stop recording.
- This dash cam does not support an app for viewing playback. Playback can be viewed directly on the camera screen or on a computer.
- For 24-hour parking monitoring, a hardwire kit (ASIN: B0BRSNWKTV) is required and sold separately.
Package Contents
Verify that all items are present in your package:
- 1 x 3-inch Dash Cam
- 1 x Waterproof Rear Camera (19.7 feet length cable)
- 1 x Suction Mount
- 1 x Car Charger (11.5 feet length cable)
- 1 x 32GB SD Card (pre-inserted in camera)
- 1 x Crowbar for wire trim
- 1 x USB Cable for power supply / files transfer (1.6 feet length)
- 1 x User Manual

Image: All components included in the GMAIPOP Dash Cam package, laid out on a surface.
Setup Guide
1. Inserting the SD Card
The 32GB SD card is typically pre-inserted. If not, gently push the SD card into the slot on the side of the dash cam until it clicks into place. Ensure the card is inserted correctly before powering on the device.
Video: Demonstrates how to insert the SD card into the dash cam and mount it onto the suction bracket. The video also shows plugging in the car charger and the automatic power-on and recording function.
2. Mounting the Front Dash Cam
Attach the dash cam to the suction mount. Clean the windshield surface thoroughly before attaching the suction cup. Press the suction cup firmly against the windshield and rotate the locking mechanism to secure it. Adjust the camera angle for optimal front view coverage.

Image: The GMAIPOP Dash Cam mounted on a windshield using a suction cup, highlighting its compact design and various features through icons.
Video: A step-by-step guide on installing the GMAIPOP Front Dash Cam, including mounting the camera and routing the power cable.
3. Connecting Power
Connect the car charger cable to the dash cam's power input and plug the other end into your vehicle's cigarette lighter socket. The dash cam will automatically power on and begin recording when the car engine starts, and power off when the engine is turned off.

Image: Close-up of the GMAIPOP Dash Cam mounted on a windshield, showing the suction cup and the power cable connected to the top of the unit.
4. Rear Camera Installation
Connect the rear camera cable to the main dash cam unit. Route the cable neatly along the vehicle's headliner and side panels to the rear of the car. The included crowbar tool can assist in tucking the cable under trim. Mount the rear camera on the rear windshield or near the license plate. For the reversing guide lines to function, connect the rear camera's red cable to the reversing lamp's positive wire.
Video: A detailed guide on how to install the GMAIPOP Rear Camera, including routing the cable through the car's interior and connecting it to the main unit and reversing light.
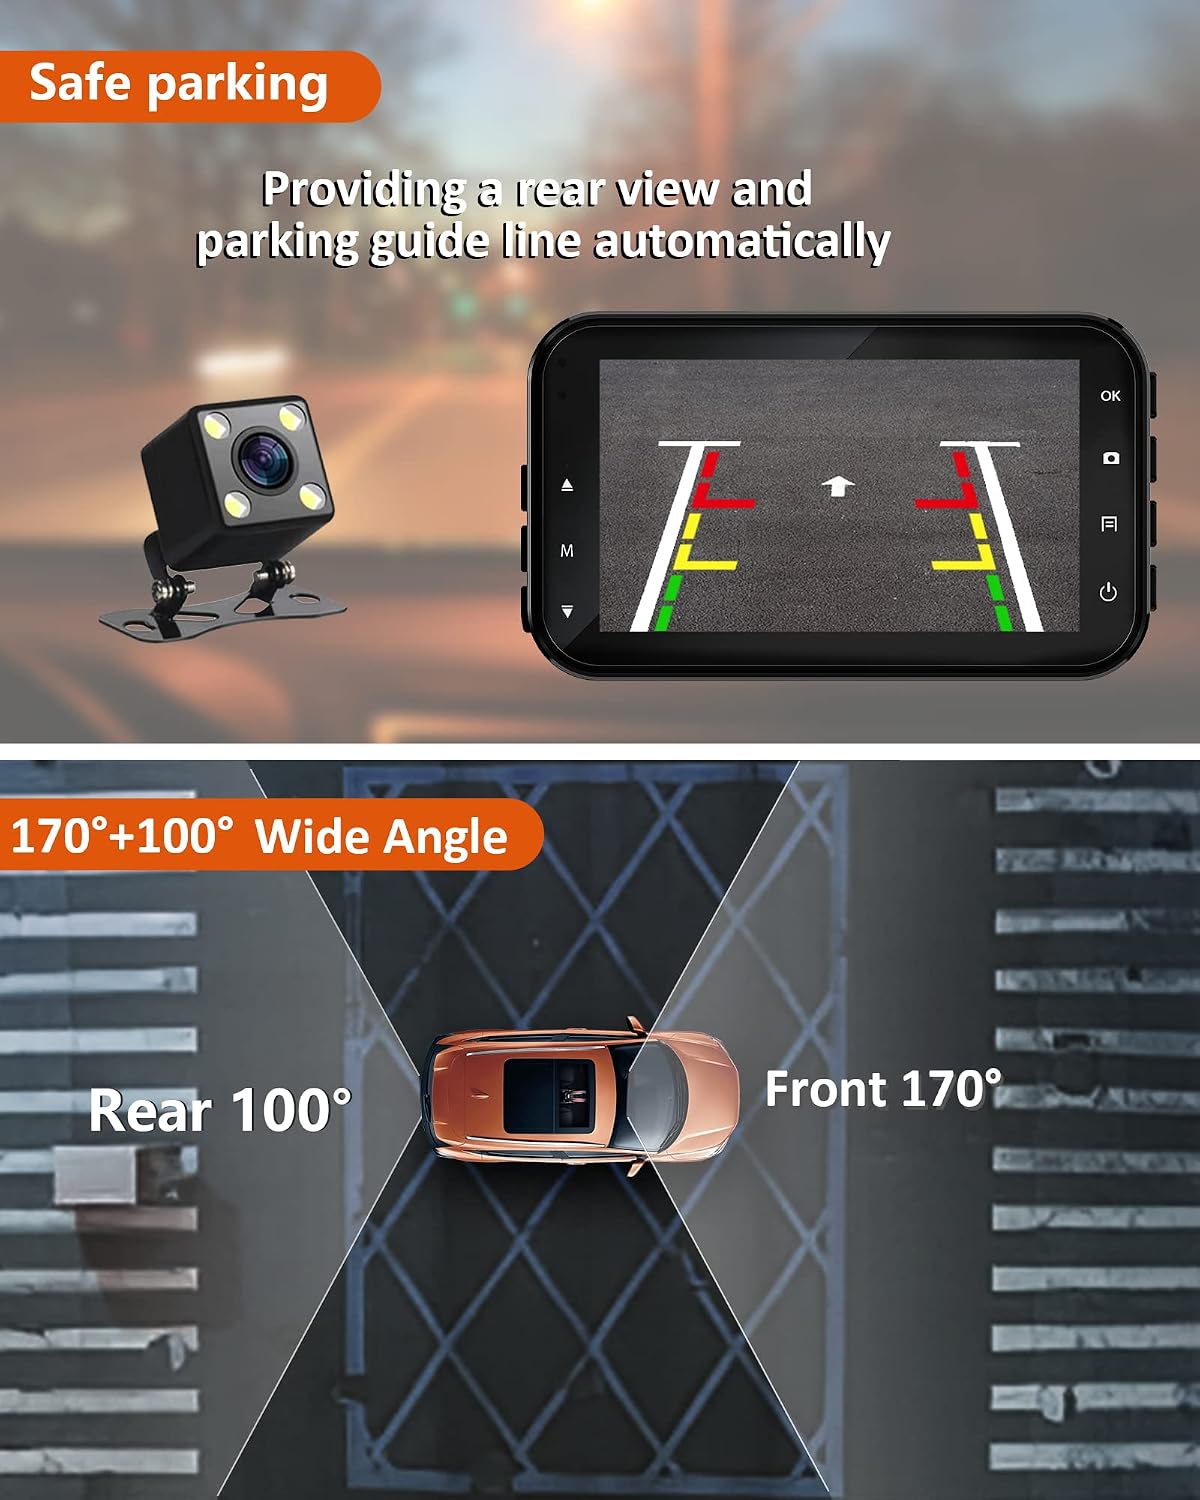
Image: Illustrates the rear camera view with parking guide lines on the dash cam screen, and a diagram showing the 170° front and 100° rear wide-angle coverage.
Operating Instructions
Automatic Recording
Once powered on, the dash cam automatically begins recording. The front camera records in 1080P Full HD with a 170° wide angle, and the rear camera records with a 100° wide angle, capturing both front and rear road conditions simultaneously.

Image: A split image showing the clear 1080P front camera view of a car from behind and a 720P rear camera view of a car from the front, demonstrating dual recording capability.
Loop Recording
The seamless loop recording feature ensures continuous recording by overwriting the oldest unlocked footage when the SD card is full. This guarantees that you always have the most recent recordings available.

Image: Illustrates the Loop Recording feature with a filmstrip of continuous driving footage, and the G-Sensor feature with a lock icon over a car accident scene, indicating emergency file protection.
G-Sensor (Emergency File Protection)
In the event of a collision or sudden impact, the built-in G-sensor automatically detects the event and locks the current video file. This prevents the footage from being overwritten by loop recording, preserving critical evidence for accidents.
Enhanced Night Vision & HDR
Equipped with an F1.8 aperture lens and HDR technology, the dash cam provides clearer and brighter video recordings at night. It automatically adjusts light exposure to prevent overexposure in bright areas and enhances visibility in dark conditions.

Image: Shows the dash cam screen displaying a clear night view of a road with streetlights, emphasizing HDR and Enhanced Night Vision features.
Video: Demonstrates the night vision capabilities of the GMAIPOP Dash Cam, showing clear footage captured in low-light conditions.
24H Parking Monitoring (Requires Hardwire Kit)
When connected to a hardwire kit (sold separately), the dash cam can monitor your vehicle's surroundings 24/7. It uses motion detection to record incidents even when the car is parked and turned off.

Image: A car in a parking garage with a circular overlay indicating 24-hour monitoring, and an inset image of a hardwire kit, noting it is required and not included.
Playback Video
To view recorded videos:
- Stop recording by pressing the "OK" button.
- Switch modes by pressing the "Mode" button.
- Navigate to the playback video mode to view your recordings.
Video: Demonstrates how to insert the SD card, mount the dash cam, connect power, and navigate the menu for playback and manual file locking.
Menu Settings
To access the menu settings, first stop recording by pressing the "OK" button. Then, press the "Menu" button once to enter the first page of settings, or twice for the second page. Use the navigation buttons to select and adjust settings such as resolution, cycle recording, exposure, motion detection, audio recording, date stamp, and G-sensor sensitivity.
Maintenance
- SD Card Formatting: Regularly format the SD card (at least once a month) to prevent data corruption and ensure smooth recording. This can be done through the camera's menu settings.
- Cleaning: Use a soft, dry cloth to clean the camera lens and screen. Avoid using abrasive cleaners or solvents.
- Temperature: The dash cam is designed to operate within a temperature range of -4°F to 158°F (-20°C to 70°C). Avoid prolonged exposure to extreme temperatures to prevent damage.
Troubleshooting Tips
- Camera not turning on/off automatically: Ensure the dash cam is continuously plugged into the car's cigarette lighter. The camera is designed to power on/off with the vehicle's ignition.
- Recording issues: Format the SD card regularly. If issues persist, try a different high-speed (Class 10 or higher) SD card.
- Dash cam falling from windshield: Ensure the suction cup and windshield are clean and dry before mounting. Rotate the suction cup bracket to the "lock" position firmly.
- Cannot access menu/change mode: Stop the current recording by pressing the "OK" button before attempting to enter the menu or switch modes.
- No rear camera display: Check all cable connections between the main unit and the rear camera. Ensure the rear camera's power wire (red cable) is correctly connected to the reversing lamp's positive.
Specifications
| Feature | Detail |
|---|---|
| Product Dimensions | 1.5 x 3.5 x 2.1 inches |
| Item Weight | 1.12 pounds |
| Batteries | 1 Lithium Ion battery required (included) |
| Connectivity Technology | USB |
| Video Capture Resolution | 1080p |
| Mounting Type | Suction Mount |
| Field Of View | Front: 170 Degrees, Rear: 100 Degrees |
| Screen Size | 3-inch IPS Screen |
| Special Features | 1080P FULL HD, G-Sensor, 24H Parking Monitor, Loop Recording, Waterproof Rear Camera, 32GB Card Included |
| Operating Temperature | -4°F to 158°F (-20°C to 70°C) |
Warranty and Support
Your GMAIPOP Dash Cam comes with a 1-year warranty from the date of purchase. Our dedicated customer support team is available 24 hours a day, 7 days a week to assist you with any questions or issues you may encounter.
For support, please refer to the contact information provided in your product packaging or visit the official GMAIPOP website.

24/7 Support

1 Year Warranty

30 Day Return
Ask a question about this manual
Ask about setup, troubleshooting, compatibility, parts, safety, or missing instructions. Manuals+ will review the question and use this page’s manual context to help answer it.