
1. Introduction
This manual provides detailed instructions for the setup, operation, and maintenance of your Nadex CR360 Cash Register. Please read this manual thoroughly before using the device to ensure proper functionality and to maximize its lifespan.
The Nadex CR360 is designed for efficient transaction processing, featuring a quick-load thermal printer, dual displays, and robust cash management capabilities. It supports up to 4700 PLUs, 50 departments, and 50 cashiers, making it suitable for various retail environments.
2. Setup
2.1 Unboxing and Initial Placement
Carefully remove the cash register from its packaging. Place the unit on a stable, flat surface. Ensure adequate ventilation around the device.
2.2 Power Connection
Connect the power adapter to the cash register and then plug it into a standard electrical outlet. The CR360 features a built-in memory system that retains all programmed data even when unplugged for extended periods, eliminating concerns about data loss during power outages or relocation.

Image: The Nadex CR360's built-in memory system ensures data retention even when unplugged.
2.3 Cash Drawer Setup
The cash drawer includes 4 bill slots and 8 coin slots. A removable coin tray allows for storage of checks, pay slips, and other valuables underneath.
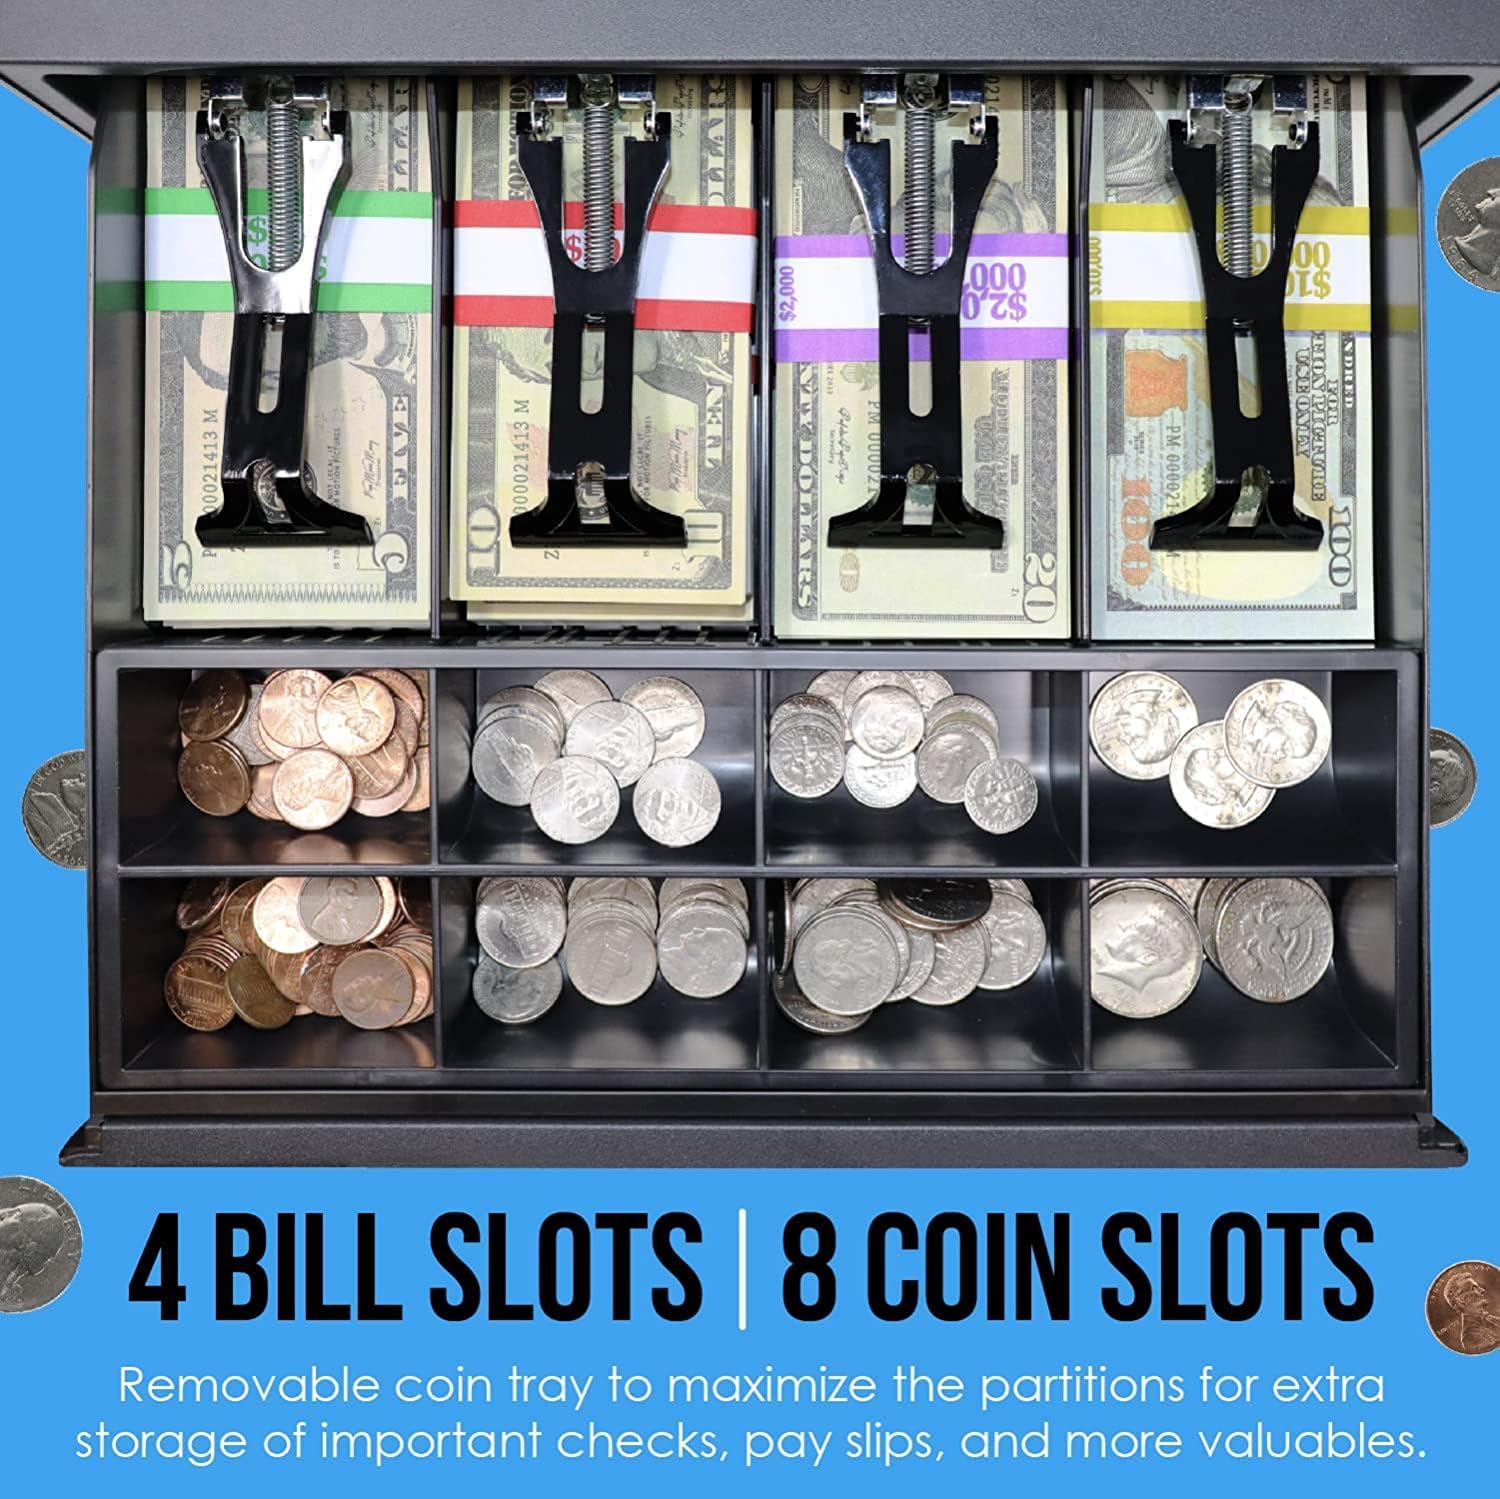
Image: The cash drawer features 4 bill slots and 8 coin slots, with a removable coin tray.
2.4 Thermal Printer Paper Loading
The CR360 uses 2-1/4" thermal paper rolls. To load, open the printer cover, place the paper roll, and close the cover. Ensure the paper feeds correctly through the slot.

Image: Instructions for loading 2-1/4 inch thermal paper into the printer.
2.5 Programming Departments and Prices
The CR360 allows you to set names and prices for up to 50 departments. This customization helps categorize sales and streamline transactions.
Video: This video demonstrates how to set names and prices for departments on your Nadex CR360 Cash Register.
2.6 Customizing Receipt Header/Footer
Personalize your receipts by adding custom headers and footers. This feature allows for business branding or important messages to customers.
Video: Learn how to customize the header and footer of your receipts on the CR360 cash register.
3. Operating Instructions
3.1 Key Functions and Displays
The CR360 features a 5-inch LCD operator display and an 8-digit customer display. Familiarize yourself with the keyboard layout and the three custom command keys:
- SUP Clerk Key: Used for normal register operations and turning off the cash register.
- SP Manager Key: Provides access to all functions, including clearing sales data, programming, and manager control operations.
- Cash DRAWER Key: Locks and unlocks the cash register drawer for security.
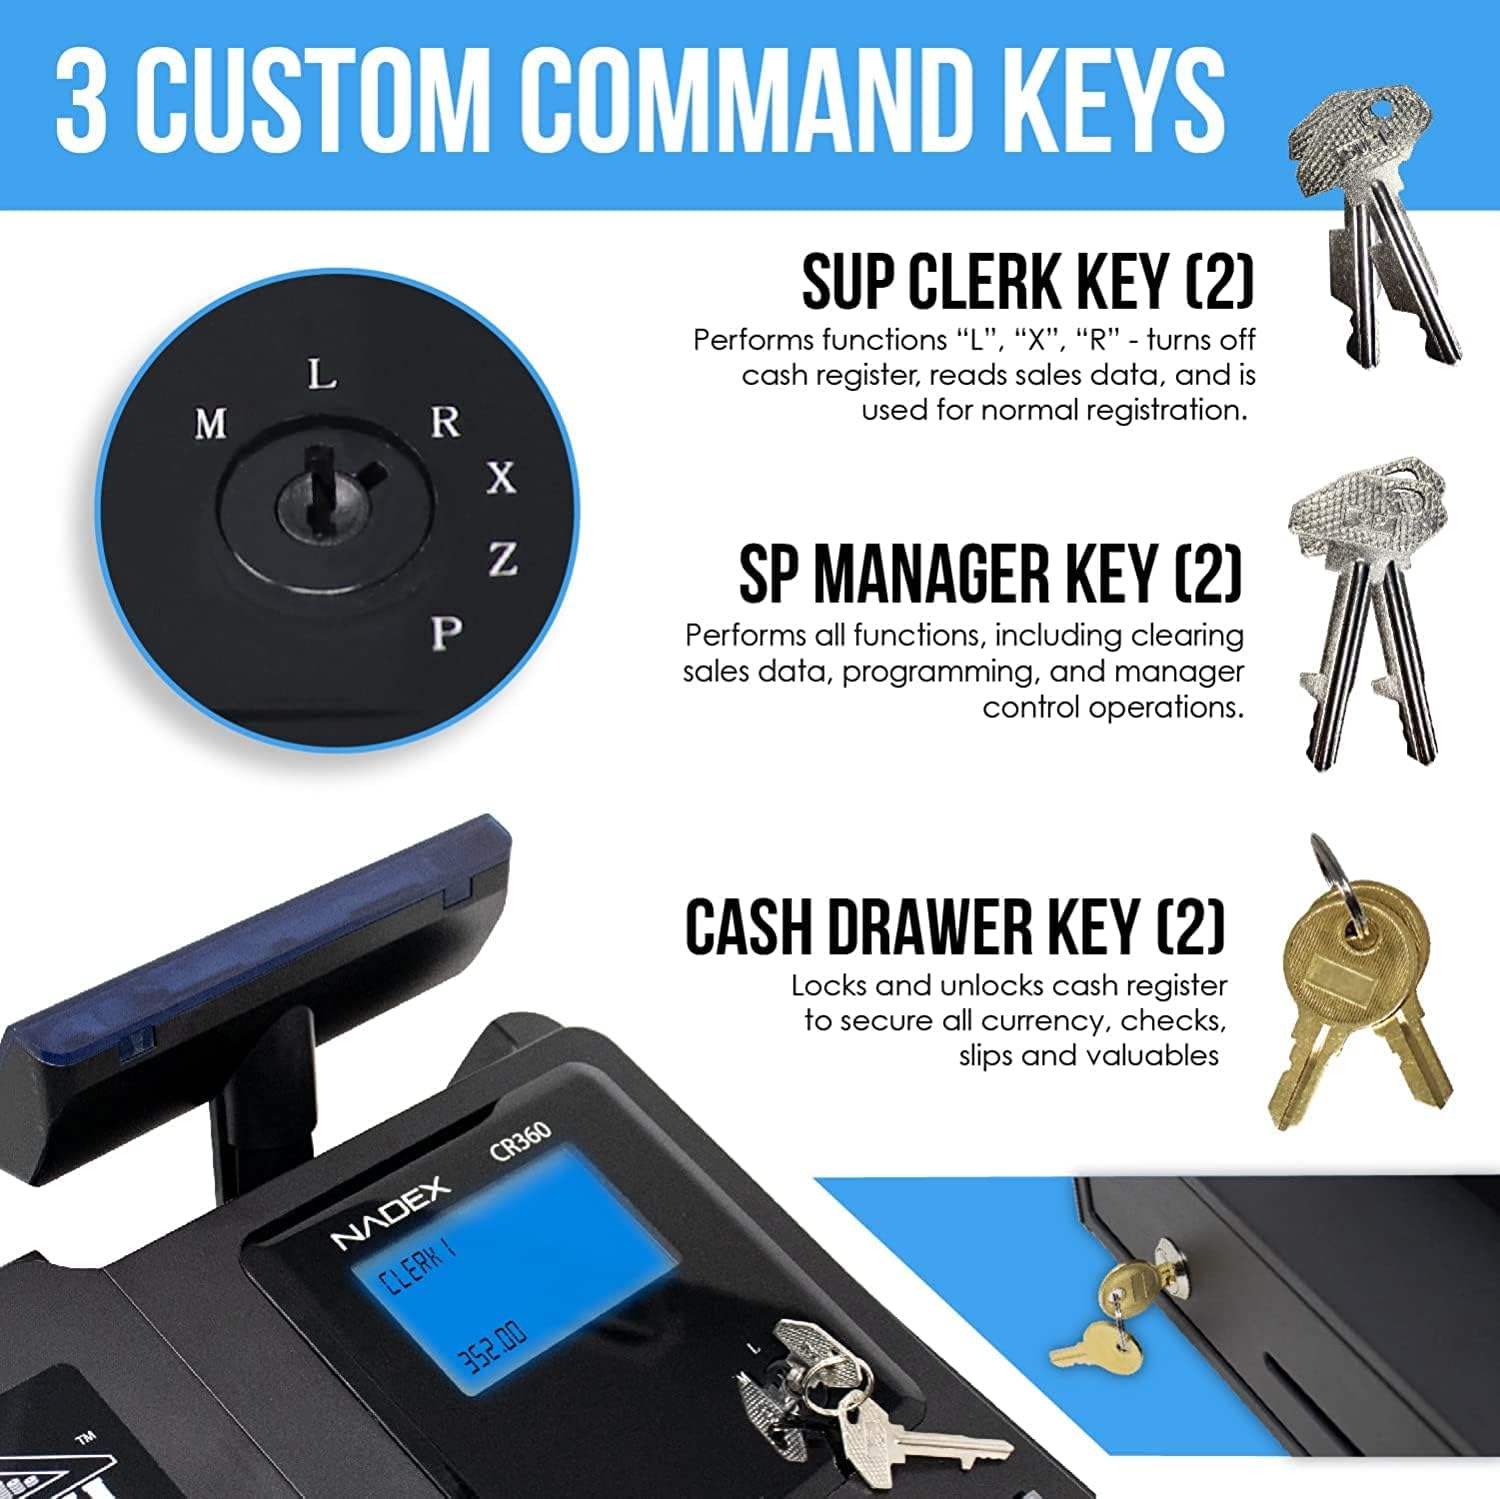
Image: The three custom command keys for various operational modes.

Image: The 5-inch LCD operator display and 8-digit customer display.
3.2 Performing Basic Sales
Follow these steps to process a standard sales transaction.
Video: A guide on how to perform basic sales transactions using the CR360 cash register.
3.3 Processing Refunds
Instructions for handling customer returns and issuing refunds.
Video: This video demonstrates the process of issuing a refund on your CR360 cash register.
3.4 Canceling an Item in a Sale
Learn how to correct errors by canceling an item during an ongoing transaction.
Video: Instructions on how to cancel an item from a sale on the CR360.
3.5 Holding a Transaction
Temporarily hold a transaction to serve another customer or address an inquiry, then recall it later.
Video: This video explains how to hold a transaction for later retrieval on the CR360.
3.6 Connectivity
The CR360 offers multiple connection ports for external devices:
- PS/2 Port: Connects to a barcode scanner.
- DK Port: For cash drawer connection.
- COM Port: Connects to a kitchen printer, scale, or for PC programming.
- USB01: Connects to a PC.

Image: Overview of the multiple connection ports on the rear of the CR360.
4. Maintenance
4.1 Cleaning
Regularly clean the exterior of the cash register with a soft, damp cloth. Avoid using abrasive cleaners or solvents. For the display screens, use a screen-specific cleaner and a microfiber cloth.
4.2 Printer Maintenance
Ensure the thermal printer head is free from dust and paper residue. Use a specialized thermal printer cleaning pen or isopropyl alcohol on a cotton swab to gently clean the print head if print quality degrades.
5. Troubleshooting
5.1 Common Issues and Solutions
- Register Not Powering On: Check power cable connection to both the unit and the wall outlet. Ensure the outlet is functional.
- Printer Not Printing: Verify paper roll is loaded correctly and not jammed. Check if the printer cover is fully closed. Ensure the correct printer settings are selected.
- Cash Drawer Not Opening: Ensure the cash drawer key is in the correct position. Check for any obstructions in the drawer mechanism.
- Display Issues: If the display is blank or unreadable, try restarting the unit. Ensure cables are securely connected.
- Data Loss After Power Off: The CR360 has a built-in memory system. If data loss occurs, contact customer support for assistance, as this indicates a potential internal issue.
For further assistance, please refer to the support section or contact Nadex customer service.
6. Specifications
| Feature | Detail |
|---|---|
| Model Number | NXTE-1386 |
| Dimensions | 18 x 17 x 12 inches (Package) |
| Weight | 14.87 pounds |
| Color | Black |
| PLU Capacity | 4700 |
| Departments | 50 |
| Cashiers | 50 |
| Printer Type | 2-1/4" Thermal Printer |
| Displays | 5-inch LCD Operator Display, 8-digit Customer Display |
| Cash Drawer | 4 Bill Slots, 8 Coin Slots (removable tray) |
| Connectivity | PS/2, DK, COM, USB01 Ports |

Image: Physical dimensions of the Nadex CR360 Cash Register.
7. Warranty and Support
7.1 Warranty Information
Nadex products are covered by a manufacturer's warranty. For specific warranty terms and conditions, please refer to the documentation included with your purchase or visit the official Nadex website. Keep your proof of purchase for warranty claims.
7.2 Customer Support
If you encounter any issues not covered in this manual or require further assistance, please contact Nadex customer support. Support contact information can typically be found on the manufacturer's website or in your product packaging.
Many users have reported positive experiences with Nadex customer service, noting their responsiveness and helpfulness in resolving issues and providing guidance on product usage and programming.