Introduction
Thank you for purchasing the ciciglow L019 Wired Telephone. This manual provides detailed instructions for setting up, operating, and maintaining your new telephone. Please read this manual thoroughly before use to ensure proper functionality and to maximize your user experience.
The ciciglow L019 is designed for ease of use, featuring large buttons, hands-free calling, caller ID display, and high-definition call quality, making it suitable for various environments including home, office, and hotel settings.
Safety Information
- Do not expose the telephone to direct sunlight, high humidity, or extreme temperatures.
- Avoid placing the telephone near heat sources or in dusty environments.
- Do not disassemble the telephone. Refer all servicing to qualified personnel.
- Clean the telephone with a soft, damp cloth. Do not use abrasive cleaners or solvents.
- Keep the telephone away from water or other liquids.
Package Contents
Please check the package contents to ensure all items are present:
- 1 x ciciglow L019 Wired Telephone Unit
- 1 x Handset Receiver
- 1 x US Standard Telephone Line Cord
- 1 x UK Standard Telephone Line Cord
- 1 x Instruction Manual (this document)
Product Overview
Familiarize yourself with the components of your ciciglow L019 Wired Telephone.

Figure 1: ciciglow L019 Wired Telephone main unit and handset.
The telephone features a clear display, large numeric keypad, and dedicated function buttons for ease of use.
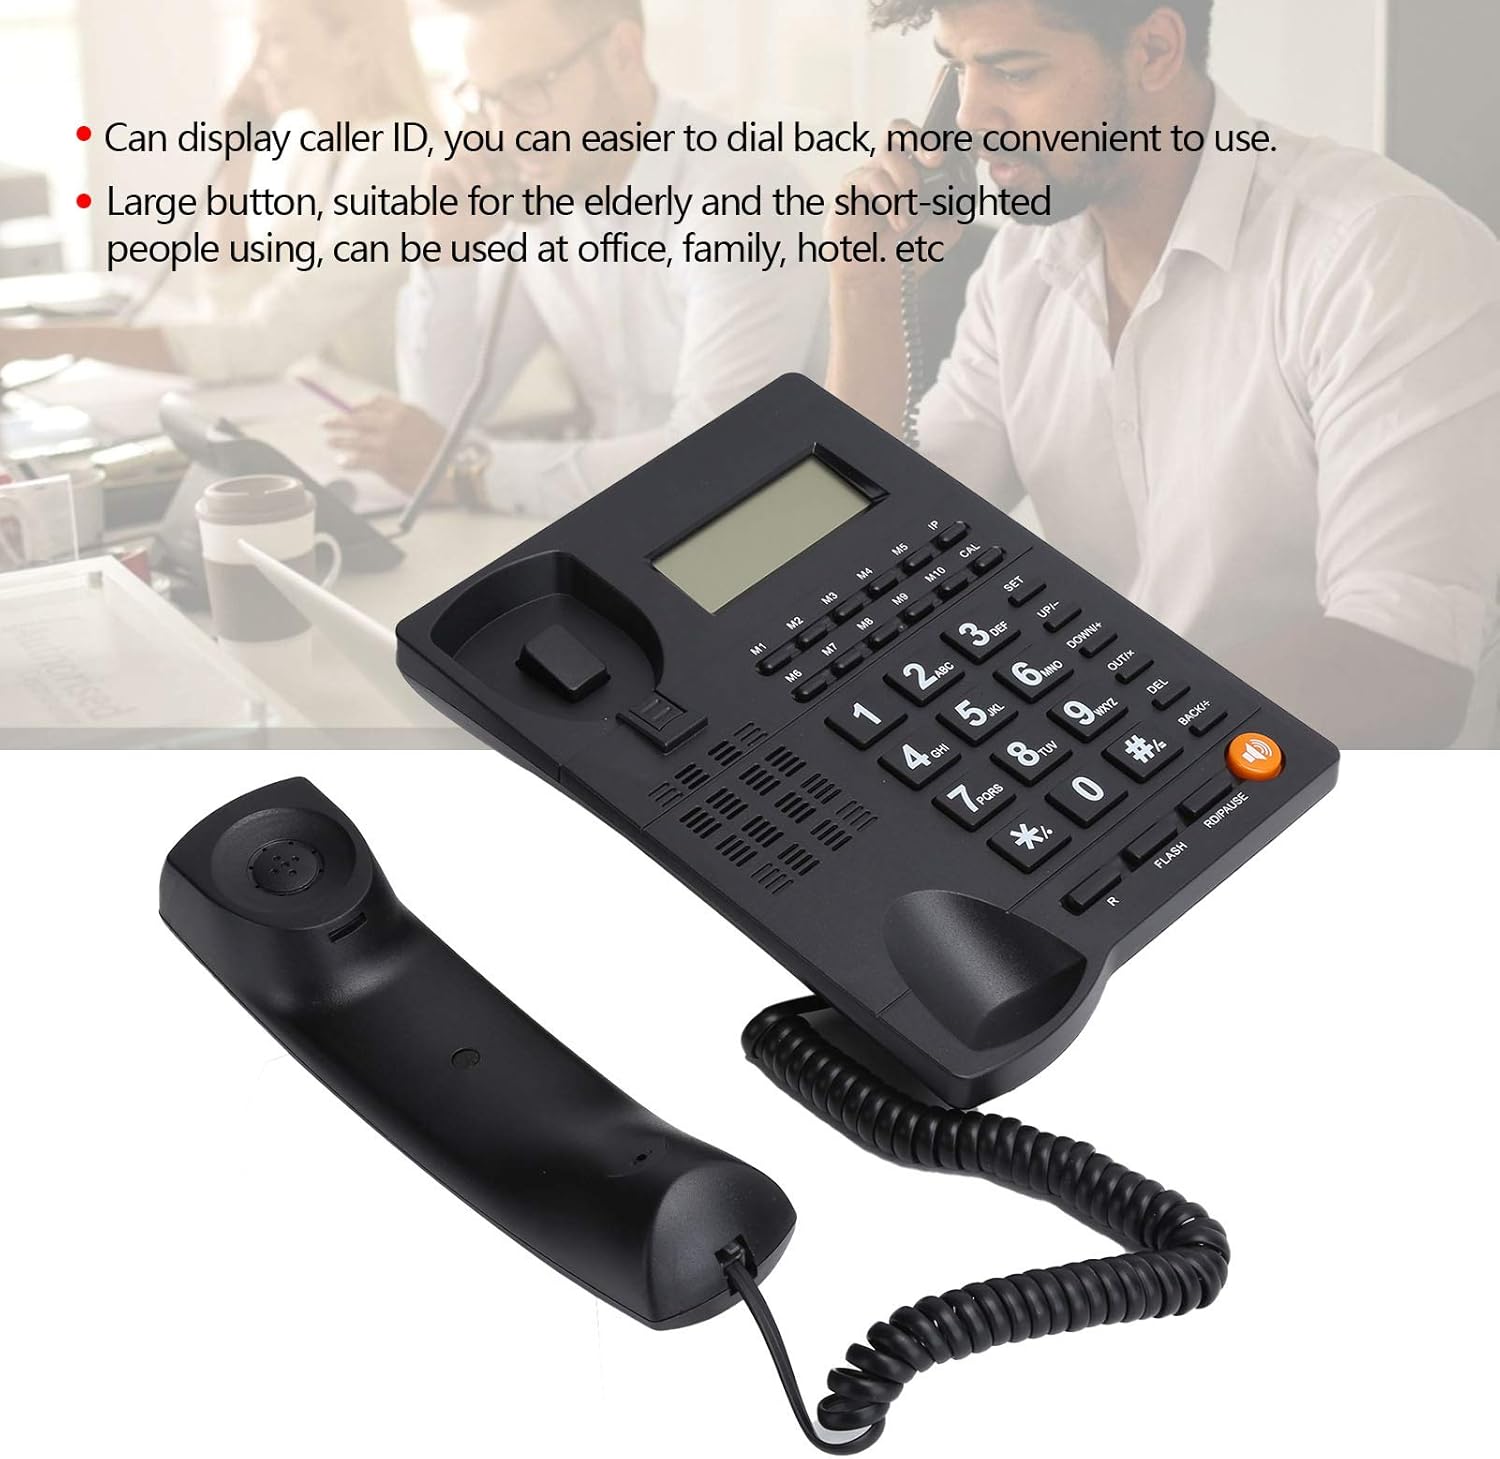
Figure 2: The telephone's display shows caller ID, and the large buttons are designed for easy visibility and pressing.

Figure 3: Close-up view of the large, easy-to-read keypad and memory buttons (M1-M10).
Setup
The ciciglow L019 telephone is designed for simple plug-and-play installation.
1. Connecting the Handset
- Locate the coiled cord.
- Plug one end of the coiled cord into the handset.
- Plug the other end of the coiled cord into the port labeled with a handset icon on the side of the telephone base unit.

Figure 4: Side view of the telephone, illustrating the handset and line connection ports.
2. Connecting to the Telephone Line
- Select the appropriate telephone line cord (US or UK standard) for your region.
- Plug one end of the telephone line cord into the port labeled "LINE" on the back of the telephone unit.
- Plug the other end of the telephone line cord into your wall telephone jack.

Figure 5: Rear view of the telephone, showing the "LINE" and "EXT" ports, and wall-mounting slots.
3. Wall Mounting (Optional)
The telephone unit can be wall-mounted. Use the integrated slots on the back of the unit to secure it to a wall using appropriate screws (not included).
Operating Instructions
Making a Call
- Lift the handset or press the Speaker button for hands-free mode.
- Dial the desired telephone number using the numeric keypad.
- Wait for the call to connect.
- To end the call, replace the handset or press the Speaker button again.
Answering a Call
- When the telephone rings, lift the handset or press the Speaker button to answer.
- To end the call, replace the handset or press the Speaker button again.
Hands-Free Calling
To use the hands-free function:
- During a call, press the Speaker button to activate hands-free mode. The speaker indicator will light up.
- You can then place the handset back on the cradle.
- To switch back to handset mode, simply lift the handset.
- To end a hands-free call, press the Speaker button again.
Volume Control
Adjust the call volume using the UP/+ and DOWN/- buttons during a call.
Caller ID Display
When an incoming call is received, the caller's number (if available and subscribed to Caller ID service) will be displayed on the screen.
Redial Function
To redial the last number called:
- Lift the handset or press the Speaker button.
- Press the RD/PAUSE button. The last dialed number will be redialed automatically.
Memory Buttons (M1-M10)
The telephone features 10 memory buttons (M1-M10) for storing frequently called numbers. Refer to the full instruction manual for detailed programming steps.
Maintenance
- Cleaning: Wipe the telephone surface with a soft, slightly damp cloth. Do not use liquid or aerosol cleaners.
- Storage: If storing the telephone for an extended period, disconnect it from the telephone line and store it in a cool, dry place.
Troubleshooting
| Problem | Possible Cause | Solution |
|---|---|---|
| No dial tone | Telephone line not connected properly. | Ensure the telephone line cord is securely plugged into both the telephone unit and the wall jack. |
| Cannot hear caller / Caller cannot hear me | Volume too low; Handset not properly connected; Faulty line. | Adjust volume using UP/+ and DOWN/- buttons. Check handset cord connection. Test with another phone if possible to rule out line issue. |
| Caller ID not displayed | Caller ID service not subscribed; Caller blocked ID. | Contact your telephone service provider to ensure Caller ID service is active. |
| Buttons unresponsive | Temporary software glitch. | Disconnect the telephone line for a few minutes, then reconnect it. |
Specifications
- Model: L019
- Brand: ciciglow
- Type: Wired Telephone
- Material: Acrylonitrile Butadiene Styrene (ABS)
- Color: Black
- Weight: Approximately 476.4 Grams
- Power Source: Corded Electric
- Dialer Type: Single Keypad
- Answering System Type: Digital (Note: This refers to the phone's internal processing, not an integrated answering machine)
- Multi-line Operation: Single-line Operation
- Caller ID: Yes
- Features: Hands-free calling, Volume control, Backlight, Number redial functions, Large buttons, HD call quality, Intelligent voice chip, Anti-interaction system for noise reduction.
Warranty and Support
Information regarding specific warranty terms and customer support contact details is not provided in this manual. Please refer to the product packaging or the retailer's website for warranty information and customer service contacts.
For further assistance, you may also visit the ciciglow Brand Store on Amazon.


