
PowMr Keeper1220
Contents
PowMr MPPT Solar Charge Controller User Manual
Model: Keeper1220 | Brand: PowMr
1. Introduction
The PowMr MPPT Solar Charge Controller (Model: Keeper1220) is an intelligent regulator designed for solar power systems. It automatically detects 12V or 24V battery systems and utilizes advanced Maximum Power Point Tracking (MPPT) technology to optimize solar energy harvesting. This controller is compatible with various battery types, including AGM, Gel, Flooded, LifePO4, and Lithium batteries, offering flexible charging solutions. It features multiple load control modes and an intuitive LCD display for real-time monitoring of charging status, battery voltage, and system performance.
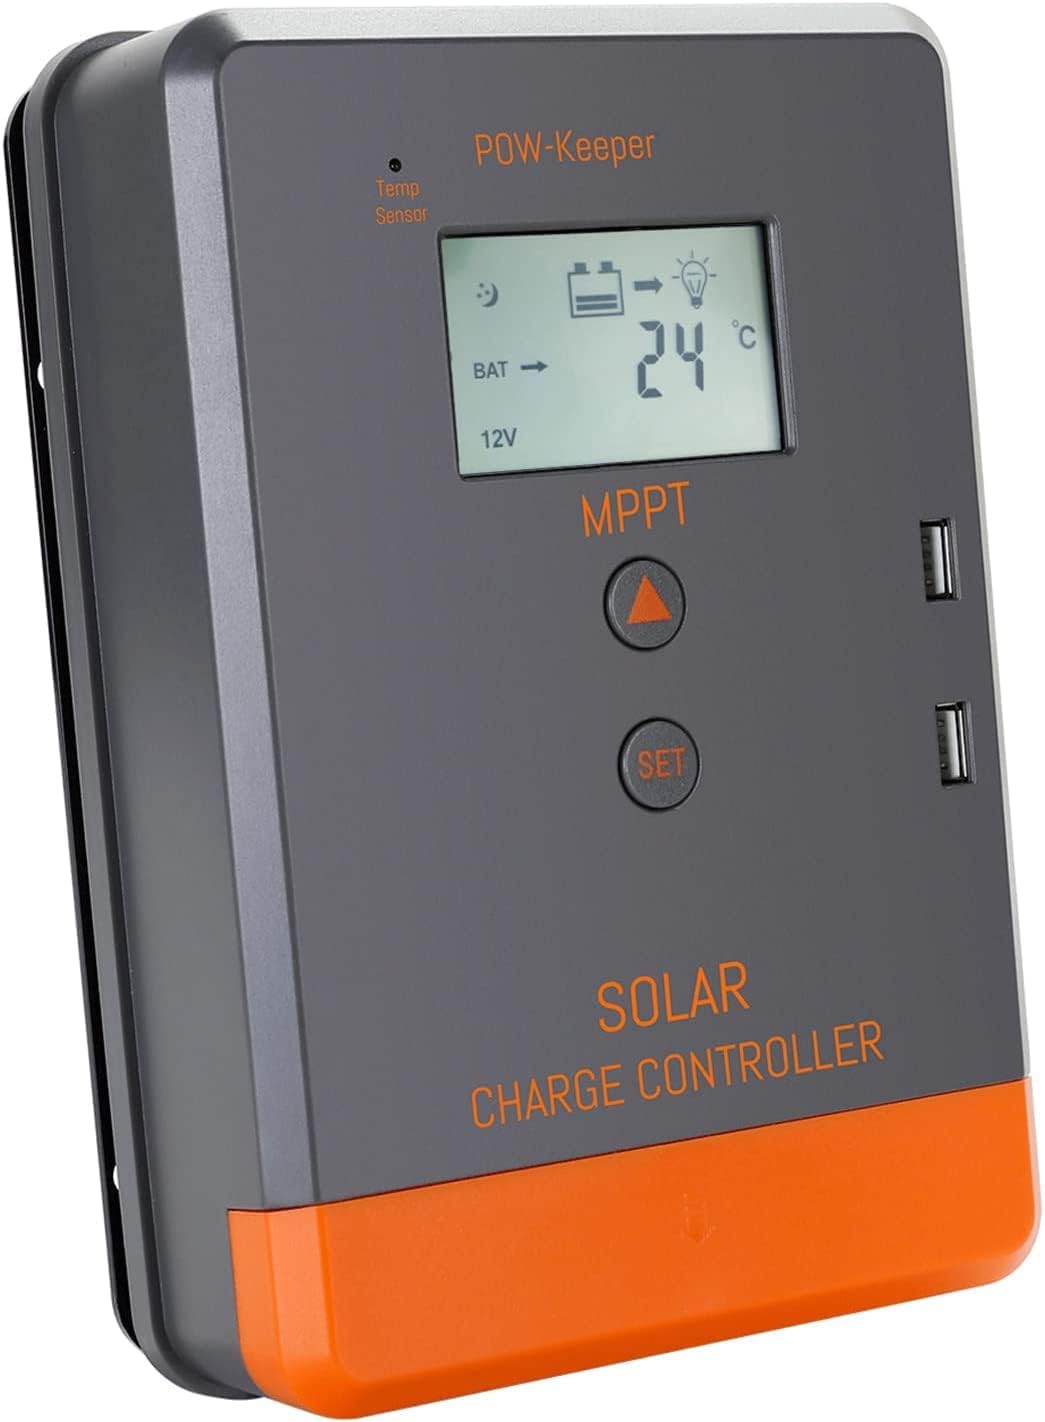
Image: PowMr MPPT Solar Charge Controller, front view showing LCD display and control buttons.
2. Package Contents
Upon opening the package, please verify that all the following items are included:
- PowMr MPPT Solar Charge Controller (Model: Keeper1220)
- User Manual
- Installation Guide Card
Video: An overview of the PowMr MPPT Solar Charge Controller, including unboxing and key features. This video demonstrates the contents of the package and highlights the controller's capabilities.
3. Setup and Installation
Follow these steps carefully to install and connect your solar charge controller:
- Mark Mounting Holes: Use the provided installation guide card to mark the positions for drilling on your chosen mounting surface. Ensure the surface is stable and allows for adequate ventilation around the controller.
Video: A quick guide demonstrating the installation and wiring process for the PowMr MPPT Solar Charge Controller. This segment shows how to mark the mounting holes.
- Secure the Controller: Securely attach the controller to the marked surface using four screws.
Video: The quick guide continues, showing the controller being secured to the mounting surface.
- Prepare Wiring: Remove the terminal screw cover at the bottom of the controller and loosen all terminal screws.
- Connect the Battery: Connect the battery cables to the designated battery terminals on the controller. Ensure correct polarity (red for positive, black for negative).

Image: A visual guide illustrating the correct wiring sequence for the solar charge controller, showing battery, solar panel, and load connections.
- Connect Photovoltaic Input: Connect the solar panel cables to the photovoltaic input terminals. Observe correct polarity.
- Connect DC Load (Optional): If using a DC load, connect its cables to the DC load terminals.
- Cover Terminals: Once all connections are secure, replace the terminal screw cover.
- Start the Controller: Close the battery circuit breaker to power on the controller.
- Activate Solar Input: Turn on the photovoltaic input (solar panel circuit breaker) to begin charging.
Important Safety Note:
- ⚠ Always connect the battery to the controller FIRST before connecting solar panels or loads.
- ⚠ Ensure all connections are tight and secure to prevent loose contacts and potential damage.
4. Operating Instructions
4.1 LCD Display Overview
The integrated LCD provides real-time information about your solar system. Press the "MENU" button to cycle through various parameters:
- Charging Current: Displays the current flowing from the solar panels to the battery.
- Generated Energy: Shows the total energy produced by the solar panels.
- Temperature: Indicates the internal temperature of the controller.
- Battery Voltage: Displays the current voltage of the connected battery.
- Error Codes: Provides diagnostic codes in case of system issues.

Image: Detailed view of the LCD display interface, showing various parameters and how to navigate them using the MENU button.
4.2 Load Control Modes
The controller offers multiple load control modes to manage the DC output:
- 24 Hours Working: The DC load output remains continuously active.
- Light Control: The DC load output is activated at sunset and deactivated at sunrise.
- Light + Time Control: The DC load output is activated at sunset and remains active for a user-defined duration.

Image: Illustration of the different load working modes available on the controller, including Manual, Solar Light Control, and Solar Light + Time Control.
5. Maintenance
Regular maintenance ensures optimal performance and longevity of your PowMr Solar Charge Controller:
- Cleanliness: Keep the controller clean and free from dust and debris. Use a dry, soft cloth for cleaning.
- Connection Checks: Periodically inspect all wiring connections to ensure they are tight and free from corrosion. Loose connections can lead to poor performance or damage.
- Ventilation: Ensure that the controller's heat sink and ventilation openings are not obstructed. Proper airflow is crucial for dissipating heat and maintaining efficient operation.
- Environmental Conditions: Avoid exposing the controller to excessive moisture, direct sunlight, or extreme temperatures beyond its operating range.
6. Troubleshooting
If you encounter issues with your PowMr Solar Charge Controller, refer to the following common troubleshooting steps:
- No Display/No Power:
- Check battery connections and ensure they are secure and correctly polarized.
- Verify that the battery circuit breaker is closed.
- Ensure the battery voltage is within the controller's operating range (12V/24V auto-detect).
- No Charging:
- Check solar panel connections and polarity.
- Ensure the solar panel circuit breaker is closed.
- Verify that there is sufficient sunlight and the solar panels are producing voltage.
- Check for any error codes on the LCD display and consult the full manual for their meaning.
- Load Not Working:
- Check DC load connections and polarity.
- Verify the selected load control mode (e.g., 24H, Light Control).
- Ensure the battery has sufficient charge to power the load.
- Unusual Behavior/Cycling On/Off:
- This could indicate an internal fault or an issue with input/output stability. Disconnect all power sources (solar and battery), wait a few minutes, and then reconnect the battery first, followed by the solar panels.
- Ensure proper wire gauge is used for all connections to prevent voltage drop or overheating.
For more detailed troubleshooting or persistent issues, please refer to the comprehensive installation manual or contact PowMr customer support.
7. Specifications
| Feature | Specification |
|---|---|
| Brand | PowMr |
| Model Number | Keeper1220 |
| Rated Charging Current | 20A |
| System Voltage | 12V/24V Auto |
| Max. PV Open Circuit Voltage | 60V |
| Max. PV Input Power (12V System) | 260W |
| Max. PV Input Power (24V System) | 520W |
| Battery Compatibility | User, Flooded, AGM, GEL, LifePO4, Lithium |
| Display Type | LCD |
| Operating Temperature | 55 Degrees Celsius |
| Package Dimensions | 7.87 x 5.2 x 2.24 inches |
| Item Weight | 1.48 pounds (0.67 Kilograms) |
| Country of Origin | China |
8. Warranty and Support
For detailed warranty information and customer support, please refer to the official PowMr documentation or contact their customer service directly.
- Official Manual: For a comprehensive guide, please download the Installation Manual (PDF).
- PowMr Store: Visit the PowMr Store on Amazon for additional products and support resources.
Ask a question about this manual
Ask about setup, troubleshooting, compatibility, parts, safety, or missing instructions. Manuals+ will review the question and use this page’s manual context to help answer it.