
1. Introduction
This manual provides detailed instructions for the installation, operation, and maintenance of your Strpump 9-inch Android 10 Car Stereo. Please read this manual thoroughly before using the product to ensure proper function and to prevent damage. Keep this manual for future reference.
2. Safety Information
- Professional Installation Recommended: Due to the complexity of car electrical systems, professional installation is highly recommended to avoid damage to the vehicle or the stereo unit.
- Power Supply: Ensure the car stereo is connected to a 12V DC power supply with negative grounding.
- Wiring: Do not short-circuit any wires. Incorrect wiring can cause damage or fire.
- Driving Safety: Do not operate the system in a way that distracts you from driving. Always prioritize road safety.
- Temperature: Avoid exposing the unit to extreme temperatures or direct sunlight for prolonged periods.
- Moisture: Keep the unit dry. Exposure to moisture can cause malfunction.
3. Package Contents
Before installation, verify that all items listed below are present in your package:

Figure 3.1: Included Accessories. This image displays the main unit, GPS antenna, radio fascia (specific to car model), two USB cables, CAM In cable, installation tool, 4G SIM RCA cable, 4G antenna, microphone, power harness (specific to car model), and an optional Can bus module.
- Main Head Unit (9-inch Android Stereo)
- Radio Fascia Frame (Specific for Citroen C4 2004-2009)
- Power Harness (Plug and Play, specific for Citroen C4 2004-2009)
- GPS Antenna
- USB Cables (x2)
- CAM In Cable
- Installation Tool
- 4G SIM RCA Cable
- 4G Antenna
- External Microphone
- Can bus (Optional, some models may not require it)
4. Setup and Installation
The Strpump car stereo is designed for a plug-and-play, non-destructive installation. The included plastic frame and power harness are tailored for the Citroen C4, C-Triomphe, and C-Quatre models from 2004 to 2009, ensuring compatibility with your vehicle's original wiring without causing harm.
4.1 Pre-Installation Check
- Ensure the vehicle's ignition is off and the battery is disconnected before starting installation.
- Confirm all package contents are present as per Section 3.
- If your car has a factory amplifier or OEM camera, a different harness set might be required. Contact the seller for assistance if this is the case.
4.2 Installation Steps (General Guide)
- Carefully remove the original car radio and dashboard trim using the provided installation tool.
- Connect the new power harness to the vehicle's wiring. Ensure all connections are secure.
- Connect the GPS antenna, 4G antenna, USB cables, CAM In cable, and external microphone to the corresponding ports on the Strpump head unit. Route cables appropriately to avoid interference.
- Mount the Strpump head unit into the new radio fascia frame.
- Carefully insert the assembled unit into the dashboard opening.
- Reconnect the vehicle battery and test the unit's functionality before fully reassembling the dashboard trim.

Figure 4.1: Installation Comparison. This image illustrates the dashboard of a Citroen C4 before and after the installation of the Strpump Android car stereo, demonstrating the integrated fit.
5. Operating Instructions
Your Strpump car stereo runs on Android 10.0, offering a familiar and intuitive user experience similar to a smartphone.
5.1 Basic Operation
- Power On/Off: The unit powers on automatically with the vehicle's ignition. Press and hold the power button for manual power control.
- Touchscreen Interface: Navigate through menus and applications using the responsive 2.5D+IPS QLED touchscreen.
- Volume Control: Adjust volume using the physical buttons or on-screen controls.
- Steering Wheel Control: The unit supports original steering wheel controls for convenient operation.

Figure 5.1: User Interface Display. This image provides an overview of various screens and functions available on the Strpump car stereo, including the main interface, application menu, navigation, Apple CarPlay, Bluetooth music, radio, USB media playback, video player, file manager, 32-band equalizer, and OBD2 data display.
5.2 Connectivity
- Wi-Fi: Connect to a Wi-Fi hotspot for internet access. Go to Settings > Network & Internet > Wi-Fi.
- 4G: Insert a 4G SIM card into the provided slot (via 4G SIM RCA cable) for mobile data connectivity.
- Bluetooth: Pair your smartphone for hands-free calling and A2DP music streaming. Go to Settings > Connected devices > Pair new device. An external microphone is included for clear call quality.

Figure 5.2: 4G and Wi-Fi Connectivity. This image details the supported 4G working bands (GSM, WCDMA, TD-SCDMA, TDD-LTE, FDD-LTE) and highlights the integrated Wi-Fi feature of the car stereo.
5.3 Navigation (GPS)
The unit supports various online and offline GPS navigation applications. Pre-installed maps may be available, and you can download additional apps from the Google Play Store.
- Online Maps: Use apps like Google Maps, Waze, or Navite with an active internet connection.
- Offline Maps: Download map data for offline use to navigate without an internet connection.
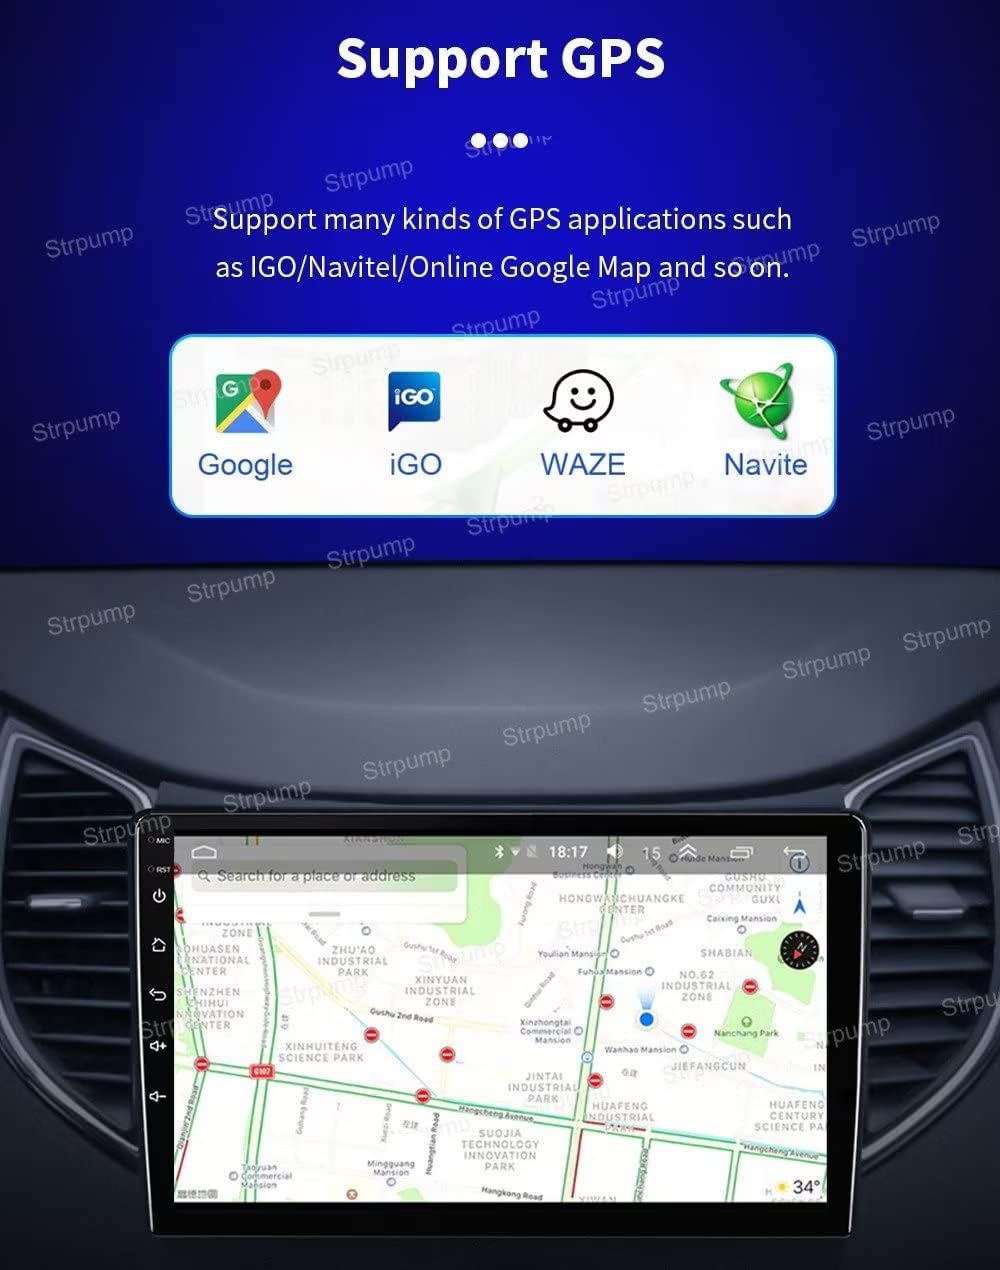
Figure 5.3: GPS Navigation Support. This image demonstrates the unit's capability to run various GPS applications, including Google Maps, iGO, Waze, and Navite, for comprehensive navigation.
5.4 CarPlay and Android Auto
The stereo features built-in wired and wireless Apple CarPlay and Android Auto functionality.
- Wired Connection: Connect your iPhone or Android phone to the 6-pin USB port. The system will automatically launch CarPlay or Android Auto.
- Wireless Connection: Follow the on-screen instructions to connect wirelessly via Bluetooth and Wi-Fi.
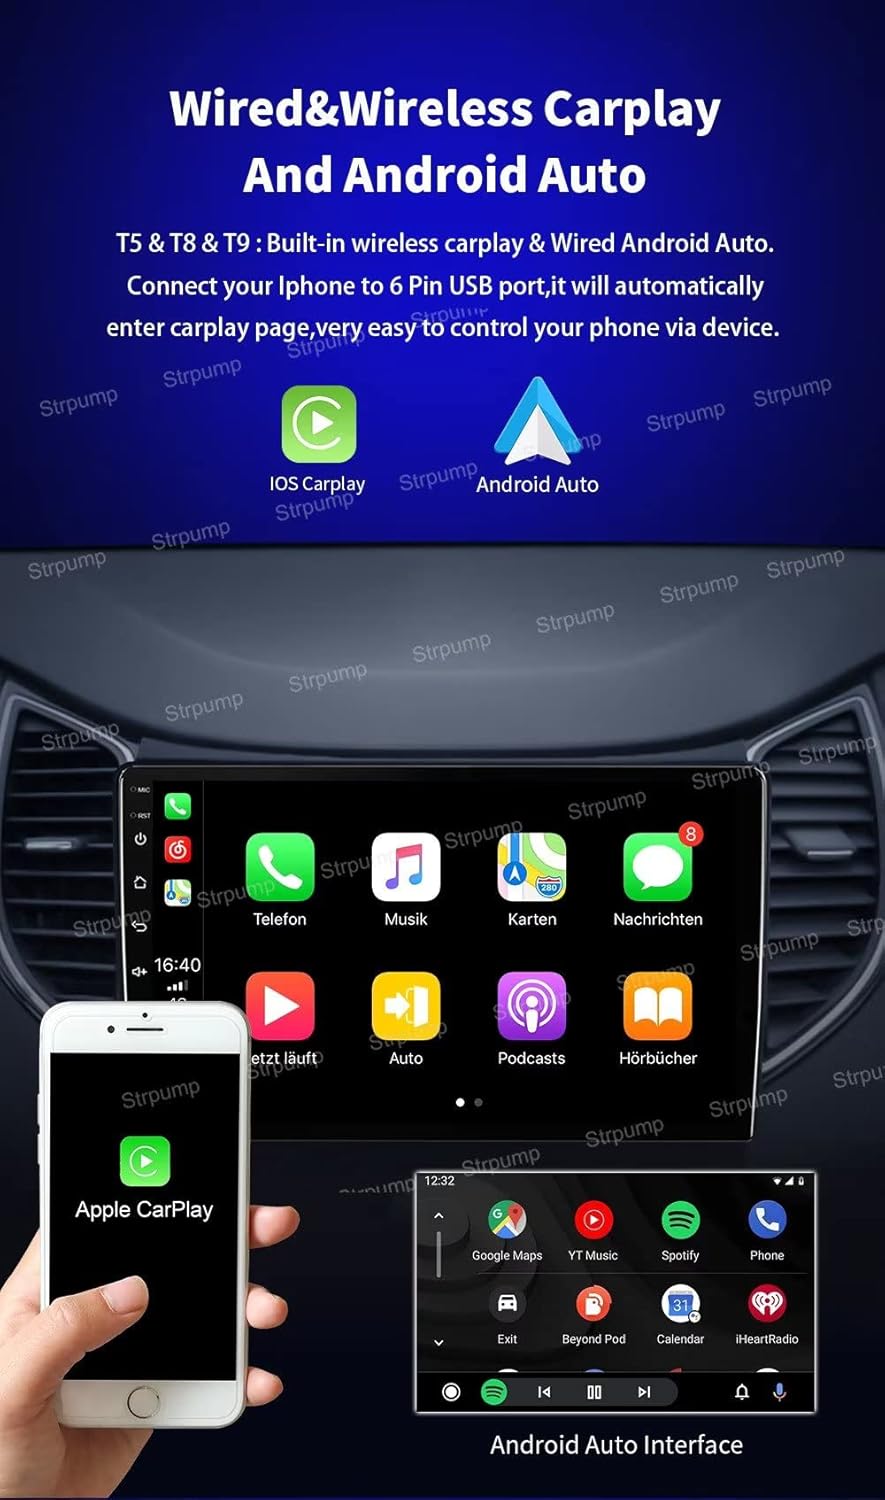
Figure 5.4: CarPlay and Android Auto. This image illustrates the seamless integration of Apple CarPlay and Android Auto, showing their respective interfaces on the car stereo display.
5.5 Audio Features
- DSP Audio Processor: Utilize the built-in 32-band EQ for precise audio customization.
- Amplifier Output: The unit features a 4 x 60W amplifier output.
- Subwoofer Output: Connect an external subwoofer for enhanced bass.
- Lossless Music: Supports playback of various lossless audio formats.
5.6 Other Functions
- Split Screen: Run two applications simultaneously on the screen.
- Google Play Store: Download and install your favorite Android applications.
- Online Media: Stream videos, TV, movies, music, and radio from platforms like YouTube.
- 3D Games: Enjoy compatible 3D games.
- Boot Logos: Customize the startup logo.
6. Connecting External Devices
The Strpump car stereo supports various optional external accessories to enhance your driving experience.
6.1 Rear View Camera
Connect a rear-view camera to the CAM In port. The system will automatically switch to the reverse display when the vehicle is put into reverse gear. The unit supports both normal CVBS AV cameras and HD AHD cameras.

Figure 6.1: Rear View Camera Functionality. This image demonstrates the automatic display of the rear-view camera feed when reversing, along with an example of a compatible AHD rear-view camera.
6.2 Optional Accessories
The following accessories can be connected (purchased separately):
- DVR (Digital Video Recorder): For front dash camera recording.
- TPMS (Tire Pressure Monitoring System): To monitor tire pressure in real-time.
- OBDII (On-Board Diagnostics II): For vehicle diagnostics and data display.
- DAB (Digital Audio Broadcasting): For digital radio reception.
- TV Tuner: For receiving television broadcasts.
7. Maintenance
Proper maintenance ensures the longevity and optimal performance of your car stereo.
- Cleaning the Screen: Use a soft, lint-free cloth to gently wipe the touchscreen. For stubborn smudges, slightly dampen the cloth with water or a screen-safe cleaner. Avoid harsh chemicals.
- Software Updates: Periodically check for software updates to ensure the system has the latest features and security patches. Updates can usually be found in the system settings or on the manufacturer's website.
- Avoid Liquids: Do not spill liquids on the unit. If liquid enters the unit, disconnect power immediately and consult a professional.
- Temperature Control: While the unit is designed for automotive use, extreme temperatures can affect performance. Avoid leaving the vehicle in direct sunlight for extended periods in hot weather.
8. Troubleshooting
If you encounter issues with your car stereo, refer to the following common problems and solutions before seeking professional assistance.
- No Power:
- Check all power connections and fuses.
- Ensure the vehicle's ignition is on.
- No Sound:
- Verify volume settings are not muted or too low.
- Check speaker connections.
- Ensure the correct audio source is selected.
- GPS Not Working/Inaccurate:
- Ensure the GPS antenna is properly connected and has a clear view of the sky.
- Check GPS settings in the system.
- Verify that navigation apps are up to date.
- Bluetooth Connection Issues:
- Ensure Bluetooth is enabled on both the stereo and your device.
- Delete previous pairings and try pairing again.
- Move your device closer to the stereo.
- Touchscreen Unresponsive:
- Restart the unit by turning the vehicle ignition off and on.
- Perform a system reset if available (refer to system settings).
- CarPlay/Android Auto Not Connecting:
- Ensure your phone's operating system is up to date.
- Try a different USB cable if using a wired connection.
- Check phone settings for CarPlay/Android Auto permissions.
9. Specifications

Figure 9.1: Screen Resolution and Technology. This image emphasizes the 1280x720P resolution and 2.5D+IPS screen technology, ensuring a clear and delicate display.
| Model Number | SP-TS18-4GB-9708 |
| Operating System | Android 10.0 |
| CPU | UIS8581A Octa-Core CortexTM A55 1.6GHZ |
| RAM | 4GB |
| ROM (Storage) | 64GB |
| Screen Type | 9-inch 2.5D+IPS QLED Screen |
| Screen Resolution | 1280*720 HD |
| Amplifier Output | 4 x 60W |
| DSP | Built-in 32-Band EQ |
| Connectivity | 4G, Wi-Fi, Bluetooth, USB, AUX-IN, Cam-IN |
| Special Features | Built-in CarPlay & Android Auto, Split Screen, GPS Navigation, Google Play Store, Subwoofer Output, Steering Wheel Control Support |
| Compatible Vehicles | Citroen C4, C-Triomphe, C-Quatre (2004-2009) |
| Wattage (Total) | 240 watts |
| Output Power (Per Channel) | 60 Watts |
| Number of Channels | 4 |
10. Warranty and Support
For warranty information, please refer to the purchase documentation or contact your retailer. Warranty terms and conditions may vary.
If you require technical support, have questions about installation, or need assistance with specific features, please contact the seller or manufacturer directly. Provide your model number (SP-TS18-4GB-9708) and a detailed description of your issue for efficient support.