1. Introduction
Thank you for choosing the DDPAI Z40 Dash Cam. This manual provides detailed instructions for the installation, setup, operation, and maintenance of your device. Please read this manual thoroughly before using the product to ensure proper function and safety.
The DDPAI Z40 is a high-resolution dash camera system designed to record driving footage, offering both front and rear camera views. It features 1944P resolution for the front camera, a Sony IMX335 sensor, built-in GPS, Wi-Fi connectivity, and a parking monitoring function.
2. Package Contents
Please check the package contents upon unboxing. If any items are missing or damaged, contact your retailer.
- DDPAI Z40 Front Dash Cam Unit
- Rear Camera
- Power Cable (USB to Car Charger)
- Car Charger
- Mounting Bracket
- Adhesive Pads
- Crowbar Tool
- User Manual
- Memory Card (Included with some packages)
3. Product Overview
Familiarize yourself with the components of your DDPAI Z40 Dash Cam system.

This image displays the main DDPAI Z40 dash cam unit with labels pointing to its key components: the mounting bracket, the 2-inch LCD screen, the 6-lens Sony IMX335 camera, and the physical control buttons.
Front Camera Unit
- Camera Lens: Records front view (1944P resolution, 140° wide angle).
- LCD Screen: 2.4-inch display for live view, playback, and settings.
- Control Buttons: Navigate menus and control functions.
- Speaker/Microphone: For audio recording and playback.
- USB Power Port: Connects to the car charger.
- Rear Camera Port: Connects the rear camera.
- MicroSD Card Slot: Insert memory card for storage.
- Mounting Slot: Attaches to the adhesive bracket.
Rear Camera Unit
- Camera Lens: Records rear view (1080P resolution, 125° wide angle).
- Connection Cable: Connects to the front camera unit.
4. Installation
Proper installation is crucial for optimal performance and safety. Ensure the dash cam does not obstruct your view or interfere with vehicle controls.
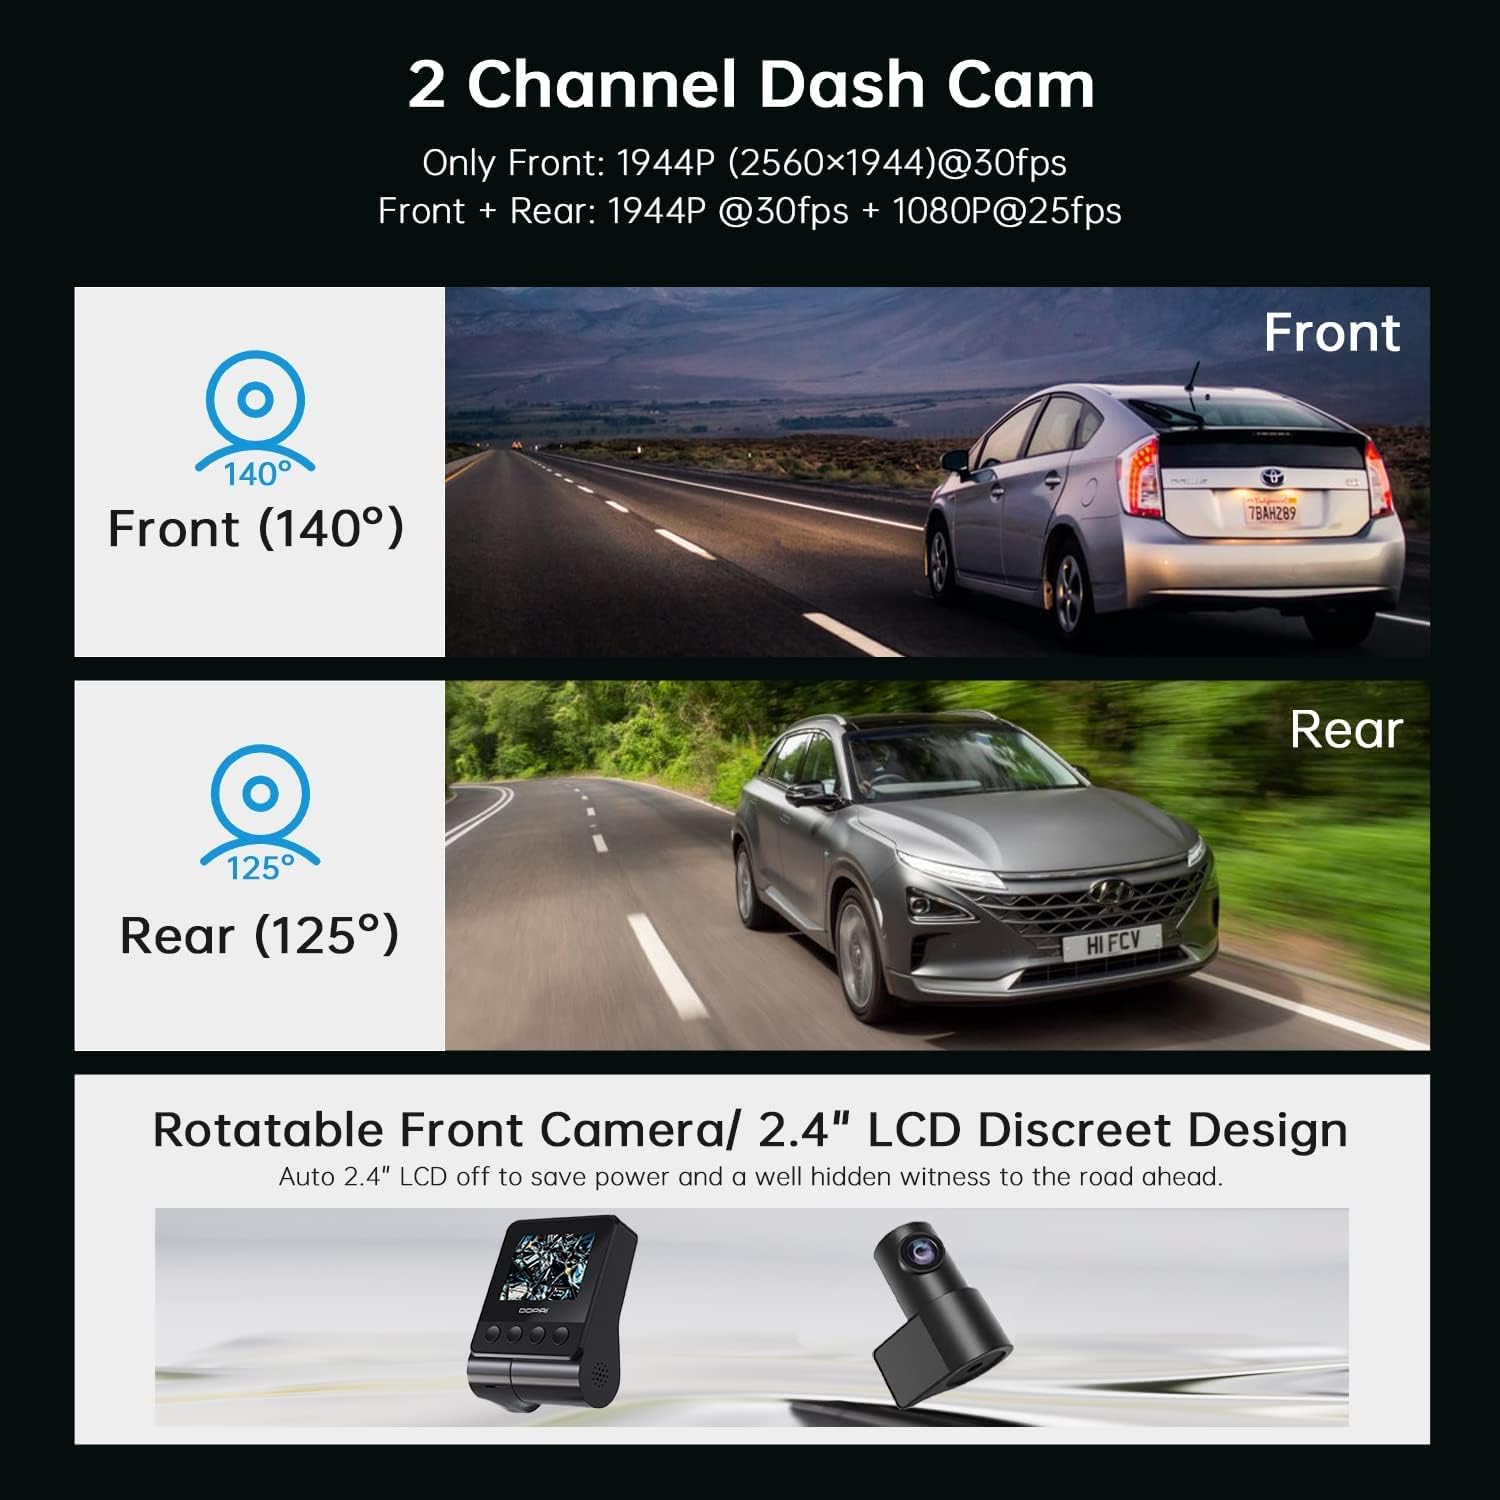
This image illustrates the dual-channel dash cam setup, showing the 140-degree front camera view and the 125-degree rear camera view, with example vehicles in each perspective.
4.1 Inserting the Memory Card
- Ensure the dash cam is powered off.
- Locate the MicroSD card slot on the side of the front camera unit.
- Insert a Class 10 or higher MicroSD card (up to 128GB recommended) into the slot until it clicks into place.
- To remove, gently push the card in until it springs out.
4.2 Installing the Front Camera
- Clean the windshield area where you intend to mount the dash cam. Ensure it is dry and free of dust.
- Attach the adhesive pad to the mounting bracket.
- Peel off the protective film from the adhesive pad and firmly press the bracket onto the windshield, ideally behind the rearview mirror, ensuring the lens has a clear view of the road.
- Slide the front camera unit onto the bracket until it locks securely.
- Adjust the camera angle to ensure the road ahead is centered in the frame.
4.3 Installing the Rear Camera
- Identify a suitable location on your rear windshield, typically at the top center, ensuring a clear view.
- Clean the area thoroughly.
- Attach the rear camera with its adhesive pad to the chosen location.
- Connect the rear camera cable to the designated port on the front camera unit.
4.4 Power Connection and Cable Routing
- Connect the USB power cable to the front camera unit.
- Plug the car charger into your vehicle's cigarette lighter socket.
- Carefully route the power cable and the rear camera cable along the edges of your windshield and interior trim using the provided crowbar tool to tuck them neatly away. This prevents obstruction and ensures a clean installation.
5. Setup
After installation, configure your dash cam settings for optimal performance.
5.1 Initial Power On
Once connected to power, the dash cam will automatically power on and begin recording when your vehicle starts. The LCD screen will display the live view from the front camera (and rear camera if connected).
5.2 DDPAI App Connection

This image shows the DDPAI mobile application interface for viewing, downloading, and sharing videos, along with a laptop screen displaying a map, illustrating the built-in GPS logger feature that records time, date, location, and speed information.
- Download the DDPAI App from your smartphone's app store (iOS or Android).
- Turn on the dash cam.
- Open the DDPAI App and tap 'Add Device'.
- Select your DDPAI Z40 from the list of available Wi-Fi networks. The default Wi-Fi name usually starts with 'DDPAI_' followed by the model name or serial number. The default password is '1234567890'.
- Once connected, you can view live footage, access recorded videos, and adjust settings via the app.
5.3 Basic Settings Configuration (via App or Device)
- Video Resolution: Set to 1944P for front and 1080P for rear for optimal clarity.
- Loop Recording: Ensure this is enabled. Videos are recorded in segments (e.g., 1, 3, or 5 minutes). When the memory card is full, the oldest unlocked files will be overwritten.
- G-Sensor Sensitivity: Adjust the sensitivity for emergency recording. A higher sensitivity will trigger recordings more easily during sudden impacts or braking.
- Parking Monitor: Enable this feature for 24-hour surveillance. Requires a hardwire kit (sold separately) for continuous power.
- Date/Time: Ensure the correct date and time are set. GPS will automatically synchronize this.
- Audio Recording: Enable or disable microphone recording.
6. Operation
Understand the various recording modes and features of your dash cam.
6.1 Driving Recording (Loop Recording)

This image highlights three key operational features: Emergency Recording, which locks video upon G-sensor activation; Parking Monitor, providing 24-hour surveillance; and Seamless Loop Recording, which overwrites old files when the memory card is full.
The dash cam automatically starts recording when the vehicle's ignition is turned on. Footage is saved in short segments (e.g., 1, 3, or 5 minutes) to the MicroSD card. When the card is full, the oldest unlocked files are overwritten by new recordings, ensuring continuous recording.
6.2 Emergency Recording (G-Sensor)
In the event of a sudden impact, collision, or hard braking, the built-in G-sensor will detect the event and automatically lock the current video segment, preventing it from being overwritten by loop recording. These files are typically stored in a separate 'Event' folder on the memory card.
6.3 Parking Monitor
When enabled and properly powered (e.g., via a hardwire kit), the dash cam can monitor your vehicle while parked. If an impact or motion is detected, it will automatically record a short video segment. This feature provides surveillance even when the vehicle is off.
6.4 GPS Logging
The built-in GPS module records your vehicle's speed, location, and route data. This information is embedded in the video files and can be viewed during playback using the DDPAI App or compatible PC software.
6.5 Viewing and Downloading Footage
- Via DDPAI App: Connect your smartphone to the dash cam's Wi-Fi. Open the app, navigate to the 'Album' or 'Playback' section to view recorded videos. You can download desired clips directly to your phone.
- Via Computer: Remove the MicroSD card from the dash cam and insert it into a card reader connected to your computer. You can then access and copy the video files.
7. Maintenance
Regular maintenance ensures the longevity and optimal performance of your dash cam.
7.1 Memory Card Formatting
It is recommended to format the MicroSD card every 2-4 weeks to prevent data corruption and ensure smooth recording. This can be done through the DDPAI App or the dash cam's settings menu. Formatting will erase all data on the card, so back up any important files first.
7.2 Cleaning the Lenses
Periodically clean the front and rear camera lenses with a soft, lint-free cloth to ensure clear video quality. Avoid using abrasive cleaners.
7.3 Firmware Updates
Check the DDPAI App regularly for firmware updates. Updates can improve performance, add new features, or fix bugs. Follow the in-app instructions carefully when performing an update.
8. Troubleshooting
If you encounter issues with your DDPAI Z40, refer to the following common problems and solutions.
- Dash Cam Not Powering On:
- Check the power cable connection to the dash cam and the car charger.
- Ensure the car charger is securely plugged into the cigarette lighter socket.
- Verify that the vehicle's cigarette lighter socket is receiving power. - Dash Cam Not Recording:
- Ensure a MicroSD card is inserted correctly.
- Format the MicroSD card (back up data first).
- Check if the memory card is full or corrupted. Replace if necessary.
- Verify loop recording is enabled in settings. - Poor Video Quality:
- Clean the camera lenses.
- Ensure the protective film has been removed from the lenses.
- Check video resolution settings in the app.
- Ensure the windshield is clean where the camera is mounted. - Wi-Fi Connection Issues:
- Ensure the dash cam is powered on.
- Restart both the dash cam and your smartphone.
- Try forgetting the Wi-Fi network on your phone and reconnecting.
- Ensure you are within close proximity to the dash cam. - G-Sensor Too Sensitive/Not Sensitive Enough:
- Adjust the G-sensor sensitivity setting in the DDPAI App. - Parking Monitor Not Working:
- Ensure the parking monitor feature is enabled in settings.
- Verify that the dash cam is receiving continuous power (requires a hardwire kit).
If the problem persists, contact DDPAI customer support for further assistance.
9. Specifications
Key technical specifications for the DDPAI Z40 Dash Cam.
| Feature | Specification |
|---|---|
| Brand | DDPAI |
| Model Name | Z40 |
| Front Camera Resolution | 1944P (2592 x 1944) @ 30fps |
| Rear Camera Resolution | 1080P @ 25fps |
| Chipset Manufacturer | HISILICON |
| Sensor | Sony IMX335 |
| Lens | 6-lens |
| Front View Angle | 140° |
| Rear View Angle | 125° |
| Display | 2.4-inch LCD |
| Connectivity | Wi-Fi |
| Special Features | Built-In GPS, Night Vision, Parking Monitor, G-Sensor, Loop Recording |
| Storage | MicroSD Card (Class 10 or higher, up to 128GB) |
| Power Source | Supercapacitor |
| Control Method | App, Physical Buttons |
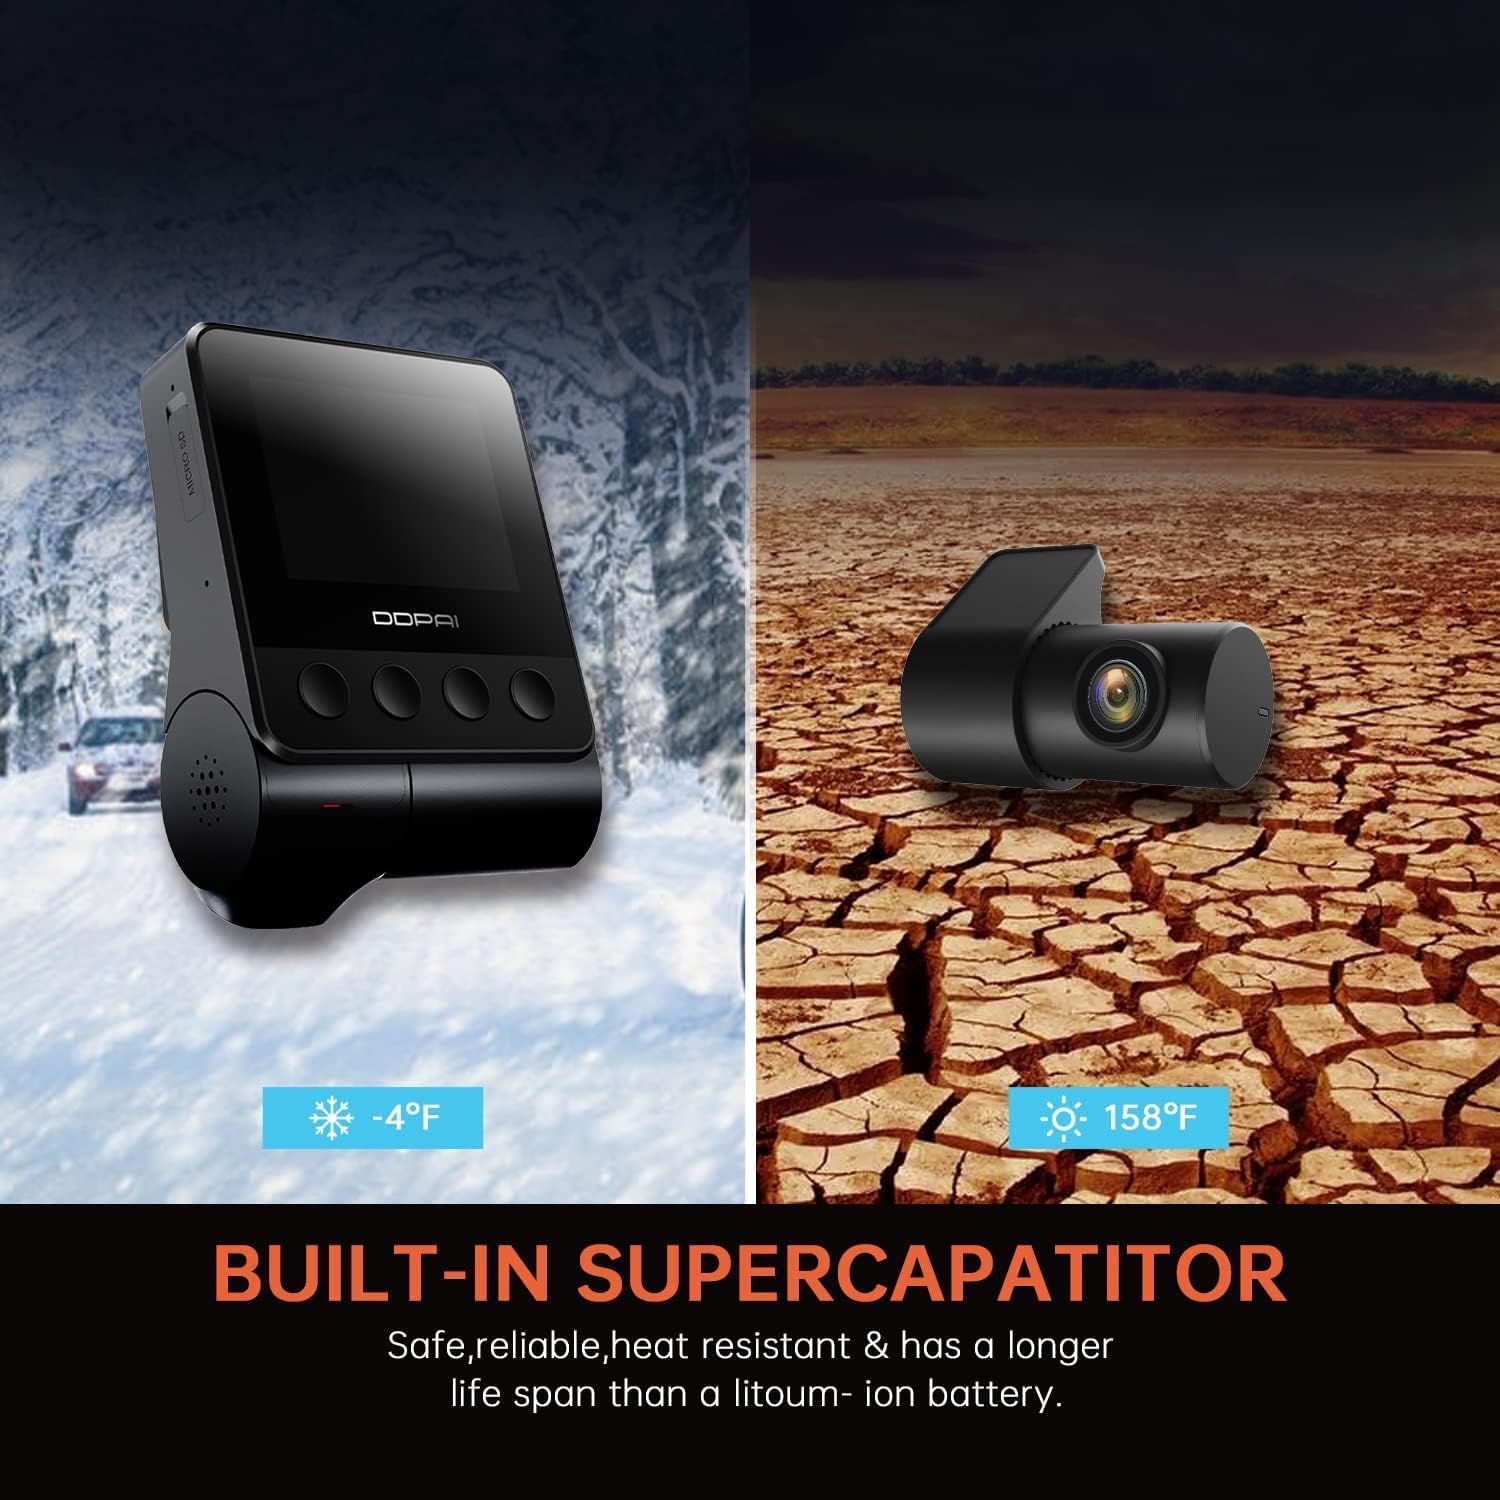
This image highlights the built-in supercapacitor, emphasizing its safety, reliability, heat resistance, and longer lifespan compared to lithium-ion batteries, with visual representations of extreme cold (-4°F) and hot (158°F) environments.
10. Warranty and Support
For warranty information, please refer to the warranty card included in your product packaging or visit the official DDPAI website. For technical support, troubleshooting assistance, or inquiries about replacement parts, please contact DDPAI customer service through their official channels.


