1. Product Overview
This manual provides detailed instructions for the installation, operation, and maintenance of your Homekicen Ceiling Mount Rain Shower System. Please read this manual thoroughly before installation and retain it for future reference.
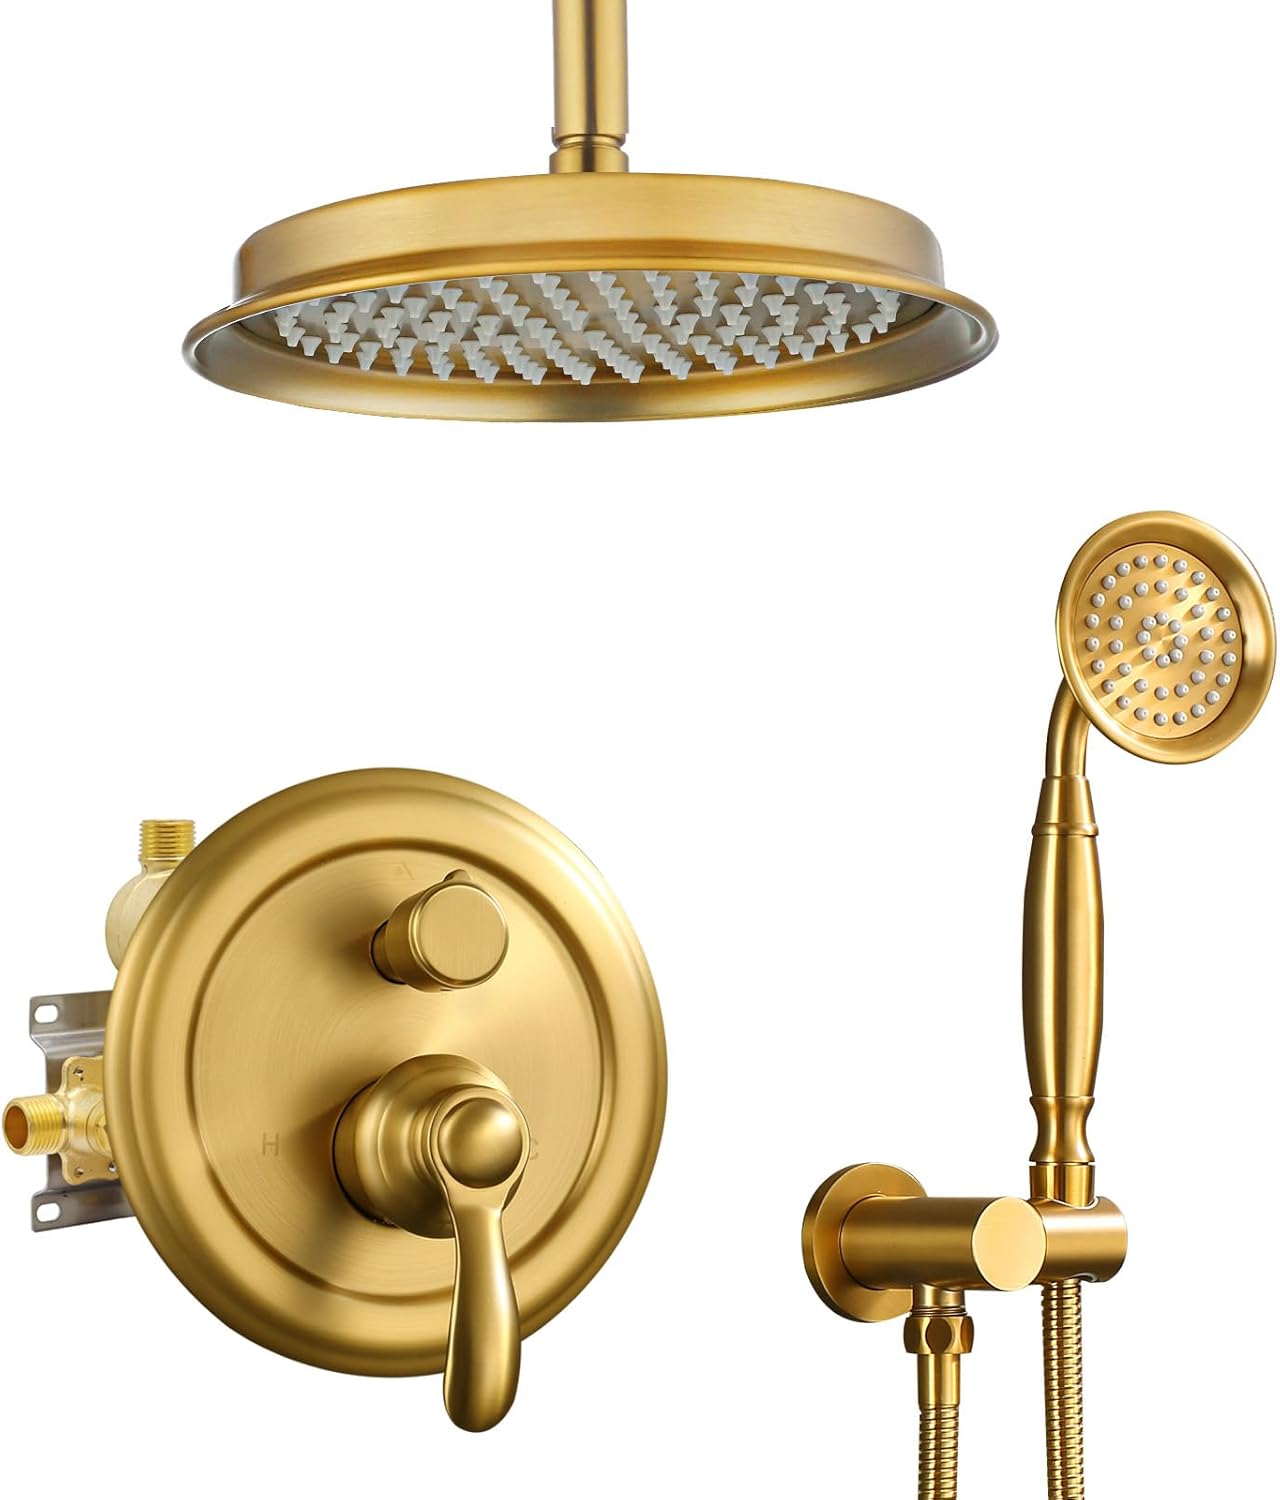
Image 1.1: Overview of the Homekicen Ceiling Mount Rain Shower System, showing the rain shower head, handheld spray, and control valve.
The Homekicen Ceiling Mount Rain Shower System combines a vintage aesthetic with modern functionality, offering a luxurious showering experience. It features a 9-inch rainfall shower head, a durable handheld spray, and a 2-way diverter brass rough-in valve.
2. Package Contents
Verify that all components are present and undamaged before beginning installation. If any parts are missing or damaged, please contact customer service.
- 9-inch Rain Shower Head (Stainless Steel)
- 12-inch Shower Arm with Flange (Stainless Steel)
- Mixing Valve (Solid Brass)
- Handheld Spray (Stainless Steel)
- Shower Holder (Brass)
- 59-inch Shower Hose (Stainless Steel)
- Installation Hardware (screws, anchors, etc.)
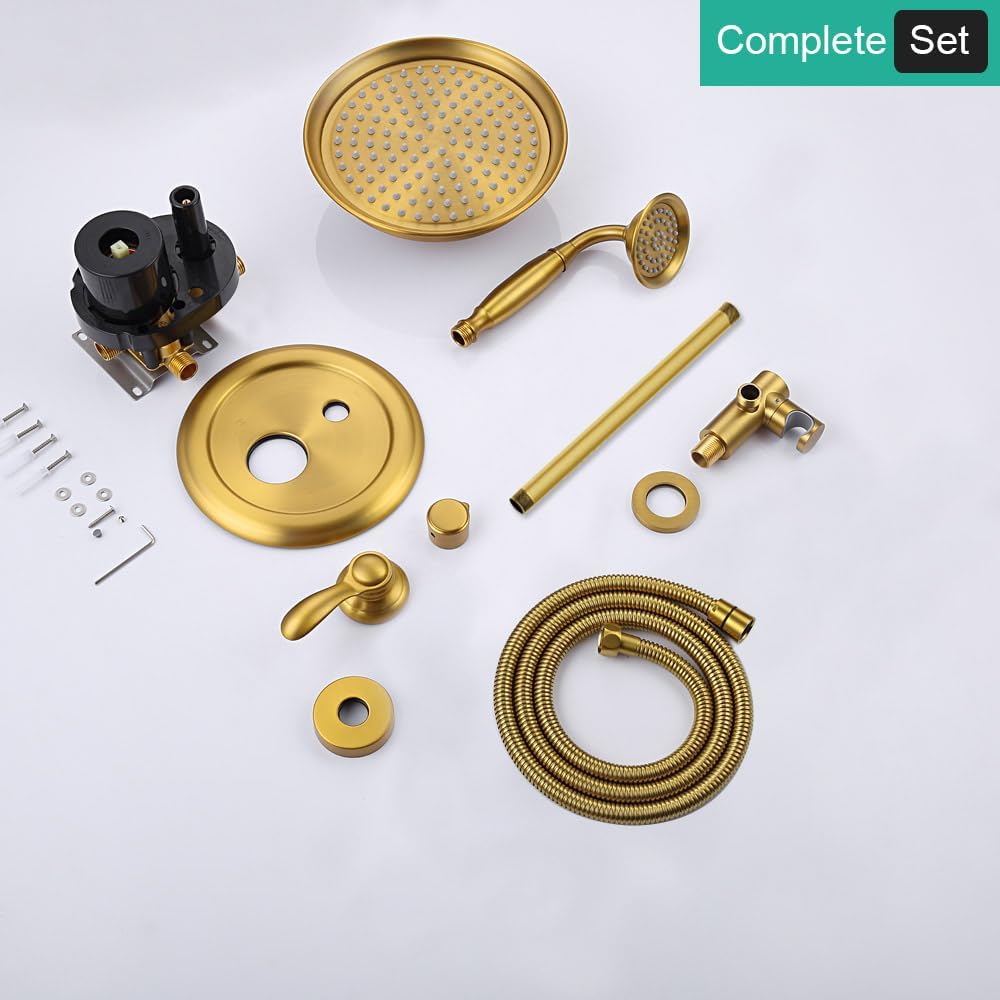
Image 2.1: All components of the Homekicen Ceiling Mount Rain Shower System as packaged.
3. Safety Information
- Always turn off the main water supply before beginning any plumbing work.
- Wear appropriate personal protective equipment, such as safety glasses and gloves.
- If you are unsure about any step of the installation process, consult a qualified plumber.
- Ensure all connections are secure and watertight to prevent leaks.
- Do not overtighten connections, as this can damage components.
4. Installation Instructions
Professional installation is recommended. Ensure compliance with local plumbing codes.
4.1. Prepare the Installation Area
- Turn off the main water supply to your home.
- Remove any existing shower fixtures.
- Ensure the wall cavity is prepared for the rough-in valve installation.

Image 4.1: Detailed view of the balance valve, showing hot and cold water inlets and mixed water outlets. This valve features a 2-way diverter and temperature control.
4.2. Install the Rough-in Valve
- Mount the solid brass mixing valve securely within the wall cavity. The valve is designed for U.S. Plumbing Standard Connection 1/2" NPT.
- Connect the hot and cold water supply lines to the designated inlets on the valve.
- Connect the mixed water outlets to the shower arm and handheld spray connections.
- Ensure all connections are sealed properly to prevent leaks.

Image 4.2: Close-up of the brass balance valve, which ensures consistent water temperature.
4.3. Install Shower Arm and Head
- Thread the 12-inch shower arm into the ceiling-mounted connection.
- Attach the 9-inch rain shower head to the shower arm. Ensure a tight seal.

Image 4.3: The 9-inch rain shower head and 12-inch shower arm, demonstrating the rainfall effect.
4.4. Install Handheld Spray and Hose
- Mount the shower holder to the wall at a convenient height.
- Connect the 59-inch shower hose to the handheld spray and the designated outlet on the mixing valve.
- Place the handheld spray into the holder.

Image 4.4: The metal handheld shower spray, 59-inch hose, and adjustable shower holder.
4.5. Install Trim Kit
- Install the decorative trim plate and handle onto the rough-in valve according to the manufacturer's instructions.
5. Operating Instructions
Your Homekicen shower system offers two distinct shower functions: the rain shower head and the handheld spray.
5.1. Water Flow and Temperature Control
- The single lever on the mixing valve controls both water flow and temperature.
- Rotate the lever to adjust the water temperature from cold to hot.
- Pull the lever outwards to increase water flow.
Video 5.1: Demonstration of the shower system's operation, showing how to switch between the rain shower and handheld spray, and adjust water flow and temperature.
5.2. Switching Between Functions
- Use the diverter knob on the mixing valve to switch between the rain shower head and the handheld spray.
- Turn the knob to select your desired water outlet.
Video 5.2: This video illustrates the process of switching between the rain shower and handheld spray functions using the diverter knob.
6. Maintenance
Regular cleaning and maintenance will ensure the longevity and optimal performance of your shower system.
6.1. Cleaning the Shower Heads and Nozzles
- The silicone nozzles on both the rain shower head and handheld spray are designed for easy cleaning.
- Simply rub the nozzles with your finger or a soft cloth to dislodge any mineral buildup.
- For more stubborn deposits, use a mild descaling solution specifically designed for bathroom fixtures. Avoid abrasive cleaners.
Video 6.1: This video demonstrates how to easily clean the silicone nozzles on the shower heads to remove mineral buildup.
6.2. General Cleaning
- Clean the brushed titanium gold finish with a soft, damp cloth.
- Do not use abrasive cleaners, harsh chemicals, or scouring pads, as these can damage the finish.
- Wipe down the fixtures regularly to prevent water spots and soap scum buildup.
7. Troubleshooting
| Problem | Possible Cause | Solution |
|---|---|---|
| Low water pressure |
|
|
| Water temperature inconsistent or too hot/cold |
|
|
| Leaking from connections |
|
|
If you encounter problems not listed here or if the suggested solutions do not resolve the issue, please contact Homekicen customer support.
8. Specifications
| Feature | Detail |
|---|---|
| Brand | Homekicen |
| Model Number | WY-FG-9SS-2 |
| Color | Brushed Titanium Gold |
| Material | Brass, Stainless Steel |
| Finish Type | Brushed |
| Number of Handles | 1 |
| Mounting Type | Ceiling Mount |
| Rain Shower Head Size | 9 inches |
| Shower Arm Length | 12 inches |
| Shower Hose Length | 59 inches |
| Connection Standard | 1/2" NPT (U.S. Plumbing Standard) |
| Product Dimensions | 23.6 x 13.4 x 6.1 inches (packaging) |
| Item Weight | 9.88 pounds (4.49 Kilograms) |

Image 8.1: Technical drawing illustrating the dimensions of the valve body for installation planning.
9. Warranty and Customer Support
Homekicen offers a 5-year warranty for quality-related issues. If any part malfunctions due to quality reasons within this period, it will be replaced free of charge.
For technical assistance, warranty claims, or any other inquiries, please contact Homekicen customer support:
- Email: homekicen@126.com
- Online Support: Visit the Homekicen Store on Amazon


