
1. Introduction
Thank you for choosing the Makita XWT12Z 18V LXT Lithium-Ion Brushless Cordless 3/8" Impact Wrench. This manual provides essential information for the safe and effective operation, maintenance, and troubleshooting of your tool. Please read this manual thoroughly before use and retain it for future reference. This compact and powerful impact wrench is designed for various fastening applications, offering excellent performance in tight spaces.
2. Safety Information
Always observe basic safety precautions to reduce the risk of fire, electric shock, and personal injury. Keep this manual for future reference.
General Power Tool Safety Warnings
- Work Area Safety: Keep your work area clean and well-lit. Cluttered or dark areas invite accidents. Do not operate power tools in explosive atmospheres, such as in the presence of flammable liquids, gases, or dust.
- Electrical Safety: Power tool plugs must match the outlet. Never modify the plug in any way. Do not use any adapter plugs with earthed (grounded) power tools. Avoid body contact with earthed or grounded surfaces.
- Personal Safety: Always wear eye protection. Use hearing protection when operating impact tools. Dress properly; do not wear loose clothing or jewelry. Keep hair, clothing, and gloves away from moving parts.
- Tool Use and Care: Do not force the power tool. Use the correct power tool for your application. Disconnect the battery pack from the power tool before making any adjustments, changing accessories, or storing power tools.
- Battery Tool Use and Care: Recharge only with the charger specified by the manufacturer. Use power tools only with specifically designated battery packs.
- Service: Have your power tool serviced by a qualified repair person using only identical replacement parts.
3. Product Overview
The Makita XWT12Z is an 18V LXT Lithium-Ion Brushless Cordless 3/8" Impact Wrench designed for efficient fastening. It features a compact design and a powerful brushless motor for extended runtime and durability.

Figure 1: Front view of the Makita XWT12Z 18V LXT Lithium-Ion Brushless Cordless 3/8" Impact Wrench. This image displays the tool's compact body, 3/8" square drive, and integrated LED light.

Figure 2: Side view of the Makita XWT12Z impact wrench, showing the model number and safety warning label. This view highlights the ergonomic grip and overall tool dimensions.
Key Components:
- 3/8" Square Drive: For attaching sockets.
- Trigger Switch: Controls tool speed and power.
- Forward/Reverse Lever: Changes rotation direction.
- LED Job Light: Illuminates the work area.
- Mode Selection Buttons (H/S): Adjusts impact power/speed settings.
- Battery Port: For inserting 18V LXT Lithium-Ion battery packs.
4. Setup
4.1 Battery Installation and Removal
The XWT12Z operates with Makita 18V LXT Lithium-Ion battery packs (sold separately).

Figure 3: View of the battery compartment on the Makita XWT12Z, showing where the 18V LXT battery slides into place. The battery is not included with the tool.
- To Install: Align the battery pack with the grooves in the tool's housing and slide it in until it locks into place with a slight click. Ensure it is fully seated.
- To Remove: Press the release button on the battery pack and slide the battery out of the tool.
Ensure the battery is fully charged before use. Refer to your battery charger's manual for charging instructions.
4.2 Socket Installation
Use only impact-rated 3/8" square drive sockets.
- Push the desired 3/8" square drive impact socket onto the anvil of the tool until it clicks into place.
- To remove, pull the socket firmly off the anvil.
5. Operating Instructions
5.1 Powering On/Off and Speed Control
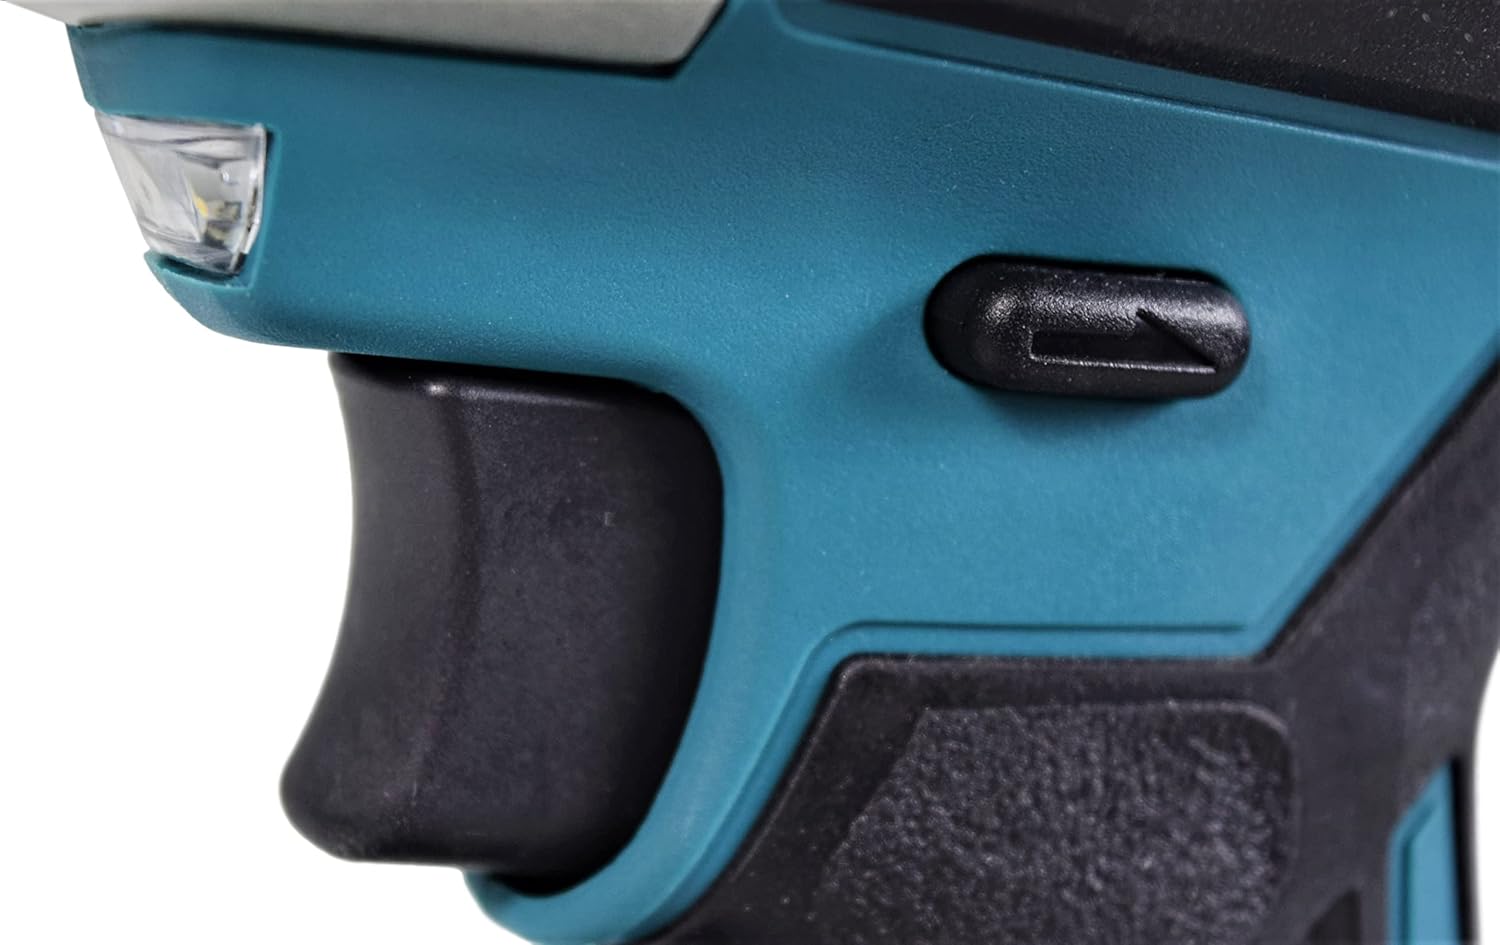
Figure 4: Close-up view of the trigger switch and the forward/reverse selector lever on the Makita XWT12Z impact wrench. The LED light is also visible above the trigger.
- To Start: Pull the trigger switch. The tool speed increases with increased pressure on the trigger.
- To Stop: Release the trigger switch.
- LED Job Light: The LED light automatically illuminates when the trigger is pulled and turns off shortly after the trigger is released.
5.2 Changing Rotation Direction
The forward/reverse lever is located above the trigger switch.
- For forward rotation (tightening), push the lever from the right side of the tool.
- For reverse rotation (loosening), push the lever from the left side of the tool.
- To lock the trigger (prevent accidental starting), set the lever to the neutral (center) position.
5.3 Adjusting Impact Power/Speed
The XWT12Z features variable two-speed settings for optimal control across different applications. The control panel is located at the base of the tool.

Figure 5: Close-up of the control panel at the base of the Makita XWT12Z, showing the LED light control button and the 'H' (High) and 'S' (Soft/Low) speed selection buttons.
- Press the 'H' button for High speed mode (0-2,400 RPM / 0-3,600 IPM) for maximum fastening power.
- Press the 'S' button for Soft/Low speed mode (0-1,300 RPM / 0-2,000 IPM) for more delicate applications or when precise control is needed.
- The selected mode will be indicated by an illuminated LED on the control panel.
5.4 Fastening Operation
- Select the appropriate socket for the fastener.
- Install the socket onto the anvil.
- Select the desired rotation direction (forward for tightening, reverse for loosening).
- Choose the appropriate speed mode (H or S) for the task.
- Place the socket over the fastener.
- Pull the trigger switch to begin operation. Apply steady pressure.
- Release the trigger to stop.
Note: The actual fastening torque can vary depending on the type of fastener, material, and condition. Always verify torque with a torque wrench when precise fastening is required.
6. Maintenance
Regular maintenance ensures optimal performance and extends the life of your tool. Always disconnect the battery before performing any maintenance.
6.1 Cleaning
- Wipe the tool's exterior with a clean, damp cloth. Do not use strong solvents or abrasive cleaners.
- Keep the ventilation openings clear of dust and debris to prevent overheating. Use compressed air if necessary.
6.2 Inspection
- Regularly inspect the tool for any signs of damage, loose screws, or worn parts.
- Check the 3/8" square drive for wear or damage.
- Ensure the forward/reverse lever and trigger switch operate smoothly.
6.3 Storage
- Store the tool in a clean, dry place, out of reach of children.
- Remove the battery pack from the tool before storage, especially for extended periods.
- Avoid storing the tool in direct sunlight or in areas with extreme temperatures.
7. Troubleshooting
If you encounter issues with your Makita XWT12Z, refer to the following common problems and solutions.
| Problem | Possible Cause | Solution |
|---|---|---|
| Tool does not start | Battery not charged Battery not properly installed Forward/Reverse lever in neutral (locked) position | Charge battery Reinstall battery securely Move lever to forward or reverse position |
| Reduced power or speed | Low battery charge Incorrect speed mode selected Tool overheating | Recharge battery Select 'H' (High) mode Allow tool to cool down |
| Socket difficult to attach/remove | Anvil or socket is dirty/damaged Incorrect socket type | Clean or replace anvil/socket Ensure use of 3/8" impact-rated sockets |
If the problem persists after attempting these solutions, contact Makita customer service or an authorized service center.
8. Specifications
Technical specifications for the Makita XWT12Z 18V LXT Lithium-Ion Brushless Cordless 3/8" Impact Wrench.
| Feature | Specification |
|---|---|
| Model Number | XWT12Z |
| Voltage | 18 Volts |
| Drive Size | 3/8 inches Square |
| Max Torque | 130 Foot Pounds |
| No-Load Speed (High) | 0-2,400 RPM |
| No-Load Speed (Low) | 0-1,300 RPM |
| Impacts Per Minute (High) | 0-3,600 IPM |
| Impacts Per Minute (Low) | 0-2,000 IPM |
| Motor Type | Brushless |
| Power Source | Battery Powered |
| Item Weight | 2 Pounds |
| Item Length | 7.5 Inches |
| Material | Metal |
| Special Features | Compact |
9. Warranty Information
Makita power tools are warranted to be free of defects from workmanship and materials for a period of one year from the date of original purchase. For specific warranty terms, conditions, and registration, please refer to the official Makita warranty statement included with your product packaging or visit the official Makita website. Keep your proof of purchase for warranty claims.
10. Support
For further assistance, technical support, or to locate an authorized service center, please visit the official Makita website or contact Makita customer service directly. Contact information can typically be found on the Makita website or in your product packaging.
Website: www.makitatools.com


