1. Introduction
Thank you for purchasing the VANBAR Dual Dash Cam. This device is designed to record your driving journey with high-definition video, providing crucial evidence in case of incidents and capturing memorable moments. Please read this manual carefully before use to ensure proper installation and operation.
2. Package Contents
Please verify that all items listed below are included in your package:
- Main Dash Cam Unit
- Rear Camera
- Car Charger (2-in-1 Cigarette Lighter Adapter)
- Suction Cup Mount
- USB Cable
- 32GB High Endurance SD Card
- User Manual
- Rear Camera Mounting Kit (screws, adhesive)
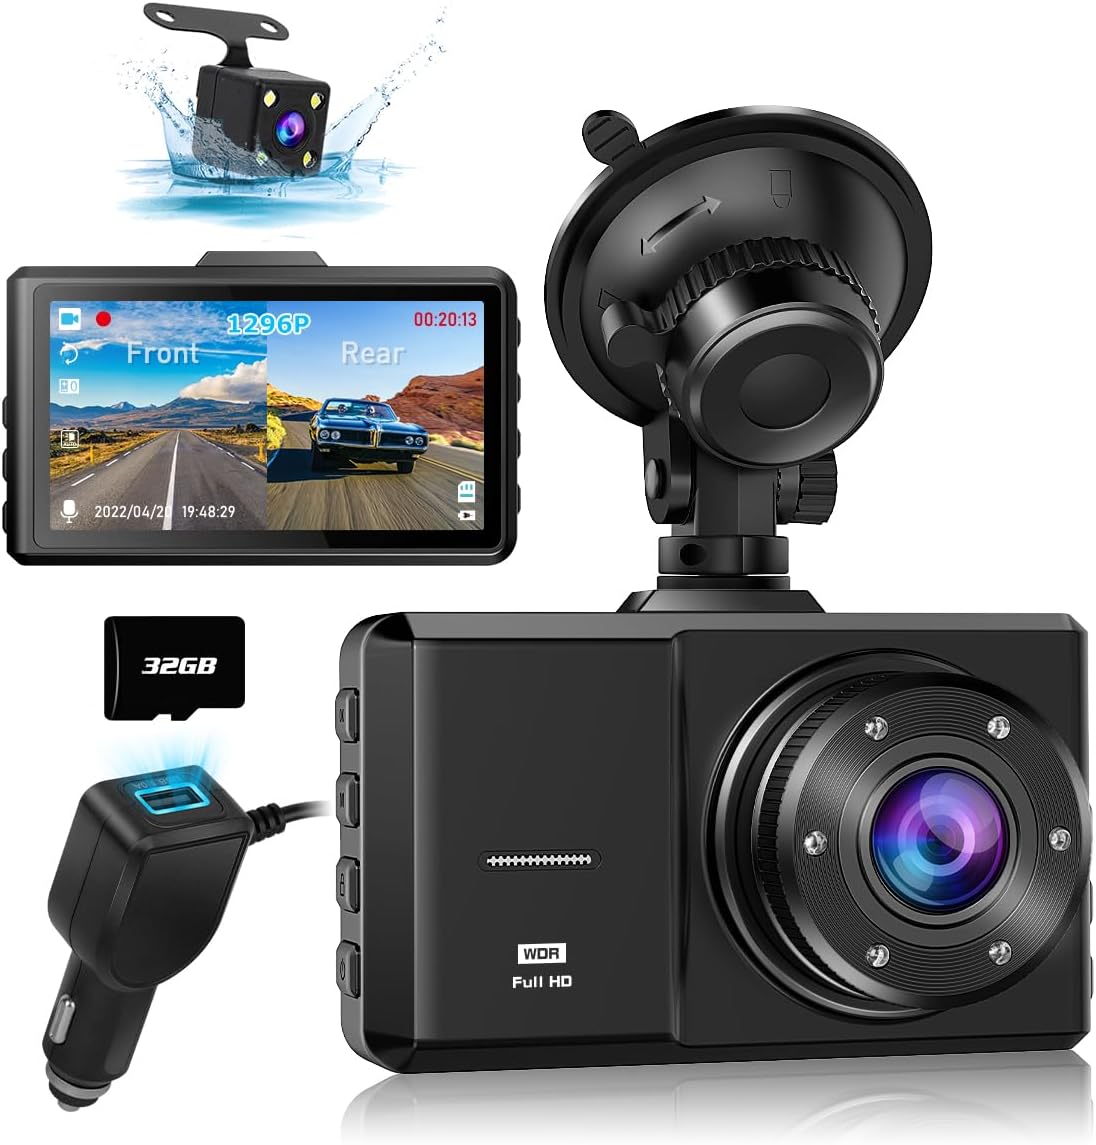
Image: Main dash cam unit, rear camera, car charger, and 32GB SD card.
3. Setup and Installation
3.1 Inserting the SD Card
- Ensure the dash cam is powered off.
- Locate the SD card slot on the side of the main unit.
- Insert the provided 32GB Class 10 high endurance SD card into the slot until it clicks. Ensure correct orientation to avoid damage.
3.2 Mounting the Front Camera
- Clean the windshield area where you intend to mount the dash cam.
- Attach the suction cup mount to the dash cam.
- Press the suction cup firmly against the windshield and lock it into place.
- Adjust the camera angle to ensure a clear view of the road ahead.
3.3 Installing the Rear Camera
- Connect the rear camera cable to the main dash cam unit.
- Route the cable neatly along the vehicle's interior trim to the rear of the vehicle.
- Mount the rear camera on the rear windshield or license plate area using the provided adhesive or screws. Ensure it has a clear view of the rear.
- For reverse assist functionality, connect the red wire from the rear camera cable to your vehicle's reverse light positive wire.
3.4 Power Connection
- Plug the car charger into your vehicle's cigarette lighter socket.
- Connect the mini USB end of the power cable to the main dash cam unit.
- The dash cam will automatically power on and begin recording when the vehicle engine starts.

Image: Illustration of the dash cam mounted on the windshield, showing both front and rear camera views on the display.
4. Operating Instructions
4.1 Basic Operation
- Power On/Off: The device powers on automatically with the car engine and powers off when the engine is turned off. You can also manually power on/off by pressing and holding the power button.
- Recording: Continuous recording starts automatically when the device is powered on. A red indicator light or icon on the screen confirms recording is active.
- Menu Navigation: Use the menu buttons (usually located on the side or bottom of the device) to navigate through settings on the 3-inch LCD screen.
4.2 Key Features
- 170° Wide Angle Lens: The front camera captures a 170-degree field of view, and the rear camera captures 150 degrees, minimizing blind spots.
- Loop Recording: When the SD card is full, the dash cam automatically overwrites the oldest unlocked footage. Video segments are typically 1, 3, or 5 minutes long.
- G-Sensor (Impact Detection): The built-in 3-axis G-sensor detects sudden movements or collisions. In such an event, the current video segment is automatically locked and saved to a protected folder, preventing it from being overwritten.
- Parking Monitor (Time-lapse): With the dedicated hardwire kit (available upon request), the dash cam can record in time-lapse mode (1 frame/second) for up to 24 hours when the engine is off, providing surveillance against vandalism or hit-and-runs.
- HDR/WDR Technology: High Dynamic Range (HDR) and Wide Dynamic Range (WDR) technologies enhance video quality in varying light conditions, ensuring clear recordings in both bright daylight and low-light environments.
- Night Vision: The front camera features 6 IR LEDs, and the rear camera has a fill light, improving visibility and recording clarity in dark conditions. License plates are clearly visible.
- LED Traffic Signal Support: The dash cam is configured to record at 27.5 frames per second (fps) to avoid flickering issues with LED traffic lights in both East and West Japan.
- Audio Recording: Audio recording can be enabled or disabled in the settings. This feature can capture important sounds as evidence or for travel memories.

Image: Visual representation of the 170-degree wide-angle coverage from the front camera.

Image: Illustration demonstrating how WDR technology improves video clarity in both bright and dark areas.
5. Playback and File Management
5.1 On-Device Playback
Recorded videos and captured photos can be easily reviewed directly on the dash cam's 3-inch LCD screen. Navigate to the playback menu using the device buttons.
5.2 Computer Playback
To view files on a computer, remove the SD card from the dash cam and insert it into a computer's SD card reader. The video files are typically in MP4 or MOV format and can be played using standard media players.
6. Maintenance
- SD Card Formatting: It is recommended to format the SD card regularly (e.g., once a month) to ensure optimal performance and prevent data corruption. Format the card using the dash cam's menu settings.
- Lens Cleaning: Keep the camera lenses clean using a soft, lint-free cloth. Avoid abrasive materials that could scratch the lens.
- Temperature: The dash cam is designed to operate in temperatures from -10°C to 70°C. Avoid prolonged exposure to extreme temperatures outside this range.
- Firmware Updates: Check the official VANBAR website periodically for firmware updates to improve performance and add new features.
7. Troubleshooting
- Dash Cam not powering on: Ensure the car charger is properly connected to both the dash cam and the vehicle's cigarette lighter socket. Check if the vehicle's cigarette lighter socket is receiving power.
- Recording stops unexpectedly: Format the SD card. Ensure you are using a Class 10 or higher high endurance SD card. Replace the SD card if the issue persists.
- Video quality is poor: Clean the camera lenses. Ensure the protective film has been removed from the lenses. Check video resolution settings in the menu.
- Rear camera not working: Check the connection between the rear camera and the main unit. Ensure the cable is not damaged.
- Buttons unresponsive: Try resetting the device by pressing the reset button (if available) or disconnecting and reconnecting the power.
8. Specifications
| Feature | Specification |
|---|---|
| Screen Size | 3 inches LCD |
| Front Camera Resolution | 1296P Full HD |
| Front Camera Angle | 170° Ultra-wide angle |
| Rear Camera Angle | 150° Wide angle |
| Image Sensor | SONY STARVIS CMOS (Front) |
| Video Technologies | HDR, WDR, Noise Reduction |
| Special Features | G-Sensor, Loop Recording, Parking Monitor (Time-lapse), Motion Detection, Night Vision (IR LED front, Fill Light rear), Engine ON/OFF Linkage, LED Traffic Signal Support (27.5fps) |
| Storage | Supports Class 10 or higher Micro SD card (32GB included) |
| Power Supply | USB Car Charger (12V/24V) |
| Operating Temperature | -10°C to 70°C |
| Mounting Type | Adhesive Mount |
| Dimensions (Package) | 14.2 x 10.9 x 9.8 cm |
| Weight (Package) | 420 g |
9. Warranty and Support
Your VANBAR Dash Cam comes with a standard 1-year warranty. You can extend this to a 3-year warranty by registering your product. To register, please send your order number and a request for "3-year warranty extension registration" to our customer service center.
VANBAR is committed to providing the best products and continuously improving based on customer feedback. We offer lifetime free version updates. If you require any updates or have questions, please contact us.
Contact Information:
- Email: vanbar_JP@163.com
- LINE: @645cthlb
Note: When contacting us via email, please use a Yahoo Mail or Gmail address if possible, as replies to au, docomo, or SoftBank email addresses may sometimes be blocked.

Image: Overview of included components and customer support contact details.


