Introduction
This user manual provides detailed instructions for the safe and efficient operation, maintenance, and troubleshooting of your JONR Intelligent Cordless Wet and Dry Vacuum Cleaner. Please read this manual thoroughly before first use and keep it for future reference.
The JONR XQ02-PM-DE is a versatile cleaning appliance designed to vacuum and wash hard floors simultaneously, handling both dry debris and wet spills. Its intelligent features, powerful suction, and self-cleaning function make floor care effortless.
Safety Instructions
WARNING: To reduce the risk of fire, electric shock, or injury, read all instructions before operating this appliance.
- Always operate the appliance on a dry, level surface.
- Do not immerse the appliance in water or other liquids.
- Keep hair, loose clothing, fingers, and all parts of body away from openings and moving parts.
- Use only JONR recommended cleaning solutions. Do not use flammable or combustible liquids.
- Do not pick up anything that is burning or smoking, such as cigarettes, matches, or hot ashes.
- Unplug the charger from the outlet when not in use and before cleaning.
- Do not use with a damaged cord or plug. If the appliance is not working as it should, has been dropped, damaged, left outdoors, or dropped into water, return it to a service center.
- This appliance contains batteries that are only replaceable by skilled persons.
Product Overview and Components
Familiarize yourself with the parts of your JONR vacuum cleaner and the accessories included.

Figure 1: JONR XQ02-PM-DE Vacuum Cleaner and Included Accessories. This image shows the main unit, an extra brush roll, a cleaning brush, a spare filter, and a bottle of floor cleaner.

Figure 2: Detailed view of included accessories. This image displays the cleaning solution, brush roll, charging dock, HEPA filter, cleaning brush, storage basket, charger, and user manual.
Main Components:
- Main Unit: Contains the motor, battery, clean water tank, dirty water tank, and handle.
- Brush Head: Houses the brush roll for scrubbing and suction.
- Clean Water Tank (0.6L): For fresh water and cleaning solution.
- Dirty Water Tank (0.55L): Collects dirty water and debris.
- LED Display: Shows battery level, tank status, and error codes.
Included Accessories:
- Brush Roll (x2)
- Replacement Filter Element (x2)
- Cleaning Liquid (x1)
- Cleaning Tool (x1)
- Charging Dock
- Power Adapter
Setup
1. Unboxing and Assembly:
- Carefully remove all components from the packaging.
- Insert the handle into the main unit until it clicks securely into place.
- Ensure the clean water tank and dirty water tank are correctly installed.
2. Initial Charging:
Before first use, fully charge the vacuum cleaner. This typically takes approximately 4 hours.
- Place the vacuum cleaner on its charging dock.
- Connect the power adapter to the charging dock and plug it into a wall outlet.
- The LED display will indicate charging status.
3. Filling the Clean Water Tank:
- Remove the clean water tank from the main unit.
- Open the tank cap and fill with clean tap water. You may add a small amount of the provided JONR cleaning solution (refer to solution bottle for exact ratio).
- Close the cap securely and reinsert the tank into the main unit.

Figure 3: Illustration of clean and dirty water tank capacities. The image shows the 0.6L clean water tank and 0.55L dirty water tank, highlighting the 35-minute runtime.
Operating Instructions
1. Powering On/Off:
- Press the Power button on the handle to turn the appliance on.
- Press the Power button again to turn it off.
2. Mode Selection:
The JONR vacuum cleaner features intelligent dirt detection and multiple cleaning modes.

Figure 4: LED display indicating cleaning modes. The image shows the display with "100" (battery percentage) and icons for normal/light stains (low noise) and medium/heavy stains (dirt detection).
- Standard Mode: Suitable for everyday cleaning and light spills. The appliance automatically adjusts suction based on detected dirt.
- Turbo Mode: For stubborn dirt and heavy spills. Activates maximum suction power.
- The LED display will show the current mode and battery level.
3. Cleaning Techniques:
Move the vacuum cleaner slowly and steadily over the floor surface. For best results, overlap each pass slightly.

Figure 5: Multi-surface cleaning capability. This image demonstrates the vacuum cleaner's effectiveness on hardwood, carpet, marble, and tile surfaces, handling various types of dirt.
- Wet Cleaning: The appliance dispenses water and cleaning solution while the brush roll scrubs and the vacuum suctions up the dirty liquid.
- Dry Vacuuming: Can be used for dry debris without dispensing water.
- Edge Cleaning: The brush head is designed to clean close to edges and corners, minimizing missed spots.

Figure 6: Close-up of the brush head demonstrating complete edge cleaning. The image highlights how the brush roll extends to clean within 1cm of edges, unlike other products.
Maintenance
Regular maintenance ensures optimal performance and extends the lifespan of your JONR vacuum cleaner.
1. Self-Cleaning Function:
After each use, it is recommended to activate the self-cleaning cycle.

Figure 7: Visual representation of the one-touch self-cleaning process. The image shows clean water flowing through the system to rinse the brush roll and pipes, collecting dirty water.
- Place the vacuum cleaner on its charging dock.
- Ensure there is sufficient clean water in the clean water tank.
- Press the self-clean button (usually indicated by a water drop icon or similar) on the handle or base.
- The appliance will run a cycle to rinse the brush roll and internal pipes, preventing odors and maintaining hygiene.
2. Emptying and Cleaning the Dirty Water Tank:
- After each use, or when the dirty water tank is full (indicated by the LED display), remove the tank.
- Carefully empty the dirty water and debris into a sink or toilet.
- Rinse the tank thoroughly with clean water.
- Allow the tank to air dry completely before reinserting it.
3. Cleaning the Brush Roll:
- Even with self-cleaning, occasional manual cleaning of the brush roll is recommended.
- Remove the brush roll cover and then the brush roll itself.
- Use the provided cleaning tool to remove any hair or debris tangled around the brush roll.
- Rinse the brush roll under running water.
- Allow it to air dry completely before reassembling.
4. Cleaning the Filter:
- The filter is located within the dirty water tank assembly.
- Remove the filter and tap it gently to dislodge any dry debris.
- If necessary, rinse the filter under cold water. Ensure it is completely dry before reinserting to prevent mold or damage.
- Replace the filter every 3-6 months, or as needed, to maintain optimal suction.
5. Storage:
- Store the vacuum cleaner on its charging dock in a cool, dry place.
- Ensure both water tanks are empty and clean before long-term storage.
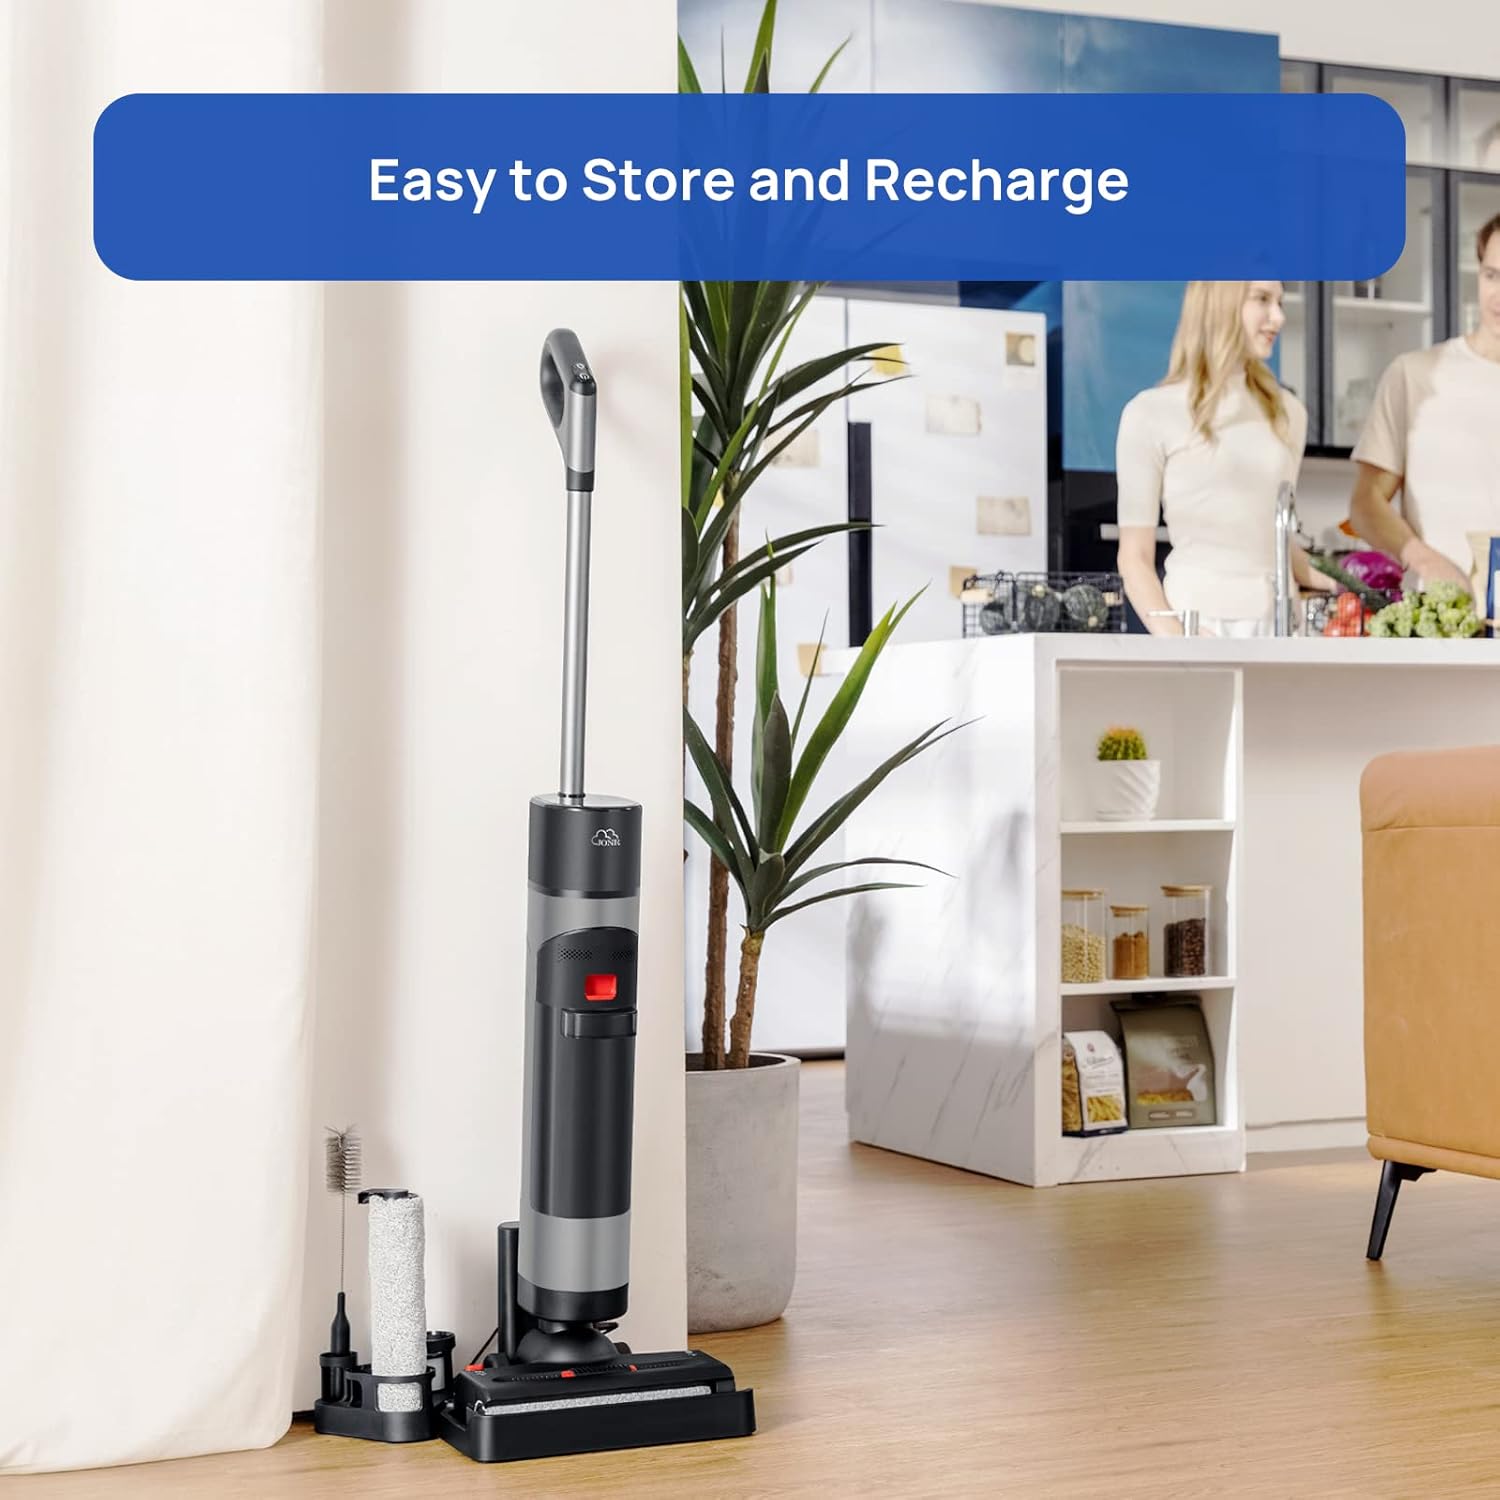
Figure 8: The JONR vacuum cleaner stored neatly on its charging dock, with accessories organized beside it. This illustrates the ease of storage and recharging.
Troubleshooting
If you encounter issues with your JONR vacuum cleaner, refer to the table below for common problems and solutions.
| Problem | Possible Cause | Solution |
|---|---|---|
| Appliance does not turn on. | Battery is low or depleted. | Charge the appliance fully. |
| No suction or weak suction. | Dirty water tank is full; Filter is clogged; Brush roll is tangled; Suction path is blocked. | Empty dirty water tank; Clean or replace filter; Clean brush roll; Check for blockages in the hose/nozzle. |
| Water not dispensing. | Clean water tank is empty; Tank is not installed correctly. | Fill clean water tank; Reinstall tank securely. |
| Error Code E4 (as reported by some users). | Often indicates a blockage or issue with the dirty water tank/sensor. | Ensure dirty water tank is empty and clean. Check for any blockages in the dirty water path or sensor area. If problem persists, contact customer support. |
| Unpleasant odor. | Dirty water tank or brush roll not cleaned properly. | Perform self-cleaning cycle. Thoroughly clean dirty water tank and brush roll, allowing them to air dry completely. |
If the problem persists after attempting these solutions, please contact JONR customer support.
Specifications
| Feature | Detail |
|---|---|
| Brand | JONR |
| Model Number | XQ02-PM-DE |
| Color | Black |
| Product Dimensions (L x W x H) | 28 x 26 x 116 cm |
| Item Weight | 4.5 Kilograms |
| Voltage | 22.2 Volts |
| Noise Level | 74 dB |
| Runtime | Up to 35 minutes |
| Battery Type | Lithium-ion (10 cells included) |
| Filter Type | Cartridge |
| Surface Recommendation | Hard Floor |
| Power Source | Battery Powered |
| Special Features | LED Display, Edge Cleaning, Strong Suction for sticky messes, Self-cleaning function, Dual-tank system (separates clean/dirty water), Mops, vacuums, and dries hard floors. |
Warranty and Support
JONR is committed to providing high-quality products and excellent customer service.

Figure 9: JONR customer support team. This image represents the availability of professional service and multilingual online assistance.
- Warranty: Your JONR vacuum cleaner comes with a 2-year professional service warranty from the date of purchase. This warranty covers manufacturing defects and malfunctions under normal use.
- Multilingual Online Assistance: For any questions or issues, JONR offers multilingual online assistance.
- European Repair Warehouse: JONR maintains a European repair warehouse for efficient service and repairs.
- Contact Support: For support inquiries, please visit the official JONR website or contact their customer service through the platform where you purchased the product.