
1. Introduction
Thank you for choosing the DOLUNTO TXES031 PCP Air Compressor. This high-pressure electric air pump is designed for various applications requiring compressed air up to 300 Bar (4500 PSI / 30 MPa), including filling PCP airguns, scuba tanks, and for use in leakage detection, pressure-tight tests, and air impermeability tests. This manual provides essential information for the safe and efficient operation, setup, and maintenance of your compressor. Please read it thoroughly before use.
2. Safety Information
Operating a high-pressure air compressor requires strict adherence to safety guidelines to prevent injury or damage. Always prioritize safety.
- Read the Manual: Understand all instructions and warnings before operating the compressor.
- Personal Protective Equipment: Always wear appropriate eye protection and hearing protection when operating the compressor.
- Ventilation: Operate the compressor in a well-ventilated area to prevent heat buildup and ensure proper cooling.
- Temperature Monitoring: The compressor temperature should not exceed 85°C (185°F). Monitor the temperature gauge closely during operation. If the temperature approaches or exceeds this limit, shut down the compressor immediately and allow it to cool.
- Pressure Limits: Do not exceed the maximum filling pressure of 300 Bar (4500 PSI / 30 MPa). Over-pressurizing can lead to dangerous failures. The unit features built-in overload protection for motor safety.
- Oil Level: Ensure the oil level is always at the position of the red dot on the oil level indicator before and during operation. Low oil levels can cause severe damage.
- Breather Valve: Always replace the crankcase breather plug with the provided breather valve before using the compressor. Failure to do so can cause internal pressure buildup and damage.
- Connections: Ensure all hoses, filters, and connections are securely fastened and free of leaks before starting the compressor. Check for leaks using a soapy water solution.
- Water Cooling: The compressor requires a water cooling system. Ensure the submersible pump is correctly placed in a water reservoir and functioning throughout operation.
- Children and Pets: Keep children and pets away from the compressor during operation.
- Power Supply: Ensure the power supply matches the compressor's voltage requirements (110V or 220V).
3. Product Overview and Components
Familiarize yourself with the main parts of your DOLUNTO TXES031 compressor.

Figure 3.1: Compressor Components
This image illustrates the key components of the compressor, including the pressure gauge for monitoring output pressure, the power switch for operation, the temperature gauge for monitoring internal temperature, the radiator tube for heat dissipation, the oil breather for crankcase ventilation, the oil level indicator, and the filling hose connection.
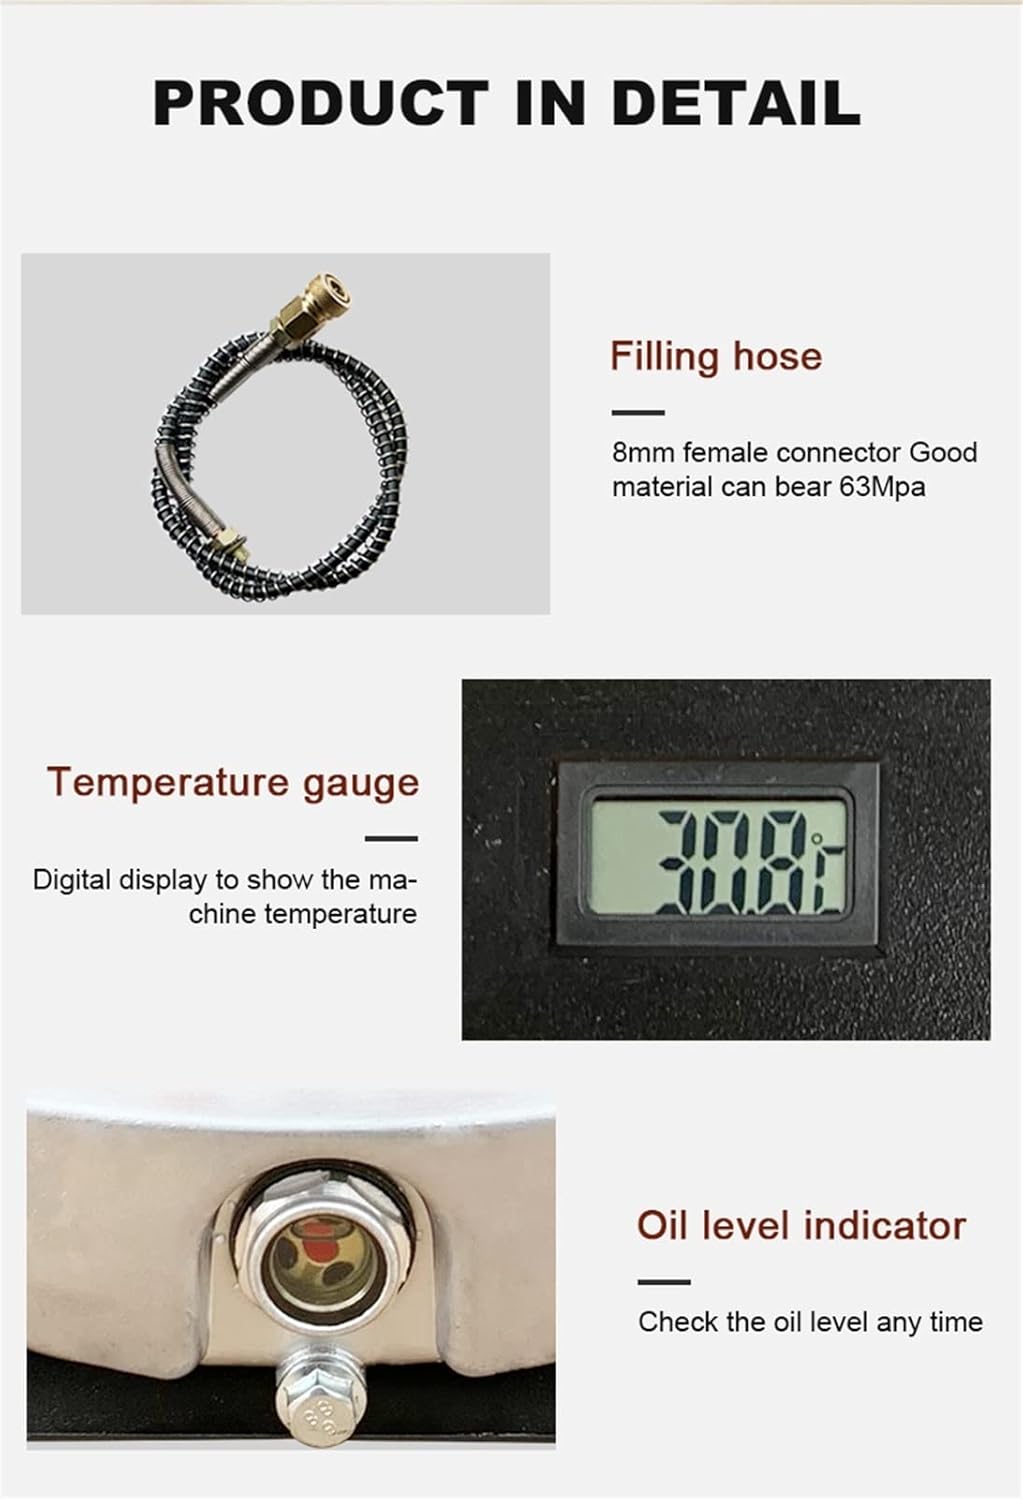
Figure 3.2: Detailed Components
A closer look at specific components: the filling hose with an 8mm female connector capable of bearing 63MPa, the digital temperature gauge for precise temperature readings, and the oil level indicator for checking oil at any time.
Key Components:
- Pressure Gauge: Displays the current output pressure.
- Power Switch: Controls the compressor's power.
- Temperature Gauge: Digital display showing the machine's internal temperature.
- Radiator Tube: Part of the cooling system.
- Oil Breather: Replaces the shipping plug for proper crankcase ventilation during operation.
- Oil Level Indicator: Allows visual inspection of the oil level.
- Filling Hose: Connects the compressor to the item being inflated, typically an 8mm female connector.
4. Specifications
Technical specifications for the DOLUNTO TXES031 compressor.

Figure 4.1: Compressor Parameters
This image provides a summary of the compressor's key technical specifications.
| Parameter | Value |
|---|---|
| Model | TXES031 |
| Net Weight | 19.2 KG (110V) / 17 KG (220V) |
| Power Rating | 1800W (1.8KW) |
| Cooling System | Water and Fan Cooling |
| Noise Level | 80 dB |
| Dimensions (L×W×H) | 400mm × 240mm × 450mm |
| Power Voltage | 110V / 220V (depending on model) |
| Compression Stage | Two-stage |
| Lubrication Mode | Splash Type |
| Inflating Speed | 2800 R/MIN |
| Working Pressure | 300 Bar / 4500 PSI / 30 MPa (Max) |
5. Setup Instructions
Follow these steps to prepare your compressor for first use.
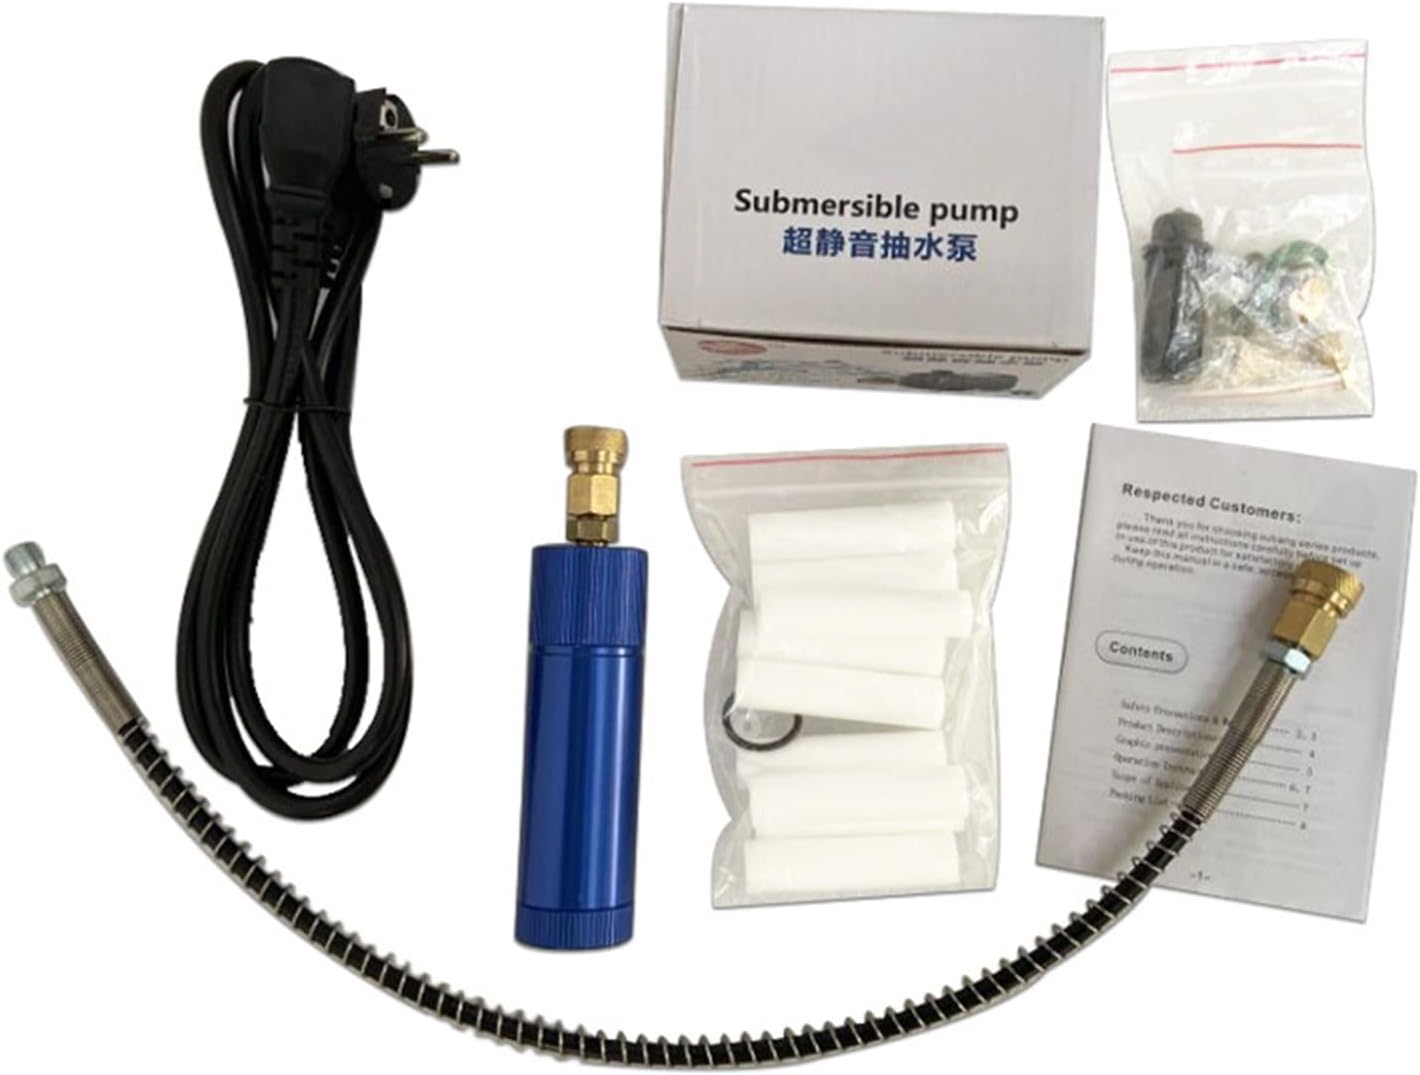
Figure 5.1: Included Accessories
This image displays the accessories typically included with the compressor, which are essential for setup and operation.
- Unpacking and Inspection: Carefully unpack the compressor and all accessories. Check for any visible damage to the outer packaging or the machine itself. If any damage is found, contact customer support immediately.
- Add Oil: Due to transportation restrictions, the compressor does not contain oil. You must add compressor oil (e.g., ISO VG46 or equivalent) before first use. Locate the oil fill port and fill until the oil level reaches the red dot on the oil level indicator.
- Install Breather Valve: Remove the shipping plug from the crankcase breather port and replace it with the provided breather valve. This allows proper ventilation during operation.
- Connect Water Cooling System:
- Place the submersible pump into a suitable water reservoir (e.g., a bucket) filled with clean water.
- Connect the water inlet and outlet hoses from the compressor to the submersible pump and the return line to the reservoir. Ensure all connections are secure to prevent leaks.
- Connect Filter and Filling Hose: The compressor includes an external filter for air quality. Connect the filter in-line with the filling hose. Ensure all connections between the compressor, filter, and filling hose are tight and free of leaks. Use a soapy water solution to check for leaks after assembly.
- Power Connection: Connect the appropriate power cord to the compressor and a suitable power outlet. Ensure the plug type matches your region (e.g., EU, UK, US, Standard).

Figure 5.2: Optional Power Plugs
This image illustrates the various power plug options available for different regions.
6. Operating Instructions
Once the compressor is set up, follow these steps for operation.
- Pre-Operation Check:
- Verify oil level is at the red dot.
- Confirm breather valve is installed.
- Ensure water cooling system is functioning (submersible pump submerged and running).
- Check all hose connections for tightness and absence of leaks.
- Connect the filling hose to the item you intend to inflate.
- Start Compressor: Turn on the power switch. The compressor will begin to operate.
- Monitor Pressure: Observe the pressure gauge. The compressor will build pressure. Do not exceed the maximum rated pressure of 300 Bar (4500 PSI / 30 MPa) for your compressor or the item being filled, whichever is lower.
- Monitor Temperature: Continuously monitor the digital temperature gauge. The compressor temperature should not exceed 85°C (185°F). If the temperature rises too high, immediately shut down the compressor and allow it to cool.
- Manual Shut-off: This model requires manual shut-off. Once the desired pressure is reached, turn off the power switch.
- Bleed Air: After turning off the compressor, slowly open the bleed valve (if present on your filling hose or system) to release residual pressure from the hose before disconnecting.
7. Maintenance
Regular maintenance ensures the longevity and safe operation of your compressor.
- Oil Level Check: Check the oil level before each use and periodically during extended operation. Replenish oil as needed to maintain the level at the red dot.
- Oil Change: Change the compressor oil after the first 10 hours of operation, then every 50 hours or every 3 months, whichever comes first. Refer to the oil drain plug for removal and refilling.
- Filter Replacement: The external air filter elements should be replaced regularly, depending on usage and air quality. Inspect them frequently and replace when discolored or saturated.
- Water Cooling System: Regularly check the water in the cooling reservoir. Replace the water if it becomes dirty or cloudy to ensure efficient cooling. Clean the submersible pump as needed.
- General Cleaning: Keep the exterior of the compressor clean and free of dust and debris to ensure proper airflow for fan cooling.
- Inspect Hoses and Connections: Periodically inspect all hoses and connections for wear, cracks, or leaks. Replace any damaged components immediately.
8. Troubleshooting
This section provides solutions to common issues you might encounter.
- Compressor Does Not Start:
- Check if the power cord is securely plugged into a working outlet.
- Ensure the power switch is in the 'ON' position.
- Verify the circuit breaker has not tripped.
- Check for any signs of motor overload protection activation.
- Low Pressure / Slow Filling:
- Inspect all hose connections for leaks using soapy water. Tighten any loose connections.
- Check if the air filter is clogged and replace if necessary.
- Ensure the item being filled does not have a leak.
- Overheating (Temperature Exceeds 85°C):
- Immediately shut down the compressor and allow it to cool.
- Check if the water cooling system is functioning correctly (submersible pump running, sufficient water in reservoir).
- Ensure the compressor is in a well-ventilated area.
- Verify the cooling fan is operating.
- Unusual Noise or Vibration:
- Shut down the compressor and inspect for any loose parts or foreign objects.
- Check oil level.
- If the noise persists, discontinue use and contact customer support.
For issues not covered in this section, please contact DOLUNTO customer support.