1. Introduction
Thank you for choosing the Lancoon LK-Z07_2 Anti-Theft Vibration Alarm. This device is designed to provide enhanced security for your belongings, including doors, windows, bikes, motorcycles, and motorhomes. It features a loud 110dB alarm, adjustable sensitivity, and multiple operating modes for versatile protection. Please read this manual carefully to ensure proper installation and operation.
2. Product Overview
2.1 Components
The Lancoon LK-Z07_2 Anti-Theft Vibration Alarm system includes the main alarm unit and a remote control.

This diagram illustrates the main components: the host alarm unit with its indicator LED, and the remote control with buttons for Arm, Disarm, SOS, and Doorbell functions.
2.2 Key Features
- Loud 110dB Alarm: Provides a strong deterrent against intruders.
- Adjustable Sensitivity: 10 levels of sensitivity to detect various degrees of vibration or movement.
- Multiple Modes: Arm, Disarm, Panic (SOS), and Doorbell modes.
- Wireless Remote Control: Operates up to 25 meters away.
- DIY Installation: Easy to install with double-sided adhesive.
- Expandable System: One alarm can pair with multiple remote controls; one remote control can also pair with multiple alarms.
- Low Battery Warning: Alerts you when batteries need replacement.

This image highlights the wide range of applications for the Lancoon vibration alarm, including bicycles, motorcycles, doors, and windows.
3. Setup
3.1 Battery Installation
- Alarm Unit: Open the battery compartment on the back of the alarm unit. Insert two (2) AAA batteries (not included), ensuring correct polarity (+/-). Close the compartment securely.
- Remote Control: The remote control comes with one (1) 12V, 27A battery pre-installed. If replacement is needed, open the small compartment on the back and replace the battery, observing polarity.
3.2 Mounting the Alarm
The alarm unit can be easily mounted using the provided double-sided adhesive sticker.
- Clean the surface where you intend to mount the alarm. Ensure it is dry and free of dust or grease.
- Peel off one side of the protective film from the double-sided sticker and apply it firmly to the back of the alarm unit.
- Peel off the other side of the protective film and press the alarm unit firmly onto the desired surface (e.g., door, window frame, bike frame). Hold for a few seconds to ensure good adhesion.
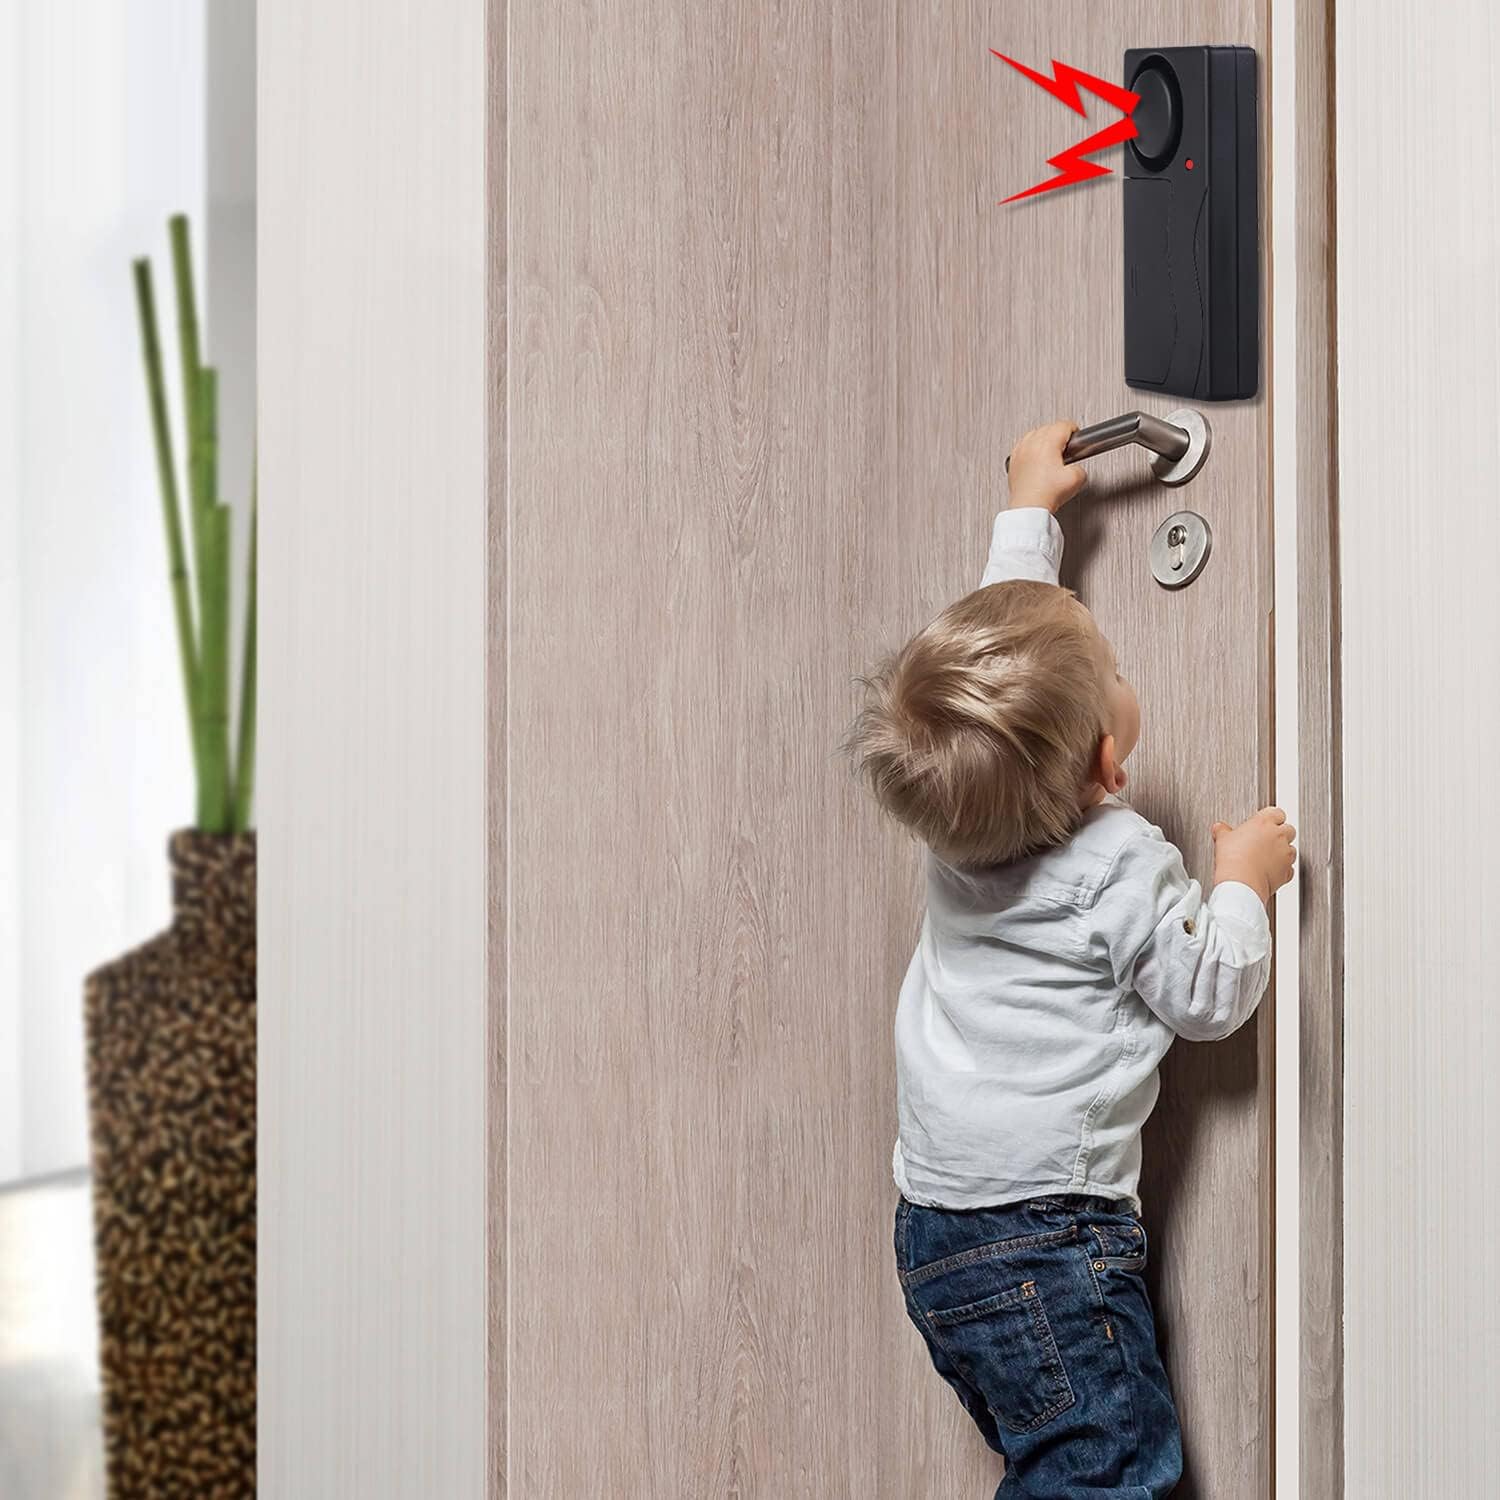
The alarm can be easily mounted on doors or windows to detect unauthorized entry, providing an additional layer of security for your home.
4. Operating Instructions
4.1 Remote Control Functions
- Arm Button (Lock icon): Press this button to activate the alarm. The alarm unit will emit a short beep, and the indicator LED will flash intermittently, signifying it is armed.
- Disarm Button (Unlock icon): Press this button to deactivate the alarm. The alarm unit will emit a short beep, and the indicator LED will stop flashing.
- SOS/Panic Button (Lightning bolt icon): Press this button to trigger the alarm immediately, regardless of its armed status. This can be used in emergency situations.
- Doorbell Button (Bell icon): Press this button to switch the alarm into doorbell mode. In this mode, a gentle vibration will trigger a doorbell sound instead of the alarm siren.
4.2 Sensitivity Adjustment
The alarm features 10 levels of sensitivity, from high to low, corresponding to different levels of touch, vibration, or impact. To adjust the sensitivity:
- Ensure the alarm is in the disarmed state.
- Press and hold the Disarm button for approximately 3 seconds until the alarm unit emits a series of beeps. The number of beeps indicates the current sensitivity level (e.g., 1 beep for level 1, 10 beeps for level 10).
- Release the Disarm button. Each subsequent short press of the Disarm button will cycle through the sensitivity levels.
- Once you reach your desired sensitivity level, wait for 5 seconds without pressing any button. The alarm will automatically save the setting and exit sensitivity adjustment mode.
4.3 Pairing Additional Devices
The system allows for flexible pairing:
- Pairing Multiple Remote Controls to One Alarm: To add another remote control, ensure the alarm is disarmed. Press and hold the Arm button on the alarm unit (if available, otherwise refer to specific pairing instructions for your model, usually involving a small button inside the battery compartment or a specific button sequence on the remote). Then, press any button on the new remote control. The alarm will beep to confirm successful pairing.
- Pairing One Remote Control to Multiple Alarms: To control multiple alarms with a single remote, repeat the pairing process for each alarm unit using the same remote control.

The alarm is designed to emit a loud 110dB sound when triggered, effectively deterring potential thieves from objects like bicycles.
5. Maintenance
5.1 Battery Replacement
When the alarm unit indicates a low battery (e.g., weaker sound, indicator LED not flashing correctly), replace the AAA batteries as described in Section 3.1. For the remote control, replace the 12V, 27A battery when its range or responsiveness decreases.
5.2 Cleaning
Wipe the alarm unit and remote control with a soft, dry cloth. Do not use abrasive cleaners or immerse the devices in water.
6. Troubleshooting
- Alarm not sounding or too quiet:
- Check if batteries are correctly installed and not depleted. Replace if necessary.
- Ensure the alarm is in Arm mode, not Doorbell mode.
- Remote control not working:
- Replace the remote control battery.
- Ensure you are within the 25-meter operating range.
- Re-pair the remote control with the alarm unit if connection is lost.
- False alarms:
- Adjust the sensitivity level to a lower setting (refer to Section 4.2).
- Ensure the alarm is mounted on a stable surface, away from strong vibrations or wind.
- Alarm not responding to vibrations:
- Increase the sensitivity level (refer to Section 4.2).
- Check battery status.
7. Specifications
| Feature | Specification |
|---|---|
| Brand | Lancoon |
| Model Number | LK-Z07_2 |
| Alarm Unit Dimensions | 85 x 42 x 17mm (3.3 x 1.6 x 0.6in) |
| Alarm Unit Power Supply | 2 x AAA batteries (not included) |
| Remote Control Dimensions | 60 x 30 x 11mm (2.4 x 1.2 x 0.4in) |
| Remote Control Power Supply | 1 x 12V, 27A battery (included) |
| Alarm Loudness | 110 Decibels |
| Remote Control Range | Up to 25 Meters |
| Sensitivity Levels | 10 levels adjustable |
| Compatible Devices | Doors, Windows, Bikes, Motorcycles, Motorhomes, All Vehicles |

A detailed view of the compact Lancoon vibration alarm unit, showcasing its design.
8. Warranty and Support
For warranty information or technical support, please refer to the product packaging or contact your retailer. You may also visit the official Lancoon website for further assistance.


