Introduction
This manual provides essential information for the installation, operation, and maintenance of your Nilight Headlights Assembly. Designed for specific Ford F-150 and Lincoln Mark LT models, these headlights offer enhanced visibility and durability.
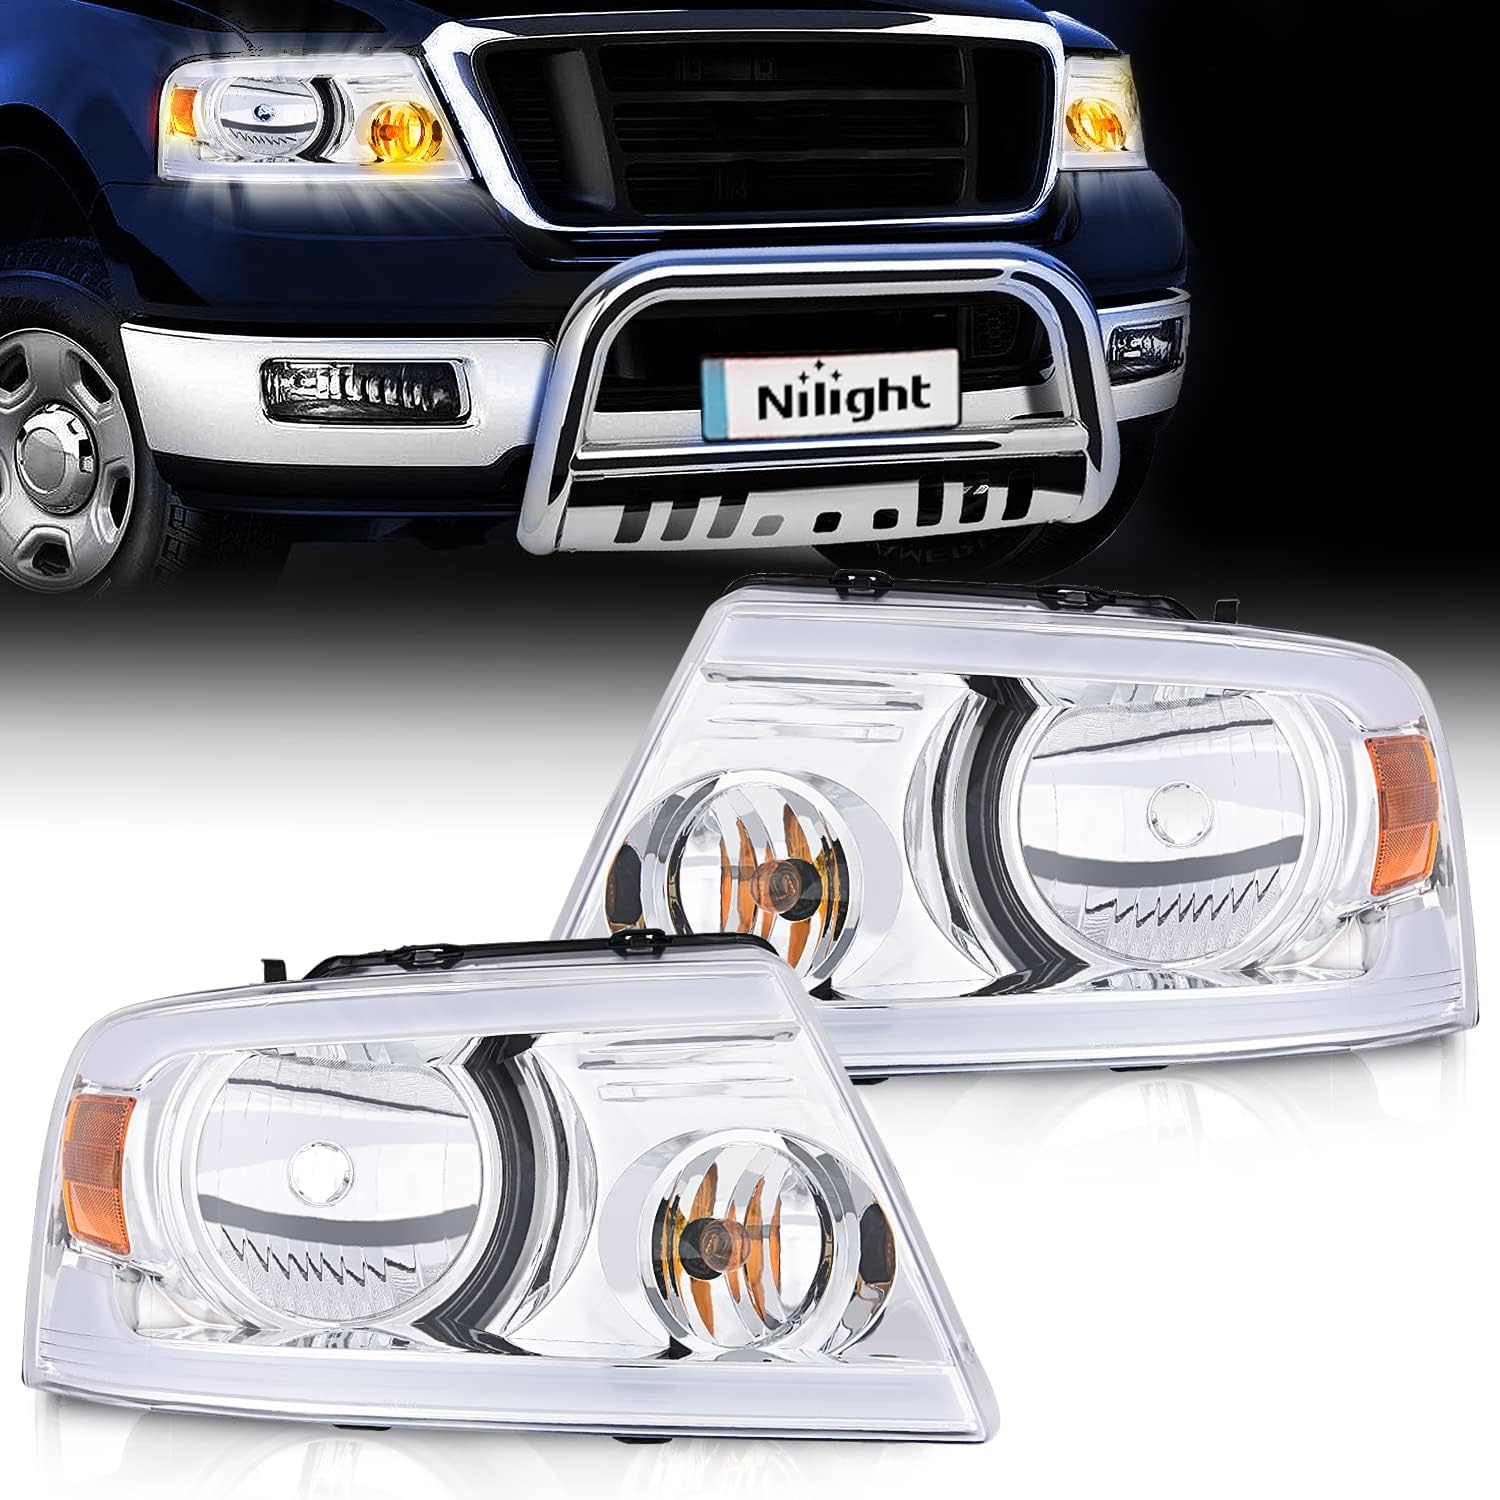
Image: A pair of Nilight Headlights Assembly units, showcasing their chrome housing and amber reflector DRL design. The image also features a vehicle with the headlights installed, demonstrating their appearance.
Safety Information
Always prioritize safety during installation and operation. Ensure the vehicle is turned off and the battery is disconnected before beginning any work. Wear appropriate personal protective equipment, such as gloves and eye protection. If you are unsure about any step, consult a qualified automotive technician.
- Ensure proper ventilation when working in enclosed spaces.
- Do not touch the bulb directly with bare hands, as oils can reduce bulb life.
- Verify all connections are secure before restoring power to the vehicle.
Package Contents
The Nilight Headlights Assembly package includes the following components:
- 1 x Driver's Side Headlight Assembly
- 1 x Passenger's Side Headlight Assembly
Note: Bulbs are NOT included and must be purchased separately. Refer to the specifications section for required bulb types.
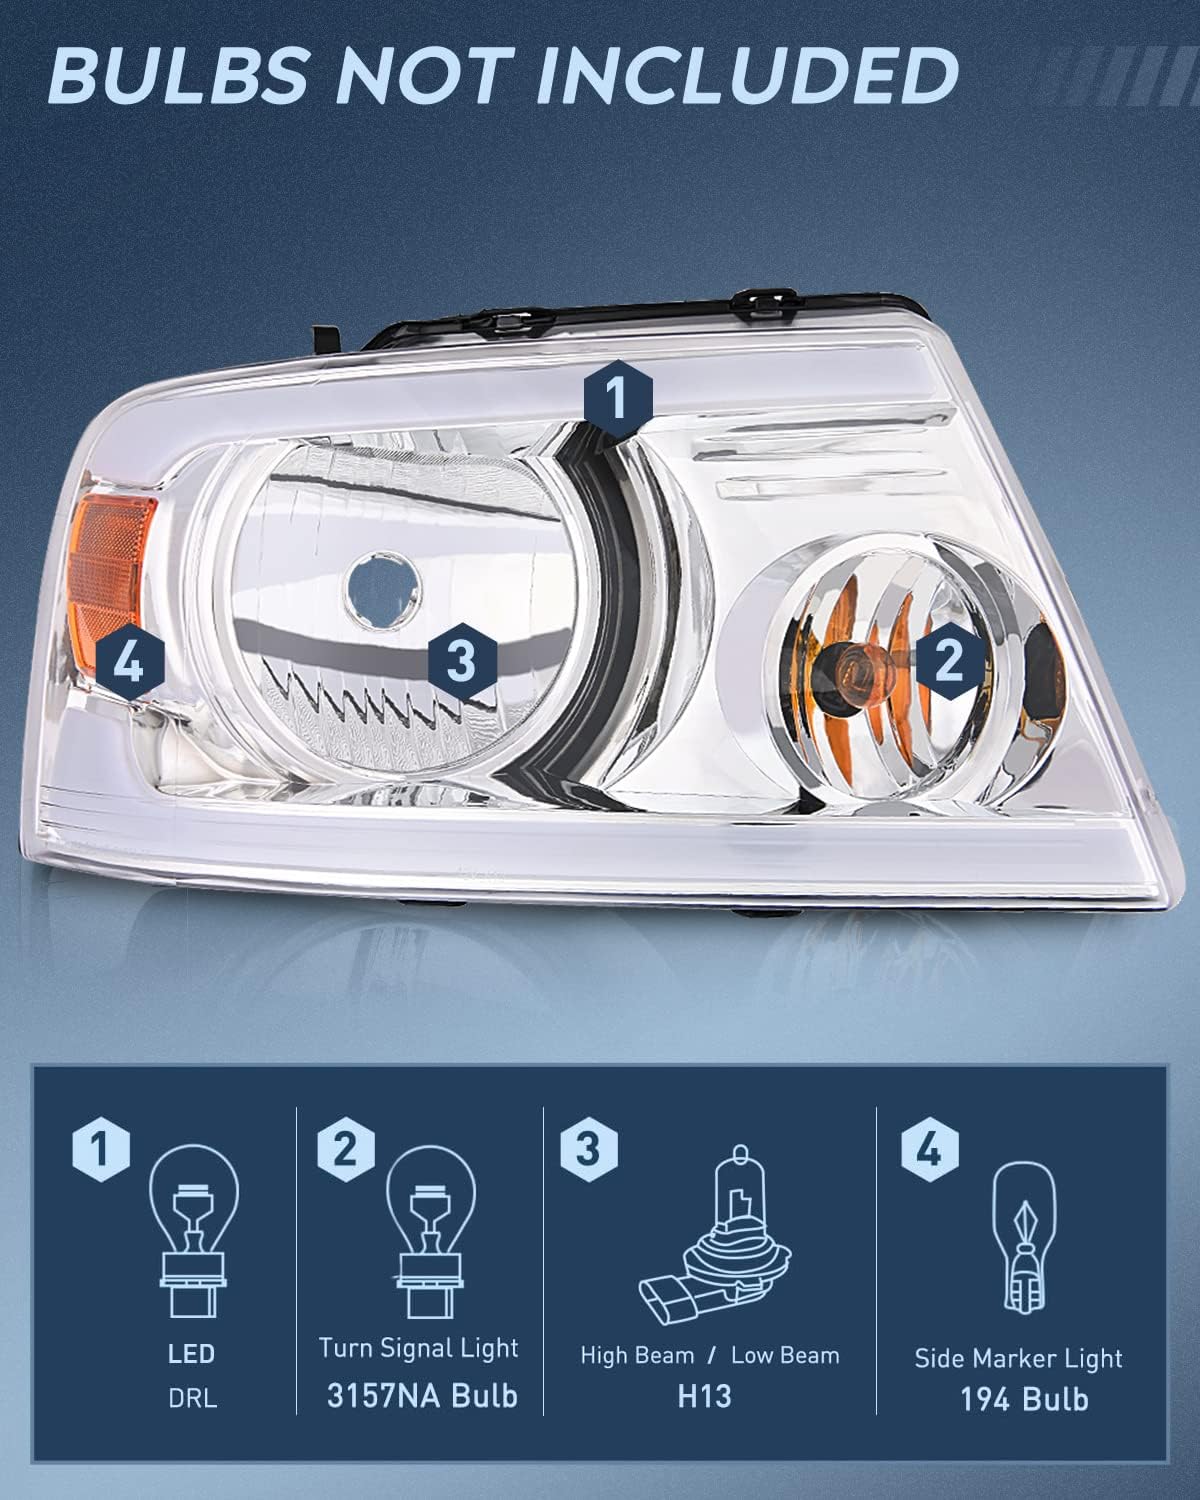
Image: A detailed view of the headlight assembly, indicating the positions for the LED DRL, Turn Signal Light (3157NA Bulb), High Beam / Low Beam (H13), and Side Marker Light (194 Bulb). This image clarifies which bulb types are needed for each function.
Installation
The Nilight Headlights Assembly is designed for a straightforward, OE standard installation, typically taking about 15 minutes. No modification or drilling is needed for compatible models.
Installation Steps:
- Preparation: Park the vehicle on a level surface, engage the parking brake, and turn off the engine. Disconnect the negative terminal of the vehicle's battery to prevent electrical shorts.
- Access Old Headlights: Depending on your vehicle model, you may need to remove the grille or bumper components to access the headlight mounting bolts. Consult your vehicle's service manual for specific instructions.
- Remove Old Headlights: Unscrew all mounting bolts securing the old headlight assembly. Carefully disconnect the electrical connectors from the bulbs and the main harness. Gently pull the old headlight assembly out of its housing.
- Install New Headlights: Connect the electrical harnesses of the new Nilight Headlights Assembly to the vehicle's wiring. Ensure all connections are secure and properly seated. Carefully slide the new headlight assembly into the vehicle's housing, aligning it with the mounting points.
- Secure Headlights: Reinstall all mounting bolts to secure the new headlight assembly firmly in place.
- Reconnect Battery: Reconnect the negative terminal of the vehicle's battery.
- Test Functionality: Turn on the vehicle's lights (low beam, high beam, turn signals, DRLs, side markers) to ensure all functions are working correctly.
- Adjust Beam Level: Use the adjusting screw on the back of the headlight assembly to fine-tune the beam level for optimal visibility and to avoid blinding oncoming drivers.

Image: This graphic illustrates the ease of installation, highlighting the high/low beam adjuster and showing a three-step process: 1) unplugging the old unit, 2) removing the old unit, and 3) installing the new unit. It emphasizes plug & play, direct bolt-on OE fitment.
Video: An official product video demonstrating the features and installation process of the Nilight Headlights Assembly for Ford F150 F-150 2004-2008. The video highlights the different light functions (turn signal, high/low beam, side marker) and shows the light output for low and high beams, as well as a comparison with other headlights.
Operation
Your Nilight Headlights Assembly provides clear and bright illumination for safer driving. The integrated DRL (Daytime Running Light) enhances daytime visibility, while the high and low beams ensure optimal lighting for various driving conditions.
Beam Adjustment:
The headlights feature an adjusting screw to allow for precise beam level alignment. This is crucial for ensuring proper road illumination and preventing glare for oncoming traffic. After installation, it is recommended to perform a beam alignment check, ideally in a dark area against a wall, to ensure the headlights are aimed correctly according to local regulations.

Image: A visual comparison demonstrating the superior clear visibility provided by Nilight headlights compared to standard headlights. The Nilight image shows a well-lit road with clear markers at 100ft, 400ft, and 800ft, while the "Others" image shows significantly less illumination.
Maintenance
To ensure the longevity and optimal performance of your Nilight Headlights Assembly, follow these maintenance guidelines:
- Cleaning: Regularly clean the outer lens with a soft cloth and mild soap and water. Avoid abrasive cleaners or harsh chemicals that can damage the polycarbonate lens.
- Inspection: Periodically inspect the headlight assembly for any signs of damage, cracks, or loose connections.
- Waterproof Design: The headlights are IP65-rated and completely sealed to prevent moisture intrusion. They also feature ventilation holes to regulate temperature and prevent fogging. If condensation occurs, ensure the ventilation holes are not obstructed.
- UV Protection: The lenses are made from upgraded materials that are UV and shock resistant to prevent yellowing or cracking over time.
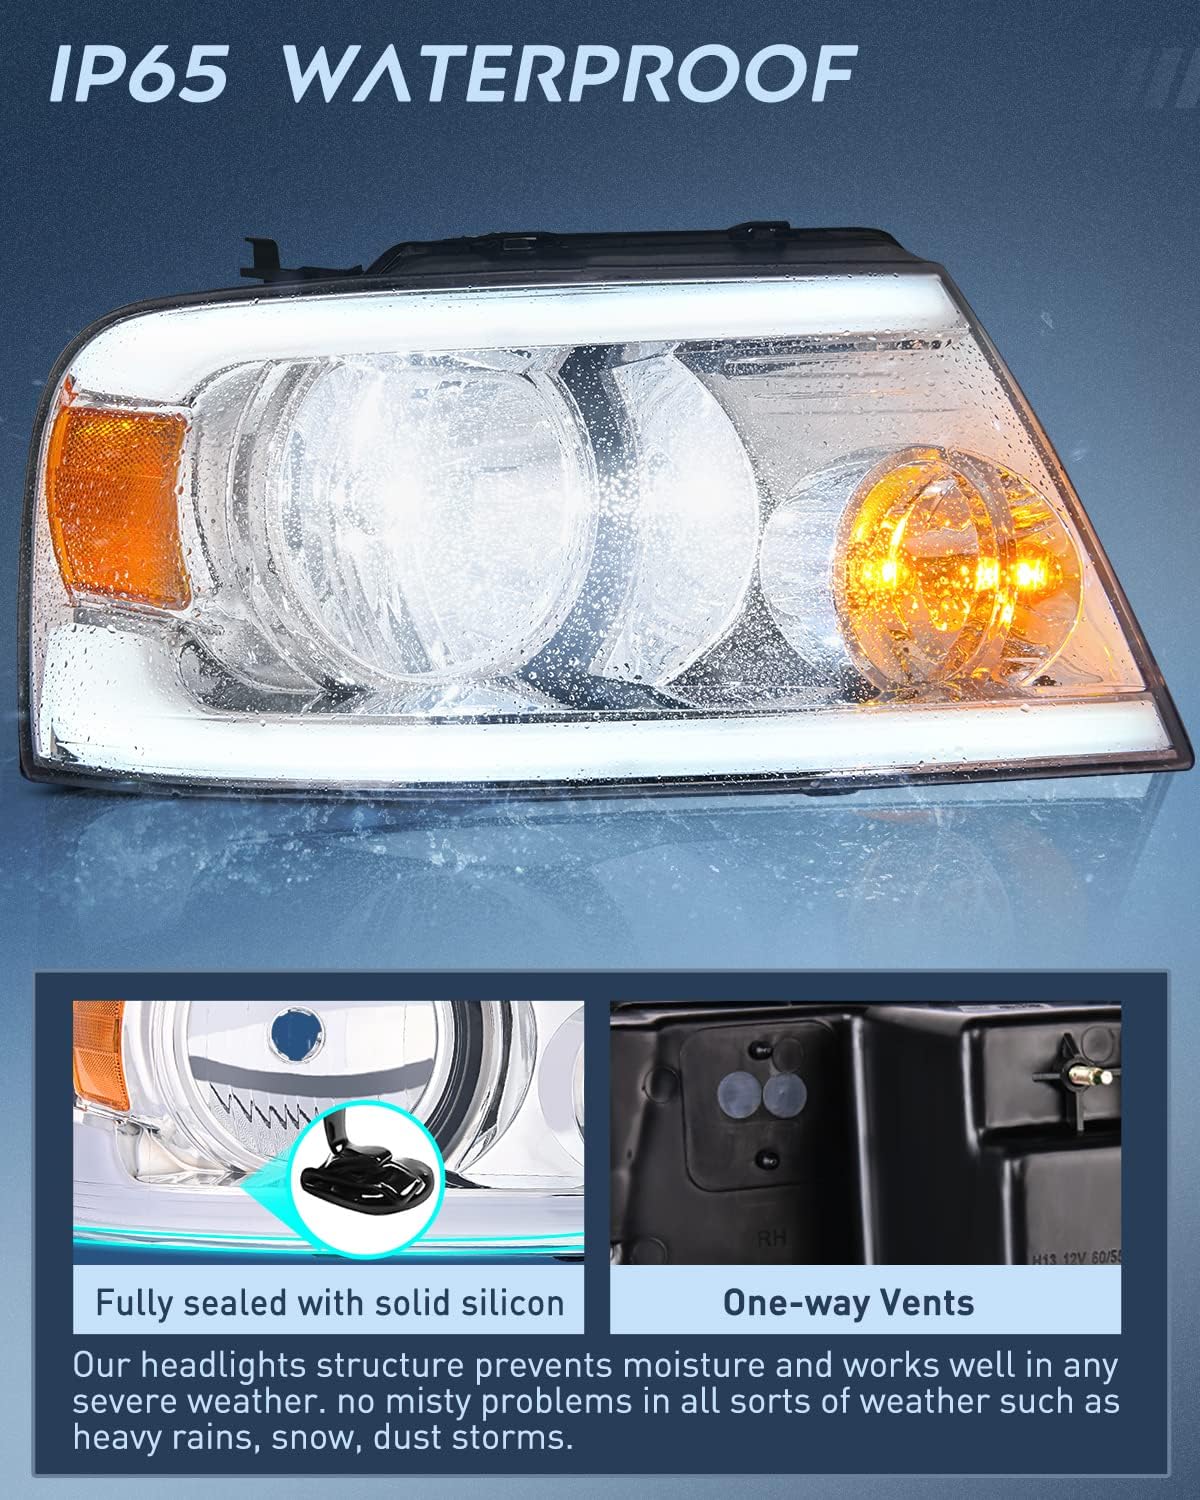
Image: This image highlights the IP65 waterproof rating of the headlights, showing water droplets on the lens and illustrating the fully sealed design with solid silicon and one-way vents. It emphasizes the prevention of misty problems in severe weather.

Image: This image illustrates the "Upgrade Material" used in the headlights, emphasizing its UV and shock resistance. It shows a protective layer over the headlight and small pellets representing the upgraded material, designed to prevent yellowing or cracking for a longer lifespan.
Troubleshooting
| Problem | Possible Cause | Solution |
|---|---|---|
| Headlights not turning on. | Loose electrical connection, blown fuse, incorrect bulb installation. | Check all electrical connections. Inspect vehicle's fuse box for blown fuses and replace if necessary. Ensure bulbs are correctly seated. |
| Excessive condensation inside the lens. | Obstructed ventilation hole, extreme temperature changes. | Ensure ventilation holes are clear. Minor condensation is normal and should dissipate. If persistent, check for proper sealing or damage. |
| Beam pattern is incorrect or too high/low. | Improper beam adjustment. | Use the adjusting screw to fine-tune the beam level. Refer to local regulations for proper headlight aim. |
| Headlight flickering. | Loose connection, faulty bulb, vehicle electrical issue. | Check connections. Test with a new bulb. If problem persists, consult a professional. |
Specifications
- Brand: Nilight
- Model: NA115
- Color: Chrome Housing + Amber Reflector DRL
- Vehicle Service Type: Ford F150 (2004-2008), Lincoln Mark LT (2006-2008)
- Lens Material: Polycarbonate
- Lens Color: Clear
- Special Feature: IP65 Waterproof, UV & Shock Resistant
- Bulb Compatibility (NOT INCLUDED):
- Turn Signal Light: 3157NA Bulb
- High Beam / Low Beam: H13
- Side Marker Light: 194 Bulb
- Dimensions (L x W x H): 25.3 x 20.9 x 11.4 inches
- Item Weight: 12.87 pounds
- UPC: 812227038908
- DOT & SAE Compliant: Yes
Warranty and Support
Nilight stands behind its products. For specific warranty details, claims, or technical support, please refer to the official Nilight website or contact their customer service directly. Information regarding warranty periods and terms of service can typically be found on the product packaging or the manufacturer's official online resources.
You can visit the official Nilight store for more information: Nilight Store on Amazon


