1. Introduction
Thank you for choosing the Hayve MS3 Digital Microscope. This advanced instrument is designed for detailed observation and analysis, featuring a 9-inch LCD display, 16MP camera, and up to 1500X magnification. It is ideal for various applications including coin inspection, micro soldering, and general scientific observation. This manual provides comprehensive instructions for setup, operation, maintenance, and troubleshooting to ensure optimal performance and longevity of your device.
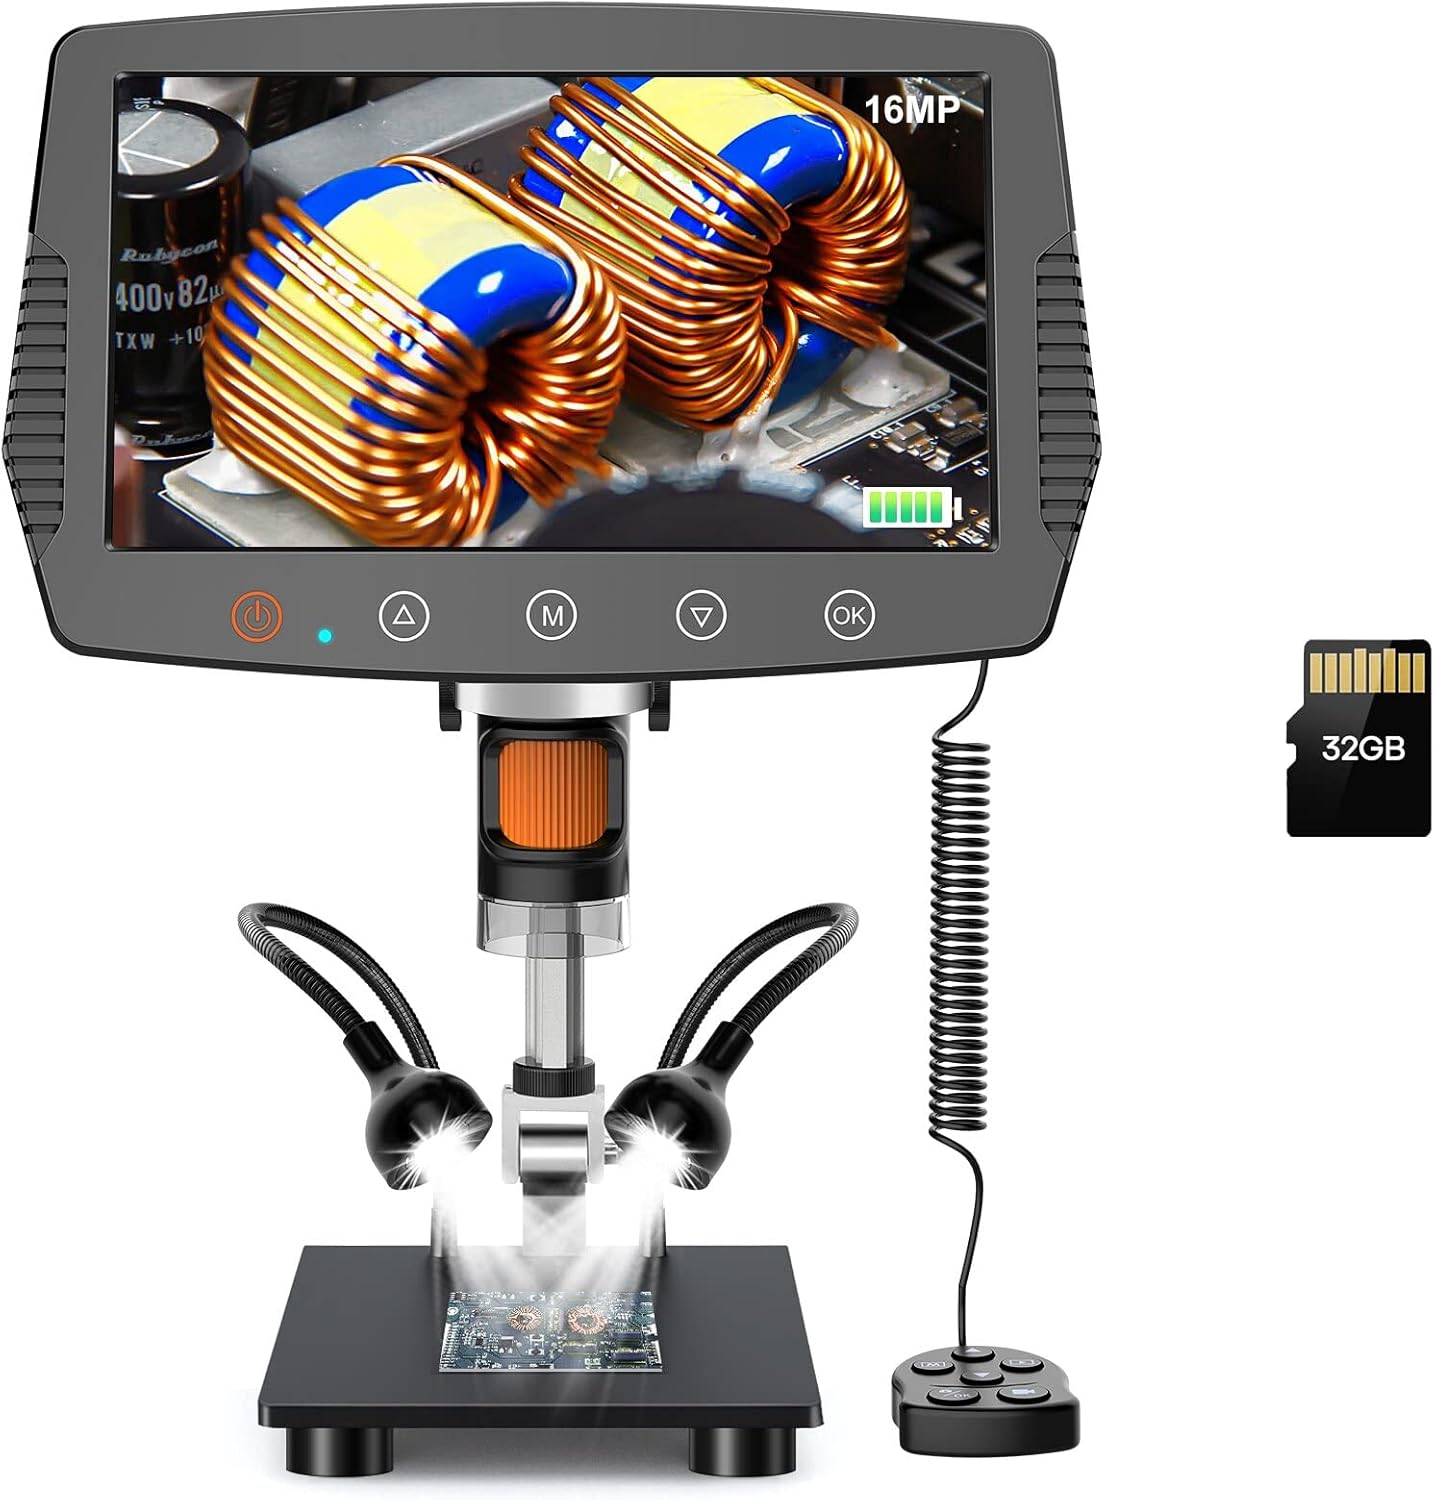
Figure 1: Hayve MS3 Digital Microscope Overview
2. Package Contents
Please verify that all items listed below are included in your package:
- Hayve MS3 Digital Microscope Unit (with 9-inch LCD screen)
- Adjustable Stand (8.5-inch length)
- Wired Remote Control
- 32GB MicroSD Card (pre-installed or included separately)
- USB Cable (for power and data transfer)
- Power Adapter
- User Manual (this document)
- Calibration Ruler (if applicable)
3. Product Features
- 9-inch Large LCD Display: Provides a clear and expansive view, 29% larger than previous models, with 90° rotation capability for comfortable viewing.

Figure 2: Large LCD Display Features
- Extended Working Distance: The 8.5-inch stand allows for a maximum distance of 6.3 inches between the lens and base, enabling observation of entire coins (up to 30mm diameter field of view).

Figure 3: Extended Stand for Wider View
- High-Resolution Imaging: Equipped with a true 16MP HD camera for capturing optimized vivid images and fluent 1080P videos.

Figure 4: 16MP HD Camera System
- Adjustable LED Illumination: Features 8 main LEDs and 2 flexible side lights to provide 100% exceptional brightness and eliminate shadows, ensuring clear observation from various angles.

Figure 5: Advanced Lighting System
- Wide Magnification Range: Offers 2X to 1500X magnification for versatile observation needs.
- Wired Remote Control: Allows for convenient operation without disturbing the microscope.
- 32GB Storage Card: Included for saving images and videos directly on the device.
- PC Compatibility: Connects to Windows and Mac OS for larger screen viewing and data management.

Figure 6: PC Connectivity and Functions
- Practical Measuring Tools: Software upgrade includes image effects (Flip horz, Flip vert, Gray, Binary, Invert, Emboss) and accurate calibration tools for data acquisition.
4. Setup and Assembly
Follow these steps to assemble your Hayve MS3 Digital Microscope:
- Attach the Bracket to the Base: Rotate the microscope bracket onto the base until securely fastened.
- Position the Stand: Rotate the stand to be perpendicular to the base and tighten the black button on the bracket to secure its position.
- Mount the Screen Unit: Carefully place the main screen unit onto the top of the stand. Ensure it clicks into place or is securely fastened. Tighten the black button on the screen unit's attachment point to prevent movement.
- Connect Remote Control: Plug the wired remote control into the designated port on the side of the screen unit.
- Power On: Connect the power adapter to the microscope and a power outlet. Press the power button to turn on the device.
Video 1: How to Install Hayve MS3 Digital Microscope. This video demonstrates the step-by-step assembly process of the microscope, including attaching the stand, mounting the screen, and connecting the remote control.
5. Operating Instructions
5.1 Basic Operation
- Power On/Off: Press and hold the power button on the screen unit to turn the microscope on or off.
- Adjusting Magnification: Rotate the focus wheel on the microscope lens to adjust the magnification and bring the object into clear focus.
- Adjusting Lighting: Use the brightness adjustment switch or controls on the remote to modify the intensity of the 8 main LEDs and 2 side lights. Position the flexible side lights for optimal illumination.
- Screen Rotation: The 9-inch LCD screen can be rotated up to 90° for ergonomic viewing angles.
5.2 Capturing Images and Videos
- Photo Mode: Press the 'M' button (Mode) to switch to photo mode. Press the 'OK' button or the photo button on the remote to capture an image.
- Video Mode: Press the 'M' button (Mode) again to switch to video recording mode. Press the 'OK' button or the video button on the remote to start/stop recording.
- Storage: Images and videos are automatically saved to the inserted 32GB MicroSD card.
5.3 PC Connection
To connect your microscope to a Windows or Mac OS computer:
- Ensure the microscope is powered on.
- Connect the microscope to your computer using the provided USB cable.
- The microscope should be recognized as a webcam or mass storage device. You may need to select the appropriate mode on the microscope's screen if prompted.
- Use compatible software on your computer (e.g., default camera application, third-party microscope software) to view the live feed, capture images, or access stored files.
6. Maintenance
- Cleaning the Lens and Screen: Use a soft, lint-free cloth specifically designed for optical surfaces to clean the lens and LCD screen. Do not use abrasive cleaners or solvents.
- General Cleaning: Wipe the body of the microscope with a dry or slightly damp soft cloth. Avoid getting moisture into any openings.
- Storage: Store the microscope in a dry, dust-free environment away from direct sunlight and extreme temperatures.
- Battery Care: If the microscope has an internal rechargeable battery, ensure it is charged regularly to maintain battery health, even if not in frequent use.
7. Troubleshooting
| Problem | Possible Cause | Solution |
|---|---|---|
| Microscope does not power on. | Low battery or power connection issue. | Ensure the power adapter is securely connected and the unit is fully charged. |
| Image is blurry or out of focus. | Incorrect focus adjustment or object too far/close. | Rotate the focus wheel to adjust. Ensure the object is within the optimal working distance. |
| Screen is too dark or too bright. | Lighting not adjusted correctly. | Adjust the brightness using the controls on the unit or remote. Reposition side lights. |
| Cannot connect to PC. | Incorrect USB connection or driver issue. | Ensure USB cable is properly connected. Try a different USB port. Check if the microscope is in PC mode. Install necessary drivers if prompted by your OS. |
| Cannot save images/videos. | MicroSD card full, not inserted, or corrupted. | Check if the 32GB MicroSD card is properly inserted. Delete old files or format the card (backup important data first). Replace the card if corrupted. |
8. Specifications
| Feature | Detail |
|---|---|
| Model Number | MS3 |
| Display Size | 9-inch LCD |
| Camera Resolution | 16 Megapixels |
| Video Resolution | 1080P |
| Magnification Range | 2X to 1500X |
| Stand Length | 8.5 inches (max working distance 6.3 inches) |
| Field of View | Up to 30mm diameter |
| Illumination | 8 main LEDs + 2 flexible side lights |
| Storage | 32GB MicroSD Card (included) |
| PC Compatibility | Windows, Mac OS |
| Power Source | Corded Electric, Internal Battery (Lithium Polymer) |
| Item Weight | 0.3 Grams |
| Material | Glass and Metal |
9. Warranty and Support
Hayve products are manufactured to high-quality standards. For warranty information, technical support, or service inquiries, please refer to the contact details provided with your purchase documentation or visit the official Hayve website. Please retain your proof of purchase for warranty claims.
For additional resources and frequently asked questions, you may visit the Hayve Store on Amazon.