1. Introduction
This manual provides essential information for the safe and effective use of your Longer RAY5 10W Laser Engraver Module. Please read these instructions carefully before installation and operation. Retain this manual for future reference.
The Longer RAY5 10W Laser Engraver Module features dual beam compressed laser technology, offering a 0.06mm laser spot for precise engraving and powerful cutting capabilities. It is designed for compatibility with Longer RAY5 and B1 series laser engravers.
2. Safety Information
WARNING: Laser radiation can cause eye and skin damage. Always follow safety precautions.
- The laser module is equipped with a panoramic filter glass protective cover designed to filter 97% of ultraviolet light. While this reduces the need for separate goggles during operation, it is always recommended to exercise caution and avoid direct eye exposure to the laser beam.
- Ensure the work area is well-ventilated to dissipate fumes and particles generated during engraving or cutting.
- Keep flammable materials away from the laser's path.
- Never leave the laser engraver unattended during operation.
- Keep children and pets away from the operating area.
3. Setup and Installation
This section outlines the general steps for installing the 10W laser module onto a compatible Longer laser engraver frame.
3.1 Unpacking and Inspection
Carefully remove all components from the packaging. Inspect the laser module and accessories for any signs of damage. Contact customer support immediately if any parts are damaged or missing.
3.2 Module Installation
- Ensure your laser engraver is powered off and disconnected from the power source.
- Mount the Longer RAY5 10W Laser Engraver Module onto the designated carriage of your compatible Longer RAY5 or B1 series machine. Refer to your specific engraver's assembly manual for detailed mounting instructions.
- Secure the module using the provided screws and mounting hardware.
- Connect the module's power and data cables to the corresponding ports on your engraver's control board. Ensure all connections are firm.
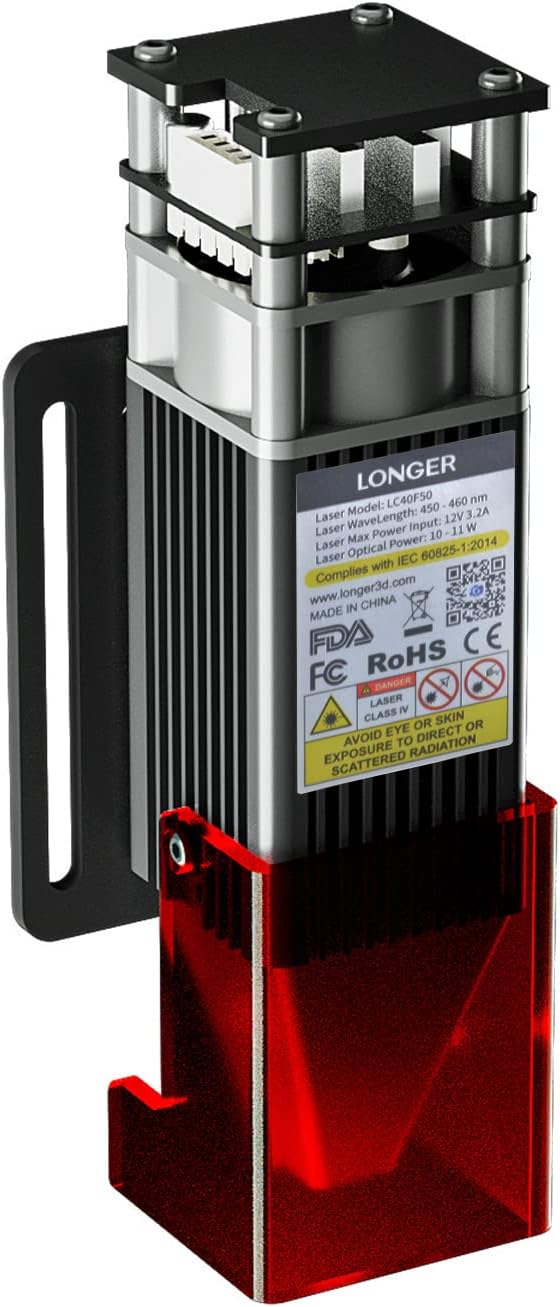
Figure 3.2.1: Longer RAY5 10W Laser Engraver Module. This image shows the laser module with its protective red shield and mounting bracket.

Figure 3.2.2: Side view of the Longer RAY5 10W Laser Engraver Module, highlighting the red protective shield.

Figure 3.2.3: Illustration of an air assist system connected to the laser module. Air assist helps reduce surface temperature and achieve cleaner edges during cutting and engraving. Air assist units are typically sold separately.
3.3 Initial Adjustments
If upgrading from a lighter laser module (e.g., 5W), it may be necessary to adjust the roller tension on your engraver's frame to compensate for the increased weight of the 10W module. This ensures stable movement and prevents leaning.

Figure 3.3.1: The 10W module is an upgrade option for existing 5W systems, offering enhanced capabilities.
4. Operating Instructions
The Longer RAY5 10W Laser Engraver Module is designed for both precise engraving and powerful cutting tasks.
4.1 Engraving Capabilities
The module utilizes a 0.06mm x 0.06mm ultra-fine fixed-focus compressed laser spot, providing a high level of detail and clarity for engraved designs. With a movement accuracy of 0.01mm and speeds up to 10000mm/min, intricate patterns can be achieved with minimal sawtooth effects.
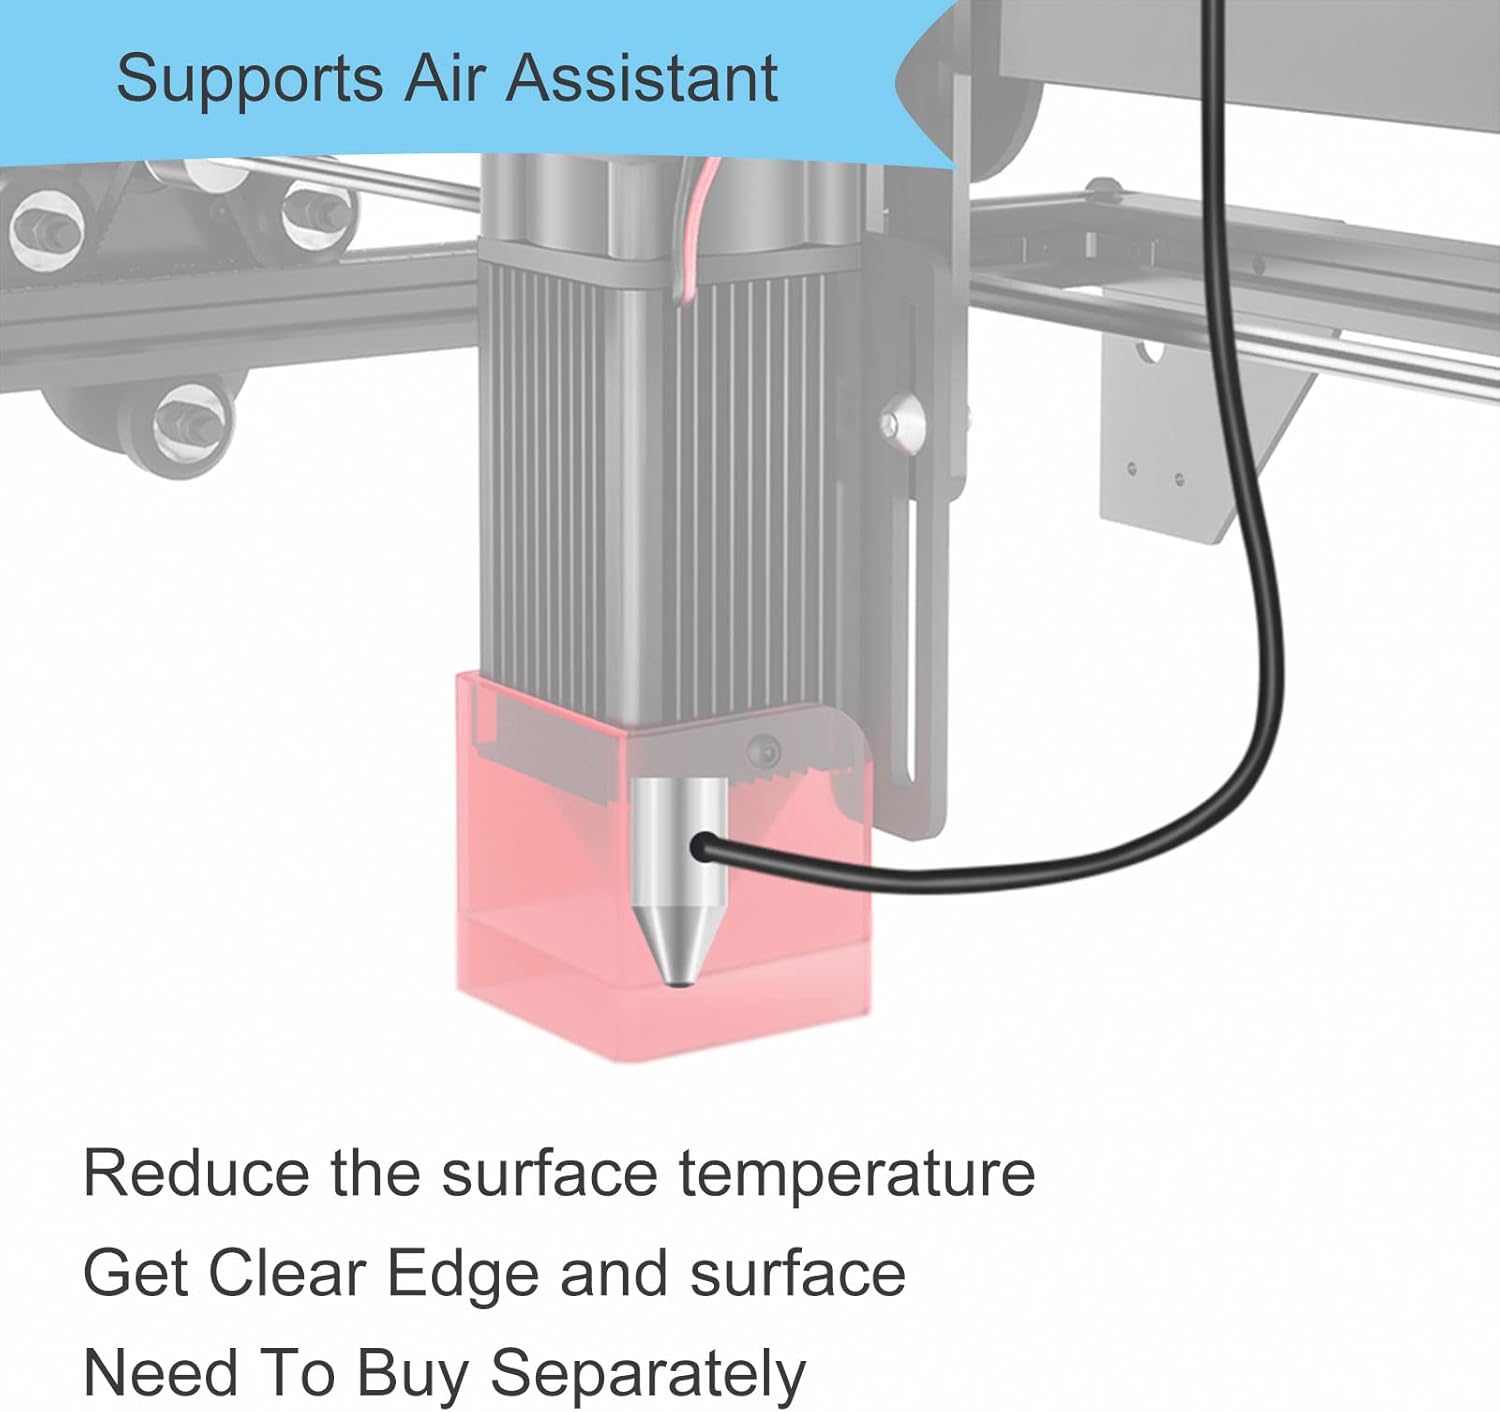
Figure 4.1.1: Example of a detailed tiger engraving, demonstrating the fine line quality achievable with the RAY5 10W module's 0.06x0.06mm laser spot compared to a larger 0.08x0.08mm spot.

Figure 4.1.2: Visual comparison illustrating how a smaller 0.06x0.06mm laser spot (RAY5 10W) produces finer details and clearer textures than a 0.08x0.08mm spot.
4.2 Cutting Capabilities
The 10W laser head employs compressed dual beam technology, resulting in higher energy density and stronger cutting ability. It can cut 20mm pine board and 10mm wood in a single pass.

Figure 4.2.1: Examples of the module's cutting performance, including cutting 20mm thick wood and 8mm thick wood in a single pass.

Figure 4.2.2: The 10W module offers a significant increase in cutting depth compared to a 5W module.
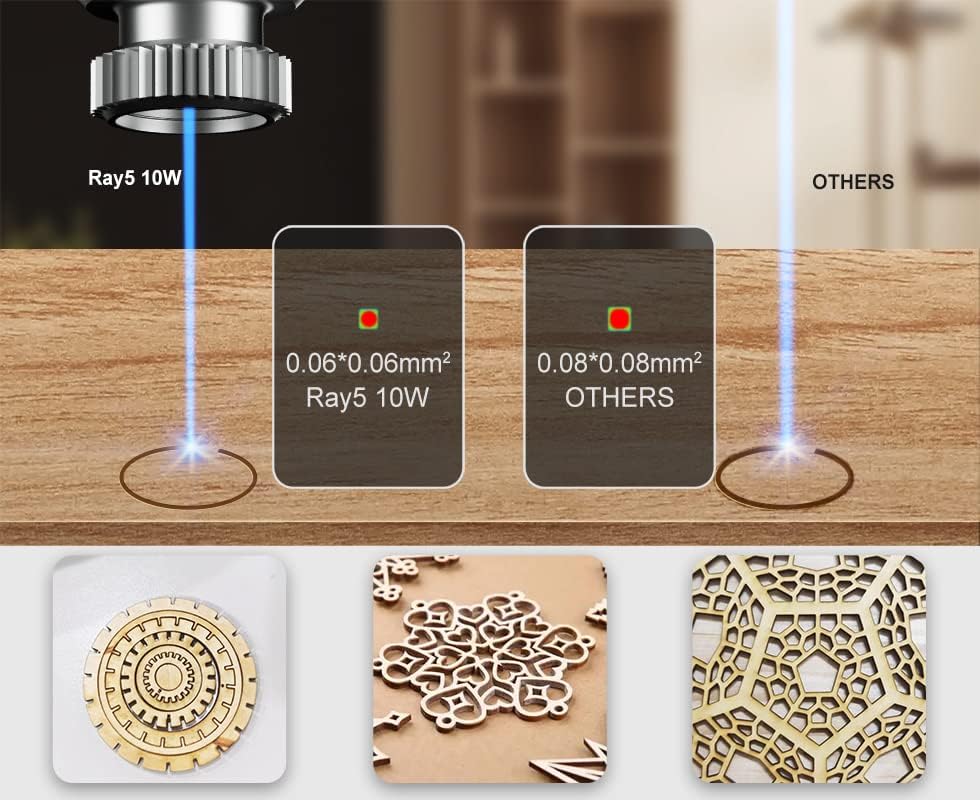
Figure 4.2.3: The Ray5 10W module features a high energy density laser focus, resulting in a wider effective cutting range compared to other laser technologies.
4.3 Applicable Materials
The Longer RAY5 10W Laser Engraver Module supports a wide range of materials:
- Engraving Materials: All wood types, paper, plastic, leather, PCB board, aluminum oxide, non-reflective plating, and lacquered metal.
- Cutting Materials: Cardboard, non-woven fabric, light wood, acrylic material, thin plastic board.
Note: The module is generally unable to engrave blue, purple, white, or transparent materials, or aluminum without an oxide layer.

Figure 4.3.1: Examples of materials suitable for engraving and cutting, including ceramic, iron, silver, stainless steel, stone, wood, rubber, kraft paper, acrylic, cloth, and leather.
5. Maintenance
Proper maintenance ensures the longevity and optimal performance of your laser module.
- Lens Cleaning: Regularly inspect and clean the laser lens to prevent residue buildup from engraving/cutting, which can degrade performance. Use a soft, lint-free cloth and appropriate lens cleaning solution. An air assist system can help keep the lens clean during operation.
- Module Lifespan: The estimated service life of the laser diode is approximately 20,000 hours under normal operating conditions.
- General Cleaning: Keep the exterior of the module free from dust and debris.
6. Troubleshooting
This section addresses common issues you might encounter.
6.1 Common Issues and Solutions
| Problem | Possible Cause | Solution |
|---|---|---|
| Laser not cutting/engraving effectively or at all. |
|
|
| Module appears to lean or move unstably. |
|
|
| Poor engraving precision or jagged lines. |
|
|
7. Specifications
Key technical specifications for the Longer RAY5 10W Laser Engraver Module:

Figure 7.1.1: Detailed parameter comparison between RAY5 5W and RAY5 10W modules.
| Feature | Specification (RAY5 10W) |
|---|---|
| Model Number | RAY5 10W |
| Laser Technology | Dioser Technology |
| Working Area | 400x400 (16.14x16.14 inch) |
| Laser Wavelength | 450nm |
| Focal Length | Fixed Focus - 50mm |
| Laser Spot Size | 0.06x0.06mm |
| Optical Output Power | 10W |
| Z Axis-Height Range | Up to 47mm |
| Fastest Working Speed | 10000mm/min |
| Engraver Output | DC12V5A |
| Engraver Input | AC110-240V |
| Software Compatibility | LaserGRBL & LightBurn |
| Connection | USB/TF Card/WiFi |
| Item Weight | 15.5 ounces |
| Package Dimensions | 9.21 x 4.69 x 3.9 inches |
8. Warranty Information
Longer provides warranty service for its products. For specific warranty periods and terms, please refer to the official Longer website or contact their customer support directly. Keep your proof of purchase for warranty claims.
9. Customer Support
For technical assistance, troubleshooting, or any inquiries regarding your Longer RAY5 10W Laser Engraver Module, please contact Longer customer support through the following channels:
- Email: Refer to the official Longer website for the support email address.
- Live Chat: Available on the official Longer website.
- Phone: Contact numbers may be available on the official Longer website.
- Facebook Group: Join the official Longer community for peer support and updates.
The Longer technical service team aims to provide prompt assistance, typically responding within 24 hours.

Figure 9.1.1: Longer offers multi-channel customer service including email, live chat, phone, and a Facebook group.
For more information, visit the official Longer website: www.longer3d.com