
Eventek 3010D-1
Eventek DC Power Supply User Manual
Model: 3010D-1
1. Introduction
This manual provides detailed instructions for the safe and effective operation of your Eventek 30V 10A DC Power Supply. Designed for precision and reliability, this switching regulated DC power supply features an LED display with coarse and fine adjustments, making it suitable for various electronic projects, laboratory work, and battery charging applications.

Figure 1: Front view of the Eventek 30V 10A DC Power Supply, showing the LED display and control knobs.
2. Key Features
- High-Definition Display: Backlit LED display provides clear 3-digit readings for voltage and current, easily visible in various lighting conditions. Adjustable range of 0-30V and 0-10A.
- Constant Voltage (C.V.) and Constant Current (C.C.) Mode: Automatic conversion between C.V. and C.C. modes based on load connection. Fine and coarse adjustment knobs allow for precise setting of desired values.
- Stable Output and Intelligent Heat Dissipation: Features low noise output with ripple less than 200mv, ensuring sustainable and stable power delivery. A built-in thermal sensor and intelligent temperature control enhance output stability and extend service life.
- Safe and Reliable: Manufactured and tested through multiple processes, incorporating short circuit protection, thermal protection, and overload protection for user safety.
- Compact Design and Diverse Applications: Weighing approximately 3.2 pounds, this compact power supply saves workbench space. It is suitable for a wide range of applications including laboratory use, electronic repair, electrolysis, burn-in tests, electroplating, brush plating, and DIY electronics projects.

Figure 2: Close-up of the high-precision LED display, showing voltage and current readings.
3. Setup
- Unpacking: Carefully remove the power supply and all accessories from the packaging. Inspect for any signs of damage.
- Placement: Place the unit on a stable, level surface with adequate ventilation. Ensure that the air vents (located on the sides and rear) are not obstructed.
- Power Connection: Connect the provided AC power cord to the power input socket on the rear of the unit, then plug it into a suitable AC power outlet (110V AC for US models).
- Output Lead Connection: Connect the red (positive) and black (negative) alligator leads to the corresponding output terminals on the front panel. Ensure connections are secure.
4. Operating Instructions
- Power On/Off: Flip the ON/OFF switch on the front panel to power on the unit. The LED display will illuminate.
- Voltage Adjustment:
- Use the COARSE V knob for large adjustments of the output voltage.
- Use the FINE V knob for precise, small adjustments of the output voltage.
- Observe the voltage reading on the LED display.
- Current Adjustment (Current Limit):
- Use the COARSE A knob for large adjustments of the current limit.
- Use the FINE A knob for precise, small adjustments of the current limit.
- The current limit prevents excessive current from flowing to your circuit. It is recommended to set the current limit before connecting a load.
- Constant Voltage (C.V.) and Constant Current (C.C.) Indicators:
- The C.V. indicator (green LED) illuminates when the power supply is operating in Constant Voltage mode, meaning the output voltage is stable at the set value.
- The C.C. indicator (red LED) illuminates when the power supply is operating in Constant Current mode, meaning the output current is stable at the set limit. This typically occurs when the load resistance is too low for the set voltage, causing the current to reach its programmed limit.
- Connecting a Load: Once voltage and current limits are set, connect your device or circuit to the output leads. The display will show the actual voltage and current being delivered.

Figure 3: Illustration of coarse and fine adjustment knobs for precise control of voltage and current.
5. Maintenance
- Cleaning: Disconnect the power supply from the AC outlet and all loads before cleaning. Use a soft, dry cloth to wipe the exterior. Do not use abrasive cleaners or solvents.
- Ventilation: Ensure the cooling fan and vents are free from dust and debris. Regular cleaning of the vents with compressed air can help maintain optimal cooling performance.
- Storage: When not in use for extended periods, store the power supply in a cool, dry place, away from direct sunlight and extreme temperatures.
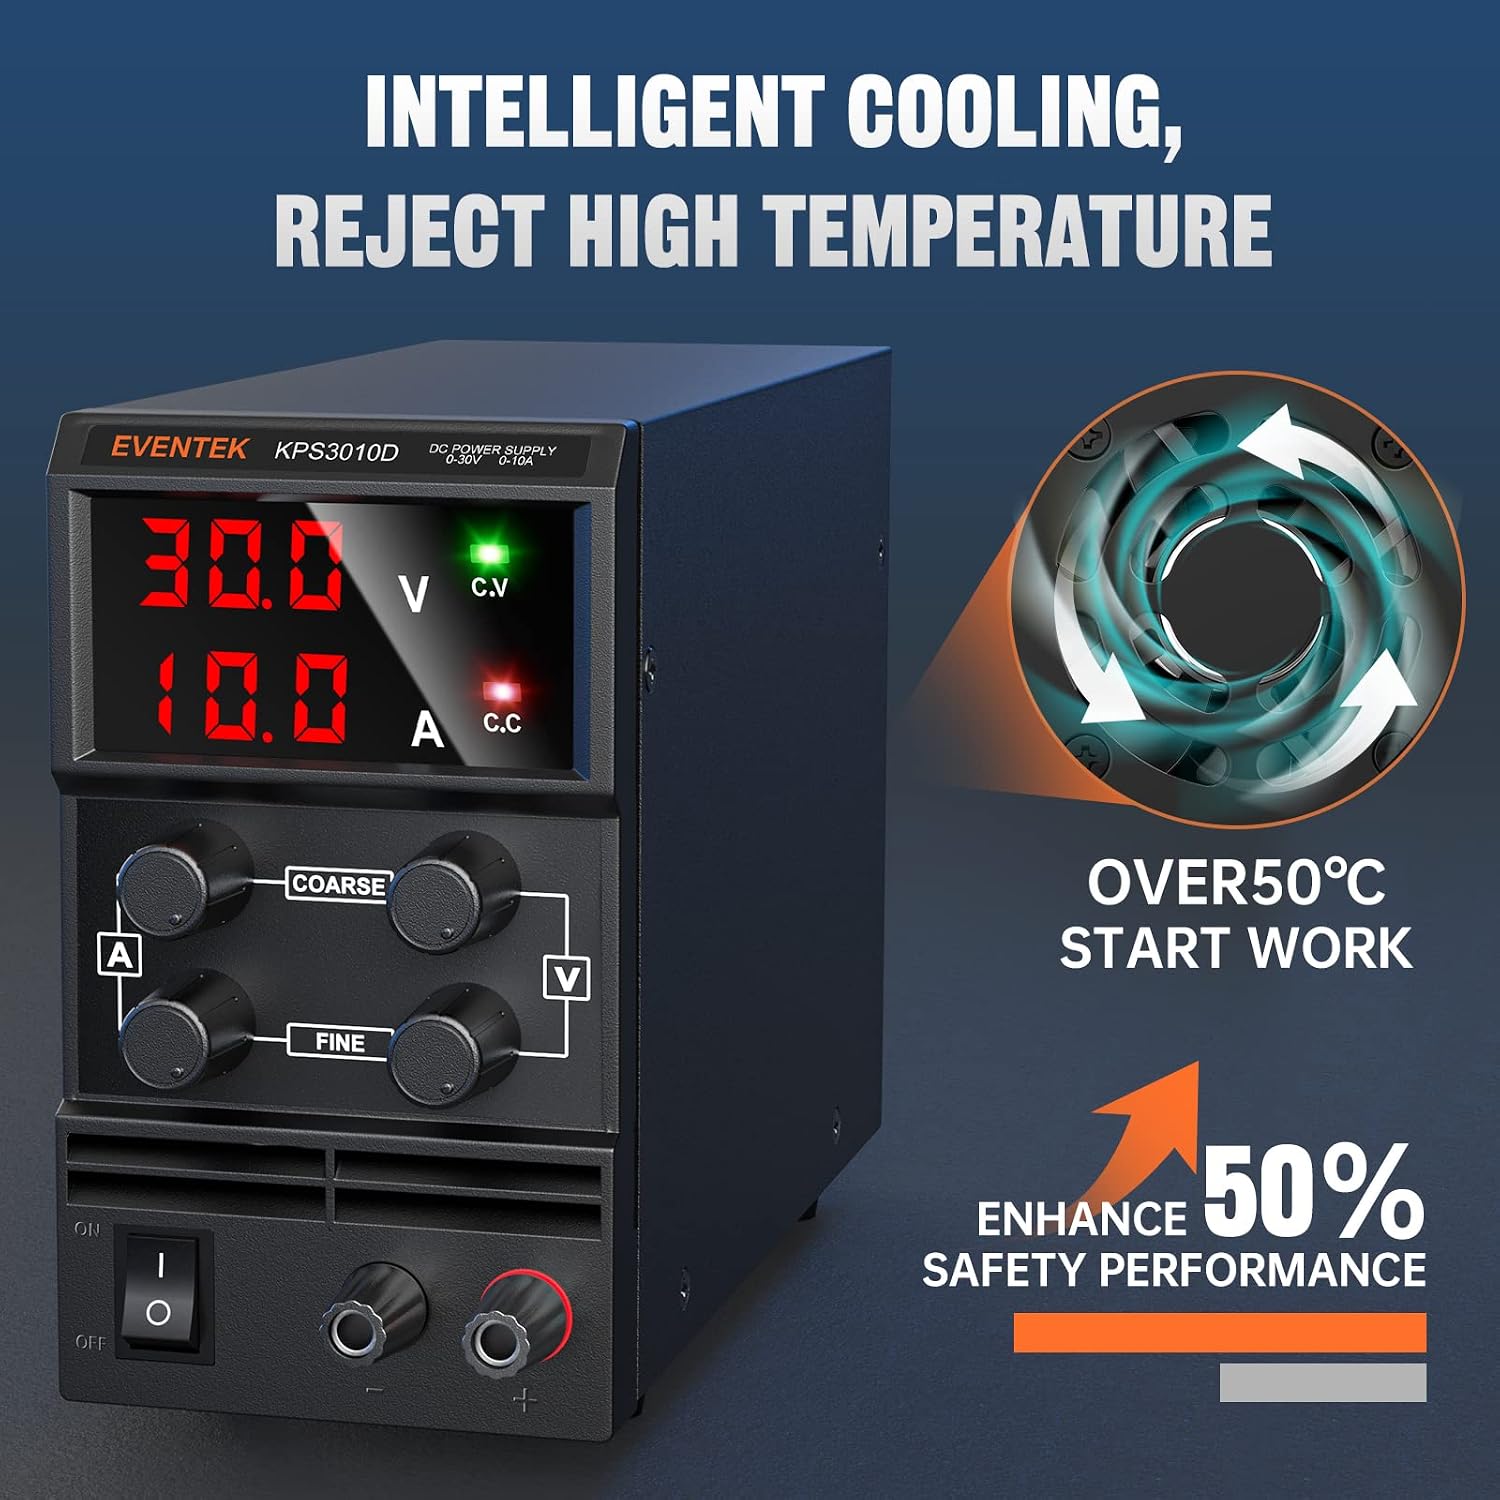
Figure 4: Diagram illustrating the intelligent cooling system, which activates when the internal temperature exceeds 50°C to enhance safety and performance.
6. Troubleshooting
If you encounter issues with your Eventek DC Power Supply, refer to the following common problems and solutions:
| Problem | Possible Cause | Solution |
|---|---|---|
| No power/Display off | Power switch off, power cord disconnected, or no AC power. | Ensure the power switch is ON. Check power cord connection to unit and wall outlet. Verify AC power at the outlet. |
| Output voltage/current not stable | Loose connections, unstable load, or unit operating in C.C. mode unexpectedly. | Check all output lead connections. Ensure the load is stable. If C.C. light is on, adjust current limit or check load resistance. |
| Unit shuts down unexpectedly | Overload protection, short circuit protection, or thermal protection activated. | Disconnect the load. Check for short circuits in your circuit. Allow the unit to cool down if it feels hot. Reduce the load or adjust current limit. |
| Display readings inaccurate | External factors or minor calibration variance. | For critical applications, verify readings with a calibrated external multimeter. |

Figure 5: Internal components highlighting the multiple protection circuits for enhanced safety.
7. Specifications
| Specification | Value |
|---|---|
| Product Dimensions | 5.71 x 3.54 x 8.46 inches; 3.64 Pounds |
| Item Model Number | 3010D-1 |
| Date First Available | June 16, 2022 |
| Manufacturer | eventek |
| Brand | Eventek |
| Output Wattage | 300 Watts |
| Wattage | 3E+2 |
| Cooling Method | Air |
| Item Dimensions L x W x H | 5.71 x 3.54 x 8.46 inches |
| Current Rating | 10 Amps |
| Maximum Input Voltage | 1.2E+2 Volts (AC) |
| Minimum Input Voltage | 1 Volts (AC) |
8. Warranty and Support
For warranty information, technical support, or service inquiries, please refer to the warranty card included with your product or contact Eventek customer service directly through their official website or the retailer where the product was purchased. Keep your purchase receipt as proof of purchase.
Related documents3010D-1


Ask a question about this manual
Ask about setup, troubleshooting, compatibility, parts, safety, or missing instructions. Manuals+ will review the question and use this page’s manual context to help answer it.