1. Introduction
This manual provides detailed instructions for the safe and effective operation, setup, and maintenance of your BAOSHISHAN ZMF-500N Force Gauge and APH Test Stand. This bundle is designed for precise force measurement applications. Please read this manual thoroughly before use to ensure optimal performance and longevity of the equipment.
2. Safety Information
Always observe the following safety precautions to prevent injury and damage to the equipment:
- Ensure the test stand is placed on a stable, level surface before operation.
- Do not exceed the maximum rated capacity of the force gauge (500N).
- Keep hands and loose clothing away from moving parts of the test stand during operation.
- Use only the specified power source for the force gauge, if applicable.
- Avoid dropping or subjecting the force gauge to strong impacts.
- Store the equipment in a dry, clean environment when not in use.
3. Package Contents
Carefully unpack all items and verify that the following components are present:

Figure 3.1: Package Contents. This image displays the various components included in the package: the ZMF-500N Digital Force Gauge, a hard carrying case, a user manual, a check certificate, an after-sale service card, various attachments (hooks, flat heads, conical heads), screws, and a connecting rod.
- ZMF-500N Digital Force Gauge
- APH Test Stand (unassembled)
- Hard Carrying Case for Force Gauge
- User Manual for Force Gauge
- Check Certificate
- After-Sale Service Card
- Various Force Gauge Attachments (hook, flat head, conical head, etc.)
- Mounting Screws and Connecting Rods
4. Product Overview
4.1 APH Test Stand

Figure 4.1: APH Test Stand. This image shows the assembled APH Test Stand, featuring a base, two vertical support rods, a horizontal crossbar, a lead screw with a hand wheel for vertical movement, and a mounting plate for the force gauge.
The APH Test Stand provides a stable platform for conducting precise push-pull force tests. It features a hand wheel for smooth, controlled vertical movement, allowing for accurate positioning of the force gauge relative to the test sample. The stand includes a mounting plate with various hole patterns to accommodate different force gauges.

Figure 4.2: APH Test Stand Mounting Holes. This image highlights the mounting plate of the APH Test Stand, detailing the various hole patterns and their dimensions: 30x145mm, 40x100mm, 20x130mm, and 40x90mm. These patterns allow for versatile attachment of different force gauges.
4.2 ZMF-500N Digital Force Gauge

Figure 4.3: ZMF-500N Digital Force Gauge. This image shows the front and back views of the ZMF-500N Digital Force Gauge, including its dimensions (124mm height, 60mm width, 40mm depth) and the hole size for mounting (M4-73*40mm). The front features an LCD display and control buttons (SET, Power, ZERO, PEAK, UNIT), while the back shows the battery compartment and a product label with the serial number 401231210.
The ZMF-500N Digital Force Gauge is a portable instrument designed for measuring push and pull forces up to 500 Newtons. It features a clear LCD display, multiple measurement units, and various operating modes. The gauge is equipped with a threaded shaft for attaching different testing accessories and a mounting point for integration with test stands.
5. Setup
5.1 APH Test Stand Assembly
The APH Test Stand typically comes partially disassembled. Follow these steps for assembly:
- Place the base plate on a stable, level surface.
- Insert the two vertical support rods into the designated holes on the base plate and secure them.
- Attach the horizontal crossbar to the top of the vertical support rods.
- Assemble the lead screw mechanism with the hand wheel and attach it to the crossbar, ensuring smooth vertical movement.
- Mount the force gauge mounting plate onto the movable carriage of the lead screw.

Figure 5.1: Assembled APH Test Stand. This image provides a side view of the assembled APH Test Stand, illustrating the robust construction and the mechanism for vertical adjustment.
5.2 Force Gauge Installation
To install the ZMF-500N Force Gauge onto the APH Test Stand:
- Select the appropriate mounting holes on the APH Test Stand's mounting plate that align with the M4-73*40mm hole pattern on the back of the ZMF-500N Force Gauge.
- Secure the force gauge to the mounting plate using the provided screws. Ensure it is firmly attached and stable.
- Attach the desired testing accessory (e.g., hook, flat head) to the threaded shaft of the force gauge.
6. Operating Instructions
6.1 Power On/Off and Zeroing
- Power On: Press the Power button (green button in the center) to turn on the force gauge.
- Zeroing: Before each measurement, ensure the gauge reads "0.0" when no force is applied. If not, press the ZERO button to reset the display.
- Power Off: Press and hold the Power button for a few seconds to turn off the force gauge.
6.2 Unit Conversion
The ZMF-500N Force Gauge supports multiple units of measurement. To switch between units:
- Press the UNIT button repeatedly to cycle through the available units: Newtons (N), kilograms (kg), ounces (Oz), and pounds (lb).
- The currently selected unit will be displayed on the LCD screen.

Figure 6.1: Unit Conversion. This image illustrates the ZMF-500N Force Gauge's ability to convert between four units: Newtons (N), kilograms (kg), ounces (Oz), and pounds (lb), by pressing the UNIT button.
6.3 Measurement Modes
The force gauge offers different measurement modes for various testing requirements:
- Real-time Mode: This is the default mode, displaying the current force being applied.
- PEAK Mode: Press the PEAK button to enter Peak Hold mode. In this mode, the gauge will display and hold the maximum force detected during the measurement. This is useful for capturing the highest force applied during a test.
- First-PEAK Mode: This mode captures the first peak force detected, often used for break-away force measurements.
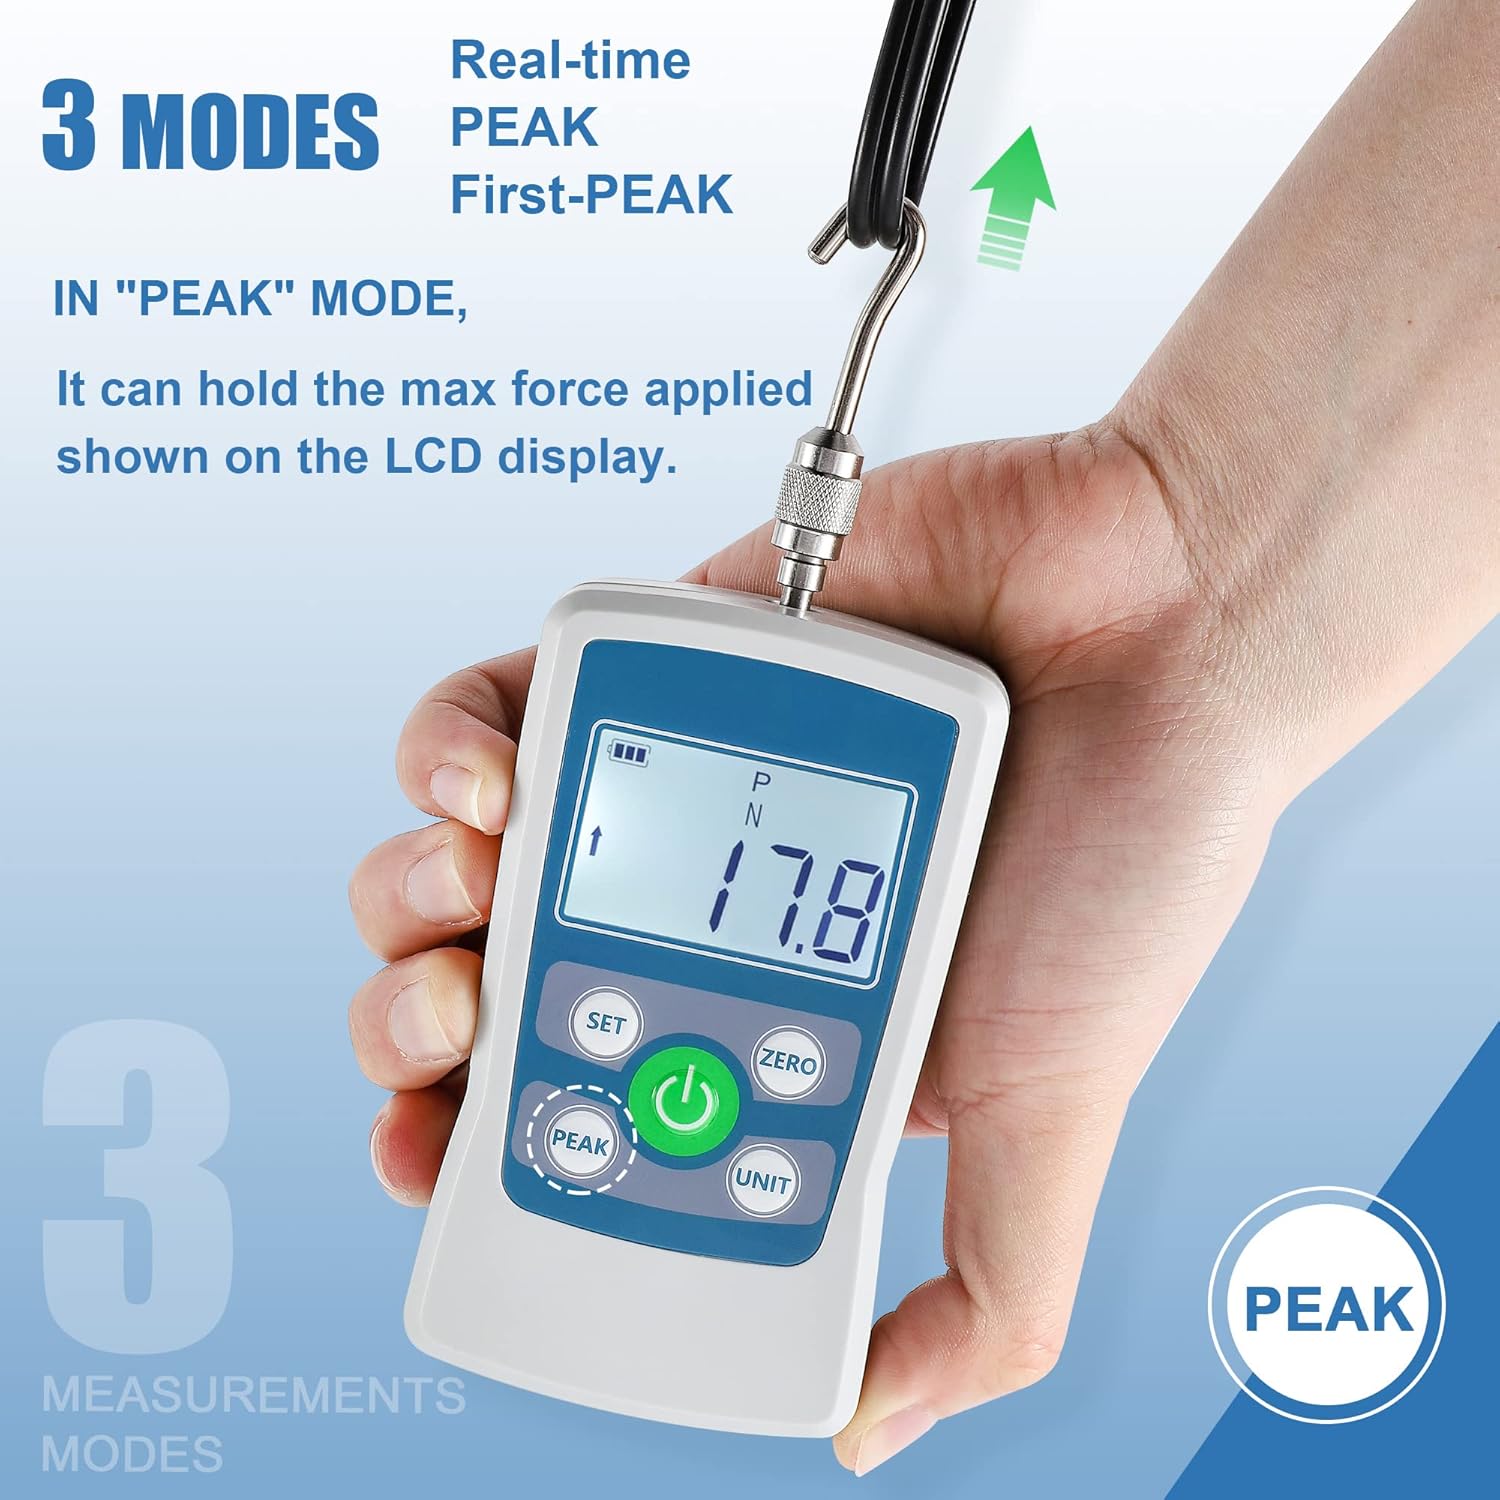
Figure 6.2: PEAK Mode. This image demonstrates the ZMF-500N Force Gauge in PEAK mode, showing how it holds the maximum force value (17.8 N) on the display after the force has been applied and released. The image also indicates "Real-time," "PEAK," and "First-PEAK" as available modes.
6.4 Conducting a Test
- Ensure the force gauge is properly mounted on the APH Test Stand and the desired attachment is secured.
- Power on the force gauge and zero it.
- Position the test sample under the force gauge attachment.
- Slowly turn the hand wheel of the APH Test Stand to apply force to the sample. Observe the force reading on the gauge's display.
- If using PEAK mode, the maximum force will be held on the display.
- Once the test is complete, retract the force gauge using the hand wheel and remove the sample.
7. Maintenance
- Cleaning: Wipe the force gauge and test stand with a soft, dry cloth. Do not use abrasive cleaners or solvents.
- Storage: Store the equipment in its protective case (for the force gauge) and in a dry, dust-free environment when not in use.
- Battery Replacement: If the battery indicator on the force gauge shows low power, replace the batteries according to the instructions in the force gauge's specific manual.
- Lubrication: Periodically apply a small amount of light machine oil to the lead screw of the APH Test Stand to ensure smooth operation.
8. Troubleshooting
| Problem | Possible Cause | Solution |
|---|---|---|
| Force gauge does not power on. | Low or dead batteries. | Replace batteries. |
| Inaccurate readings. | Not zeroed before use; exceeding capacity; environmental factors. | Press ZERO button; ensure force is within 500N; operate in stable conditions. |
| Test stand movement is stiff. | Lack of lubrication on lead screw; dust/debris. | Clean and lubricate the lead screw. |
| Gauge displays "OVERLOAD". | Force applied exceeds 500N capacity. | Reduce applied force immediately to prevent damage. |
9. Specifications
9.1 ZMF-500N Digital Force Gauge
- Model: ZMF-500N
- Maximum Capacity: 500 N
- Units: N, kg, Oz, lb
- Dimensions: Approximately 124mm (Height) x 60mm (Width) x 40mm (Depth)
- Mounting Hole Size: M4-73*40mm
- Serial Number (Example): 401231210 (Refer to your device for specific serial number)
9.2 APH Test Stand
- Overall Dimensions: Approximately 490mm (Height) x 210mm (Length) x 140mm (Width)
- Mounting Plate Hole Patterns: 30x145mm, 40x100mm, 20x130mm, 40x90mm
- Operation: Manual hand wheel for vertical adjustment
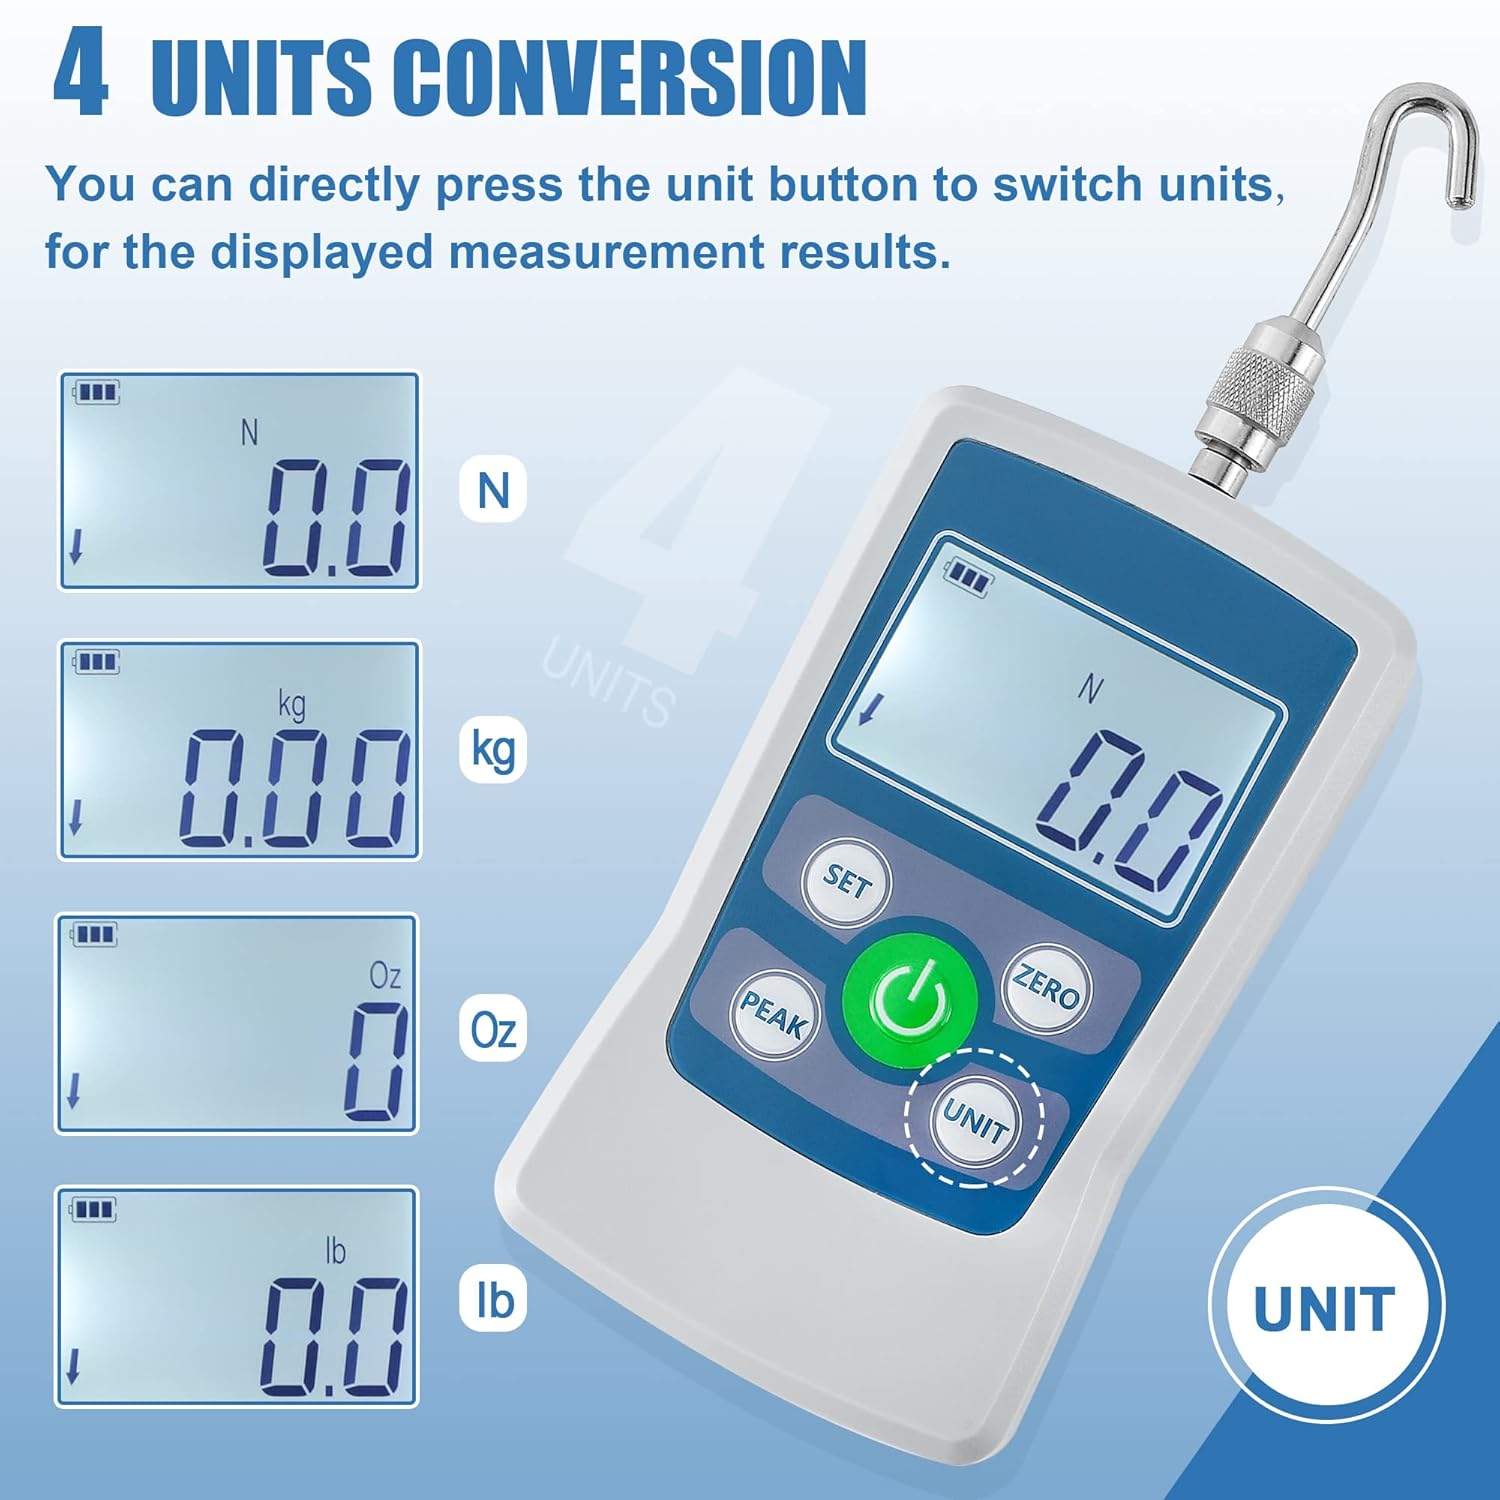
Figure 9.1: APH Test Stand Dimensions. This image provides the key dimensions of the APH Test Stand: 490mm in height, 210mm in length (depth), and 140mm in width.
10. Warranty and Support
BAOSHISHAN products are manufactured to high-quality standards. For warranty information, technical support, or service inquiries, please refer to the included After-Sale Service Card or contact your authorized BAOSHISHAN dealer. Keep your purchase receipt as proof of purchase for warranty claims.
For further assistance, you may visit the official BAOSHISHAN store on Amazon: BAOSHISHAN Store.


