1. Introduction
This manual provides comprehensive instructions for the setup, operation, and maintenance of your Hayve MS1 Digital Microscope. Please read this manual thoroughly before using the device to ensure proper functionality and to maximize your viewing and recording experience. The Hayve MS1 is designed for detailed observation and analysis, featuring a 7-inch HD screen, 12MP camera sensor, and versatile connectivity options.
2. Safety Information
- Keep the device away from water and high humidity.
- Avoid exposing the device to direct sunlight or extreme temperatures.
- Do not attempt to disassemble or repair the device yourself. Contact customer support for assistance.
- Use only the provided power adapter and accessories.
- Ensure the device is placed on a stable, flat surface during operation.
3. Package Contents
Verify that all items are present in the package:
- Hayve MS1 Digital Microscope Unit
- Adjustable Stand (8.5'' Longer Stand)
- Remote Control
- 32GB Micro-SD Card
- USB Cable
- HDMI Cable
- Power Adapter
- 12 Prepared Slides
- User Manual (this document)
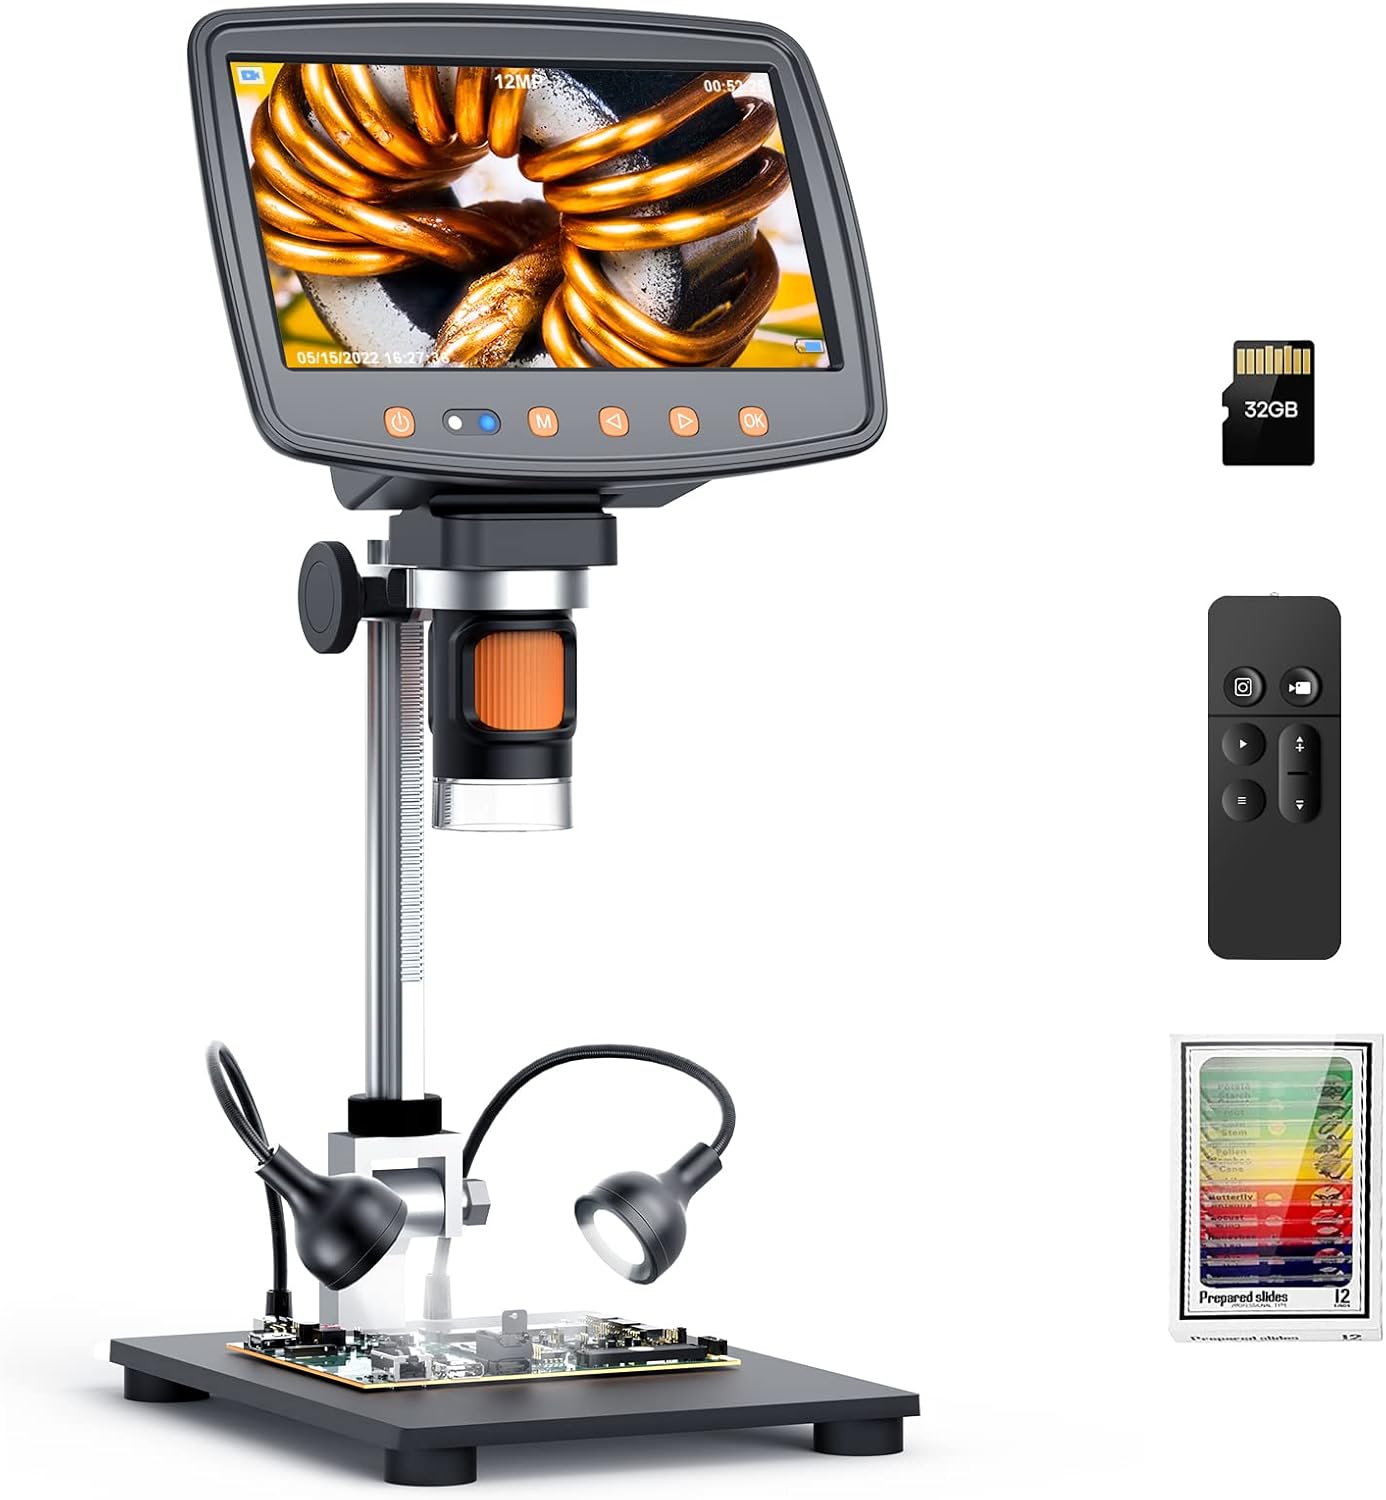
Image: Hayve MS1 Digital Microscope with its included accessories: the main unit, a 32GB Micro-SD card, a remote control, and a set of 12 prepared slides.
4. Product Overview
4.1 Key Components
- 7-inch HD IPS Screen: Provides a clear and wide viewing area for observations.
- 12MP Ultra-Precise Camera Sensor: Captures high-quality images and videos.
- Adjustable Stand: 8.5-inch longer stand for a wider and higher field of view, especially useful for larger objects like coins.
- Adjustable LED Lights: Two gooseneck LED lights for optimal illumination of the specimen.
- Focus Wheel: For adjusting the clarity of the image.
- Control Buttons: On the display for power, menu, zoom, photo/video capture.
- Micro-SD Card Slot: For storing captured images and videos (32GB card included).
- HDMI Output: For connecting to external monitors or TVs.
- USB Port: For connecting to a computer (Windows/Mac) and power.
- Remote Control: For hands-free operation of photo/video, zoom, and brightness.
4.2 Screen Display

Image: Close-up of the 7-inch IPS HD screen, showcasing vibrant color reproduction and clear details of a magnified flower.
5. Setup Instructions
- Assemble the Stand: Attach the microscope unit to the adjustable stand. Ensure all connections are secure. The 8.5-inch longer stand provides ample working distance.
- Insert Micro-SD Card: Locate the Micro-SD card slot on the microscope unit. Gently insert the provided 32GB Micro-SD card until it clicks into place. This card is essential for saving images and videos.
- Connect Power: Connect the power adapter to the microscope's power input and then to a power outlet. The device can also be powered via USB.
- Position Lighting: Adjust the two gooseneck LED lights to illuminate the area where your specimen will be placed.
6. Operating Instructions
6.1 Power On/Off
Press and hold the power button on the display unit to turn the microscope on or off.
6.2 Adjusting Magnification and Focus
Place your specimen on the base plate. Rotate the focus wheel to achieve a clear image on the 7-inch display. The microscope offers a magnification range from 2X to 1500X.

Image: Visual representation of the microscope's magnification capabilities, showing an object at 2X, 500X, and 1500X zoom levels.
6.3 Adjusting Lighting
Use the controls on the microscope or the remote control to adjust the brightness of the LED lights. Optimal lighting is crucial for clear observation.

Image: Demonstrates the adjustable lighting feature, showing a coin under different light intensities (Off, 50%, 100%).
6.4 Taking Photos and Recording Videos
Press the dedicated photo button to capture still images or the video button to start/stop recording. All captures are saved to the inserted Micro-SD card. The 12MP camera sensor ensures high-quality output.
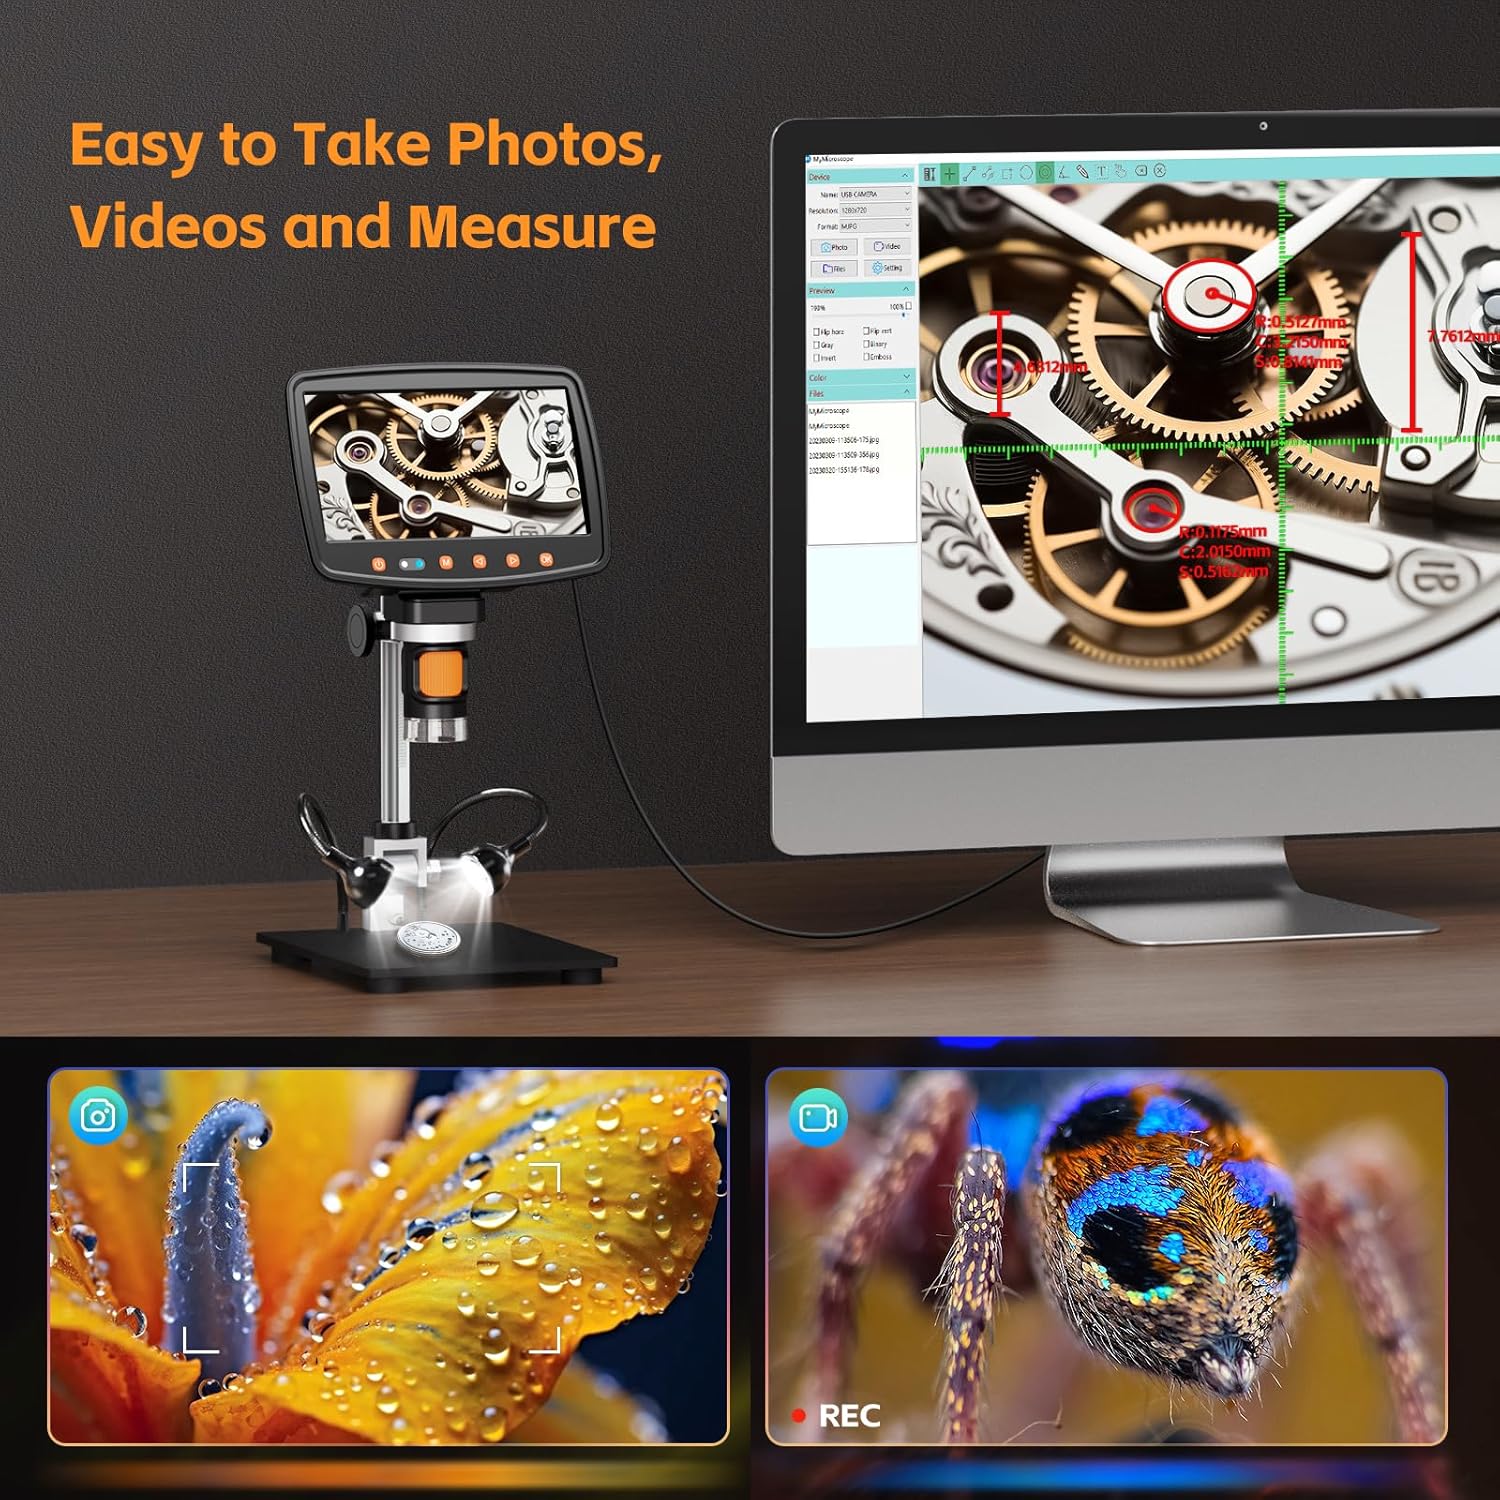
Image: The microscope connected to a computer, illustrating its capabilities to take photos, record videos, and perform measurements on magnified objects.
6.5 Connecting to External Displays (TV/PC)
The Hayve MS1 supports HDMI output for connecting to a TV or monitor, and USB connection for Windows or Mac computers. This allows for a larger viewing experience and advanced software functionalities.
- HDMI Connection: Use the provided HDMI cable to connect the microscope to an HDMI-enabled display. Select the correct input source on your display.
- USB Connection (PC/Mac): Connect the microscope to your computer using the USB cable. Install the necessary software (details in section 6.6) to enable viewing, capturing, and measurement functions on your computer.

Image: The microscope demonstrating its multi-interface capability, showing connections to both a computer monitor and a television for larger display options.
6.6 Software Features
When connected to a computer, the Hayve digital microscope software allows for advanced functions:
- Measurement: Flexibly measure dimensions, angles, areas, perimeters, and radii of observed objects.
- Image Effects: Apply professional image effects such as Flip Horizontal, Flip Vertical, Grayscale, Binary, Invert, and Emboss for enhanced analysis.
6.7 Remote Control Usage
The included remote control allows for convenient, hands-free operation, preventing device shake during critical observations. Functions include:
- Taking photos
- Recording videos
- Zoom in/out
- Adjusting LED brightness
7. Maintenance
- Cleaning: Use a soft, dry cloth to clean the exterior of the microscope. For the lens, use a specialized lens cleaning cloth and solution. Avoid abrasive materials.
- Storage: Store the microscope in a clean, dry place away from dust and direct sunlight when not in use.
- Battery Care: The device contains a Lithium Polymer battery. For optimal battery life, avoid fully discharging the battery frequently and store the device with a partial charge if not used for extended periods.

Image: A user operating the microscope, indicating its 3-hour working battery life for extended use.
8. Troubleshooting
| Problem | Possible Cause | Solution |
|---|---|---|
| No power | Battery discharged; Power cable not connected properly. | Charge the battery; Ensure power cable is securely connected. |
| Blurred image | Focus not adjusted; Lens dirty; Insufficient lighting. | Rotate the focus wheel; Clean the lens; Adjust LED brightness. |
| Cannot save photos/videos | Micro-SD card not inserted; Card full; Card corrupted. | Insert Micro-SD card; Delete old files or use a new card; Format card (backup data first). |
| No display on external monitor | HDMI/USB cable loose; Incorrect input source selected on monitor. | Check cable connections; Select correct HDMI/USB input on external display. |
| Remote control not working | Battery low/dead; Obstruction between remote and microscope. | Replace remote control battery; Ensure clear line of sight. |
| Gooseneck lamp not working | Loose connection; Faulty lamp. | Check connection; Contact customer support if faulty. |
9. Specifications
| Feature | Detail |
|---|---|
| Brand | Hayve |
| Model Name | MS1 |
| Screen Size | 7-inch HD IPS |
| Camera Sensor | 12MP Ultra-Precise |
| Magnification Range | 2X-1500X |
| Stand Height | 8.5 inches (longer stand) |
| Storage | 32GB Micro-SD Card (included) |
| Connectivity | HDMI, USB (Compatible with TV/Windows/Mac) |
| Light Source | Adjustable LED Lights |
| Battery Type | 1 Lithium Polymer battery (included) |
| Product Dimensions | 10.63 x 8.66 x 4.72 inches |
| Item Weight | 0.011 ounces (0.3 Grams) |
| Material | Metal |
| Color | Black |
10. Warranty and Support
For warranty information and customer support, please refer to the warranty card included in your product packaging or visit the official Hayve website. If you encounter any issues not covered in this manual, please contact Hayve customer service for assistance.
Optional protection plans are available for purchase separately to extend coverage beyond the standard warranty period. Details can be found on the product's purchase page.
11. Official Product Videos
Below are official product videos from the seller demonstrating various features and uses of the Hayve MS1 Digital Microscope. Please note that specific video URLs with 'creator_type: Seller' and 'm3u8' format were not provided in the product data, so this section serves as a placeholder for where they would be embedded.
Video Placeholder: Product Overview
Description: A general overview video showcasing the Hayve MS1 Digital Microscope, its main parts, and basic functionality.
Video Placeholder: Coin Observation Guide
Description: A demonstration video focusing on using the Hayve MS1 Digital Microscope for coin inspection, highlighting the adjustable stand and clear display for coin collectors.


