
Introduction
This manual provides detailed instructions for the installation, maintenance, and specifications of the Hosim H16P RC Car Front Shock Tower, model 16170. This component is an original spare part designed specifically for the Hosim 4WD 1:16 H16P GPS RC Car, ensuring proper fit and performance for your remote control vehicle's suspension system.
Product Overview
The front shock tower is a crucial structural component of your RC car's suspension. It provides the upper mounting points for the front shock absorbers, connecting them to the chassis. This part is designed to withstand impacts and provide a stable platform for the suspension, contributing to the vehicle's handling and durability.

Image 1: Top-down view of the Hosim H16P Front Shock Tower, showing mounting holes and structural design.
Installation Guide
Proper installation of the front shock tower is essential for the performance and longevity of your Hosim H16P RC Car. Follow these steps carefully:
- Preparation: Ensure your RC car is powered off and the battery is disconnected. Place the car on a stable, clean surface. You may need a small Phillips head screwdriver and possibly a small wrench.
- Remove Existing Shock Tower (if replacing):
- Carefully detach the front shock absorbers from the existing shock tower. This usually involves unscrewing small bolts at the top of the shocks.
- Locate and remove the screws that secure the shock tower to the chassis of the RC car. Keep these screws safe for reinstallation.
- Gently lift and remove the old shock tower.
- Position the New Shock Tower: Align the new Hosim 16170 Front Shock Tower with the mounting points on the chassis. Ensure it sits flush and correctly oriented.
- Secure the Shock Tower: Use the original screws to fasten the new shock tower to the chassis. Tighten the screws securely but avoid over-tightening, which can strip the plastic threads.
- Reattach Shock Absorbers: Connect the top of the front shock absorbers to the designated mounting holes on the new shock tower. Ensure they are securely fastened and can move freely without binding.
- Final Check: Gently test the front suspension by pressing down on the front of the car. The shocks should compress and rebound smoothly. Verify all screws are tight and no parts are loose.
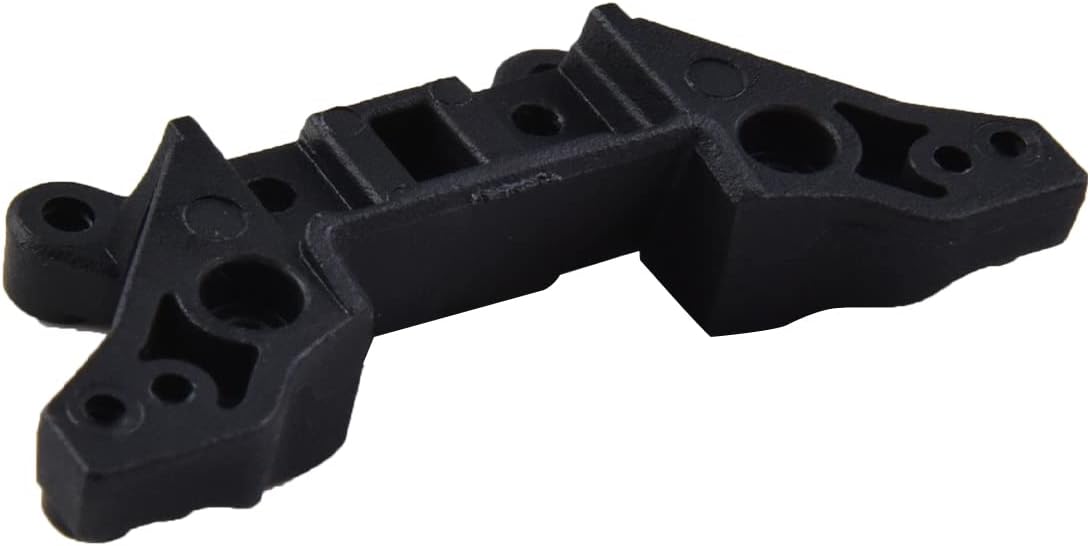
Image 2: Angled view of the Hosim H16P Front Shock Tower, highlighting its structural integrity and various mounting points.

Image 3: Bottom-up view of the Hosim H16P Front Shock Tower, showing the underside structure and screw holes.
Operating Considerations
Once installed, the front shock tower works in conjunction with the shock absorbers and other suspension components to manage the vehicle's handling over various terrains. While the shock tower itself does not have "operating" controls, its proper function is critical for:
- Suspension Integrity: Provides a rigid anchor for the front shocks, ensuring they absorb impacts effectively.
- Chassis Protection: Distributes forces from impacts, protecting the main chassis components.
- Handling Stability: A properly installed and undamaged shock tower contributes to predictable steering and stability during high-speed maneuvers and jumps.

Image 4: Another angled view of the Hosim H16P Front Shock Tower, illustrating its robust construction.
Maintenance
To ensure the longevity and optimal performance of your Hosim H16P Front Shock Tower, consider the following maintenance tips:
- Regular Inspection: After each significant use, visually inspect the shock tower for any signs of cracks, bends, or stress marks.
- Check Fasteners: Periodically check that all screws securing the shock tower and shock absorbers are tight. Vibrations during operation can sometimes loosen fasteners.
- Cleaning: Remove dirt, mud, and debris from the shock tower and surrounding suspension components. A soft brush and mild cleaner can be used, followed by thorough drying.
- Replacement: If the shock tower shows significant damage, such as cracks or deformation, replace it immediately to prevent further damage to your RC car's suspension.
Troubleshooting
If you encounter issues related to the front shock tower, consider these common troubleshooting steps:
- Loose Suspension: If the front suspension feels loose or wobbly, check all mounting screws on the shock tower and shock absorbers for tightness.
- Unusual Noises: Squeaking or grinding noises from the front suspension might indicate loose components or friction. Inspect the shock tower for any contact points with other parts.
- Visible Damage: Cracks, bends, or breaks in the shock tower are clear indicators that the part needs replacement. Continued use with a damaged shock tower can lead to more severe issues.
- Uneven Ride Height: While often related to shock absorbers, an improperly seated or damaged shock tower can also contribute to uneven front ride height. Re-check installation.
Specifications
| Feature | Detail |
|---|---|
| Part Number | 16170 |
| Component Name | Front Shock Tower |
| Quantity | 1 per package |
| Compatibility | Hosim 4WD 1:16 H16P GPS RC Cars |
| Material | Durable composite plastic (typical for RC parts) |
| Package Dimensions | 5 x 3 x 1 inches |
| Item Weight | 3.2 ounces |
| Manufacturer Recommended Age | 14 years and up |
Warranty and Support
For information regarding warranty coverage, technical support, or to purchase additional spare parts, please contact Hosim customer service directly or visit their official website. Ensure you have your product model number (16170) and details of your Hosim H16P RC Car available when contacting support.
You can often find support information on the Hosim Store on Amazon or through the original purchase platform.
