
HFCCYBGS WT13
Contents
User Manual
High-Precision Visible Light Three-Channel Transmittance Meter
Model: WT13
1. Introduction
The HFCCYBGS WT13 High-Precision Visible Light Three-Channel Transmittance Meter is an advanced instrument designed for accurate measurement of light transmittance across visible light, infrared, and ultraviolet spectra. This device is ideal for evaluating the optical properties of various transparent and translucent materials, including automotive glass, architectural glass, plastic sheets, and mobile phone screens.
Its core principle involves measuring the ratio of transmitted light intensity to incident light intensity, expressed as a percentage. The WT13 features high accuracy, quick automatic calibration, and a user-friendly interface, making it an essential tool for quality control and research in various industries.
2. Safety Information
Please read and understand all safety instructions before operating the device to ensure safe and proper use.
- Battery Safety: Use only specified battery types (4x1.5V AAA). Do not mix old and new batteries, or different types of batteries. Remove batteries if the device will not be used for an extended period to prevent leakage.
- Environmental Conditions: Operate the device within the specified temperature (0~50℃) and humidity (<90%) ranges. Avoid exposure to extreme temperatures, direct sunlight, or high humidity.
- Handling: Handle the device with care. Avoid dropping or subjecting it to strong impacts, which may damage internal components.
- Cleaning: Use a soft, dry cloth for cleaning. Do not use abrasive cleaners or solvents, as they may damage the casing or display.
- Repair: Do not attempt to disassemble or repair the device yourself. Refer all servicing to qualified personnel.
3. Product Overview
The WT13 Transmittance Meter is designed for ease of use and precision. Below are the key components and features:

Figure 3.1: Front view of the WT13 Transmittance Meter. This image displays the device's front panel, featuring a clear LCD screen that shows IR, UV, and VL transmittance percentages, along with battery status. Below the screen are three control buttons: 'MOD' (Mode), 'Power', and 'CAL' (Calibration).
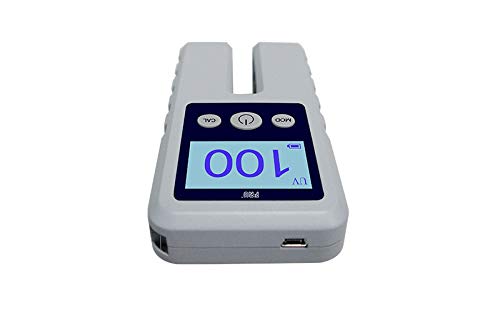
Figure 3.2: Side view of the WT13 Transmittance Meter. This image highlights the side profile of the device, showing the measurement slot and a micro-USB port for potential power or data transfer (though data transfer is not explicitly mentioned in specs, it's a common port). The display is visible from an angle, showing "UV 100%".
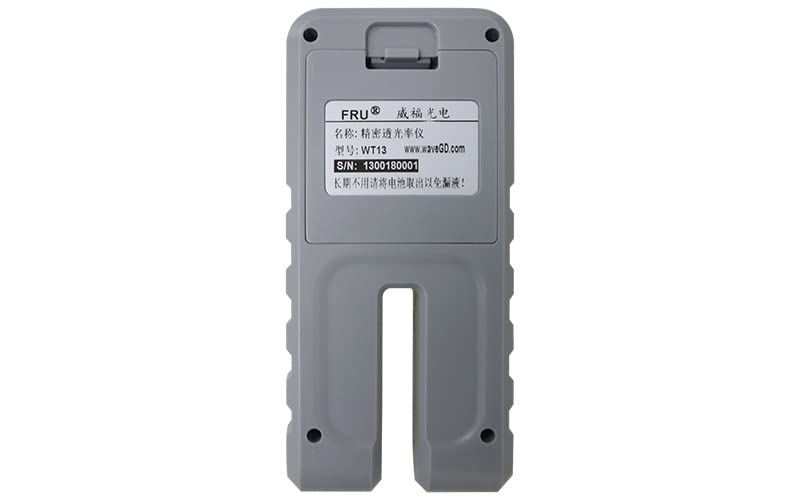
Figure 3.3: Back view of the WT13 Transmittance Meter. This image shows the rear of the device, including the battery compartment cover. Text on the back indicates the brand "FRU®", model "WT13", and a serial number, along with a reminder to remove batteries for long-term storage.
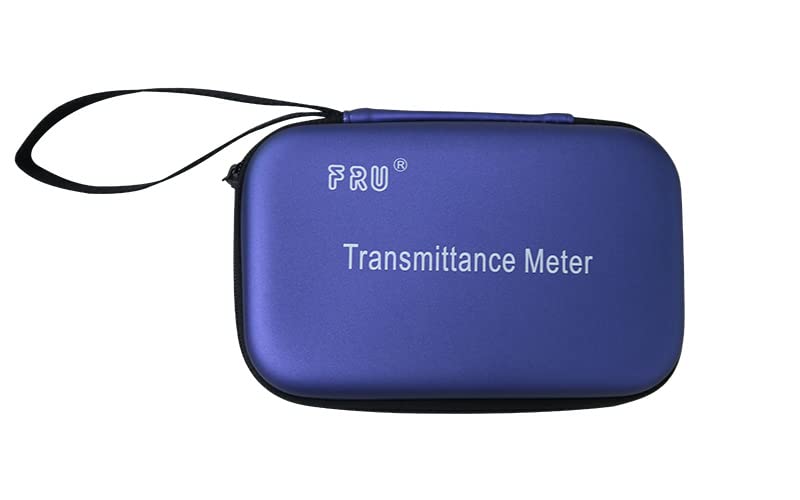
Figure 3.4: Carrying case for the WT13 Transmittance Meter. This image displays the compact, blue zippered case designed to protect the meter, featuring the "FRU® Transmittance Meter" logo on its top surface.
Key Features:
- Three-Channel Measurement: Simultaneously measures visible light (VL), infrared (IR), and ultraviolet (UV) transmittance.
- Wide Application: Suitable for various transparent and translucent parallel plane samples.
- Automatic & Manual Calibration: Features automatic calibration to 100% transmittance upon startup and supports manual calibration with clear LCD prompts.
- High Accuracy & Resolution: Provides precise measurements with a resolution of 0.1% and accuracy of ±2%.
- Large LCD Display: Clear and brief interface for easy reading of results.
4. Setup
4.1 Unpacking
Carefully remove the WT13 Transmittance Meter and its accessories from the packaging. Verify that all components are present:
- WT13 Transmittance Meter
- User Manual
- Carrying Case (if included with your model)
- Inspection Certificate (if included)
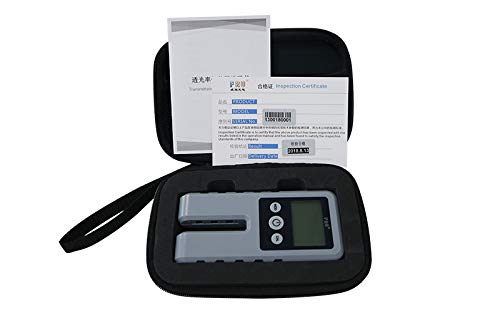
Figure 4.1: WT13 Transmittance Meter and manual within its protective case. This image shows the meter securely nestled in its custom-fit carrying case, alongside the folded user manual, indicating how the product is packaged for transport and storage.

Figure 4.2: WT13 Transmittance Meter with user manual and inspection certificate. This image displays the meter next to its user manual and an inspection certificate, highlighting the documentation provided with the device.
4.2 Battery Installation
The WT13 meter requires 4x 1.5V AAA (UM-4) batteries (not included).
- Locate the battery compartment on the back of the device (refer to Figure 3.3).
- Slide the battery compartment cover downwards to open it.
- Insert four 1.5V AAA batteries, ensuring correct polarity (+ and -) as indicated inside the compartment.
- Replace the battery compartment cover by sliding it upwards until it clicks into place.
5. Operating Instructions
5.1 Powering On/Off
- To power on the device, press the Power button (center button) once. The LCD will illuminate and display the current transmittance readings.
- To power off the device, press and hold the Power button for approximately 3 seconds until the display turns off.
5.2 Automatic Calibration
Upon powering on, the WT13 meter performs an automatic calibration to 100% transmittance. This process typically takes about 3 seconds. Ensure there is no sample in the measurement slot during this initial calibration.
5.3 Manual Calibration
If recalibration is needed or if the automatic calibration is interrupted, you can perform a manual calibration:
- Ensure the measurement slot is empty and clean.
- Press the CAL button (right button).
- The LCD will display prompt messages guiding you through the calibration process. Follow the on-screen instructions.
- Once calibration is complete, the display will show 100% for all channels (IR, UV, VL).
5.4 Taking Measurements
To measure the transmittance of a sample:
- Ensure the device is powered on and calibrated.
- Gently insert the sample material (e.g., glass, plastic sheet) into the measurement slot. The sample thickness should not exceed 9mm.
- The device will automatically detect the sample and display the transmittance percentages for Visible Light (VL), Infrared (IR), and Ultraviolet (UV) on the LCD screen.
- Remove the sample from the slot when measurement is complete.
5.5 Mode Selection (MOD Button)
The MOD button (left button) allows you to cycle through different display modes or measurement parameters, if applicable. Refer to the on-screen prompts or specific model features for detailed functionality of this button.
6. Maintenance
6.1 Cleaning
- Keep the measurement slot free from dust and debris. Use a soft, lint-free cloth or a small air blower to clean the slot.
- Wipe the exterior of the device with a soft, dry cloth. Do not use liquid cleaners, sprays, or abrasive materials.
6.2 Storage
- When not in use, store the WT13 meter in its protective carrying case to prevent damage from impacts or dust.
- Store the device in a cool, dry place, away from direct sunlight and extreme temperatures.
- For long-term storage (more than one month), remove the batteries to prevent leakage and potential damage to the device.
7. Troubleshooting
| Problem | Possible Cause | Solution |
|---|---|---|
| Device does not power on. |
|
|
| Inaccurate readings / Calibration failure. |
|
|
| Display is dim or flickering. |
|
|
| Device freezes or becomes unresponsive. |
|
|
8. Specifications
| Parameter | Value |
|---|---|
| Model | WT13 |
| Measurement Range | 0~100% |
| Resolution | 0.1% |
| Accuracy | ±2% |
| Visible Light Spectrum Range | 380~760nm |
| Infrared (IR) Wavelength | 940nm |
| Ultraviolet (UV) Wavelength | 365nm |
| Power Supply | 4x 1.5V AAA (UM-4) batteries (NOT INCLUDED) |
| Working Current | <30mA |
| Sample Thickness | <9mm |
| Operating Temperature | 0~50℃ |
| Operating Humidity | <90% |
| Dimensions (LxWxH) | 135.5mm x 62.5mm x 22.5mm |
| Weight | 93g (Battery excluded) |
9. Warranty and Support
This product is manufactured by HFCCYBGS. For warranty information, technical support, or service inquiries, please refer to the contact information provided with your purchase or visit the official HFCCYBGS website. Please retain your proof of purchase for warranty claims.
For further assistance, you may also contact the seller through the platform where the product was purchased.
Documents and downloads
Ask a question about this manual
Ask about setup, troubleshooting, compatibility, parts, safety, or missing instructions. Manuals+ will review the question and use this page’s manual context to help answer it.