
1. Product Overview
The Strpump OEM Rear View Camera Video Adapter Cable is designed to facilitate the retention of your vehicle's original factory rearview camera when upgrading to an aftermarket Android head unit or screen. This adapter converts the proprietary 4-pin camera connector from your OEM radio to a standard RCA video output, ensuring compatibility with new display systems.
It includes a built-in 12V to 6V voltage converter, eliminating the need for an external step-down module for the camera's power supply.
2. Compatibility
This adapter is specifically designed for select Toyota, Lexus, and Mazda vehicles where the original equipment manufacturer (OEM) radio features a 4-pin camera connector. Please verify your vehicle's existing camera connector type before installation.
2.1 Compatible Vehicle Models:
- Toyota 86: 2012-2015, 2016-
- Toyota Land Cruiser: 2007-2011 (200 Series), 2007-2015 (200 Series)
- Lexus RX300
- Toyota Old RAV4
- Toyota Sienna: 2005-2009
- And other models where the OEM radio has a 4-pin camera connector similar to the one shown below.
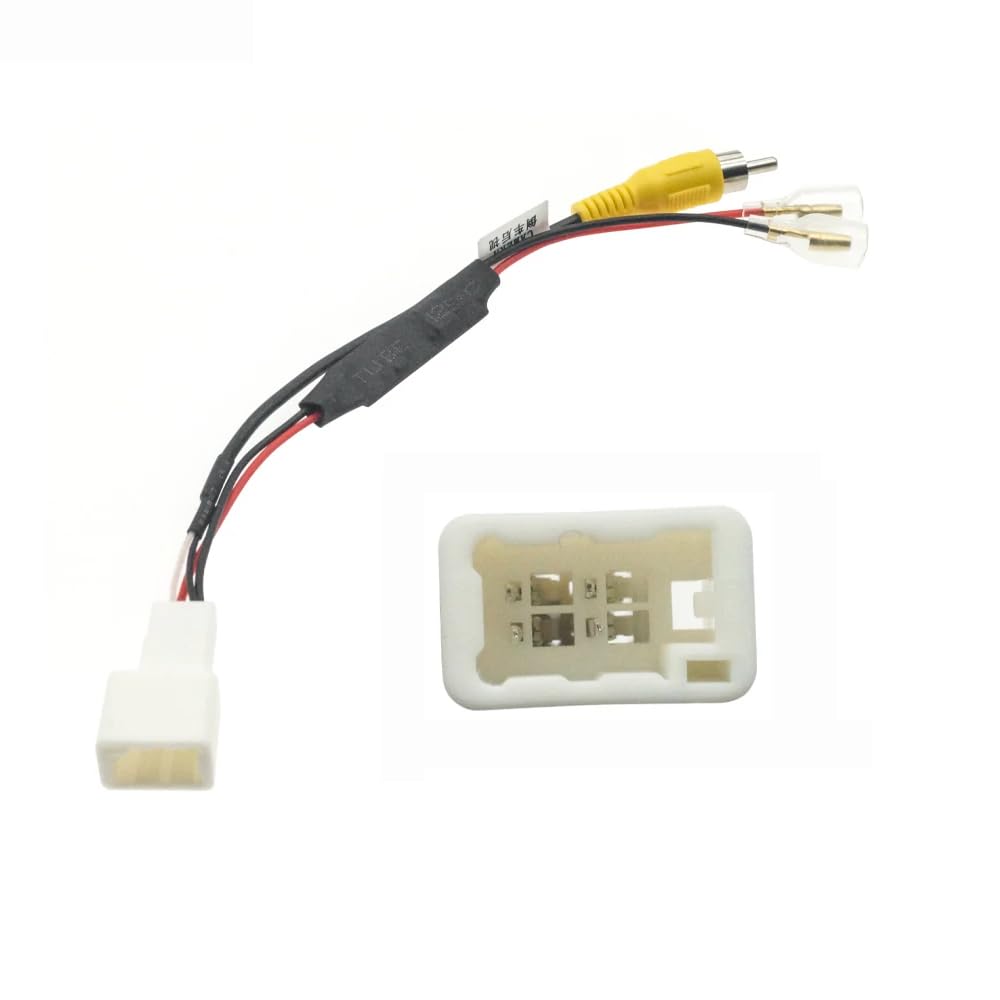
Image 1: Example of an original car radio with the 4-pin camera connector highlighted. Ensure your vehicle's radio has a similar connector for compatibility.
Important: Always compare the adapter's plug with your car's existing connector to confirm compatibility before proceeding with installation.
3. Package Contents
- 1 x Strpump OEM Rear View Camera Video Adapter Cable (with integrated 12V to 6V voltage converter)

Image 2: The Strpump Rear View Camera Video Adapter Cable. It features a white 4-pin connector on one end, a yellow RCA male connector, and two bare wires (red and black) for power.
4. Setup and Installation
Installation of this adapter requires basic automotive electrical knowledge. If you are unsure, it is recommended to seek professional assistance.
4.1 Safety Precautions:
- Disconnect the vehicle's battery negative terminal before starting any electrical work.
- Ensure all connections are secure to prevent short circuits.
- Route cables carefully to avoid pinching or damage.
4.2 Installation Steps:
- Access the OEM Radio: Carefully remove the trim panels and fasteners to gain access to the rear of your vehicle's OEM radio or display unit. Refer to your vehicle's service manual for specific instructions on removing the head unit.
- Locate the OEM Camera Connector: Identify the 4-pin camera connector on the back of your OEM radio. This is typically a white or beige connector. (Refer to Image 1 for an example).
- Connect the Adapter: Plug the white 4-pin connector of the Strpump adapter cable into the corresponding 4-pin port on your OEM radio. Ensure it clicks securely into place.
- Connect RCA Video Output: Connect the yellow RCA male connector from the adapter to the "Camera In" or "Reverse Video Input" RCA port on your new aftermarket Android screen or head unit.
- Connect Power Wires:
- Connect the red wire (positive) from the adapter to a 12V switched power source (e.g., accessory power or reverse light trigger wire) on your new head unit's harness.
- Connect the black wire (negative) from the adapter to a ground point on your new head unit's harness or vehicle chassis.
Note: The adapter has a built-in 12V to 6V converter for the camera, so the power input to the adapter itself should be 12V.
- Test Functionality: Before reassembling the dashboard, reconnect the vehicle's battery. Turn on the ignition and engage reverse gear to test if the OEM camera video now displays correctly on your new screen.
- Reassemble: Once confirmed working, carefully reassemble all removed panels and components.
5. Operating Instructions
Once correctly installed, the Strpump OEM Rear View Camera Video Adapter Cable operates automatically. When the vehicle is shifted into reverse gear, the original factory rearview camera's video feed will be sent through the adapter to your aftermarket head unit, displaying on its screen.
No additional user interaction is required for the adapter itself. The functionality will be controlled by your aftermarket head unit's settings for reverse camera display.
6. Maintenance
The Strpump adapter cable is a passive electronic component and requires no routine maintenance. Ensure that all connections remain secure and free from moisture or physical damage. If the cable or connectors appear damaged, replacement is recommended.
7. Troubleshooting
| Problem | Possible Cause | Solution |
|---|---|---|
| No video signal from camera on new screen. |
|
|
| Flickering or distorted video. |
|
|
| Camera image is upside down or mirrored. |
8. Specifications
- Product Type: OEM Rear View Camera Video Adapter Cable
- Brand: Strpump
- Connector Type (Input): 4-Pin OEM Camera Connector
- Connector Type (Output): RCA Male Video Output
- Voltage Converter: Built-in 12V to 6V (for camera power)
- Material: Plastic, Copper
- Compatibility: Specific Toyota, Lexus, and Mazda models (refer to Section 2)
9. Warranty and Support
For warranty information or technical support, please contact your retailer or the manufacturer directly. Keep your purchase receipt as proof of purchase.
Manufacturer: Strpump