
1. Introduction
Thank you for choosing the Rollei DF-S 1600 SE Film and Slide Scanner. This device is designed to digitize your precious film negatives and slides with high resolution, preserving your memories for years to come. This manual provides detailed instructions for the proper setup, operation, and maintenance of your scanner. Please read this manual thoroughly before using the device to ensure optimal performance and safety.
2. Safety Instructions
- Always use the provided power adapter. Using an incorrect adapter may damage the device and void the warranty.
- Do not expose the scanner to water or excessive moisture.
- Avoid placing the scanner in direct sunlight or near heat sources.
- Keep the scanner away from strong magnetic fields.
- Do not attempt to disassemble or repair the scanner yourself. Refer to qualified service personnel.
- Clean the scanner with a soft, dry cloth. Do not use liquid cleaners or solvents.
- Ensure proper ventilation around the device during operation.
3. Package Contents
Please check the contents of your package upon unpacking. If any items are missing or damaged, contact your retailer.
- Rollei DF-S 1600 SE Film and Slide Scanner
- Power Adapter
- USB Cable
- Film Holder for 135/126/110 mm Negatives
- Slide Holder for 135/126/110/8 mm Slides
- Cleaning Brush
- User Manual (this document)

Image: Included film and slide holders for different media types.
4. Product Overview
Familiarize yourself with the main components of your Rollei DF-S 1600 SE scanner.

Image: Angled view of the Rollei DF-S 1600 SE scanner, highlighting the display and film input.

Image: Front view of the scanner, showing the power button and film output slot.
- LCD Display: 3.5-inch TFT LCD color screen for previewing images and navigating menus.
- Control Buttons: Buttons for navigation, capture, and menu access.
- Film/Slide Input Slot: Where film holders are inserted.
- Power Button: To turn the device on/off.
- SD Card Slot: For inserting an SD/SDHC/MMC memory card to save scanned images.
- USB Port: For connecting to a computer or power adapter.
- HDMI/TV Out Port: For connecting to an external display or TV.
5. Setup
Follow these steps to set up your scanner for first use.
- Connect Power: Connect the provided power adapter to the scanner's USB port and then to a power outlet. The scanner can also be powered via a computer's USB port.
- Insert Memory Card: Insert an SD/SDHC/MMC memory card (not included) into the designated slot on the scanner. Ensure it is inserted correctly until it clicks into place.
- Power On: Press and hold the Power button until the LCD display turns on.
- Select Language: If prompted, use the navigation buttons to select your preferred language and confirm.
- Prepare Film/Slide: Choose the appropriate film or slide holder for your media type. Carefully insert your negatives or slides into the holder. Ensure they are clean and free of dust.

Image: Preparing a film strip for insertion into the scanner using a film holder.
6. Operating Instructions
6.1 Scanning Negatives (135, 126, 110 mm)
- Insert the negative film strip into the appropriate negative film holder. Ensure the film is flat and correctly aligned.
- Insert the loaded film holder into the scanner's film input slot. Push it gently until it locks into position.
- On the scanner's LCD, select "Negative Film" as the media type.
- Use the navigation buttons to preview the image. Adjust exposure and color settings if necessary (refer to Section 6.3).
- Press the "Capture" button to scan the image. The scanned image will be saved to the memory card.
- Remove the film holder and advance the film to the next frame, or replace with a new film strip.
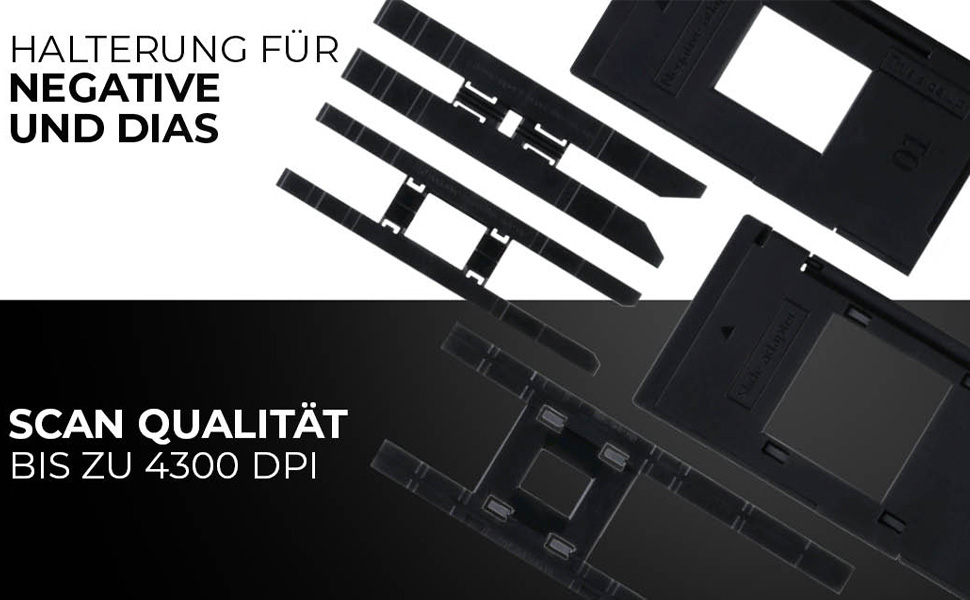
Image: Scanning a negative film strip with the Rollei DF-S 1600 SE.
6.2 Scanning Slides (135, 126, 110, 8 mm)
- Place your mounted slide into the appropriate slide holder. Ensure the slide is clean and correctly oriented.
- Insert the loaded slide holder into the scanner's film input slot.
- On the scanner's LCD, select "Slide" as the media type.
- Preview the image on the display. Adjust settings as needed (refer to Section 6.3).
- Press the "Capture" button to scan the image. The scanned image will be saved to the memory card.
- Remove the slide holder and replace with the next slide.

Image: Scanning a mounted slide with the Rollei DF-S 1600 SE.
6.3 Adjusting Settings
The Rollei DF-S 1600 SE offers 7 manual adjustment levels for optimal image results. Access the menu to adjust settings such as:
- Exposure: Brightness adjustment.
- Color Balance: Adjust red, green, and blue channels.
- Resolution: Select scanning resolution (up to 16 MP interpolated, 4300 DPI optical).
- Film Type: Ensure the correct film type (color negative, black & white negative, slide) is selected for accurate color reproduction.
6.4 Connecting to PC/TV
- USB Connection (PC): Connect the scanner to your computer using the USB cable. The scanner will appear as a mass storage device, allowing you to transfer scanned images.
- HDMI/TV Connection: Use an HDMI cable (not included) to connect the scanner to a TV or external monitor. This allows for a larger view of your images during scanning or playback.
7. Maintenance
Regular maintenance ensures the longevity and performance of your scanner.
- Cleaning the Scanner: Use the provided cleaning brush to gently remove dust from the film input slot and the internal light source. Do not use compressed air, as it may push dust further inside.
- Cleaning Film/Slide Holders: Wipe the holders with a soft, dry, lint-free cloth. Ensure they are free of dust and debris before inserting film or slides.
- Storage: When not in use, store the scanner in a cool, dry place, away from direct sunlight and dust.
8. Troubleshooting
If you encounter issues, refer to the table below for common problems and solutions.
| Problem | Possible Solution |
|---|---|
| Scanner does not power on. | Ensure the power adapter is securely connected to both the scanner and a working power outlet. Try a different USB port or power outlet. |
| Images appear blurry or dusty. | Clean the film/slides and the scanner's internal light source using the provided brush. Ensure film/slides are inserted correctly and flat. |
| Colors are incorrect. | Verify that the correct film type (negative, slide) is selected in the scanner's menu. Adjust color balance settings manually. |
| Memory card error / Cannot save images. | Ensure the memory card is inserted correctly and is not full. Try formatting the card (this will erase all data) or use a different card. Check if the card is locked (write-protected). |
| Scanner freezes or is unresponsive. | Turn off the scanner, disconnect the power, wait a few seconds, then reconnect and power on again. |
9. Specifications
| Feature | Value |
|---|---|
| Brand | Rollei |
| Model Name | Rollei DF-S 1600 SE |
| Item Model Number | 20699 |
| Scanner Type | Film Scanner |
| Resolution | 4300 DPI (Optical) |
| Connectivity Technology | HDMI, USB |
| Item Weight | 513 Grams |
| Color Depth | 2.8 megabits |
| Optical Sensor Technology | CCD, CMOS |
| Minimum System Requirements | Windows, macOS |
| Media Type | Negative, Slide, 110 mm Film, 8 mm/Super8 Film |
| Light Source Type | LED |
| International Article Code | 04048805206995 |
10. Warranty and Support
Rollei is committed to providing high-quality products and customer satisfaction.
- Exchange Guarantee: Your Rollei DF-S 1600 SE scanner comes with an exchange guarantee for a full 24 months from the date of purchase.
- Free Return Shipping: Enjoy free return shipping within 14 days of purchase.
- Help & Support: Our expert team is available to assist you with any questions or issues.
- Contact Information: You can reach us Monday-Friday from 10:00 AM to 4:00 PM at +49 40 270 750 277.


