
1. Product Overview
This manual provides instructions for the POWERTEC 6 Inch Jointer Blades, Model 14803V. These blades are designed as replacement cutting tools for various jointer machines, offering precise cutting action for woodworking applications.
The blades are constructed from M2 high-speed steel, which provides durability, wear resistance, and heat resistance. This material allows for efficient cutting of various wood types. Each blade features a sharp single cutting edge designed for precise cutting. Machined locator holes facilitate safe and accurate alignment of the knives to the jointer cutting head.

Image 1.1: Set of three POWERTEC 6 Inch HSS Jointer Blades.

Image 1.2: Close-up view of a POWERTEC jointer blade's cutting edge.
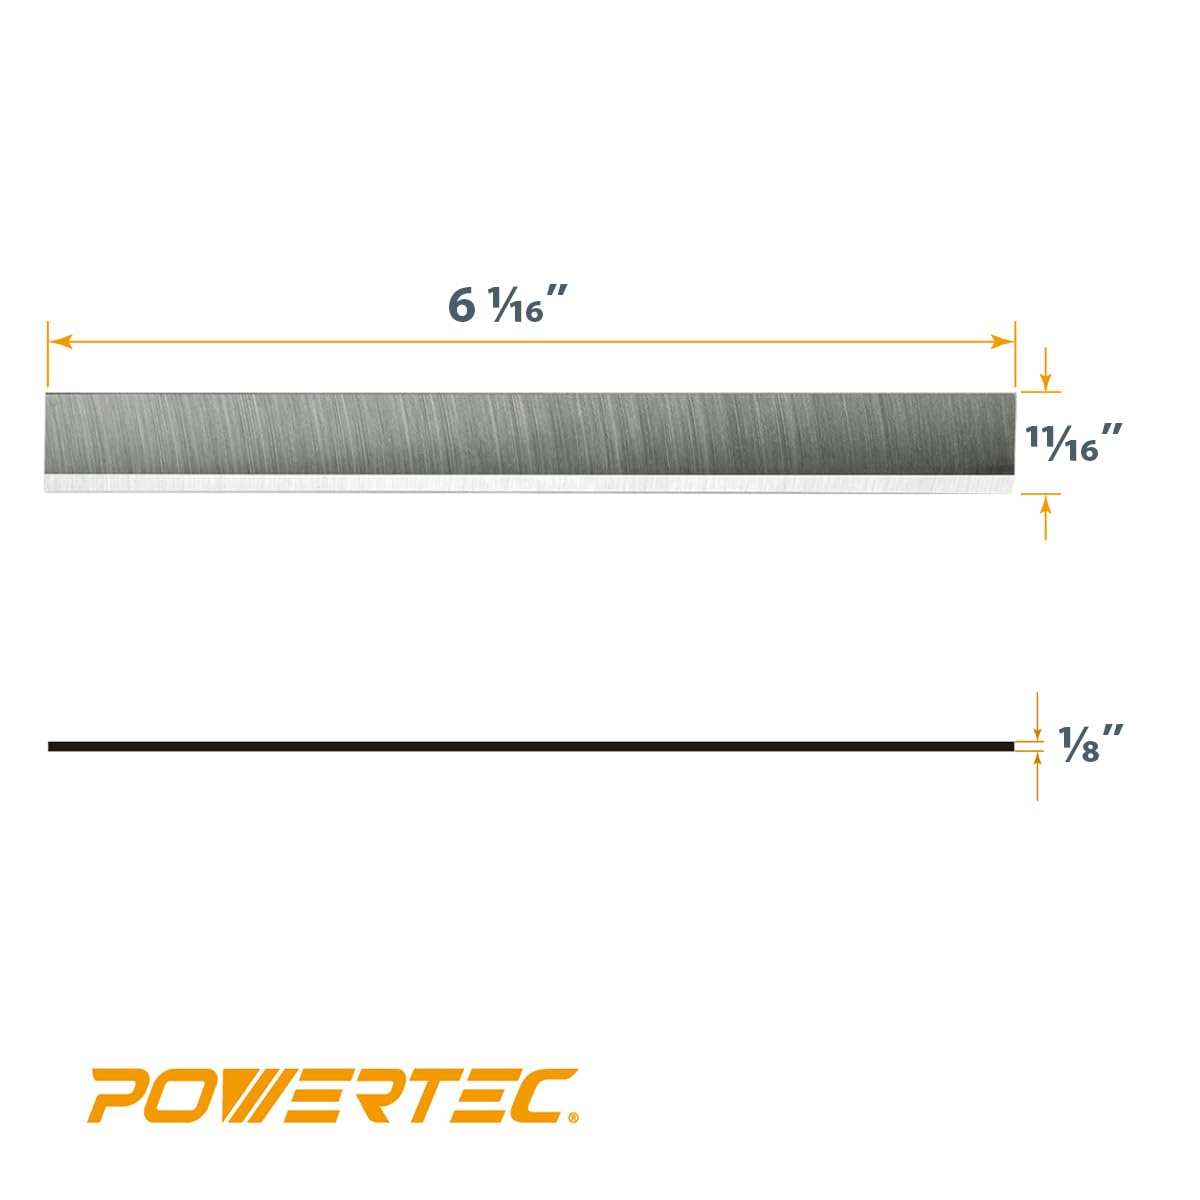
Image 1.3: Illustration highlighting the M2 High-speed Steel construction of the blades.
2. Safety Information
Always prioritize safety when working with power tools and sharp objects. Failure to follow safety guidelines can result in serious injury.
- Read and Understand: Before installation or operation, read and understand the instruction manual for your jointer machine and these replacement blades.
- Personal Protective Equipment (PPE): Always wear appropriate PPE, including safety glasses or a face shield, hearing protection, and gloves when handling blades or operating the jointer.
- Unplug Power Tool: Always disconnect the jointer from its power source before performing any maintenance, blade changes, or adjustments.
- Sharp Edges: Jointer blades are extremely sharp. Handle them with extreme care to prevent cuts. Use protective gloves.
- Proper Installation: Ensure blades are installed correctly and securely according to the jointer manufacturer's instructions. Improper installation can lead to blade ejection or damage.
- Inspect Blades: Before each use, inspect blades for damage, dullness, or cracks. Do not use damaged blades.
- Work Area: Keep your work area clean, well-lit, and free of obstructions.
3. Compatibility
These POWERTEC 6 Inch HSS Jointer Blades are compatible with the following jointer models:
- Delta Jointers: 37-658, 37-190, 37-195, 37-205, 37-220, 37-275X
- JET Jointers: 708457K, JJ-6CS

Image 3.1: Compatible jointer models (Delta 37-190, 37-195, JET JJ-6CS).

Image 3.2: Additional compatible jointer models (Delta 37-205, 37-220, 37-275X).
4. Installation and Setup
Replacing jointer blades requires precision and adherence to safety protocols. Refer to your specific jointer machine's manual for detailed instructions on blade replacement, as procedures may vary slightly between models.
General Installation Steps:
- Disconnect Power: Ensure the jointer is unplugged from the power source before beginning any work.
- Access Cutter Head: Open the jointer's cutter head guard or access panel as per your machine's manual.
- Remove Old Blades: Loosen the blade locking screws or wedges that secure the old blades. Carefully remove the old blades, handling them with gloves.
- Clean Cutter Head: Thoroughly clean the cutter head and blade seats to remove any sawdust, resin, or debris. This ensures proper seating of the new blades.
- Install New Blades: Carefully insert the new POWERTEC jointer blades into the cutter head slots. Align the machined locator holes with the corresponding pins or guides on the cutter head.
- Set Blade Height: Adjust the blade height using a blade setting jig or straightedge to ensure the blades are perfectly flush with the outfeed table at the top dead center of their rotation. This is a critical step for achieving smooth, accurate cuts.
- Secure Blades: Tighten the blade locking screws or wedges evenly and securely. Double-check all fasteners to ensure they are tight.
- Test Rotation: Manually rotate the cutter head to ensure the blades clear all components and are properly seated.
- Reassemble and Test: Reattach any guards or panels. Plug in the jointer and perform a test cut on a scrap piece of wood to verify proper operation and cut quality.

Image 4.1: Illustrative image of a jointer blade being installed.
5. Operation Guidelines
Once the blades are correctly installed, follow these guidelines for safe and effective jointer operation:
- Workpiece Preparation: Ensure your workpiece is free of nails, screws, or other foreign objects that could damage the blades.
- Feed Rate: Use a consistent and moderate feed rate. For harder woods, a slower feed rate may be necessary.
- Depth of Cut: Avoid taking excessively deep cuts, especially with harder materials. Multiple shallow passes are often better for blade longevity and cut quality.
- Grain Direction: Always feed the wood with the grain to prevent tear-out and ensure a smooth finish.
- Push Blocks: Use push blocks for safe feeding of workpieces, keeping hands away from the cutter head.
6. Maintenance
Proper maintenance extends the life and performance of your jointer blades.
- Regular Cleaning: After each use, clean the blades and cutter head to remove sawdust and resin buildup. Resin can dull blades and affect cutting performance. Use a suitable blade cleaner.
- Inspection: Periodically inspect the blades for signs of dullness, nicks, or damage. Dull blades can lead to poor cut quality and increased strain on the jointer motor.
- Storage: When not in use, store spare blades in their protective packaging in a dry environment to prevent corrosion and damage.
7. Troubleshooting
Here are some common issues and potential solutions:
| Problem | Possible Cause | Solution |
|---|---|---|
| Rough or uneven cuts | Dull or nicked blades, improper blade height setting, resin buildup. | Replace blades, re-adjust blade height, clean blades and cutter head. |
| Excessive tear-out | Feeding against the grain, dull blades, too deep a cut. | Feed with the grain, replace blades, reduce depth of cut. |
| Jointer motor straining | Dull blades, too deep a cut, feeding too fast. | Replace blades, reduce depth of cut, slow down feed rate. |
8. Specifications
Key specifications for the POWERTEC 6 Inch HSS Jointer Blades (Model 14803V):
- Material: High Speed Steel (M2)
- Length: 6-1/16 inches (154 mm)
- Width: 11/16 inches (16.5 mm)
- Thickness: 1/8 inches (2.7 mm)
- Number of Cutting Edges: 1 per blade
- Quantity: Set of 3 blades
- Model Number: 14803V
- UPC: 843441115571

Image 8.1: Dimensional specifications of the jointer blades.
9. Warranty Information
POWERTEC products are manufactured to high-quality standards. For specific warranty details regarding your jointer blades, please refer to the warranty statement included with your purchase or visit the official POWERTEC website. Keep your proof of purchase for any warranty claims.
10. Customer Support
If you have any questions, require assistance with installation, or need further support for your POWERTEC 6 Inch HSS Jointer Blades, please contact POWERTEC customer service. Contact information can typically be found on the product packaging or the official POWERTEC website.
For additional resources and product information, you may visit the POWERTEC Store on Amazon.