1. Introduction
This manual provides instructions for the cenmate 4 Bay External Hard Drive Enclosure, Model 706PM. This enclosure is designed to house up to four 2.5-inch or 3.5-inch SATA HDDs or SSDs, offering a maximum capacity of 72TB (18TB per drive). It provides reliable external storage for personal and business use, featuring high-speed data transfer and broad compatibility.
2. Package Contents
Please verify that all items are present in your package:
- cenmate 4 Bay External Hard Drive Enclosure (Model 706PM)
- USB A/C 3.0 Cable
- eSATA Cable
- DC 12V 5A Power Adapter
- Screws for 2.5-inch drive installation
- Screwdriver

This image displays the complete package contents for the cenmate 4-bay enclosure, which includes the enclosure unit, USB A/C 3.0 cable, eSATA cable, DC 12V 5A power adapter, mounting screws, and a screwdriver for installation.
3. Product Overview
Familiarize yourself with the components and ports of your cenmate 4 Bay Enclosure:

This image provides a detailed view of the cenmate 4-bay enclosure, showing its front panel with bay buttons and indicator lights, and its rear panel with eSATA, USB 3.0, USB-C, DC IN power port, power switch, and dual 2.8-inch cooling fans.
Front Panel:
- Bay Buttons: Used to release and insert drive trays.
- Indicator Lights: LEDs for each bay indicate drive activity (red when in use).
Rear Panel:
- eSATA Port: For connecting to a computer via eSATA cable.
- USB 3.0 Port: For connecting to a computer via USB 3.0 Type-A cable.
- USB-C Port: For connecting to a computer via USB-C cable.
- Power Switch: To turn the enclosure on or off.
- DC IN Port: For connecting the 12V 5A power adapter.
- 2.8" Fans: Dual cooling fans to maintain optimal operating temperature.
4. Setup Instructions
4.1 Installing Hard Drives/SSDs
- Gently press the bay button on the front panel to release and pull out a drive tray.
- For 3.5-inch HDDs: Place the HDD into the tray, aligning the screw holes. Secure it with the provided screws.
- For 2.5-inch SSDs/HDDs: Place the 2.5-inch drive into the tray, aligning the screw holes. Use the provided screws and screwdriver to secure it.
- Carefully slide the loaded drive tray back into the enclosure until it clicks into place.
- Repeat for any additional drives.

This image illustrates the process of installing both 3.5-inch hard disk drives (HDD) and 2.5-inch solid-state drives (SSD) into the cenmate 4-bay enclosure. The enclosure supports both form factors.

This image shows a standard 3.5-inch hard disk drive (HDD) securely placed within one of the drive trays, ready for insertion into the cenmate 4-bay enclosure.

This image illustrates a 2.5-inch solid-state drive (SSD) mounted within a drive tray, demonstrating how smaller drives are prepared for installation into the cenmate 4-bay enclosure.
4.2 Connecting to Your Computer
- Connect the DC 12V 5A power adapter to the DC IN port on the rear of the enclosure and plug it into a power outlet.
- Choose one of the following connection methods to link the enclosure to your computer:
- USB Connection: Use the provided USB A/C 3.0 cable to connect the enclosure's USB 3.0 or USB-C port to an available USB port on your computer.
- eSATA Connection: Use the provided eSATA cable to connect the enclosure's eSATA port to an available eSATA port on your computer.
- Flip the power switch on the rear of the enclosure to the 'ON' position.
- Your operating system (Windows, Mac OS, Linux) should automatically detect the enclosure and its installed drives. No additional drivers are typically required.
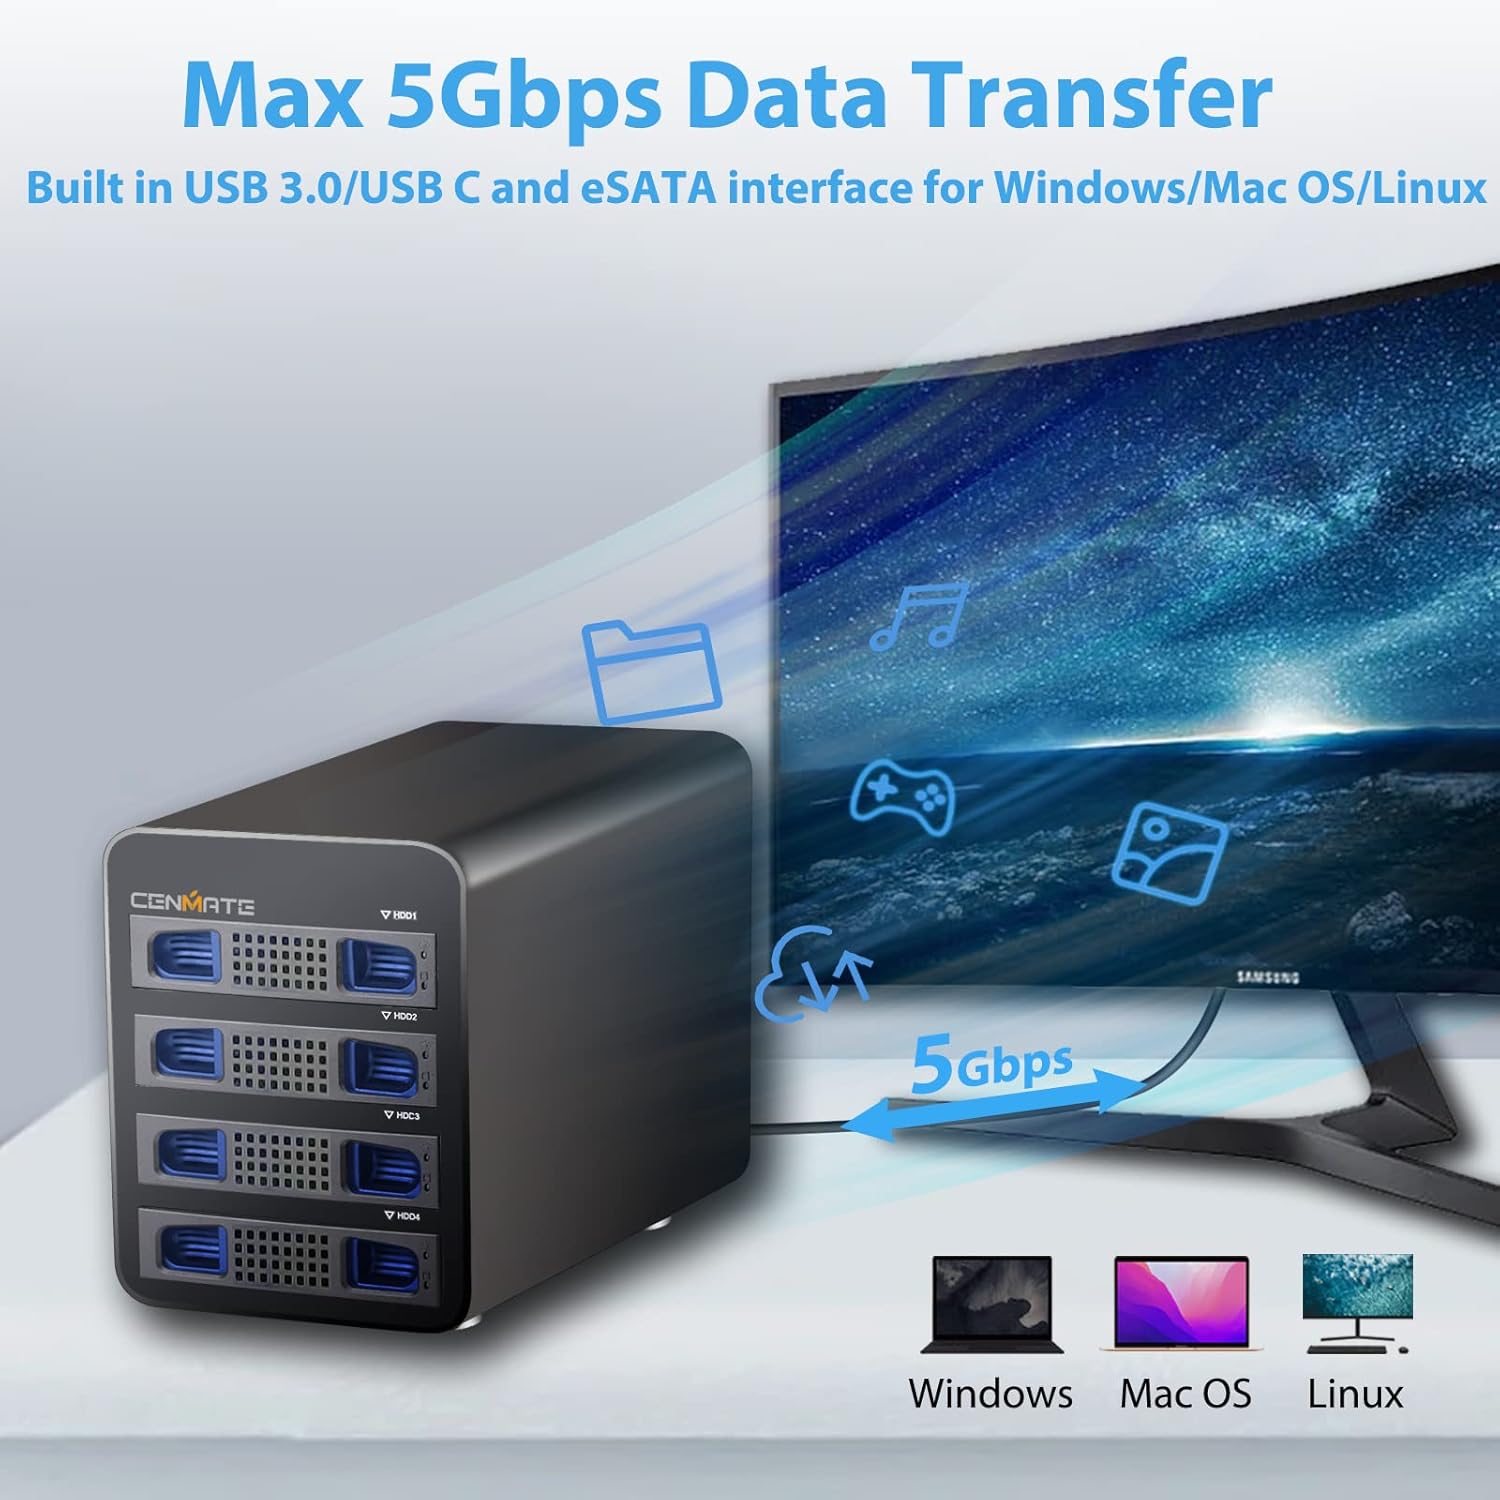
The image displays the cenmate 4-bay enclosure connected to a computer, highlighting its capability for high-speed data transfer up to 5Gbps via USB 3.0/USB-C, compatible with Windows, Mac OS, and Linux systems.
Note: Please remove the transparent protective film from the enclosure before use.

The image presents the cenmate 4-bay enclosure, showcasing its compact and sturdy design. A transparent protective film is visible, which should be removed before use to prevent dust and scratches during transport.
5. Operating Instructions
5.1 Data Transfer
Once connected, your computer will recognize the installed drives as individual storage devices. You can drag and drop files, copy, paste, and manage data as you would with any other external drive. The enclosure supports data transfer rates up to 6Gbps via SATA III protocol (internally) and up to 5Gbps via USB 3.0/USB-C.
5.2 Hot-Swappable Functionality
The enclosure supports hot-swapping of drives. This means you can insert or remove drives while the enclosure is powered on and connected to your computer. However, always ensure that no data is being actively read from or written to a drive before removing it. Safely eject the drive from your operating system first to prevent data corruption.
5.3 Drive Activity Indicators
Each drive bay has an LED indicator. These LEDs will illuminate (typically red) when the corresponding drive is active, indicating data access. Do not remove a drive while its indicator light is on.
5.4 Auto Sleep Mode
The enclosure features an auto-sleep mode that activates after approximately 10 minutes of inactivity. This function helps to reduce power consumption and minimize wear on the hard drives. The drives will automatically spin up when accessed again.

This image shows the cenmate 4-bay enclosure with an overlay indicating its 'Auto Sleep' feature, which activates after 10 minutes of inactivity to reduce wear on hard drives and conserve power.
6. Maintenance
6.1 Cleaning
To clean the enclosure, use a soft, dry cloth. For dust accumulation, especially around the fan vents, use compressed air. Do not use liquid cleaners or solvents, as they may damage the device.
6.2 Handling and Storage
Handle the enclosure with care to avoid drops or impacts. Store it in a cool, dry place away from direct sunlight and extreme temperatures. Ensure adequate ventilation around the enclosure during operation to prevent overheating.
7. Troubleshooting
If you encounter issues with your cenmate 4 Bay Enclosure, please refer to the following common solutions:
- Drives Not Recognized:
- Ensure the power adapter is securely connected and the enclosure is powered on.
- Verify that the USB or eSATA cable is firmly connected to both the enclosure and your computer.
- Check that each drive tray is fully inserted and clicked into place.
- Try connecting the enclosure to a different USB or eSATA port on your computer.
- Confirm that the drives themselves are functional by testing them in another device if possible.
- Drives Getting Hot:
- Ensure the enclosure is placed in a well-ventilated area.
- Check that the rear cooling fans are operating correctly and are not obstructed.
- Excessive heat can indicate a drive issue; consider checking drive health.
- Cannot Safely Dismount/Eject Drives:
- Ensure no applications or processes are actively accessing files on the drives. Close all programs that might be using the drives.
- Wait for all drive activity indicator lights to turn off before attempting to eject.
- If issues persist, perform a clean shutdown of your computer before disconnecting the enclosure.
- Compatibility with NAS Software:
- This enclosure is designed as a Direct-Attached Storage (DAS) device and is not intended for Network Attached Storage (NAS) functionality. It may not be fully compatible with NAS operating systems like TrueNAS Scale, which might only recognize a single drive or have limited functionality.
- Fan Noise:
- The enclosure includes dual cooling fans which may produce audible noise during operation, even when drives are idle. This is a normal characteristic of the device.
8. Specifications
| Brand | cenmate |
| Model Number | 706PM |
| Supported Drives | 2.5-inch / 3.5-inch SATA HDD/SSD |
| Max Number of Drives | 4 |
| Max Capacity | 72 TB (18 TB per drive) |
| Hardware Interface | USB 2.0, USB 3.0, USB Type C, eSATA |
| Data Transfer Rate | Up to 6 Gbps (SATA III), Up to 5 Gbps (USB 3.0) |
| Compatible Devices | PC, Laptop, Desktop, MacBook |
| Compatible OS | Windows 2000 / Me/ XP / Vista / Win 7 / Win 8 / Win 8.1 /Win 10/ Win 11, Mac OS 9.1/10, Linux and higher versions |
| Material | Aluminum |
| Color | Black |
| Power Supply | DC 12V 5A Power Adapter |
| Item Weight | 7.32 pounds |
| Package Dimensions | 11.1 x 10.28 x 7.44 inches |
| UPC | 795063152048 |
9. Warranty and Support
cenmate provides lifetime technical support for this product. If you have any questions, require assistance, or encounter issues not covered in this manual, please do not hesitate to contact cenmate support. We aim to reply and resolve your problem within 24 hours.
For support, please visit the official cenmate website or contact customer service through the platform where you purchased the product.