Introduction
This manual provides detailed instructions for the proper assembly, operation, and maintenance of your PalliPartners Metal Detector Model 1064. Please read this manual thoroughly before using the device to ensure safe and efficient operation.
Safety Information
WARNING:
- Do not submerge the control box underwater. The search coil is waterproof, but the control unit is not.
- Keep batteries away from heat, open flames, and conductive materials.
- Dispose of batteries according to local regulations.
- Always be aware of your surroundings when metal detecting. Avoid dangerous areas such as active construction sites or areas with unexploded ordnance.
- Obtain permission before detecting on private property.
Package Contents
Verify that all items are present in your package:
- 1 × PalliPartners Metal Detector (Model 1064)
- 1 × Carrying Bag
- 1 × Shovel (durable and strong)
- 1 × Headset (compatible with the detector's jack)
- 2 × 9V Batteries (required and included)
- 1 × User Manual (this document)
Assembly and Setup
Follow these steps to assemble your metal detector:
- Attach the Search Coil: Connect the 12-inch waterproof search coil to the lower stem. Ensure it is securely fastened.
- Connect the Control Box: Slide the control box onto the upper stem and secure it. Connect the cable from the search coil to the control box.
- Install Batteries: Open the battery compartment on the control box and insert the two 9V batteries, observing polarity.
- Adjust the Stem: Adjust the stem length from 41.3 inches to 47.6 inches to a comfortable height for your use. This prevents strain during long detection sessions.
- Attach Armrest: Secure the armrest to the upper stem for added comfort and stability.
- Connect Headphones: Plug the included headphones into the headset jack on the control box for private audio alerts.

This image shows the main components of the metal detector, including the control box with its LCD display, the adjustable stem, the armrest, and the 12-inch search coil. The search coil is designed to be waterproof, allowing for detection in shallow water, while the control box should remain dry.
Operating Instructions
Before beginning your search, ensure the detector is properly assembled and batteries are installed. Turn on the device using the POWER button on the control panel.
Basic Operation:
- Sensitivity Adjustment: Use the "SENS" buttons to adjust the sensitivity level. Higher sensitivity can detect smaller or deeper objects but may also pick up more interference.
- Volume Control: Adjust the volume of the audio alerts using the "SENS/Volume Control Button" as indicated on the display.
- Sweeping Technique: Hold the detector with the search coil parallel to the ground, about 1-2 inches above the surface. Sweep the coil slowly from side to side in overlapping arcs. Maintain a consistent height and speed for optimal detection.
- Target Indication: When a metal object is detected, the device will emit an audio tone, and the LCD display will show a target ID number and an icon indicating the probable type of metal.

This image highlights the waterproof capability of the search coil, suitable for use in shallow water environments like beaches or streams. It also shows the thick sponge pad and arc upgraded handle for comfortable use.
Video Tutorial:
Video 1: An overview of the PalliPartners Metal Detector, demonstrating its features and basic operation, including the included accessories and adjustable design.
Modes of Operation
The PalliPartners Metal Detector offers five distinct operation modes to optimize your search for various types of metals:
- All Metal Mode (A-M): In this mode, the metal detector will notify you whenever it detects any type of metal. This is ideal for general searching when you want to find all metallic objects without discrimination.
- Discrimination Mode (DISC): This mode allows you to discriminate against certain types of metal. You can set the detector to ignore unwanted metals (e.g., iron) and focus on specific targets.
- Notch Mode: Press the "NOTCH" button, then use the "+" or "-" buttons to select and eliminate specific target categories from detection. This is useful for filtering out common trash items.
- Memory Mode: This mode allows the detector to remember and search for a specific type of metal you have previously identified, while ignoring others.
- Jewelry Mode: Specifically designed to eliminate iron and respond primarily to other metals commonly found in jewelry.
- Pinpoint Mode (PP): After detecting a target, switch to Pinpoint mode to precisely locate the exact position of the buried object, making recovery easier.

This image visually represents the different search modes, helping users understand their purpose and selection on the device.
Display and Controls
The intuitive LCD display provides clear information about detection mode, sensitivity, battery condition, and volume level, even in low light conditions.
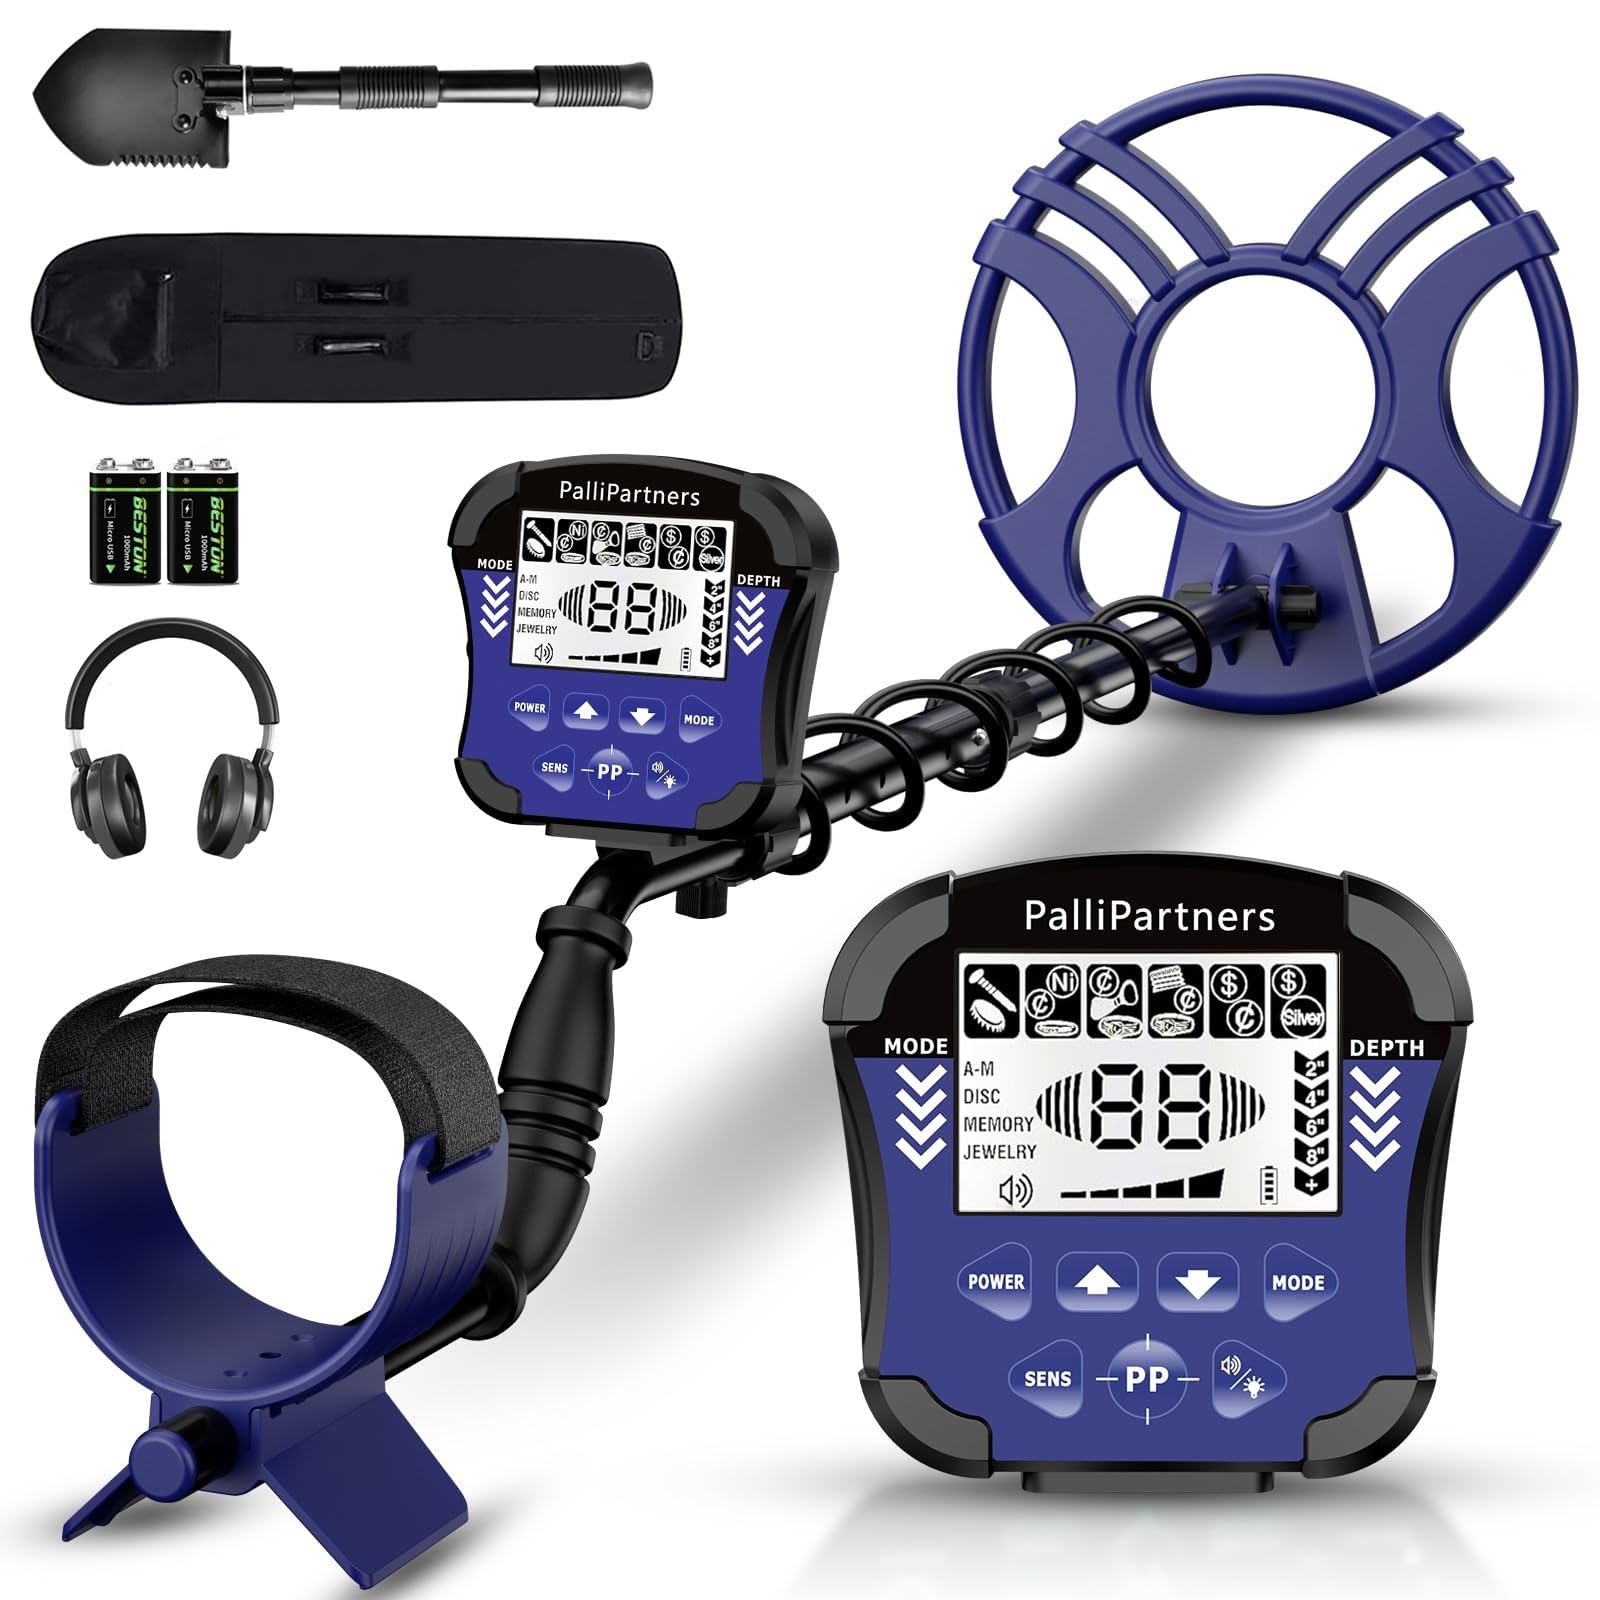
This image provides a clear diagram of the control panel, labeling each button and display indicator for easy reference during operation. It shows the Disc Numeric Indicator, Mode, Depth, and Low Battery Indicator.
Key Indicators:
- Sens Level Indicator: Shows the current sensitivity setting.
- Coin Depth Indicator: Estimates the depth of detected coins.
- Volume Indicator: Displays the current audio volume.
- Mode Indicator: Shows the active detection mode (All Metal, Disc, Notch, Memory, Jewelry, Pinpoint).
- Low Battery Indicator: Alerts you when batteries need replacement.
Audio Tones:
The detector provides three distinct audio tones (low, medium, high) to help identify different types of metals, corresponding to target ID ranges.

This chart helps users interpret the audio tones and digital values displayed on the LCD screen to better identify detected objects.
Maintenance
Proper maintenance ensures the longevity and optimal performance of your metal detector:
- Cleaning: Wipe the search coil and stem with a damp cloth after each use, especially after detecting in wet or sandy conditions. Ensure the control box remains dry.
- Storage: Store the detector in a cool, dry place. If storing for an extended period, remove the batteries to prevent leakage.
- Battery Replacement: Replace batteries when the low battery indicator appears on the LCD display.
- Cable Care: Avoid sharp bends or excessive pulling on the coil cable to prevent damage.
Troubleshooting
If you encounter issues with your metal detector, refer to the following common problems and solutions:
- No Power:
- Check if batteries are correctly installed with proper polarity.
- Replace old or depleted batteries with new 9V batteries.
- Erratic Signals/False Positives:
- Reduce the sensitivity setting.
- Ensure you are not wearing metal objects (jewelry, watches, phones) that could interfere with the signal.
- Avoid areas with high electrical interference (power lines, other electronic devices).
- Ensure the search coil is swept parallel to the ground and not lifted too high.
- No Detection:
- Increase the sensitivity setting.
- Check if the search coil cable is securely connected to the control box.
- Verify that the detector is not in a highly discriminatory mode that might be filtering out desired targets.
- Weak or Faint Signals:
- Replace batteries, even if the low battery indicator is not yet active.
- Increase sensitivity.
Specifications
| Feature | Specification |
|---|---|
| Brand | PalliPartners |
| Model Number | 1064 |
| Color | Black & Purple |
| Search Coil Diameter | 12 inches |
| Waterproof Rating | IP54 (for search coil only; control box is not waterproof) |
| Detection Depth | Up to 8.7 inches |
| Operating Modes | 5 Modes (All Metal, Disc, Notch, Memory, Jewelry, Pinpoint) |
| Display | LCD Display with Backlight |
| Adjustable Stem Length | 41.3 inches to 47.6 inches |
| Power Source | 2 x 9V Batteries (included) |
| Item Weight | 3.9 Pounds |
| Product Dimensions | 21"L x 6"W x 7.8"H (folded/packaged) |
| Operating Frequency | 9 KHz |
Warranty Information
PalliPartners provides a 1-year limited warranty from the date of purchase against defects in materials and workmanship. This warranty does not cover damage caused by misuse, accident, unauthorized modification, or normal wear and tear. Please retain your proof of purchase for warranty claims.
Customer Support
For any questions, technical assistance, or warranty claims, please contact PalliPartners customer support:
- Email: support@pallipartners.com (example)
- Phone: 1-800-XXX-XXXX (example)
- Website: Visit the PalliPartners Store on Amazon
Our support team is available to assist you with any inquiries regarding your metal detector.


